This guide explains how to configure AWS S3 backup storage inside the RingQ Time Machine feature for automated and secure cloud backups.
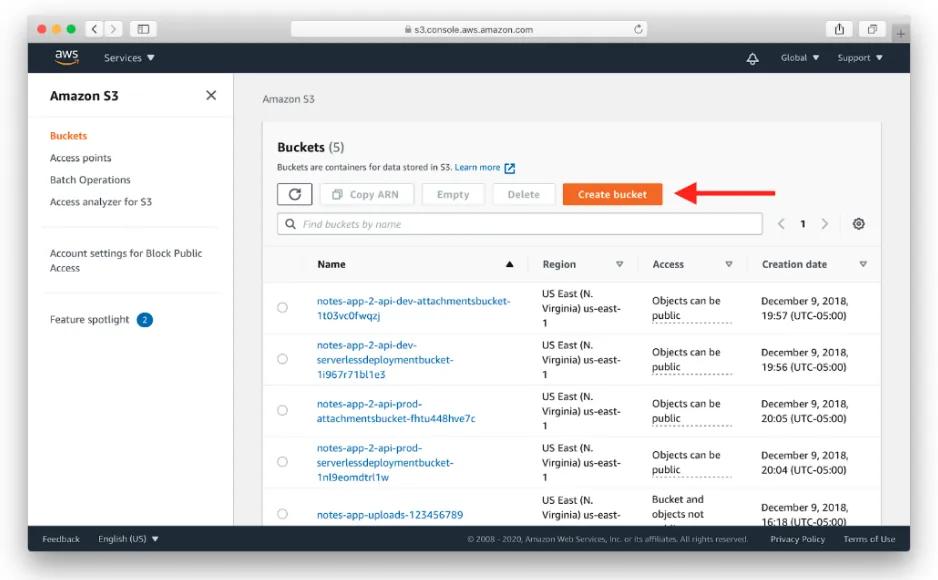
Log in to your AWS Console.
Navigate to Amazon S3.
Click Create bucket.
Configure:
a. Bucket Name: e.g., ringq-backup-prod. b. Region: Choose the region closest to your RingQ server (important for latency).
Enable Bucket Versioning (Recommended).
Enable Server-Side Encryption (SSE-S3 or SSE-KMS) (Recommended).
Click Create bucket.
Important: Do NOT use root credentials.
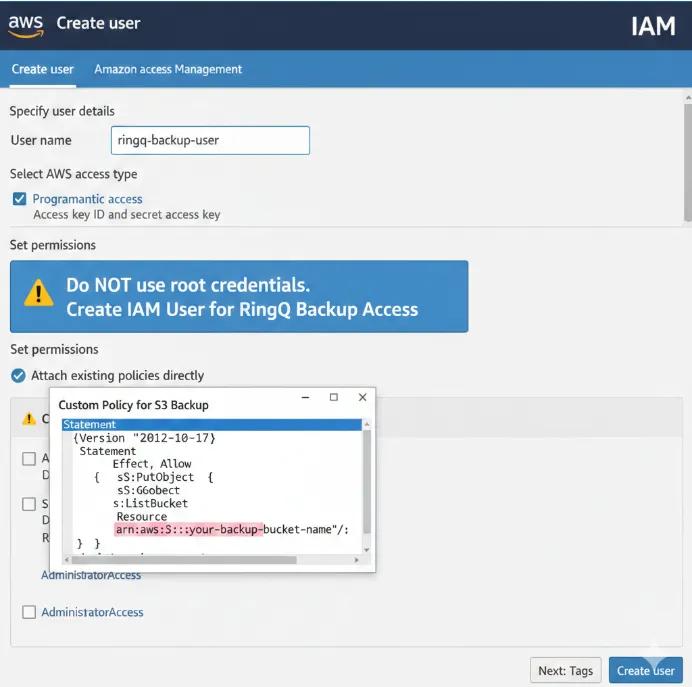
Go to IAM → Users → Create user.
Username: ringq-backup-user
Enable Programmatic Access (Access Key).
Attach permission. Recommended: Custom policy limited to your S3 bucket.
Create user.
Save the Access Key ID and the Secret Access Key.
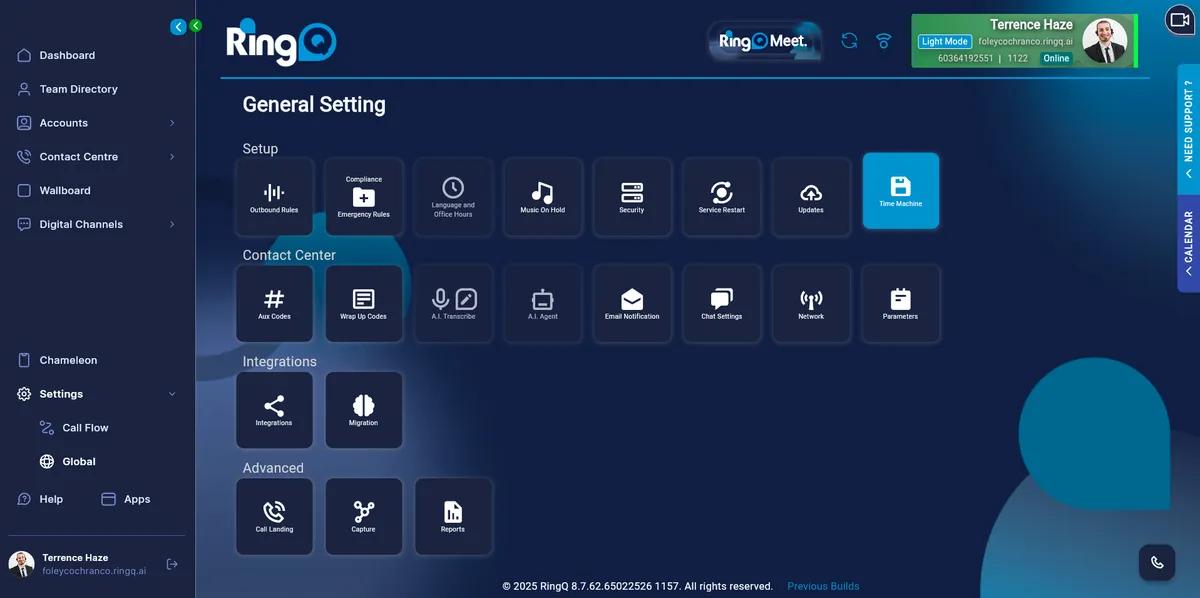
Log in to your RingQ Admin Dashboard.
Navigate to Settings → Global → Time Machine.
Go to Settings.
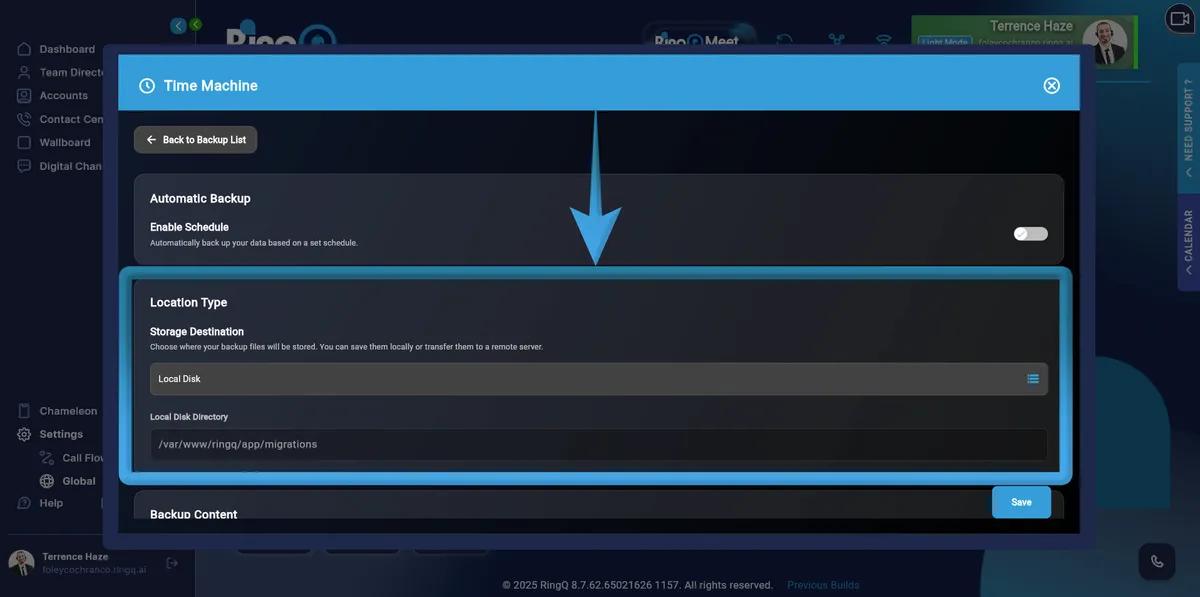
Scroll down to Location Type.
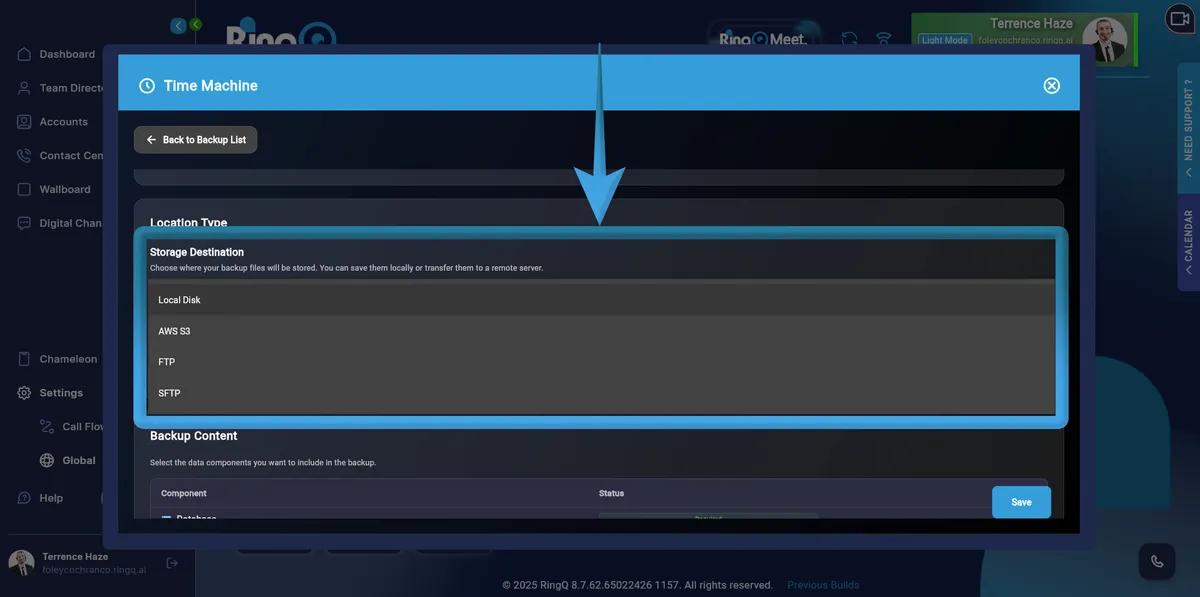
Click Storage Destination.
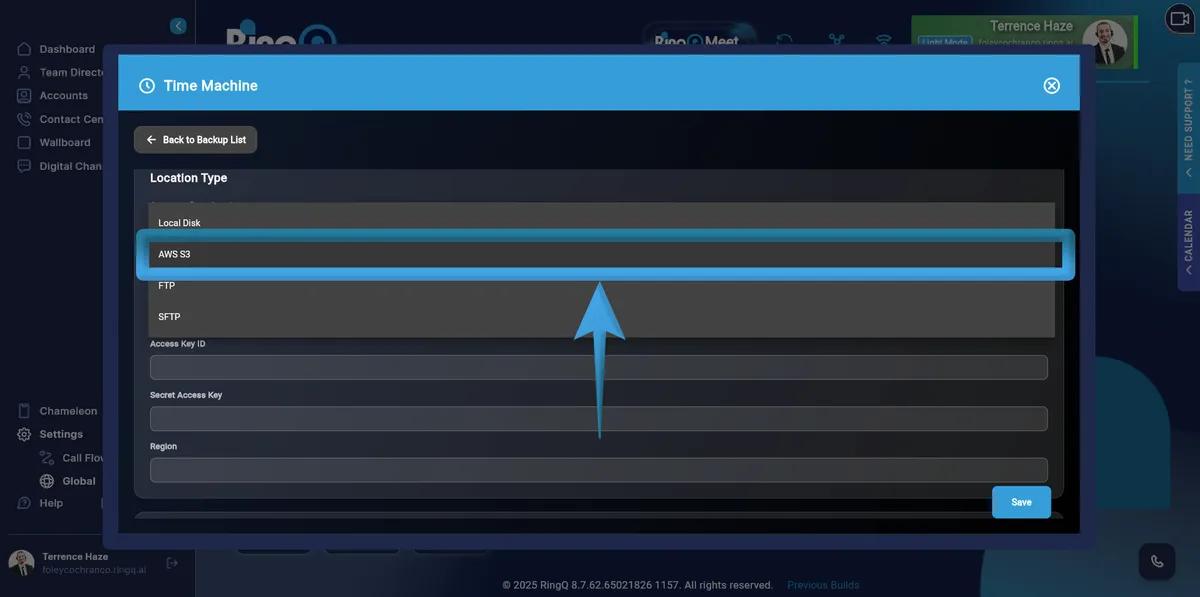
Select AWS S3.
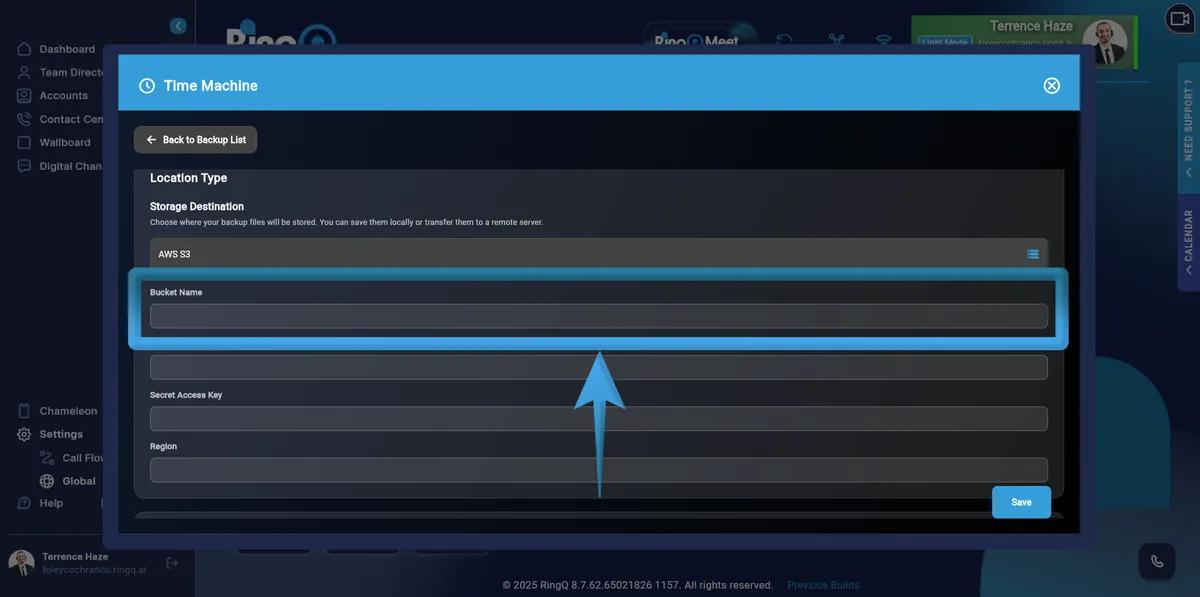
Fill in the following fields:
Click Save to apply and store the configuration.
