This guide provides detailed instructions for configuring a Telnyx SIP trunk with your RingQ account using an IP-based connection. Unlike the registered method, a peer connection relies on IP authentication, eliminating the need for SIP credentials and enabling a direct, secure connection between RingQ and Telnyx.
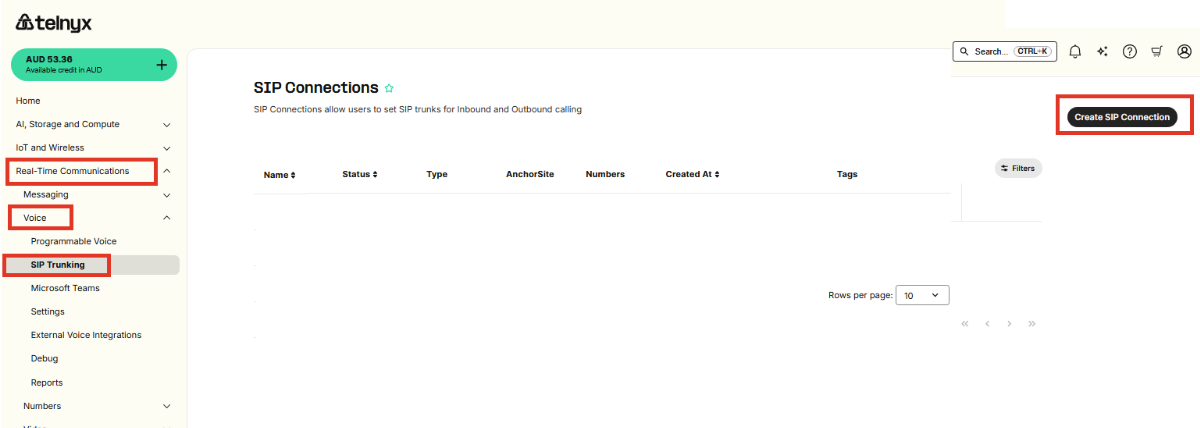
Navigate to Real-time Communications > Voice > SIP Trunking.
Click Create SIP Connections.
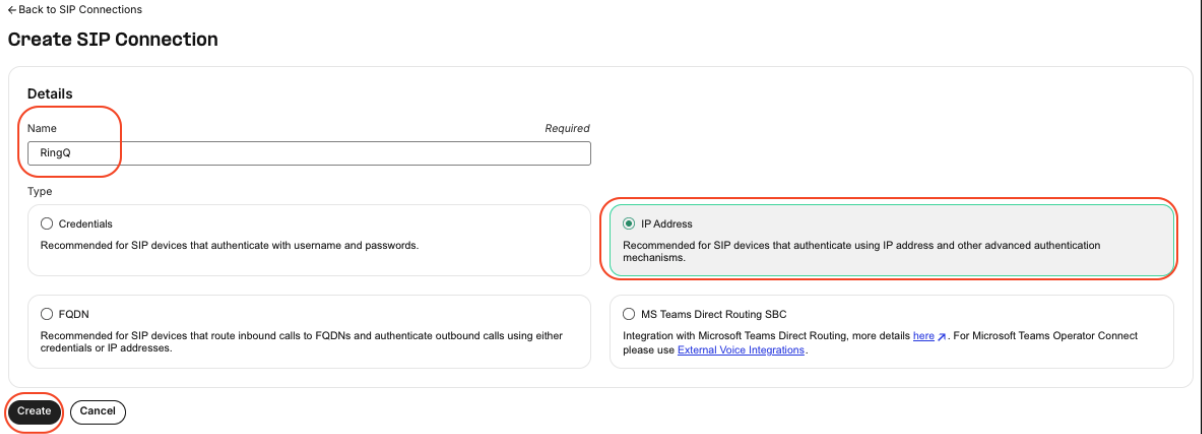
Enter the trunk name.
Select Type as IP address.
Click the Create button.
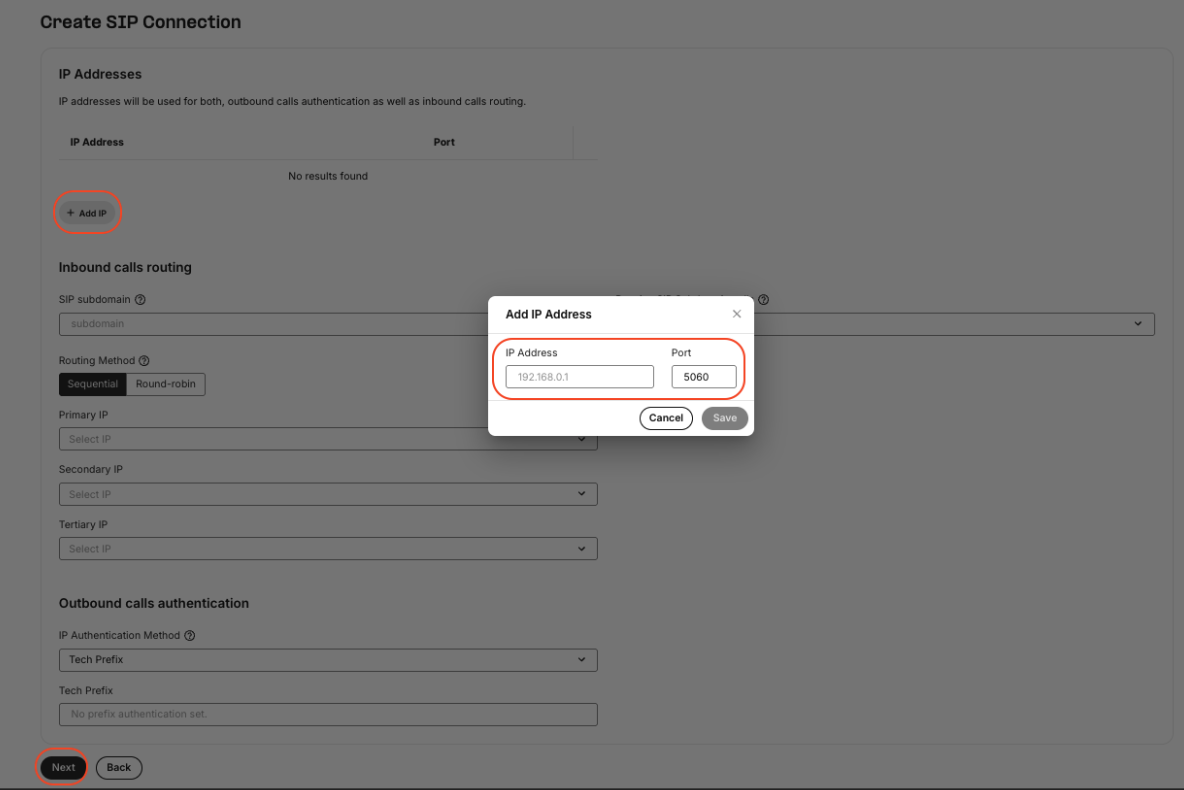
Add the RingQ public IP address.
To add a prefix, use the Tech Prefix field.
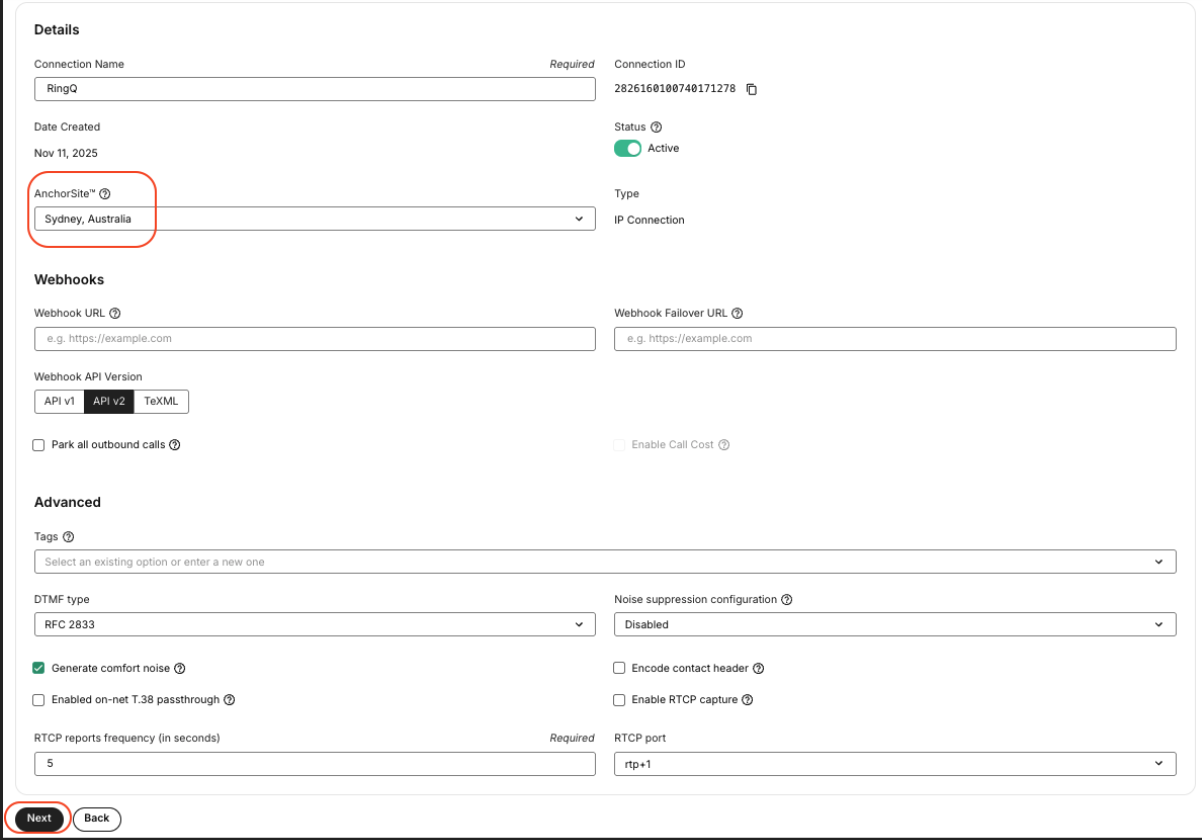
In the Configurations tab, select an Anchor Site based on your location. The remaining values can be left as default.
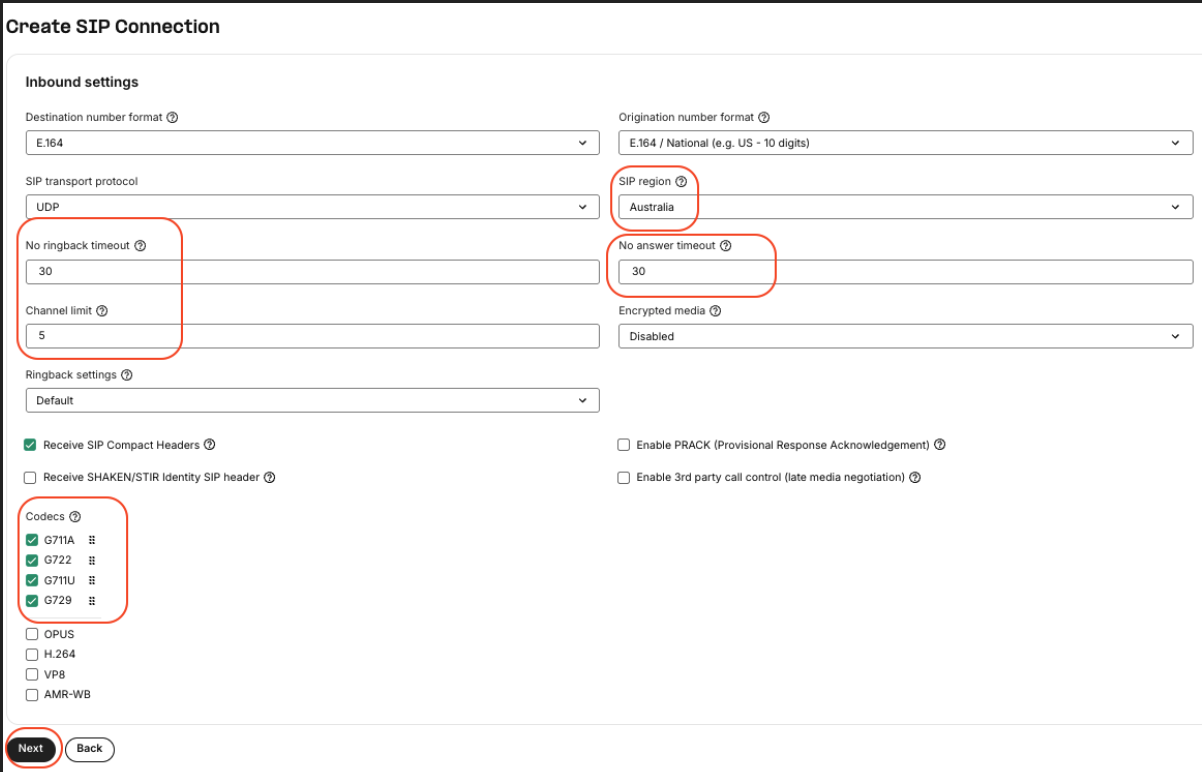
In Inbound Settings:
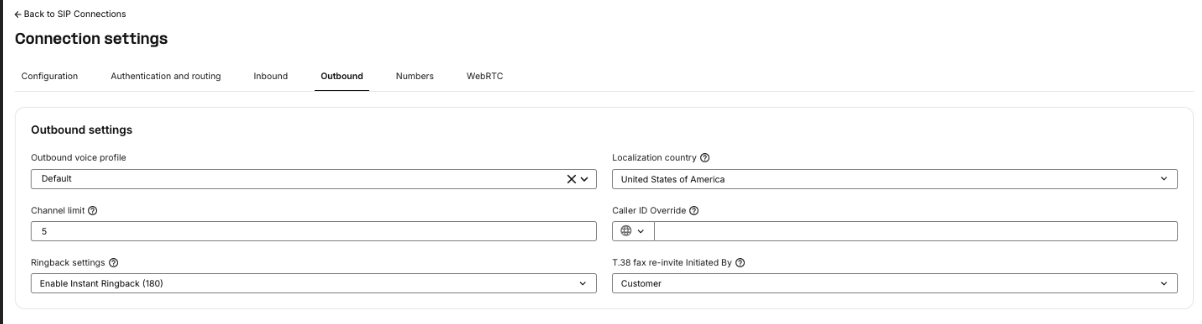
In the Outbound Settings tab:
Click Next.
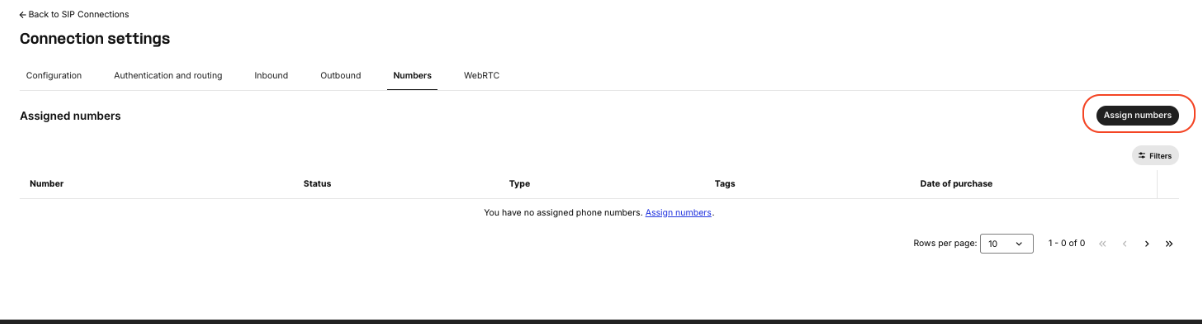
In the Connection Settings tab, click Assign DID Number to this trunk to configure the DID.

To assign an existing DID number, click the Assign button.
Click Buy DID to purchase a DID number.
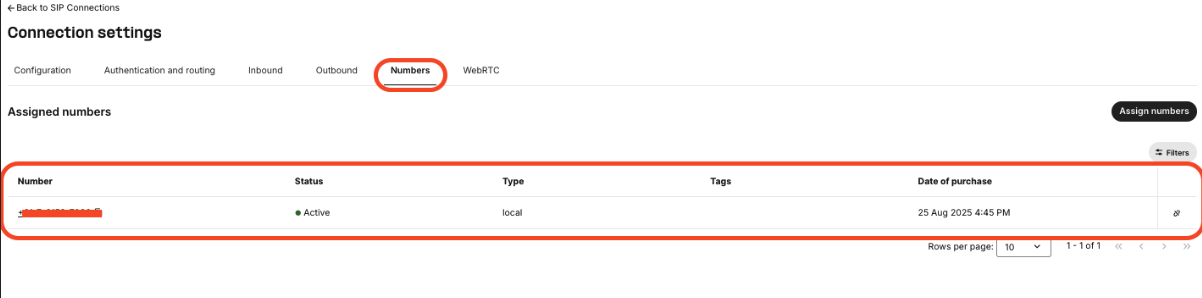
Once assigned, you will see the number on the trunk.
Click Complete.
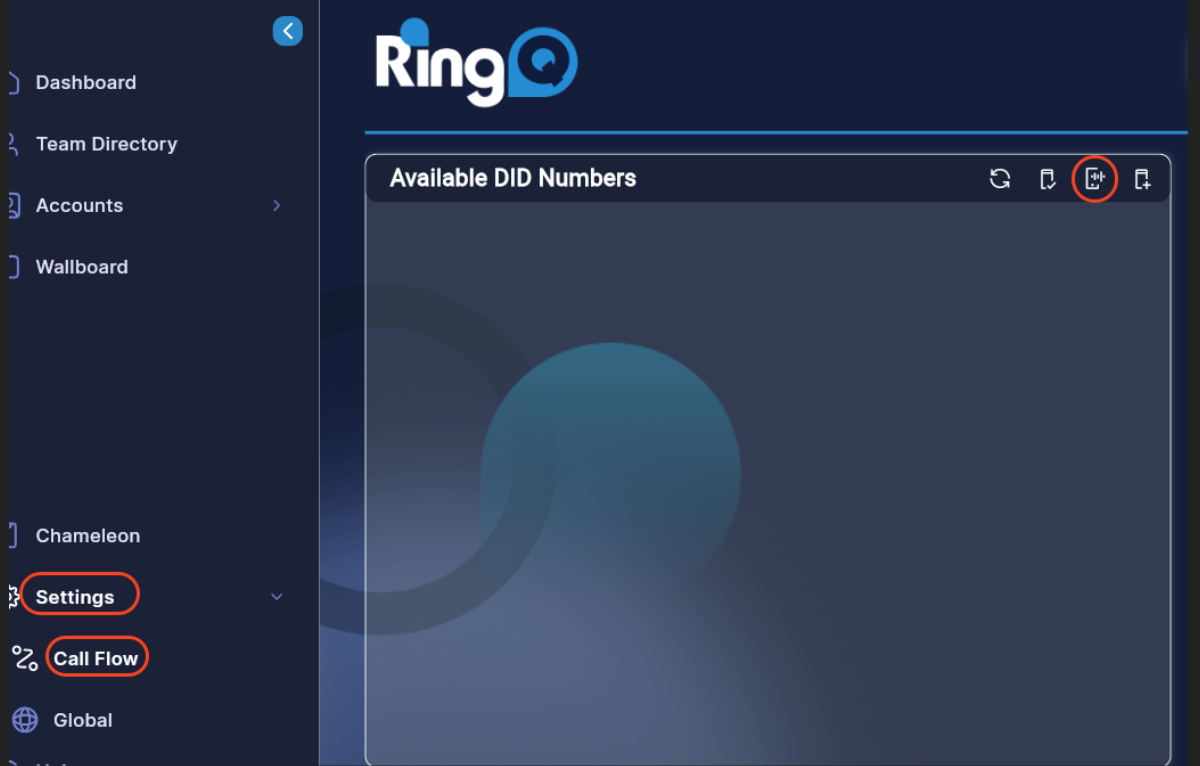
Log in to your RingQ instance.
Go to Settings > Call Flow > SIP.
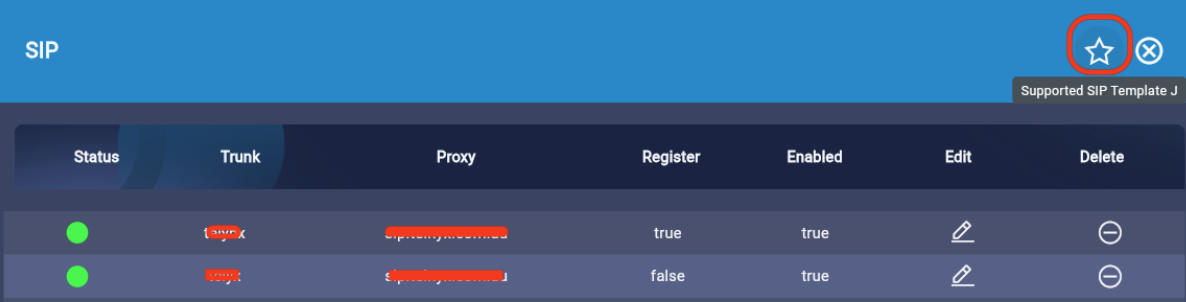
Click Supported SIP Templates.
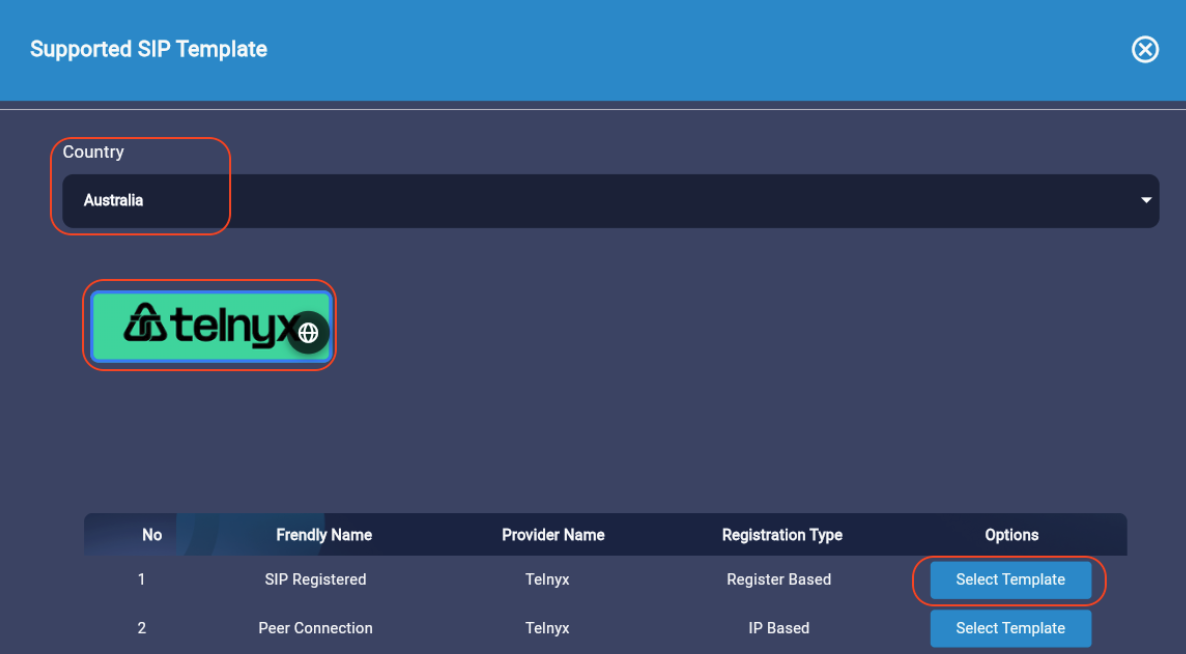
Select the country that you want to configure.
Select the provider logo.
Select the IP-Based template.
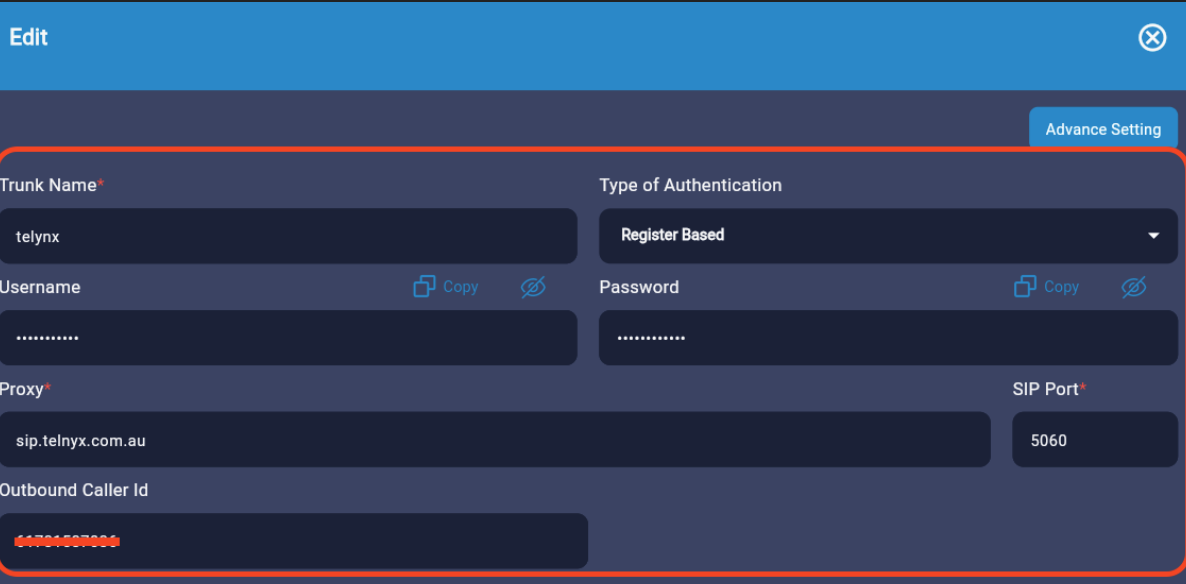
Enter the trunk name.
Leave the username and password fields empty.
Enter the outbound caller ID that you want to use as the main number.
Click Create.
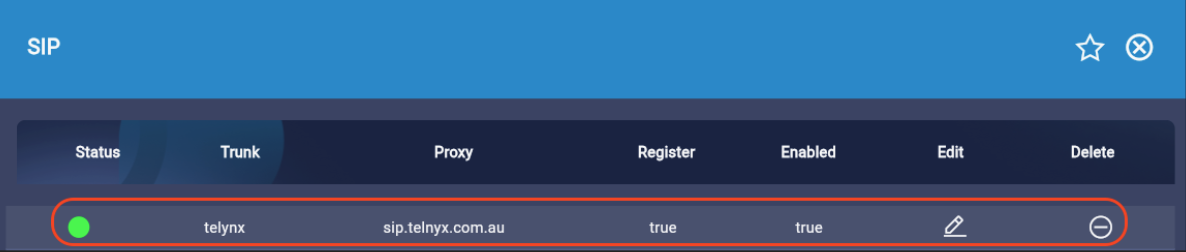
The SIP trunk is now registered, and the status will be green.
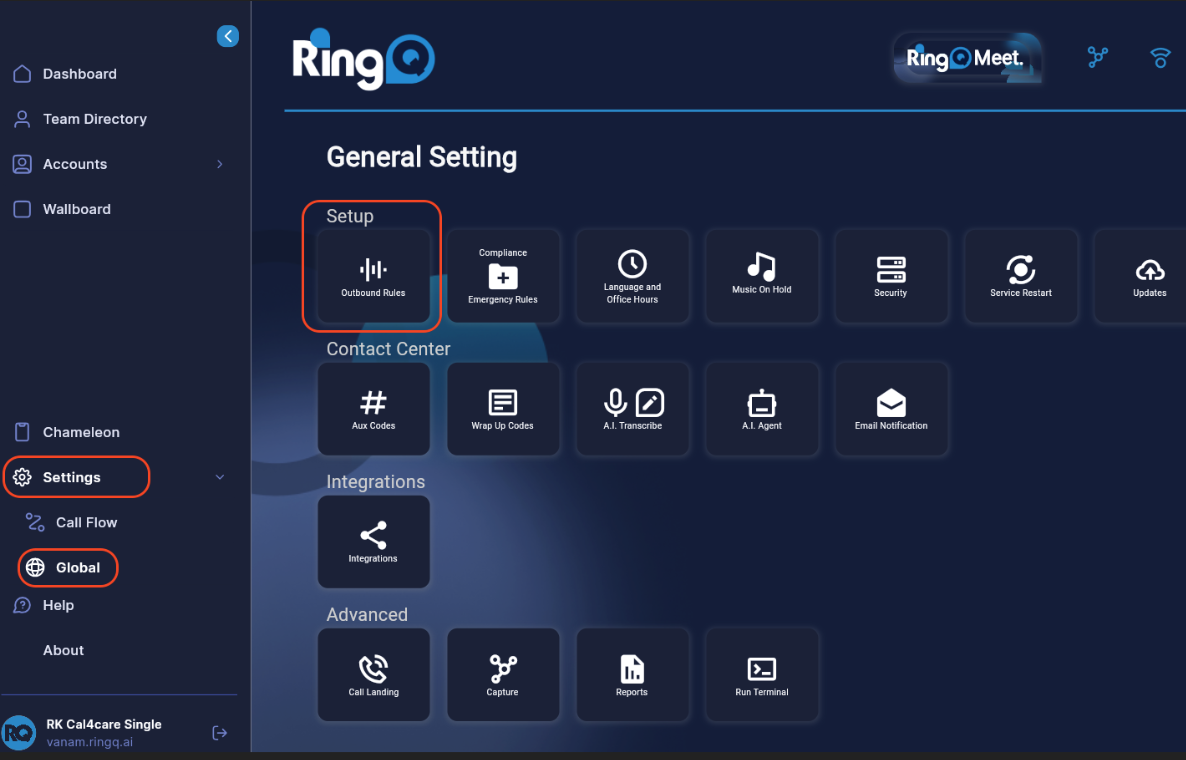
Go to Settings > Global Settings > Outbound Rules.

Click Outbound Rule +.
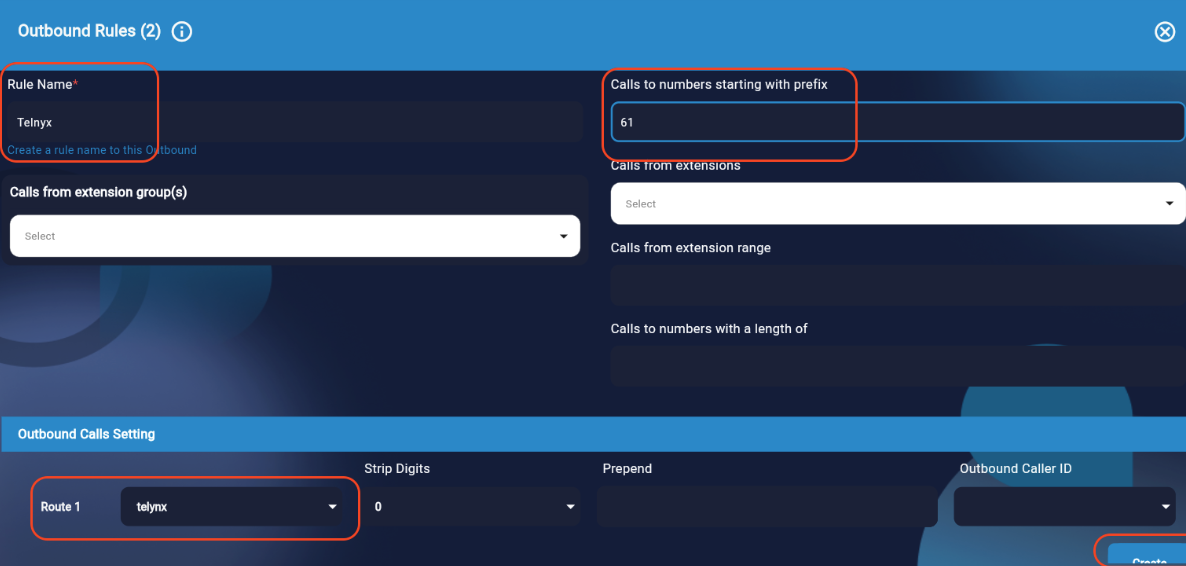
Enter the rule name and prefix details.
Select Route as Telnyx SIP.
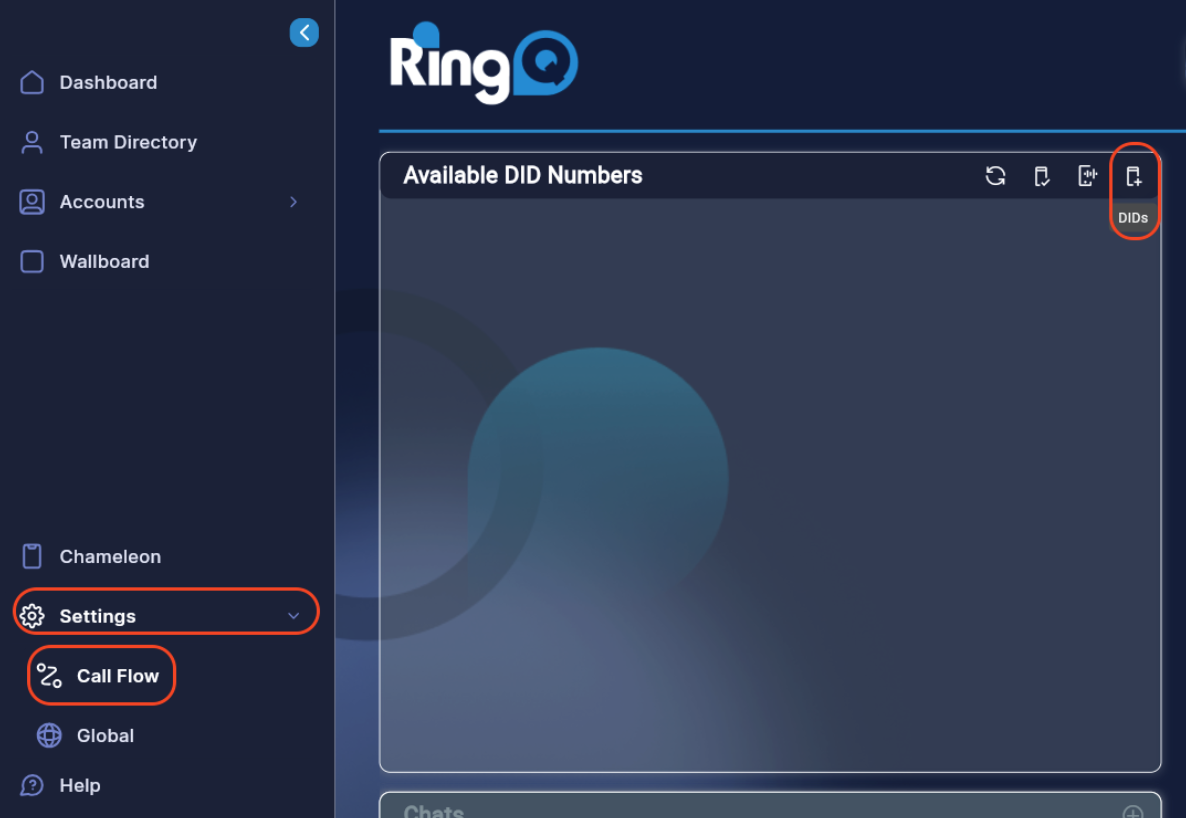
Go to Settings > Call Flow > Add DID.

Click the Add DID number button (shown above).
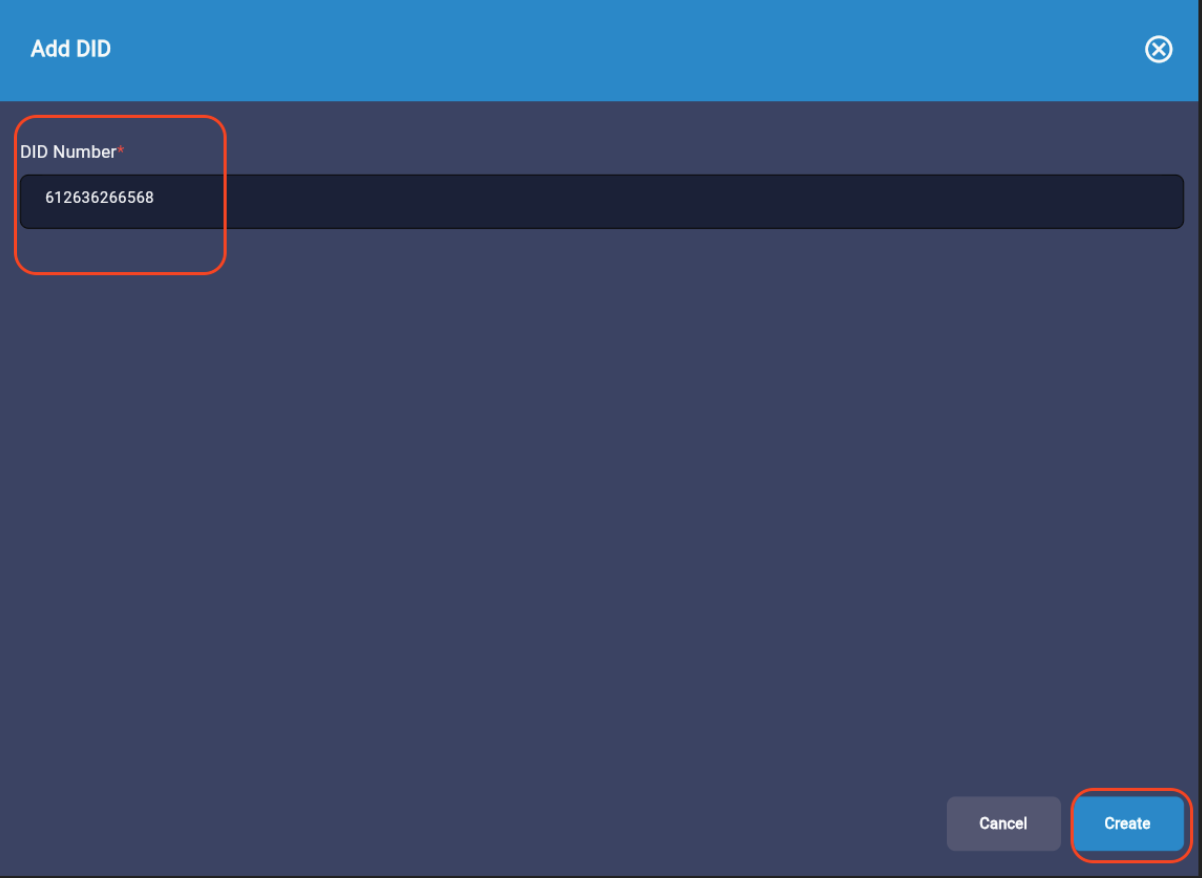
Enter the DID number.
Click Create.
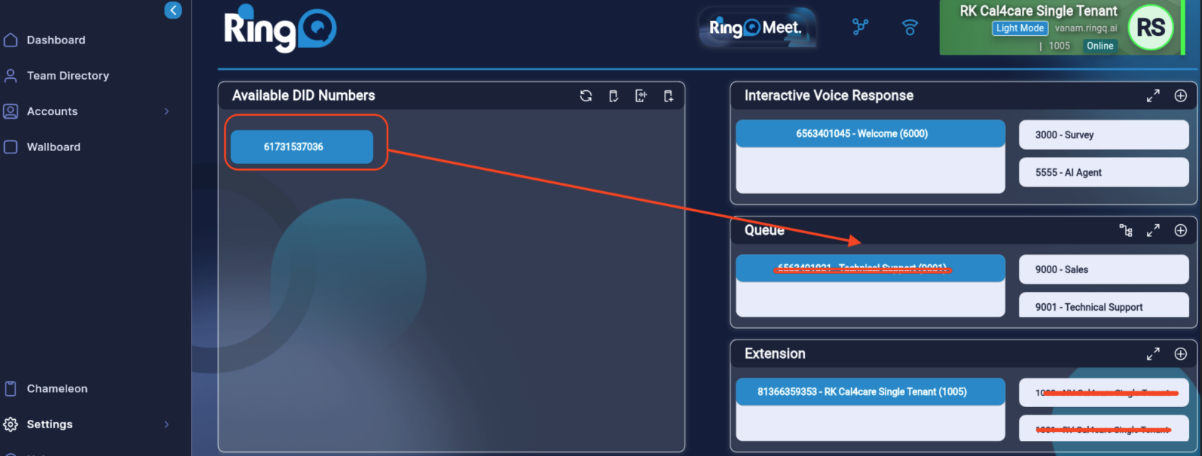
The DID will appear in the Available DID Numbers list.
Click the DID number and drag it to where it is needed.
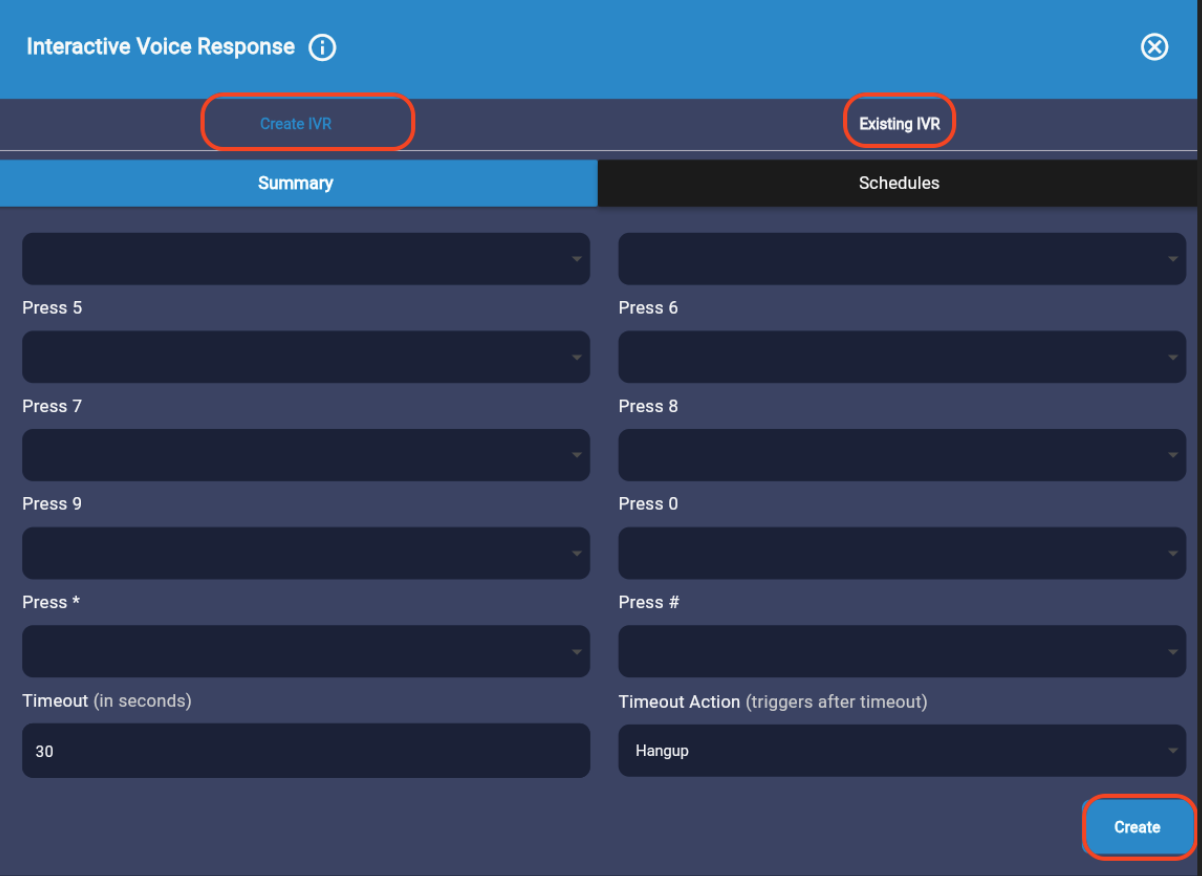
When you drop the DID number, you will be given the option to create an extension, IVR, or queue, or to add it to an existing extension, IVR, or queue.
