This guide walks you through the process of configuring your Snom D150 IP phone to work seamlessly with RingQ. Whether you’re setting up a brand-new device or updating an existing one, you’ll learn how to register your phone, apply the correct settings, and get it ready to make and receive calls using RingQ’s VoIP platform.
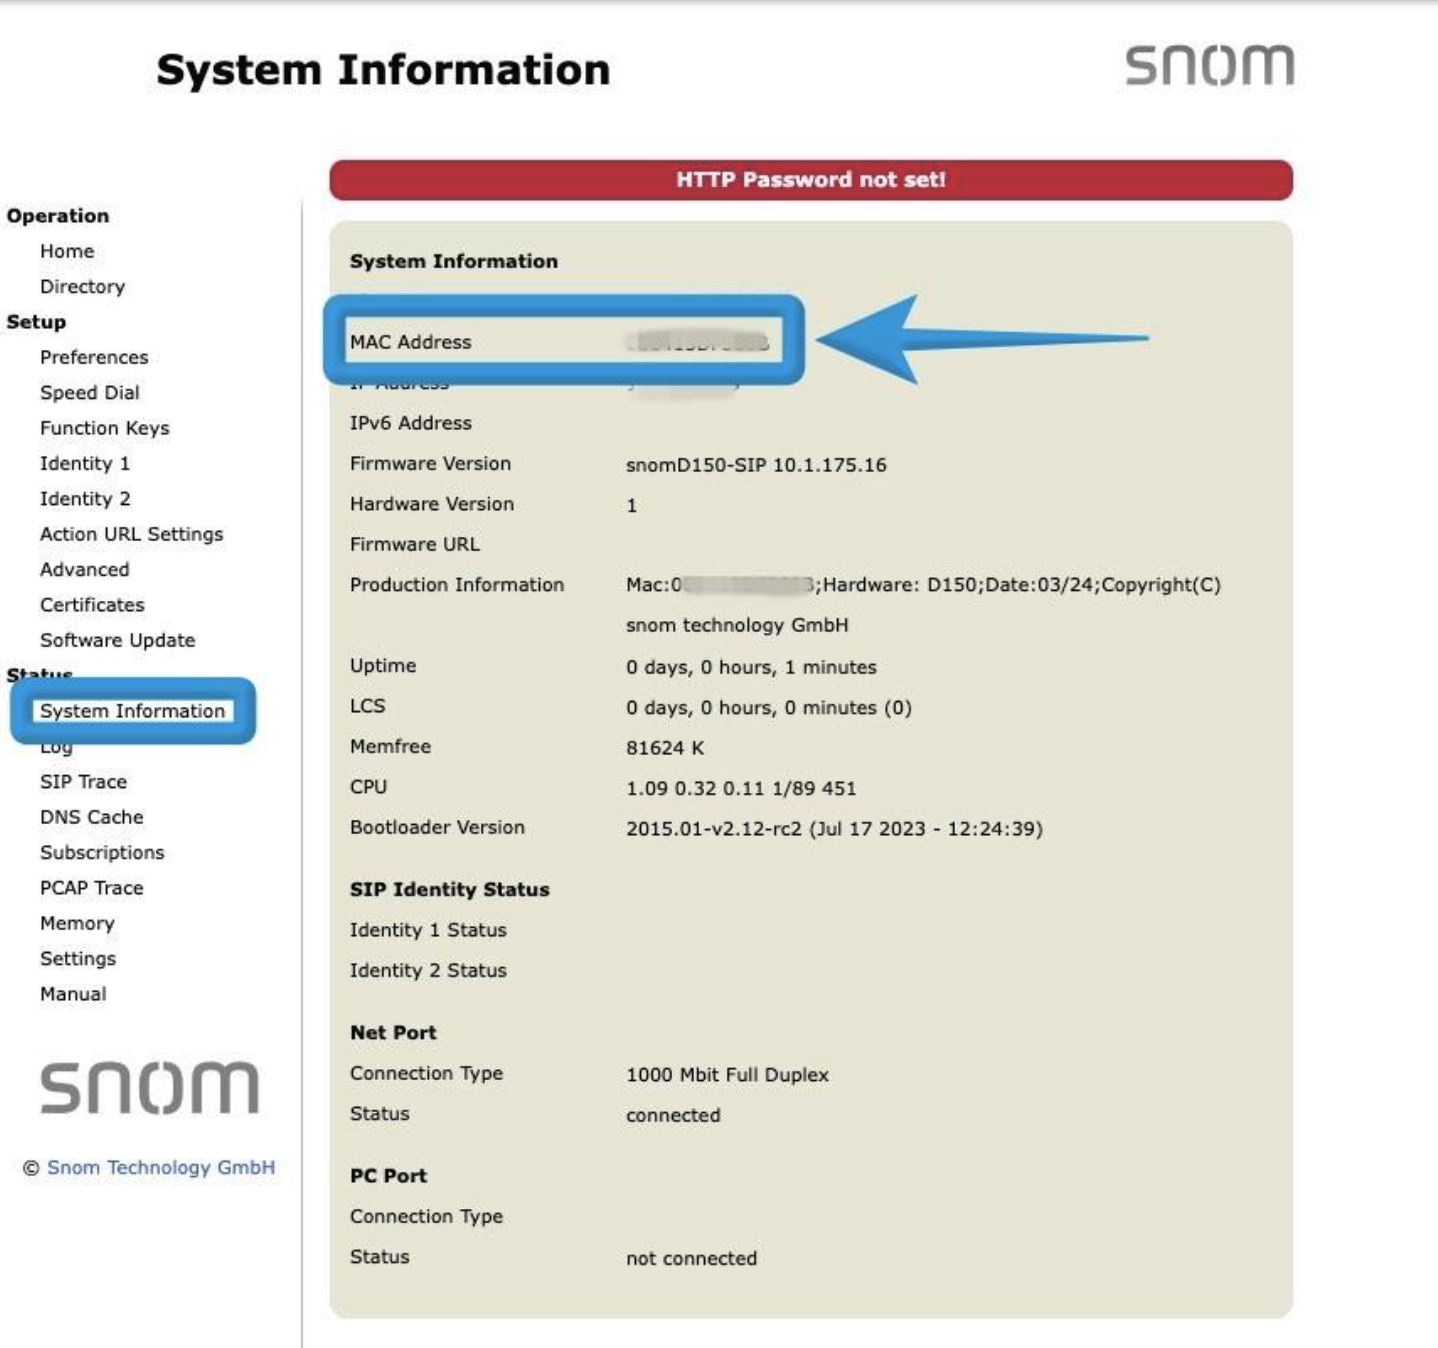
From the Snom web interface, navigate to System Information.
Locate and copy the MAC address of the device.
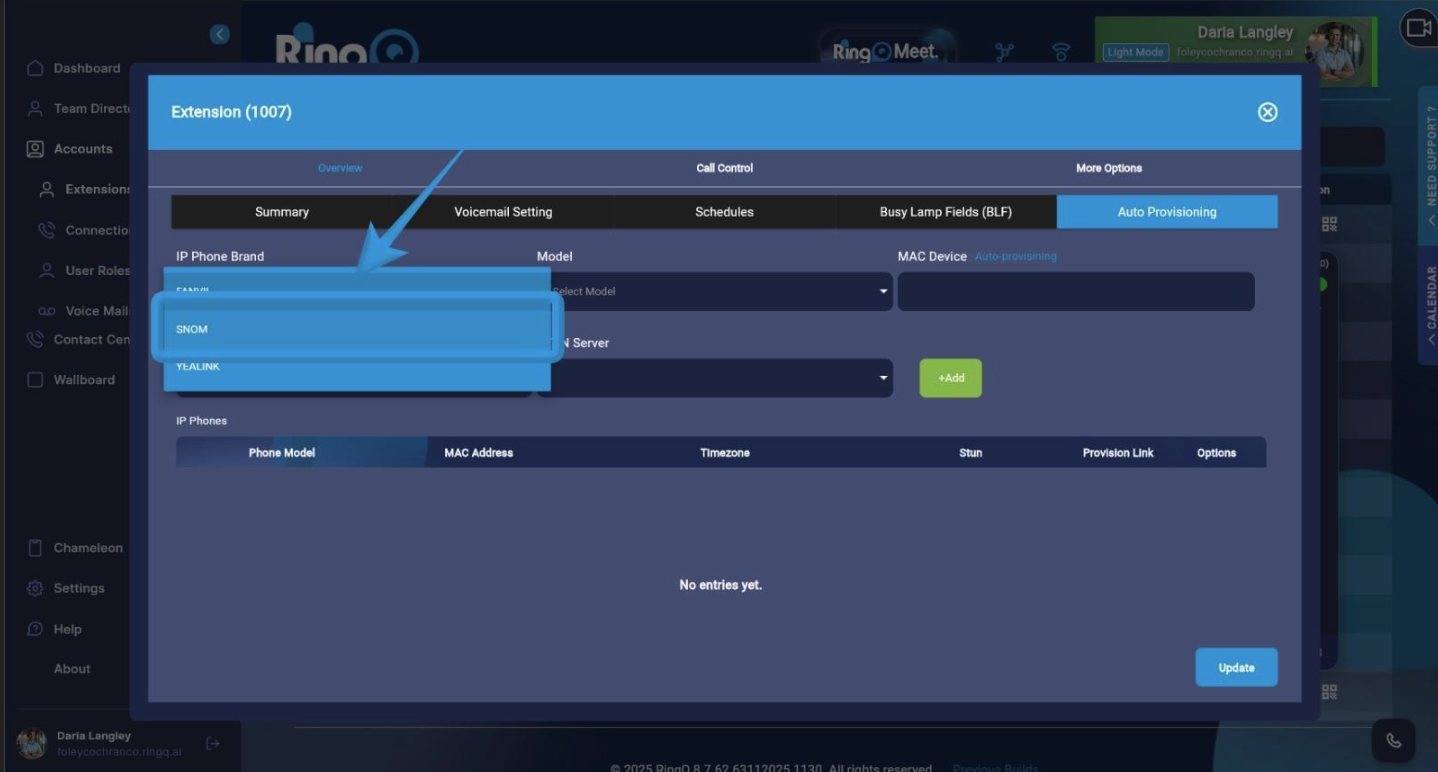
Go to the RingQ Auto Provisioning page under your extension.
Set the IP Phone Brand to Snom.
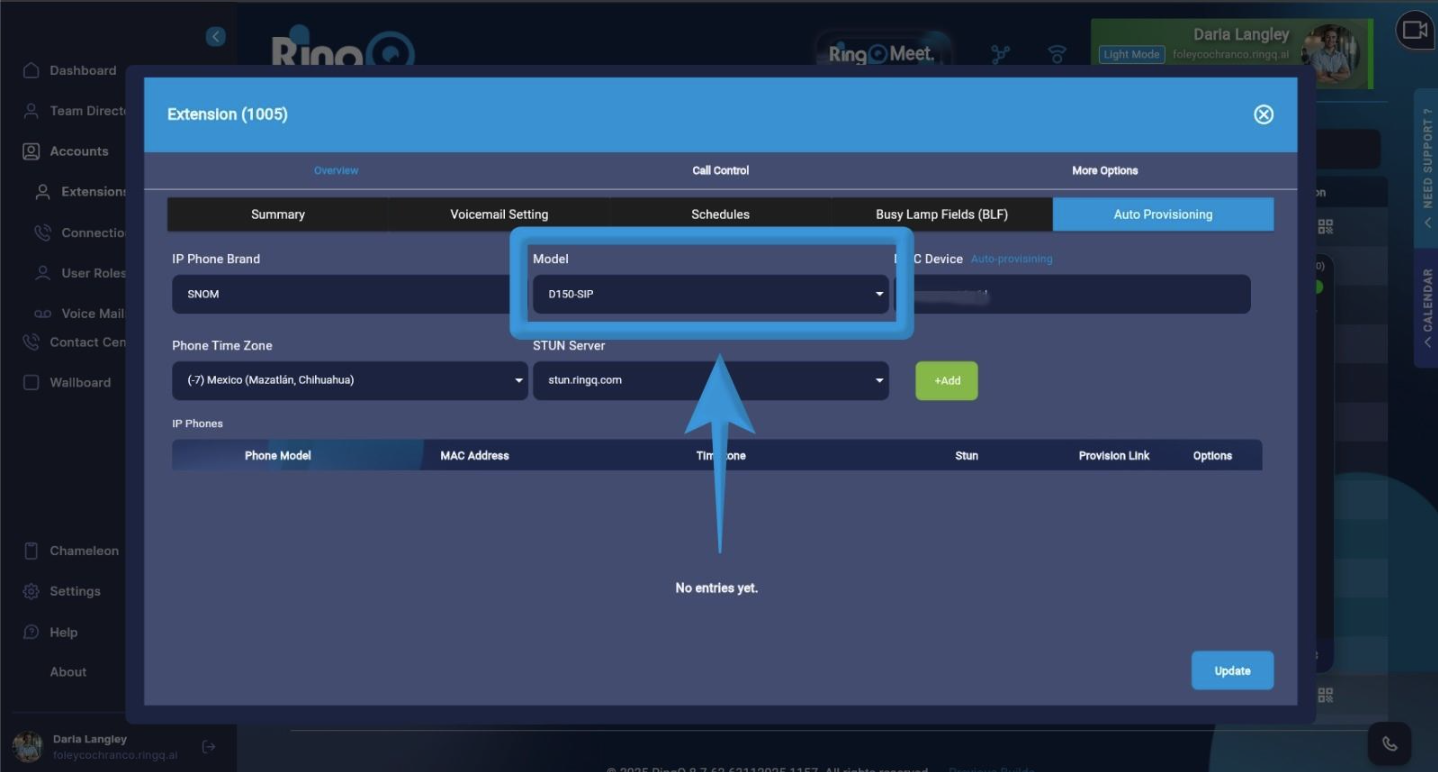
Select Snom D150 as the model.
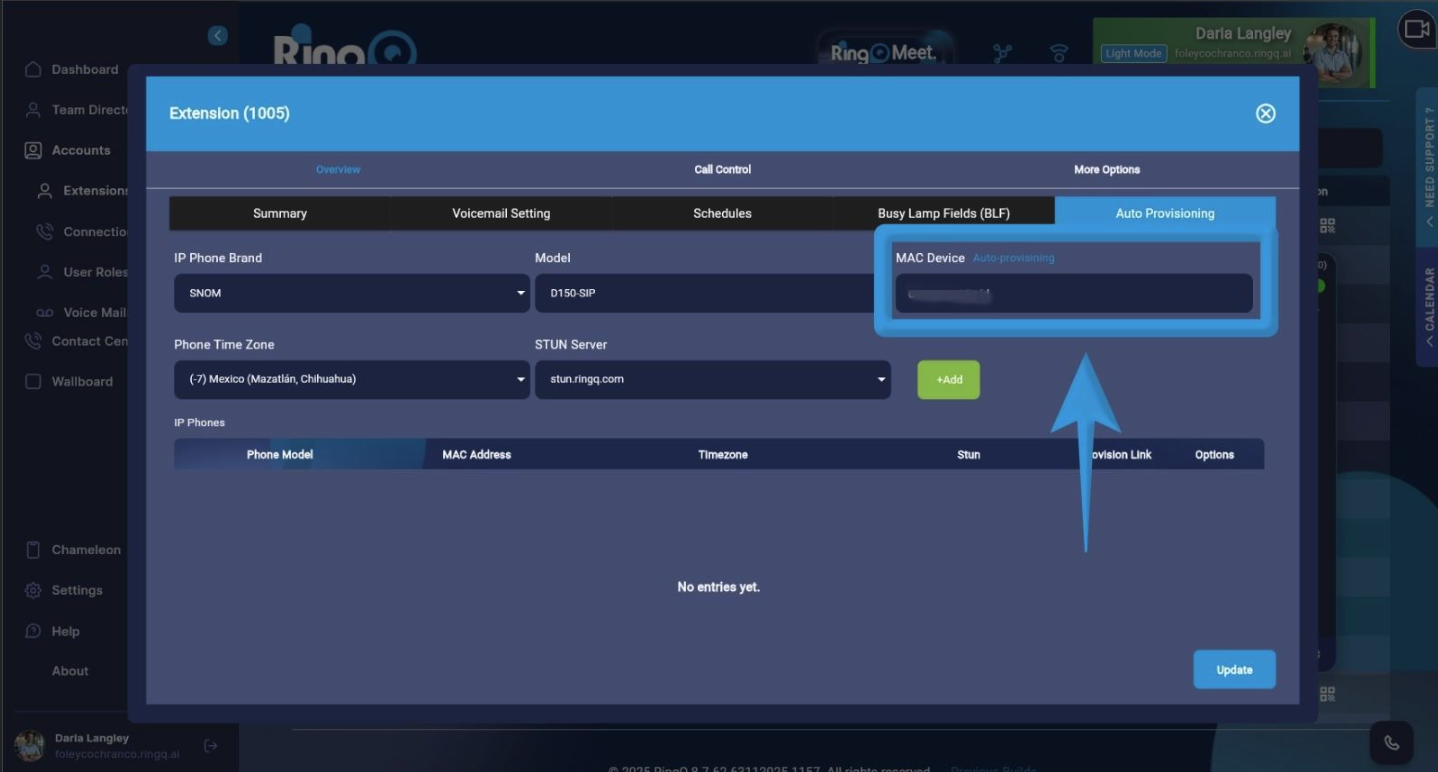
Paste the MAC address into the MAC Address field.
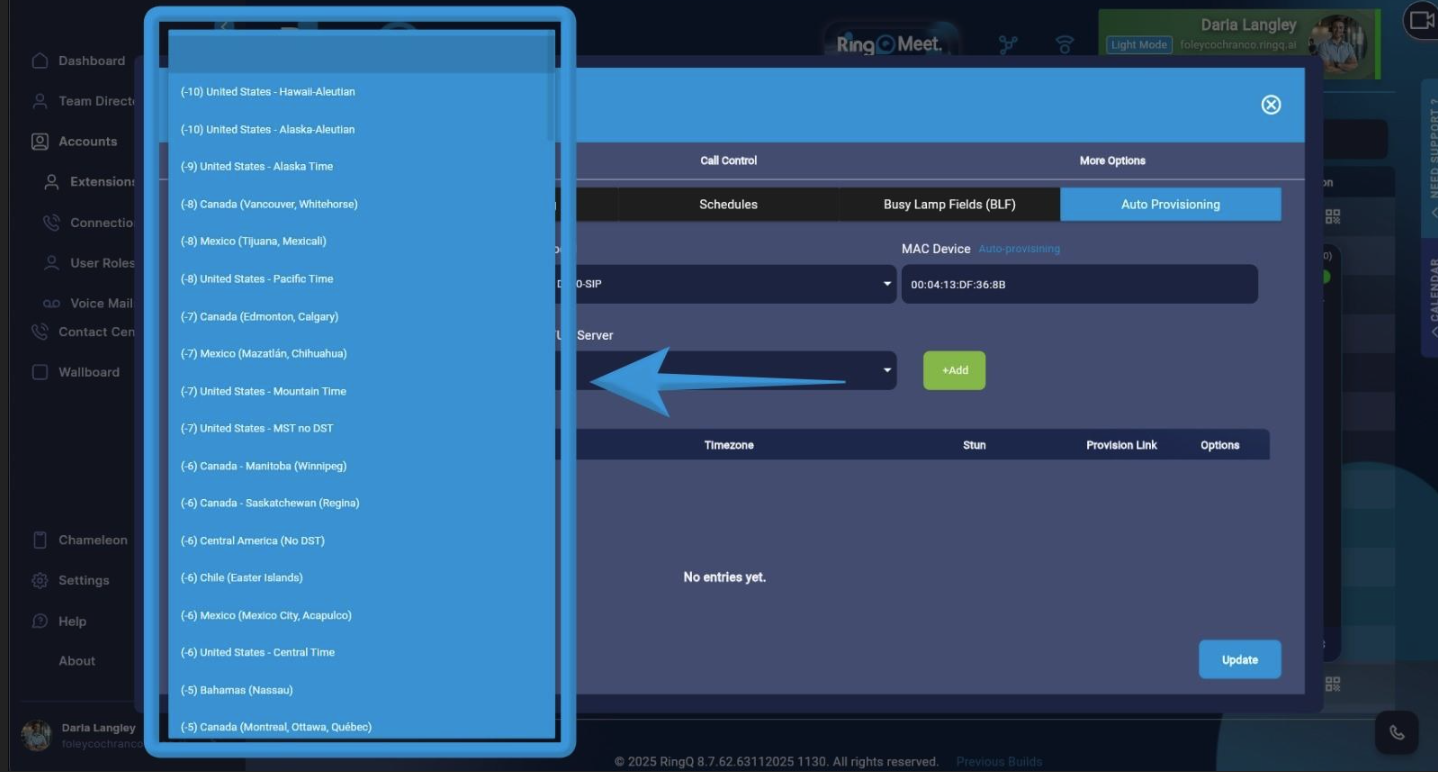
Select the appropriate time zone.
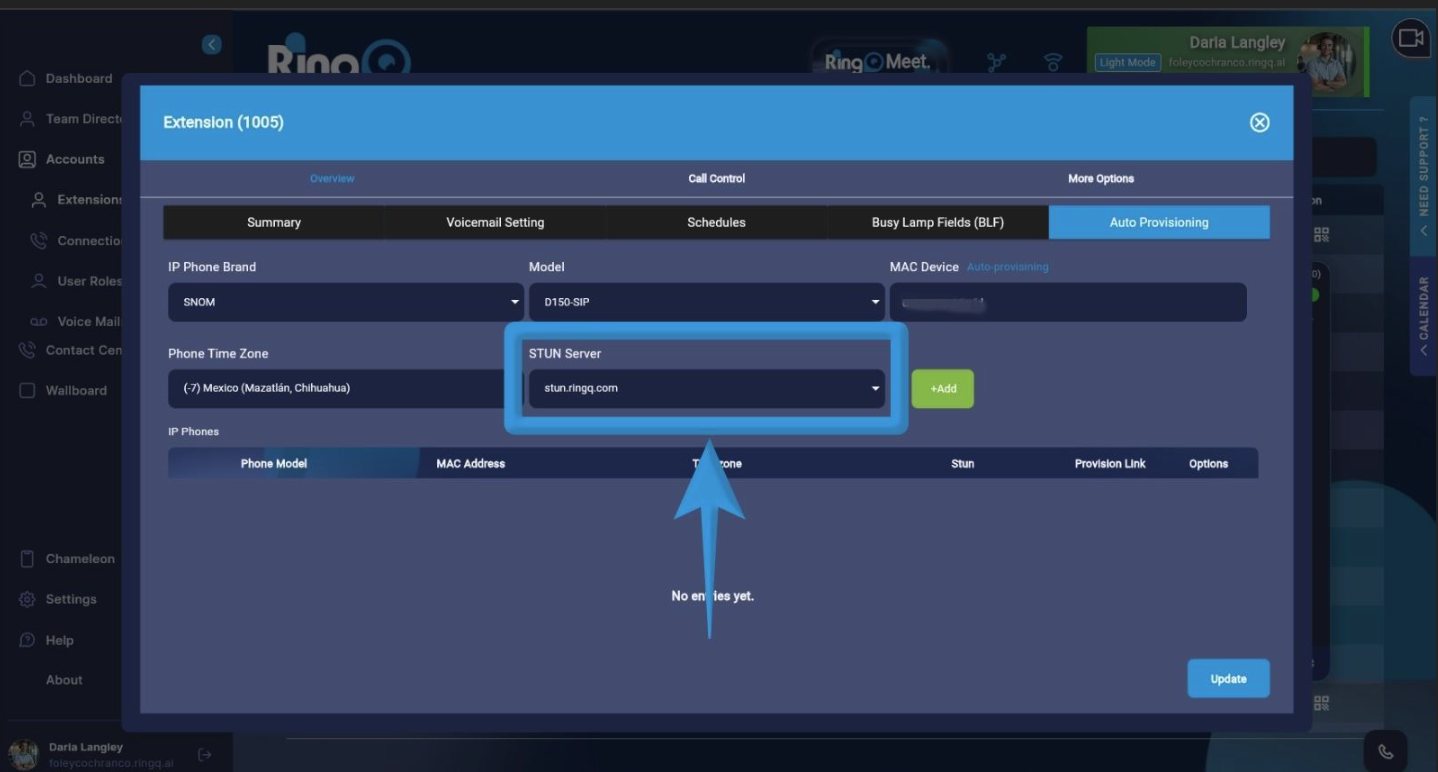
The STUN Server will auto-populate.
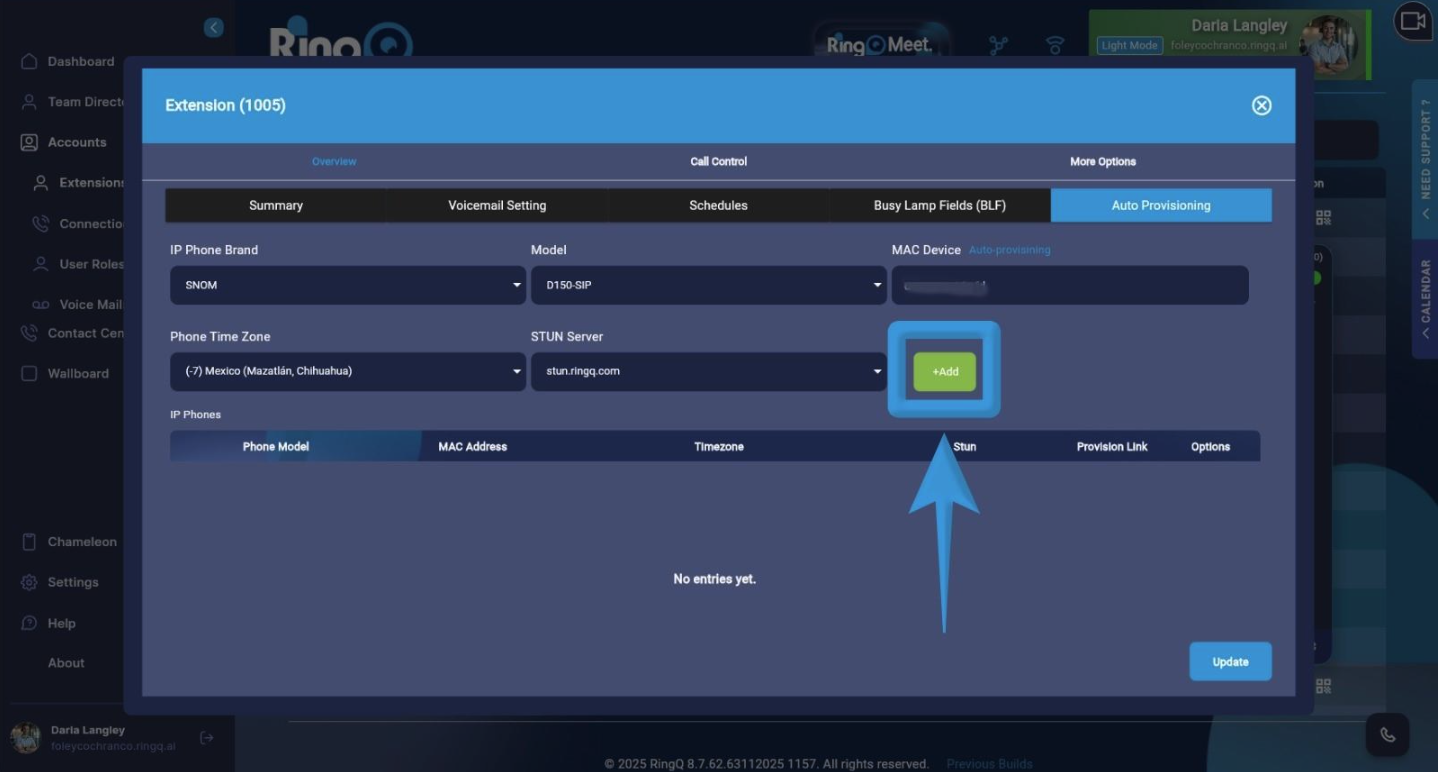
Click Add to add the device to the provisioning list.
Click Update to apply changes.
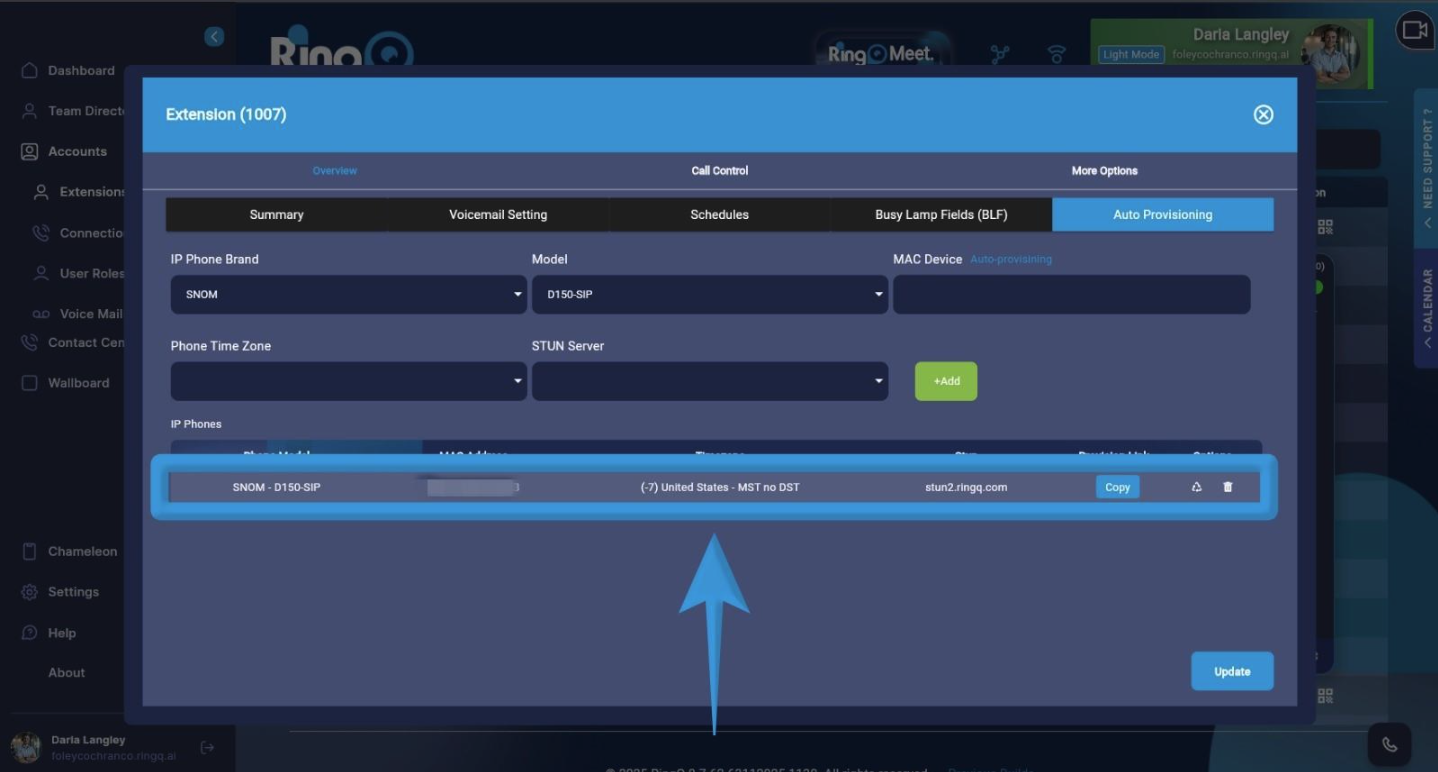
Return to the Auto Provisioning page.
Locate the newly registered Snom D150 in your device list.
Click the Copy button to copy the provisioning URL.
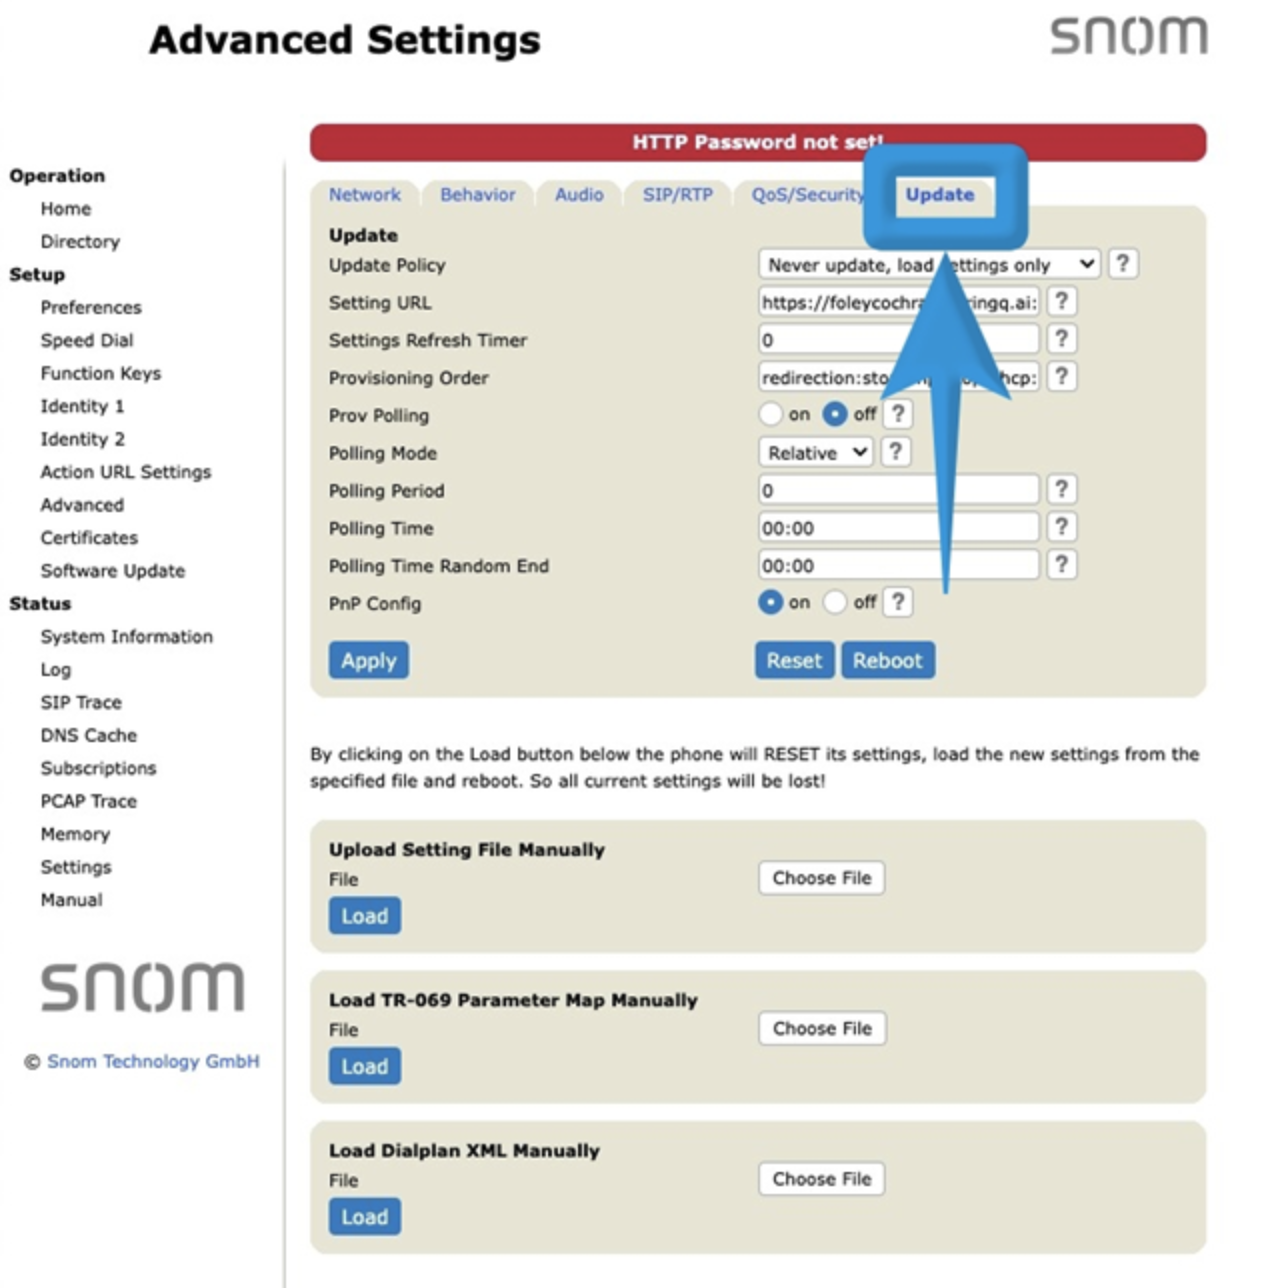
On the Snom D150 web interface, go to Advanced Settings.
Click the Update tab.
Locate the Setting URL field.
Paste the provisioning URL you copied from RingQ.
Click Apply.
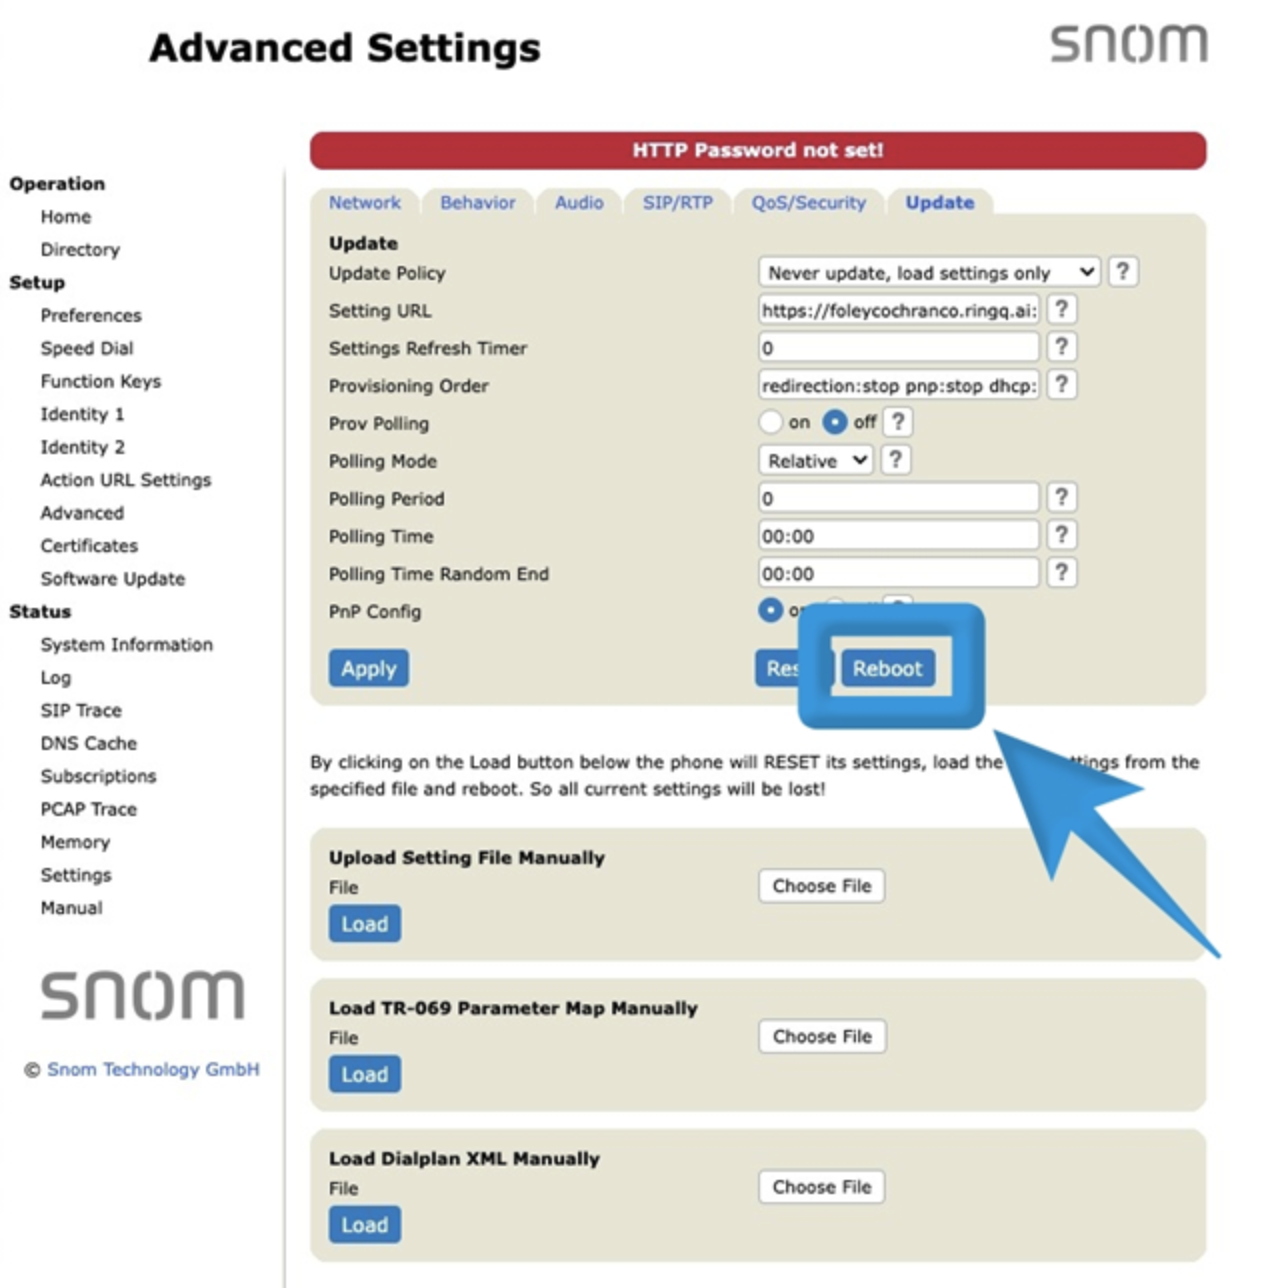
Click Reboot to restart the phone.
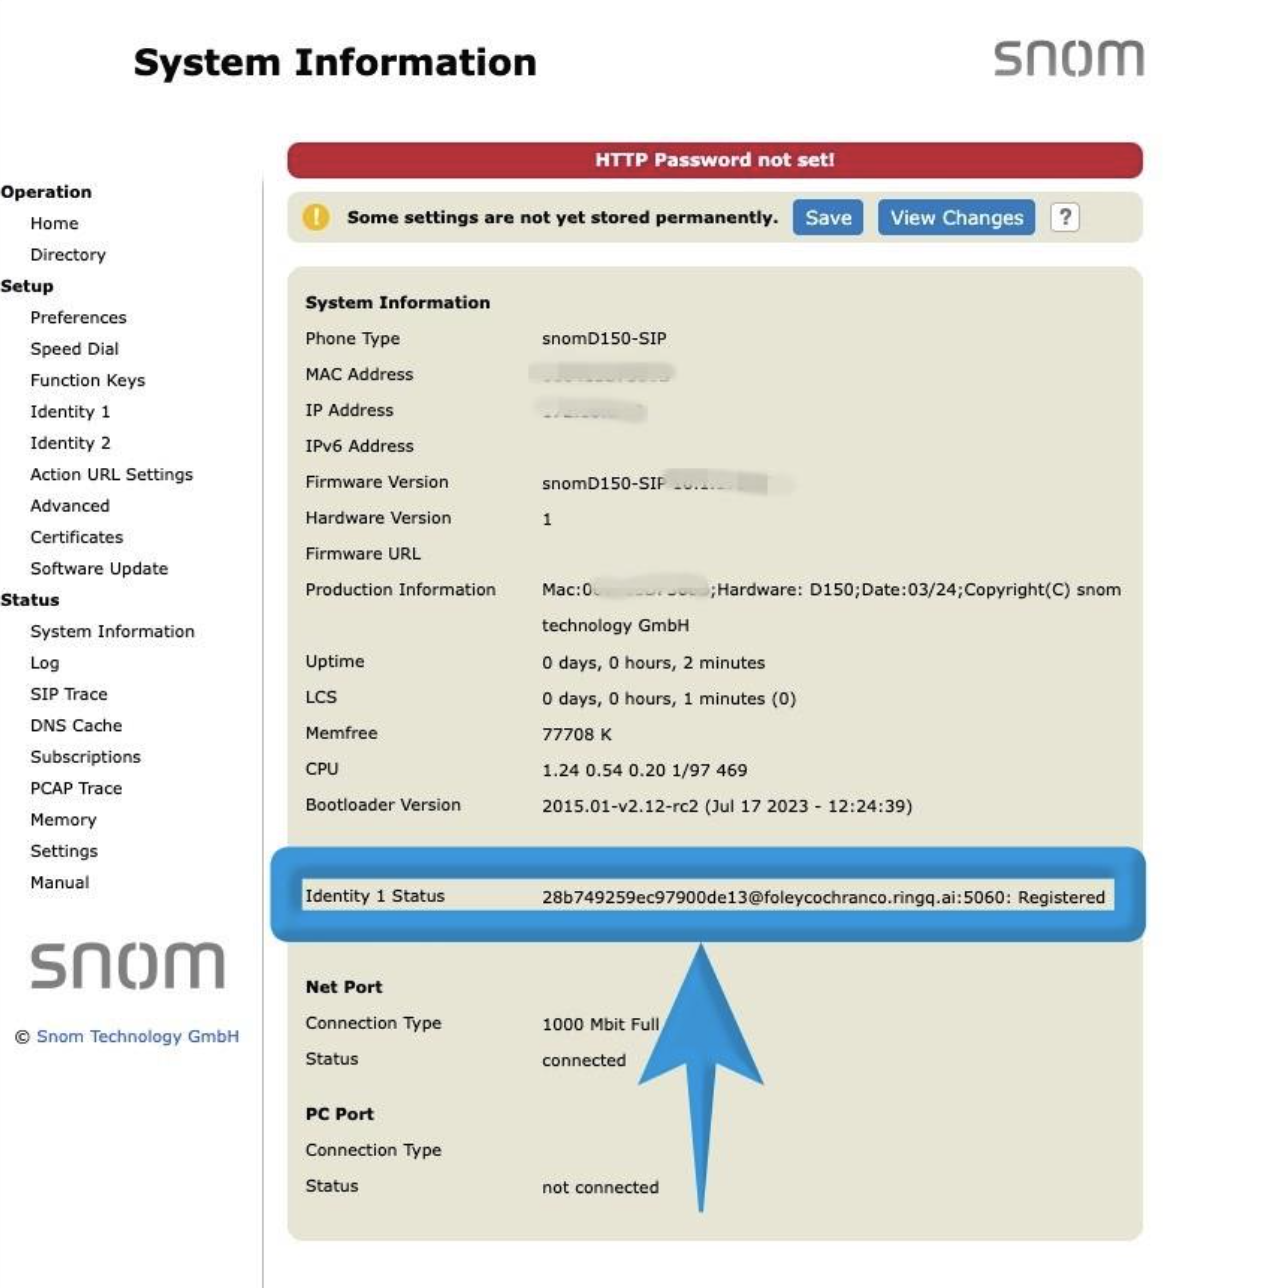
After rebooting, go to Status → System Information on the Snom D150.
Verify that the device has successfully downloaded the configuration and registered with RingQ.
