Auto-provisioning Fanvil IP phones with RingQ simplifies deployment, saves time, and ensures consistent configurations across your devices. Instead of manually entering SIP credentials and settings on each phone, RingQ’s provisioning system automatically applies the correct configuration as soon as the phone connects to the network.
This guide walks you through the step-by-step process of setting up auto-provisioning for Fanvil IP phones with RingQ — from preparing your RingQ account and phone details to confirming successful registration. Whether you’re deploying a single device or managing hundreds, this method helps streamline setup, reduce errors, and get your phones operational in minutes.
Connect your Fanvil IP phone to the same network as your computer.
In your browser, type the IP address of the Fanvil IP phone (e.g., 192.168.100.xxx) in the address bar.
Enter the username and password to log in to the web interface.
Connect your Fanvil IP phone to the same network as your computer.
In your browser, type the IP address of the Fanvil IP phone (e.g., 192.168.100.xxx) in the address bar and log in to the web interface.
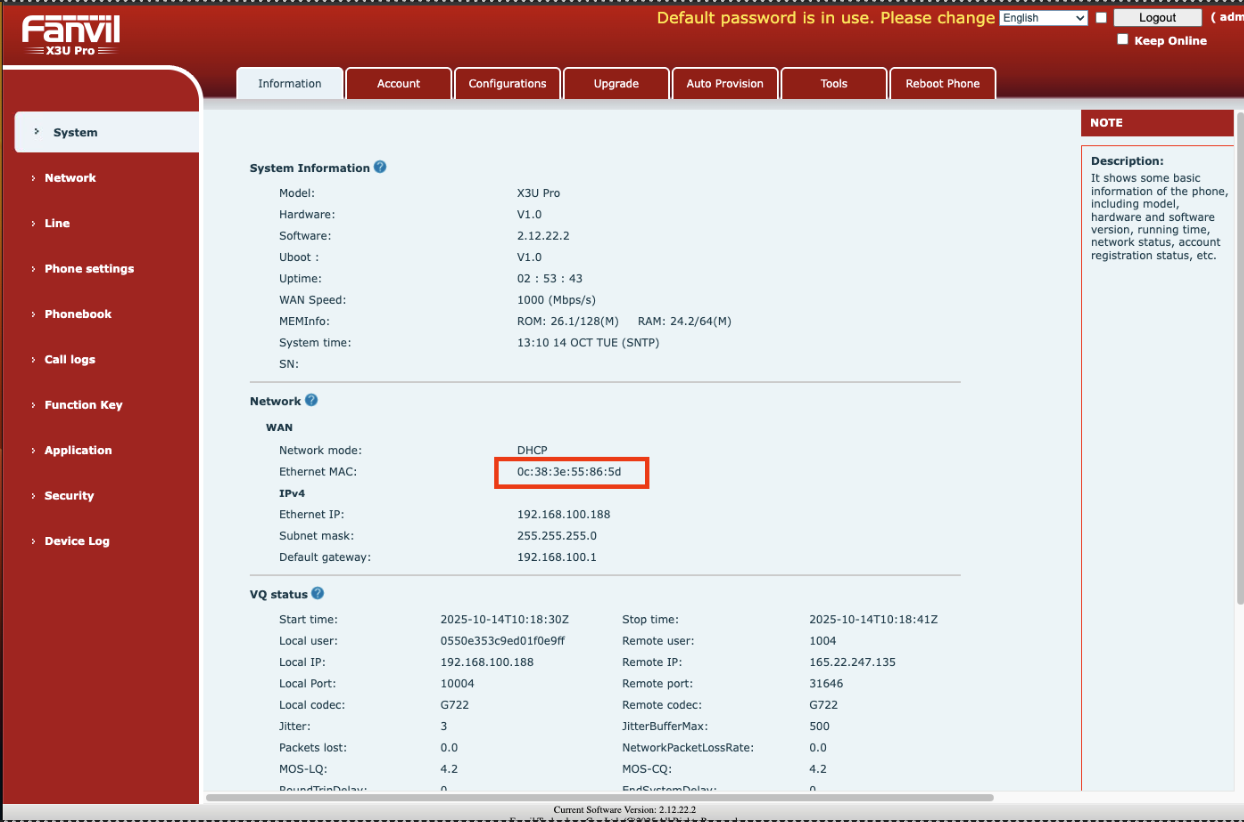
Once logged in, locate and copy the MAC address of your IP phone. You can also find the MAC address on the label on the back of the phone.
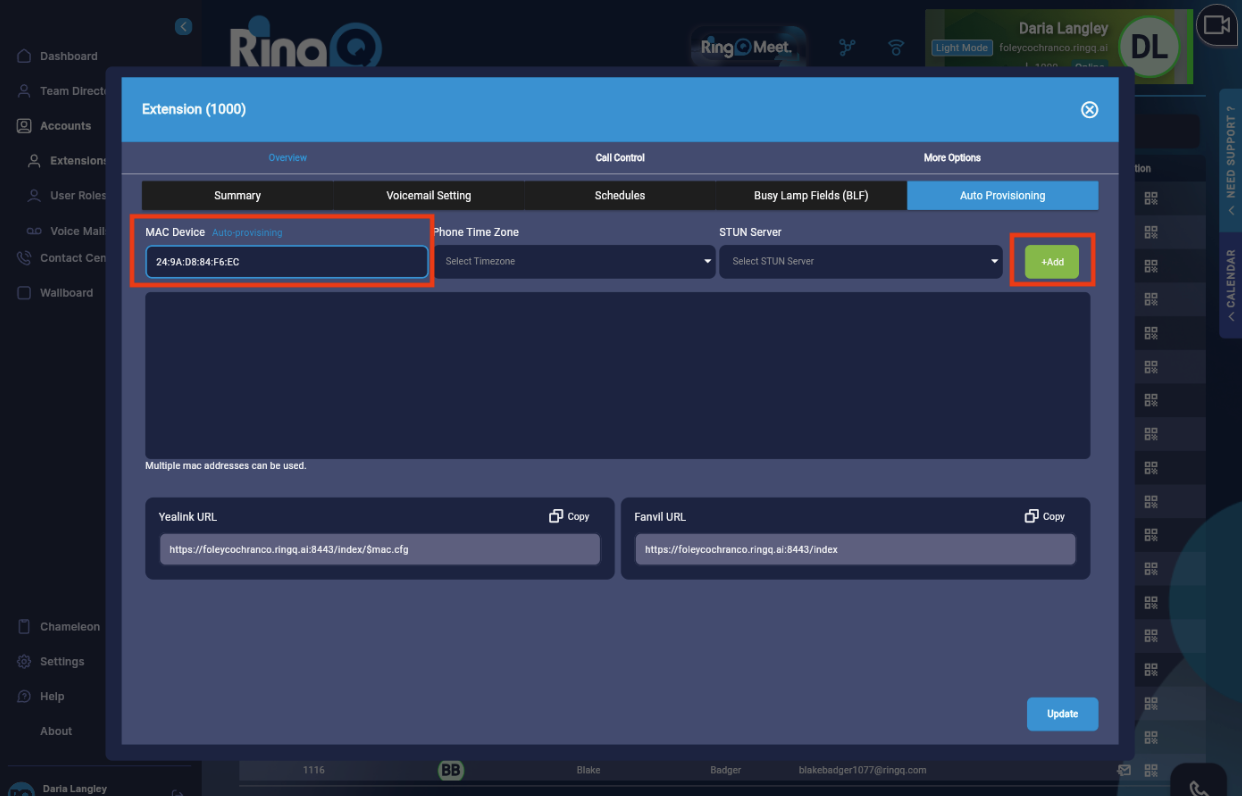
Log in to your RingQ web portal.
Navigate to Auto Provision.
Enter the MAC address of your IP phone into the designated field.
Click the Add button to register the device.
Select your timezone and STUN server, then click Update.
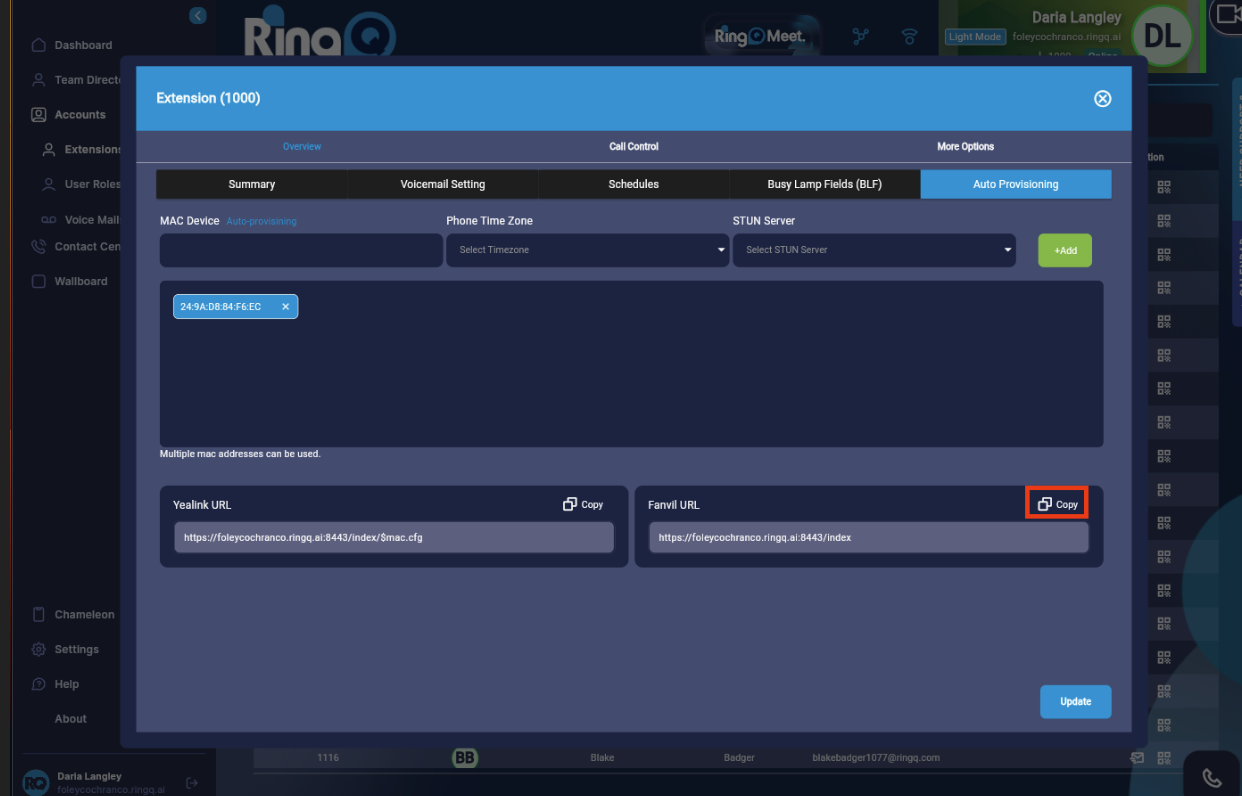
Click the Copy button beside the Fanvil section to copy the provisioning URL.
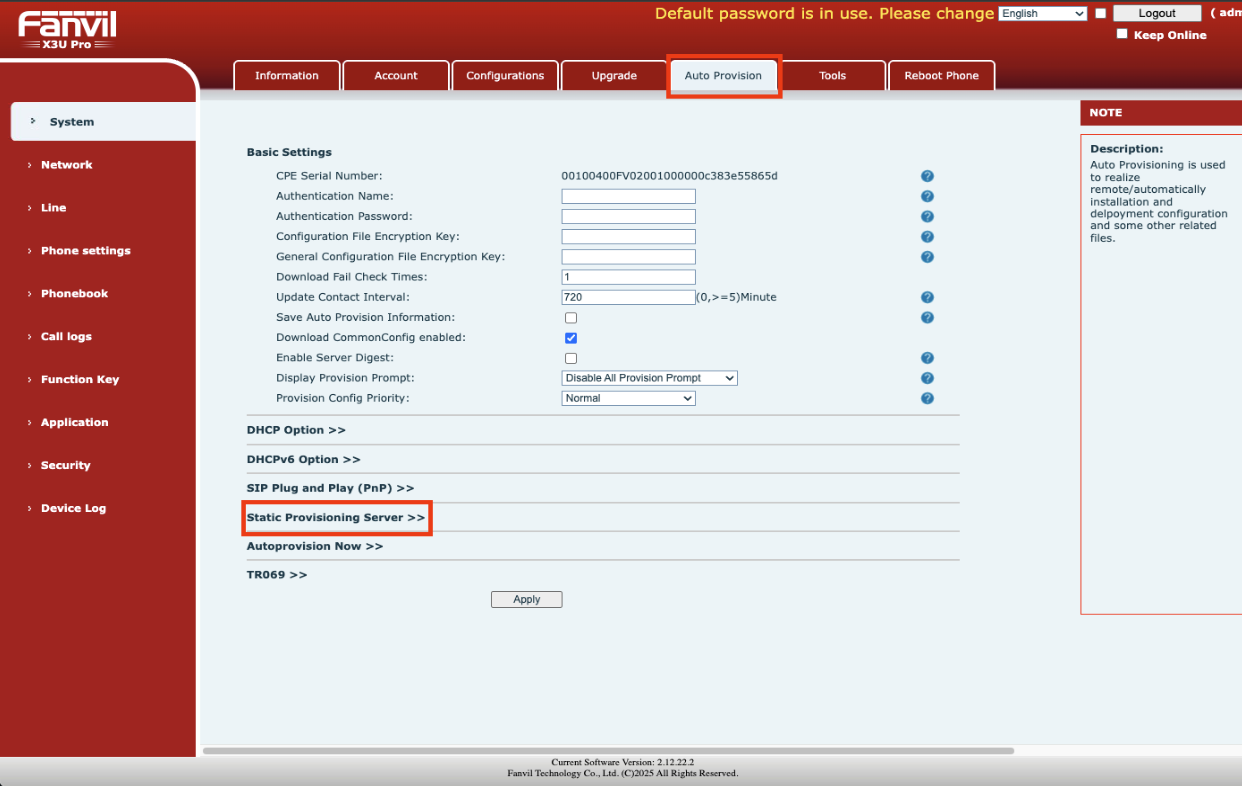
Return to the Fanvil web interface.
Go to System > Auto Provision > Static Provisioning Server.
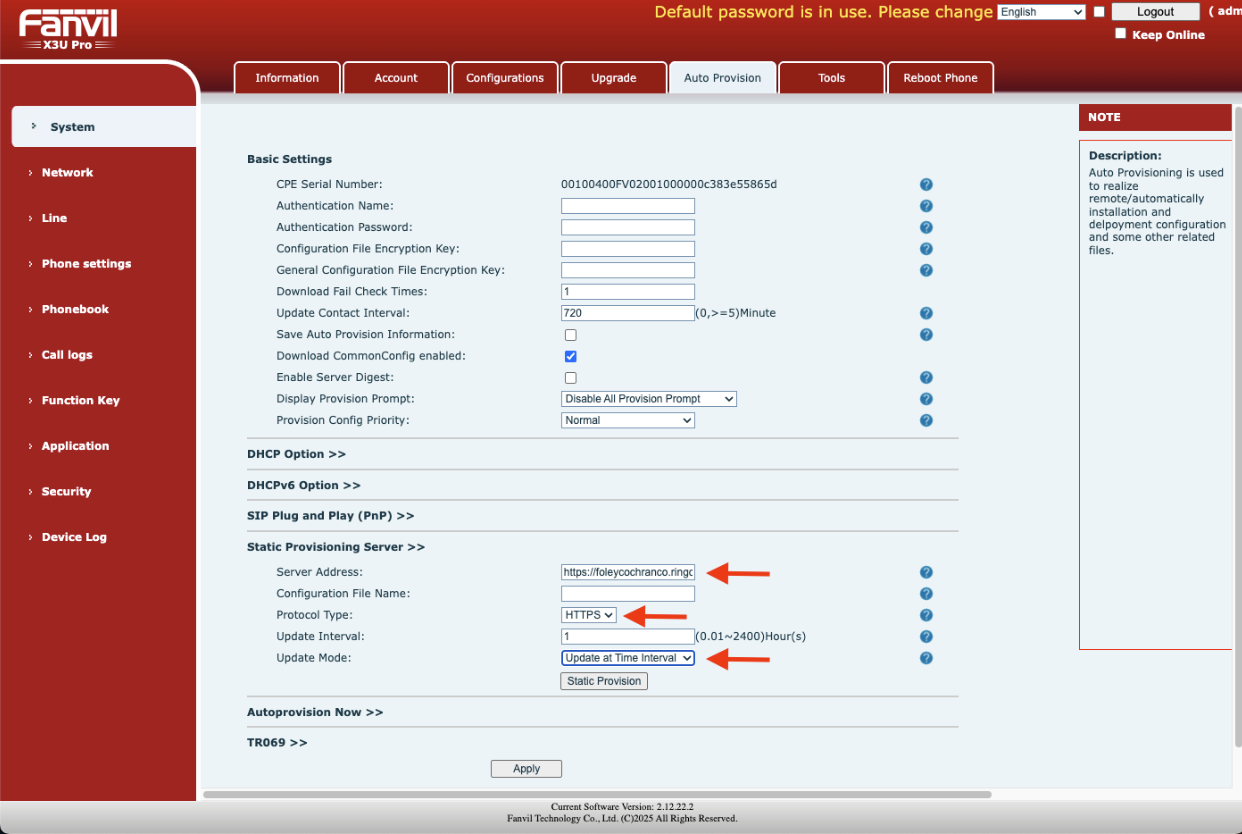
In the Server Address field, paste the URL copied from RingQ.
Set the following options:
Click Apply to save your configuration.
Then click Static Provision to confirm the setup.
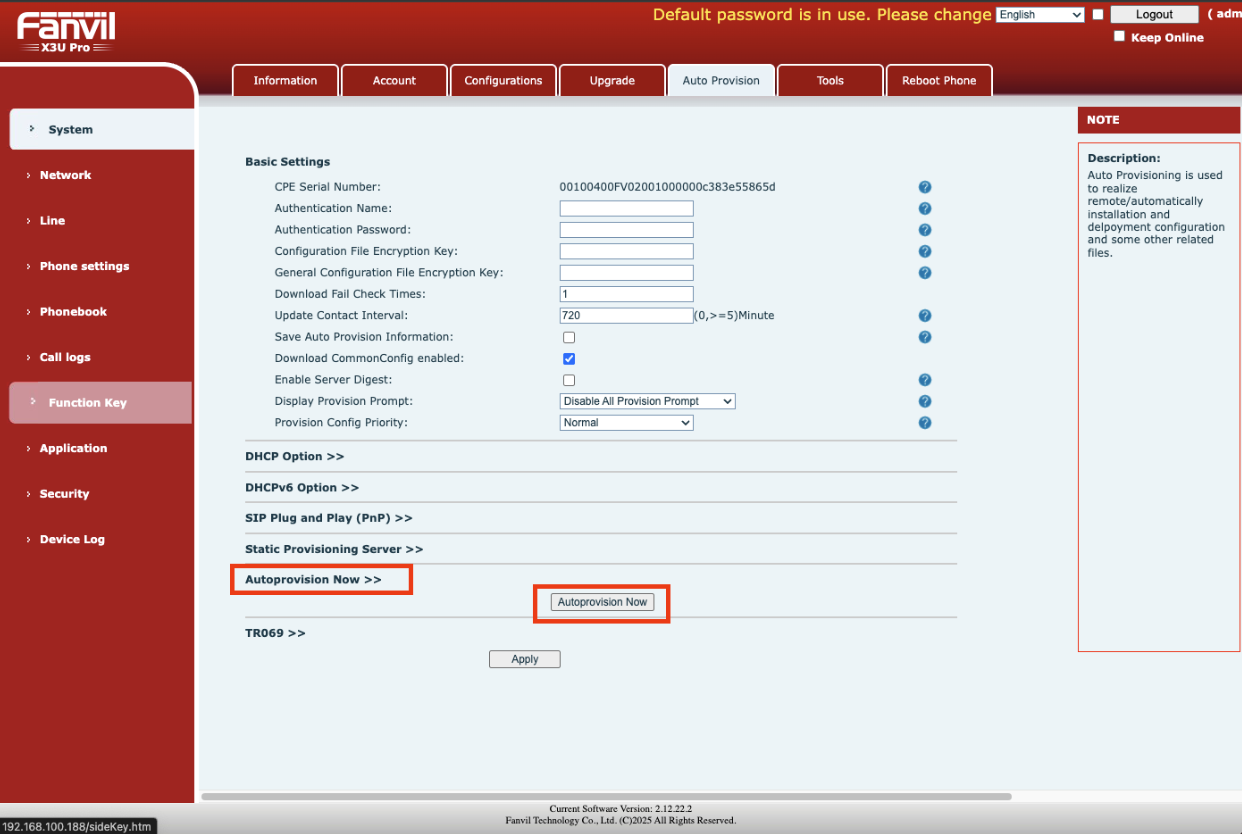
Navigate to the Function section on the left-hand menu and click the Auto Provision button. The device will now download its configuration from the RingQ server.
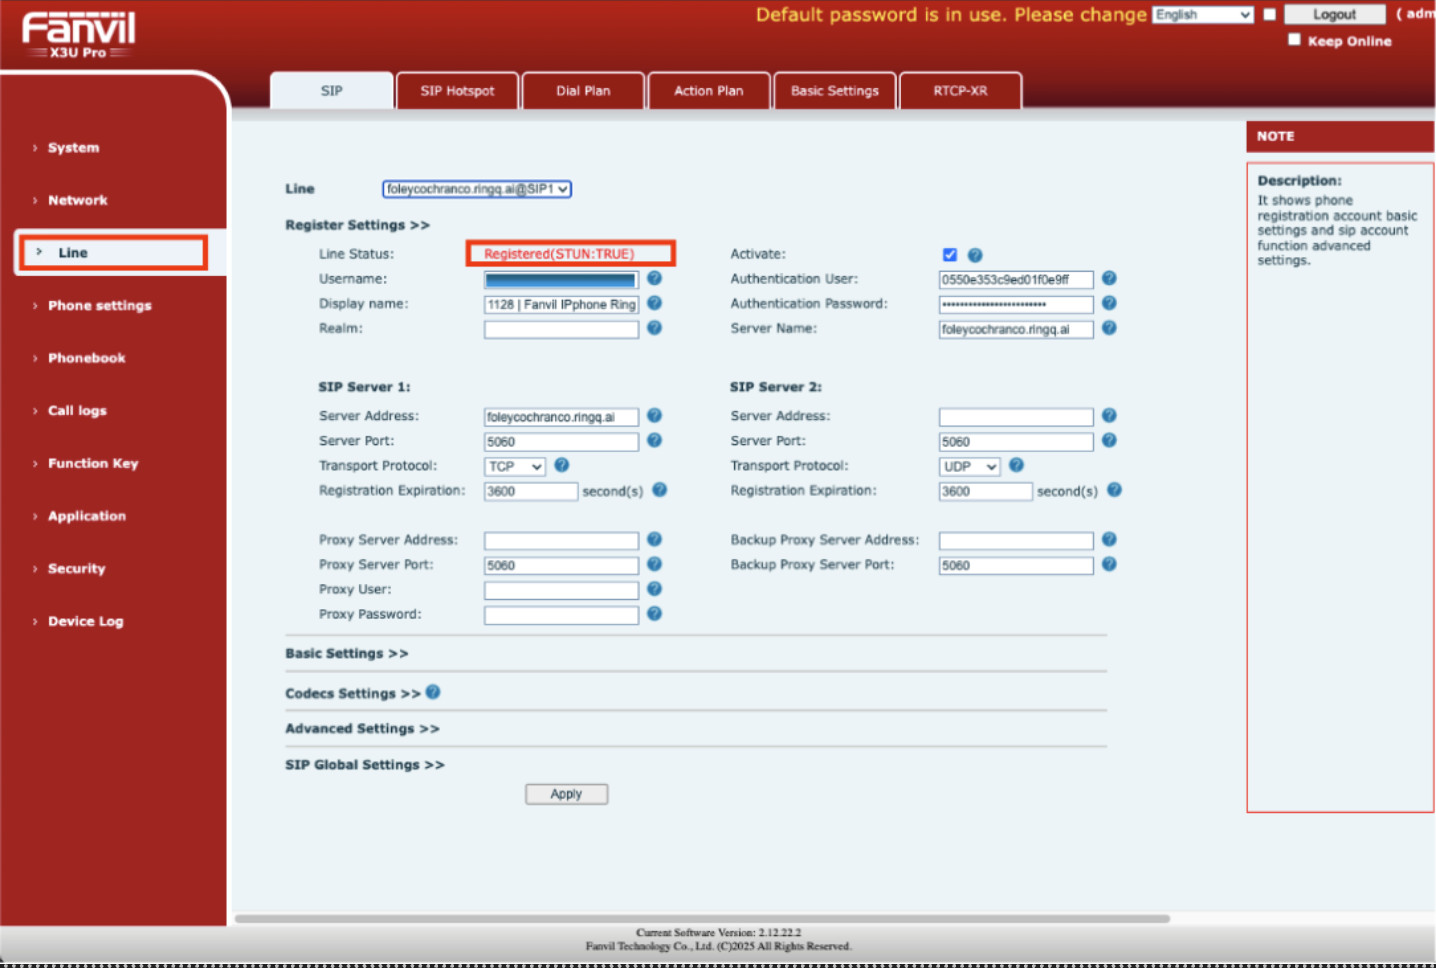
Go to the Line Status page on the IP phone interface.
Confirm that the auto-provision process was successful. The phone should now display the registered RingQ account and be ready for use.
