This guide explains how to create and schedule a video meeting using RingQ Meet. Scheduling a meeting lets you invite participants in advance, set access permissions, and manage the meeting’s timing with ease.
1. Log in to the RingQ Web App.
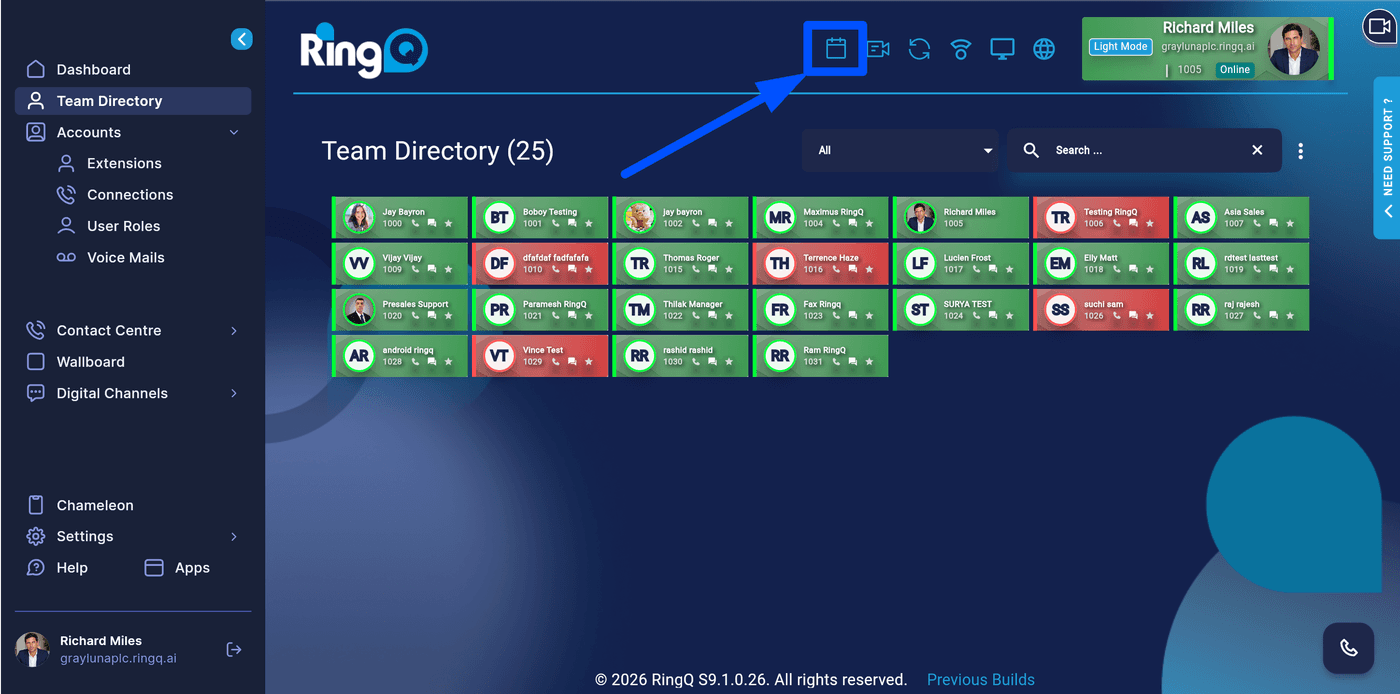
2. Click the RingQ Calendar button in the top menu bar.
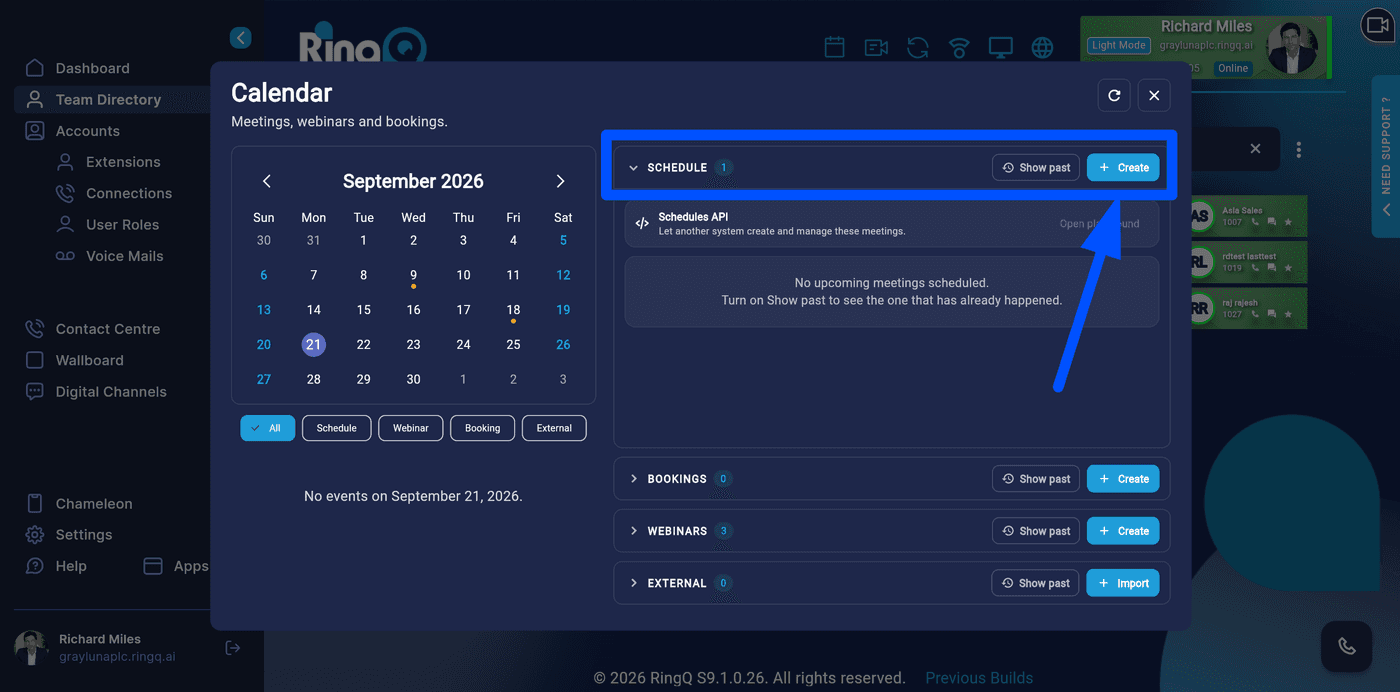
3. Select Schedule to expand the menu, and then click on the “Create” button.
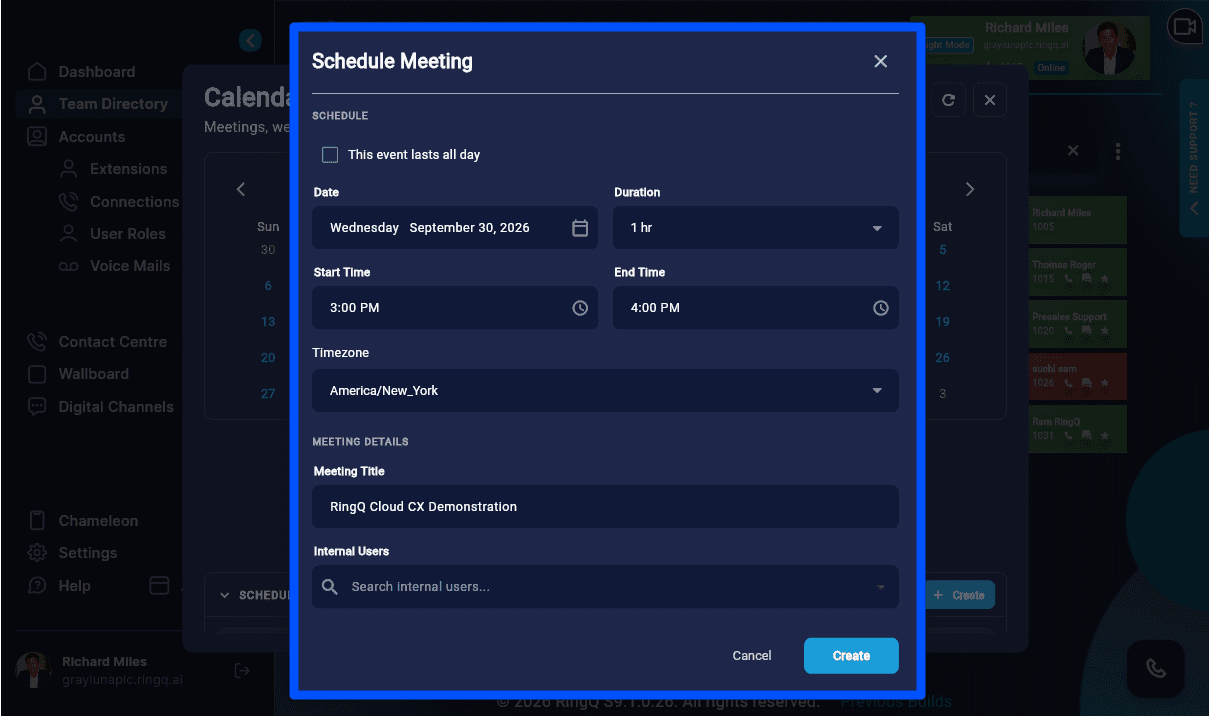
4. Complete all the required information to schedule your meeting:
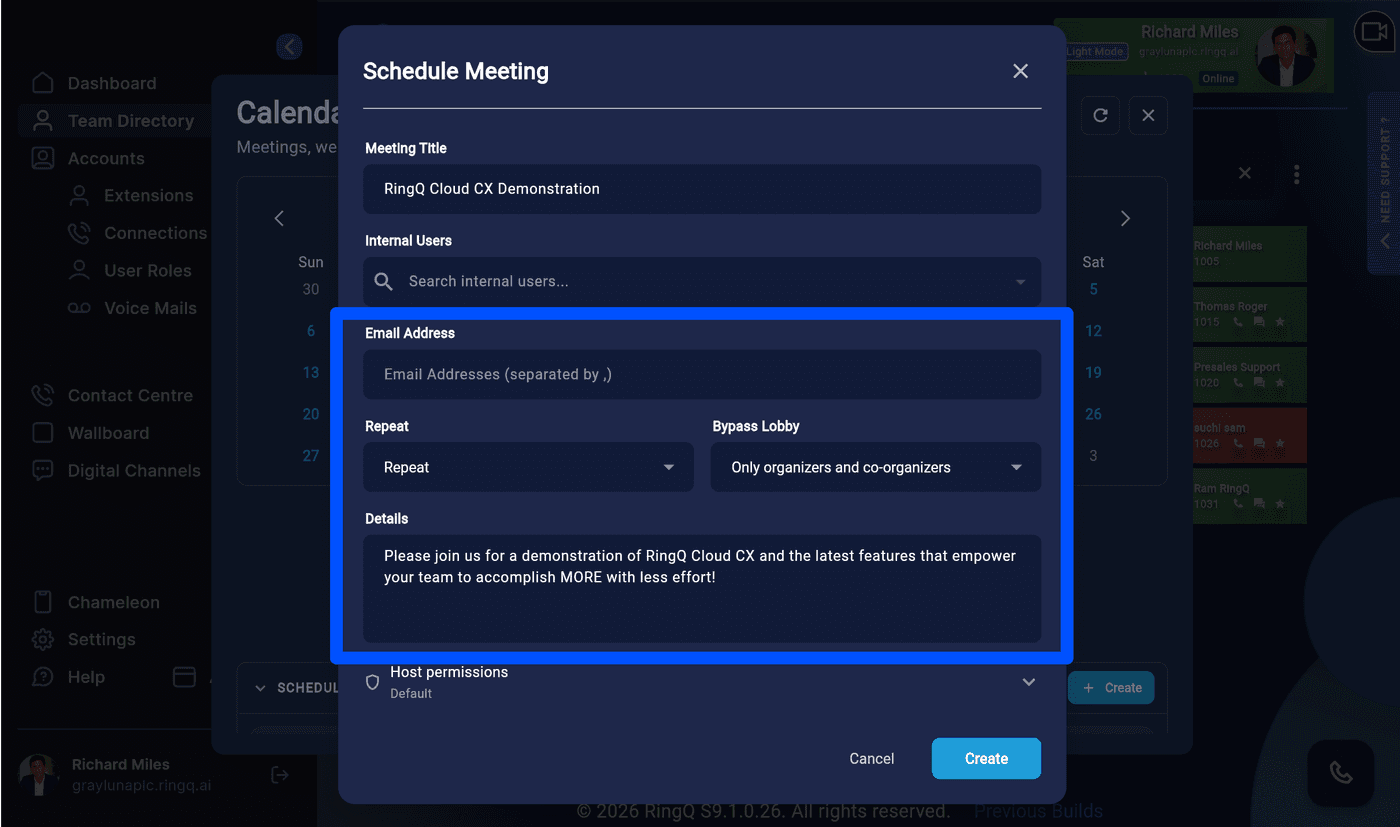
5. Scroll down the menu to fill in the remaining information:
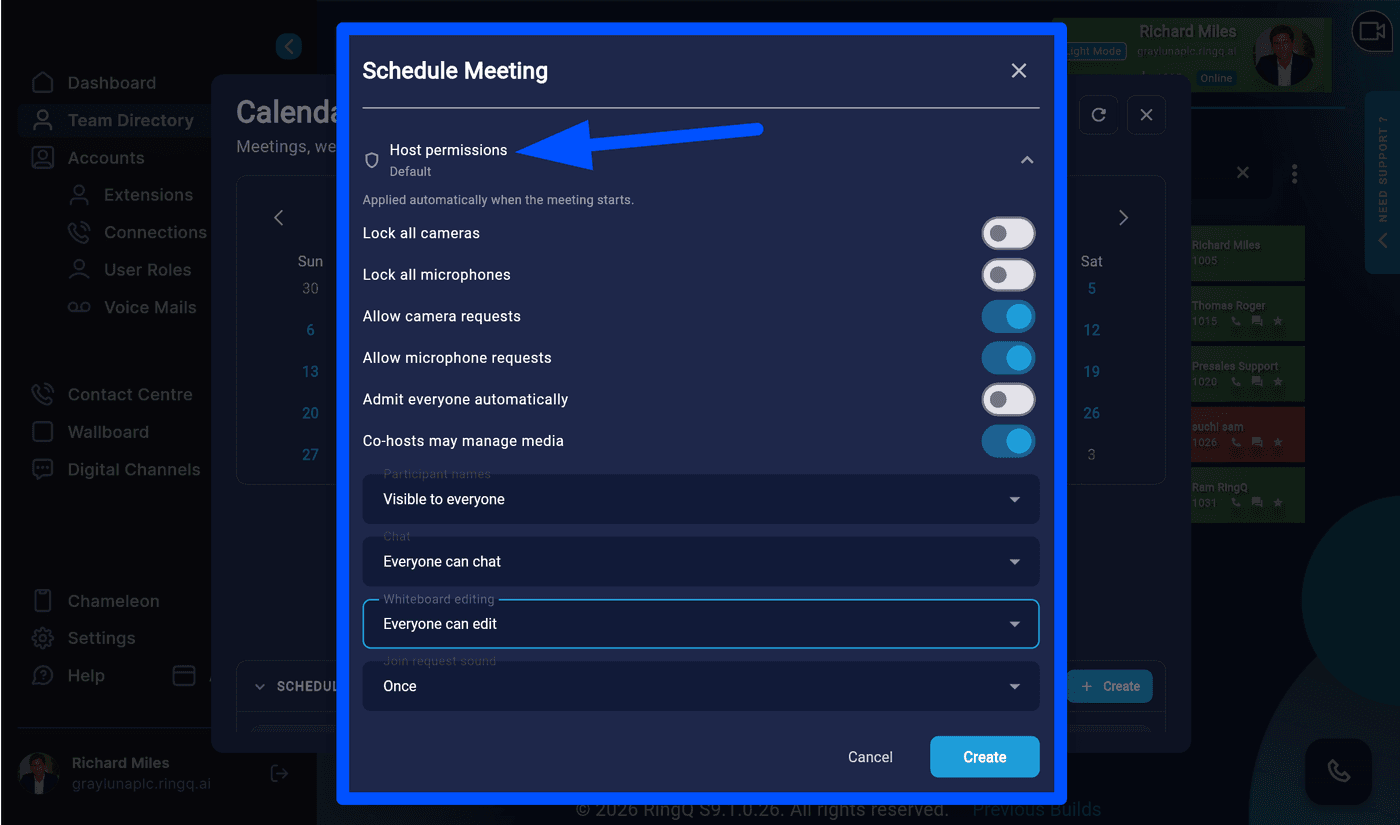
6. The final menu is Host Permissions, which allows a Host to lock cameras, microphones, permit requests for camera or microphones from participants, admit everyone automatically, and also enable co-hosts to manage media.