This guide shows you how to enable or disable notifications from your RingQ app on your iOS device. You can choose to be notified only for specific actions—or not at all—and also learn how to manage your iPhone’s Do Not Disturb settings.
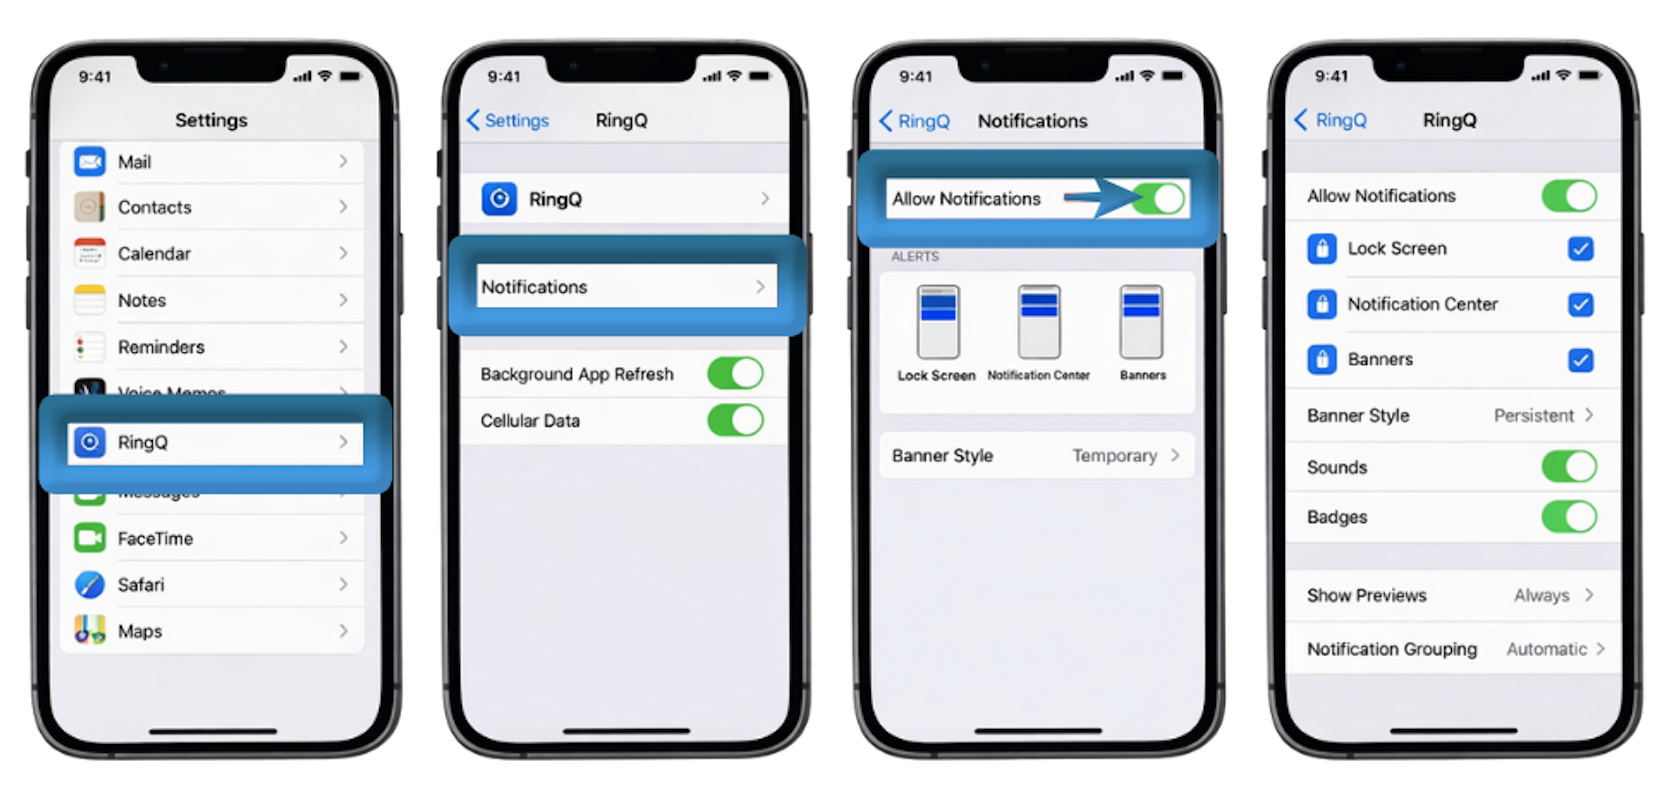
First, ensure that iOS has granted the app permission to “wake up” your phone for an incoming call.
Open the Settings app on your iPhone.
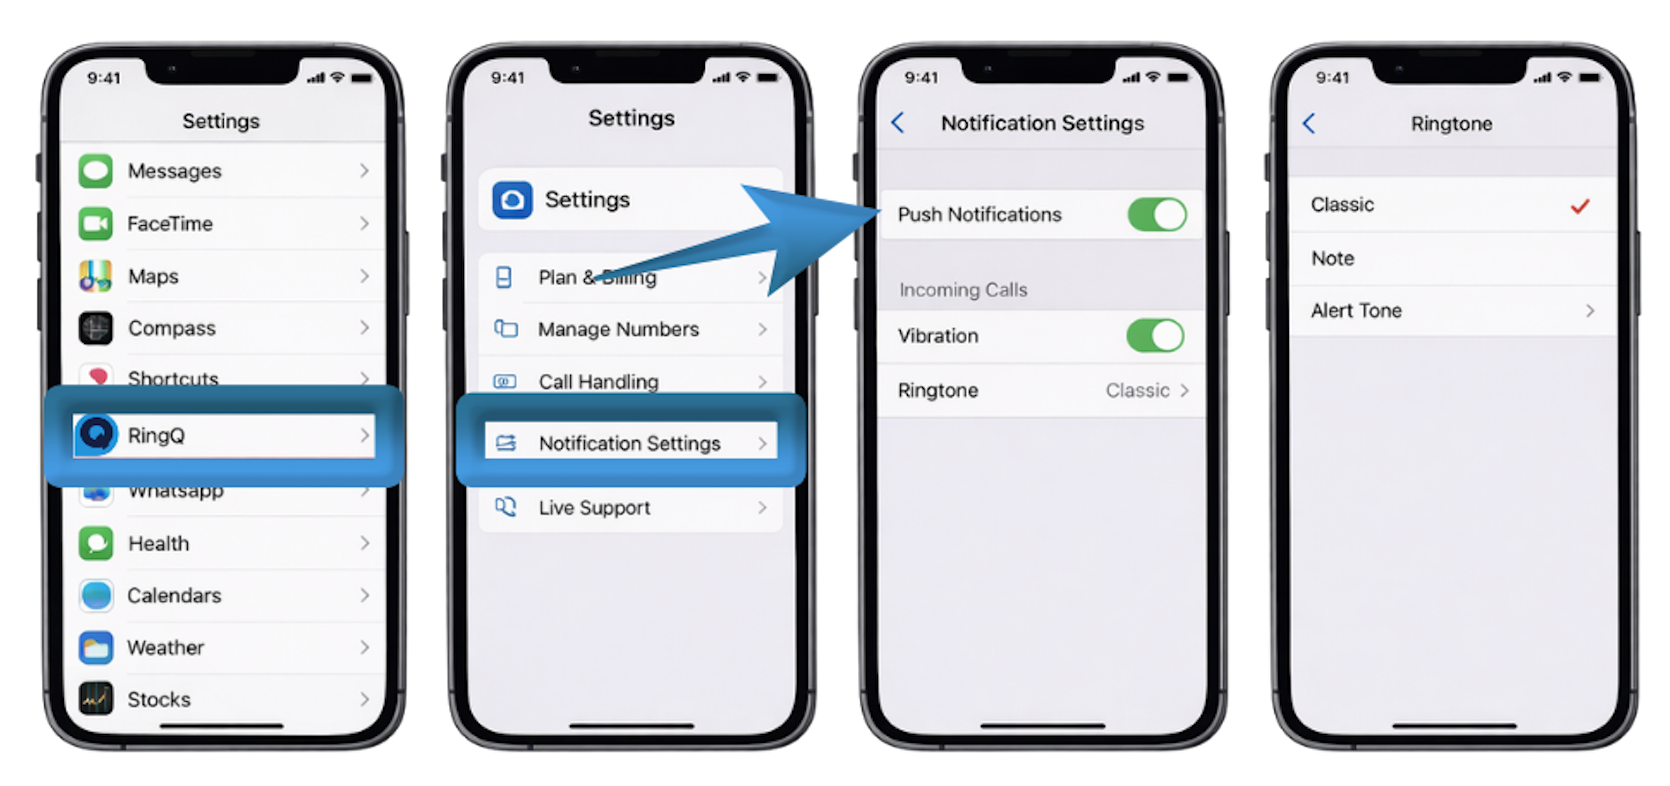
Once the system permissions are set, you must verify that the app’s internal “Push” features are active.
Open the RingQ app.
Tap your Profile/Settings icon (usually in the top-left or bottom-right corner).
Look for Notification Settings or Push Notifications.
Ensure Push Notifications are toggled ON.
Note: This allows the RingQ server to send a “wake-up” signal to your iPhone for incoming calls or chats. (Optional) Under Incoming Calls, you can usually select a specific ringtone to distinguish business calls from personal ones.
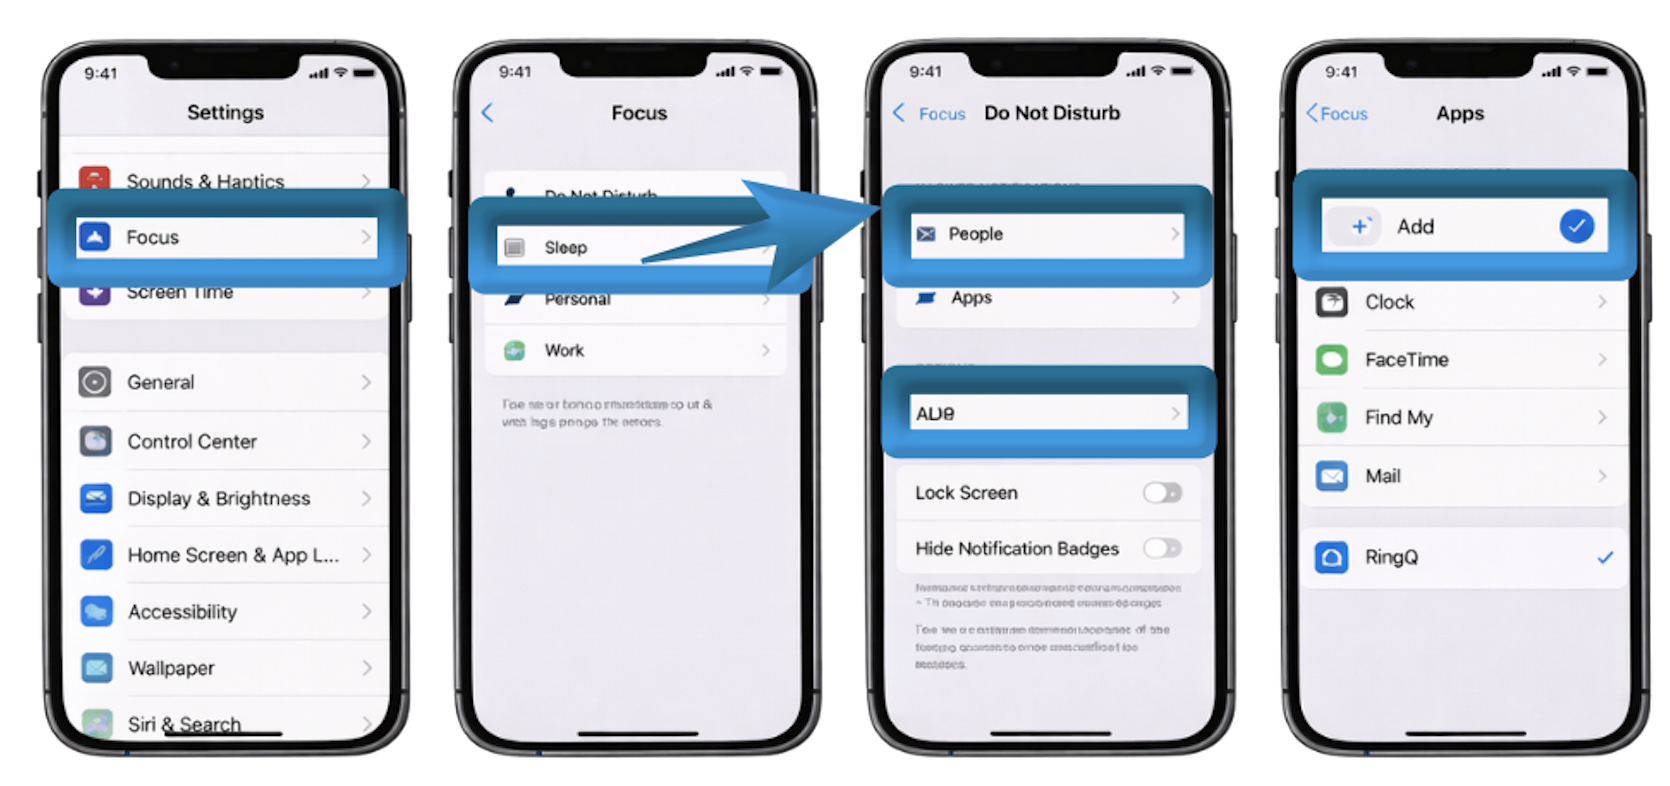
If your notifications are still not appearing, your iPhone’s Focus Mode might be blocking them.
Go to Settings > Focus.
If you use Do Not Disturb or Work mode, tap it.
Tap Apps under the “Allowed Notifications” section.
Tap Add (+) and select RingQ to ensure calls get through even when your phone is silenced.
