RingQ MPLS Configuration Guide
This guide walks through the steps required to configure an MPLS SIP trunk on the RingQ platform. MPLS (Multiprotocol Label Switching) connectivity provides a dedicated, private network path for voice traffic, offering improved reliability and call quality compared to standard internet-based SIP trunks.
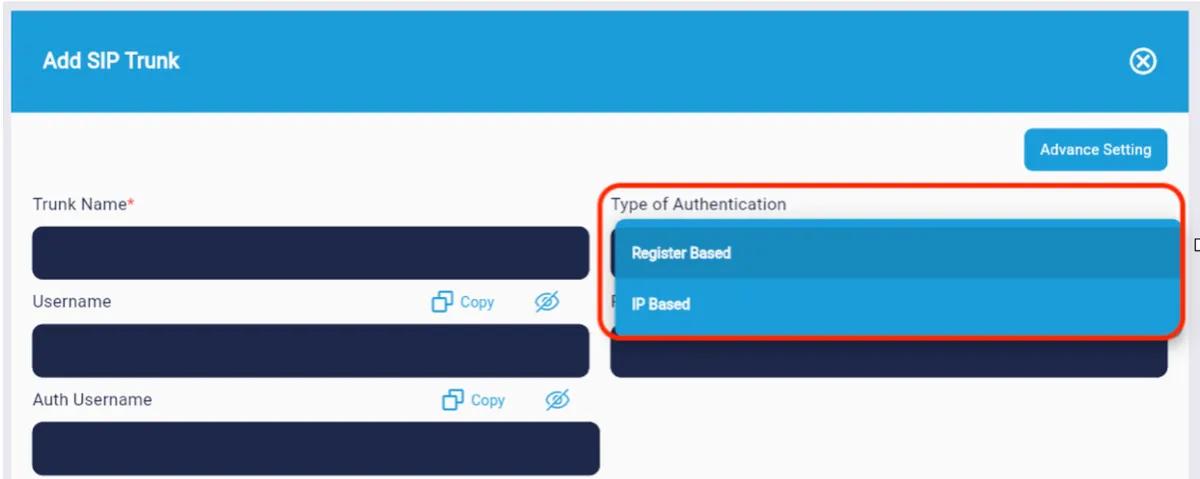
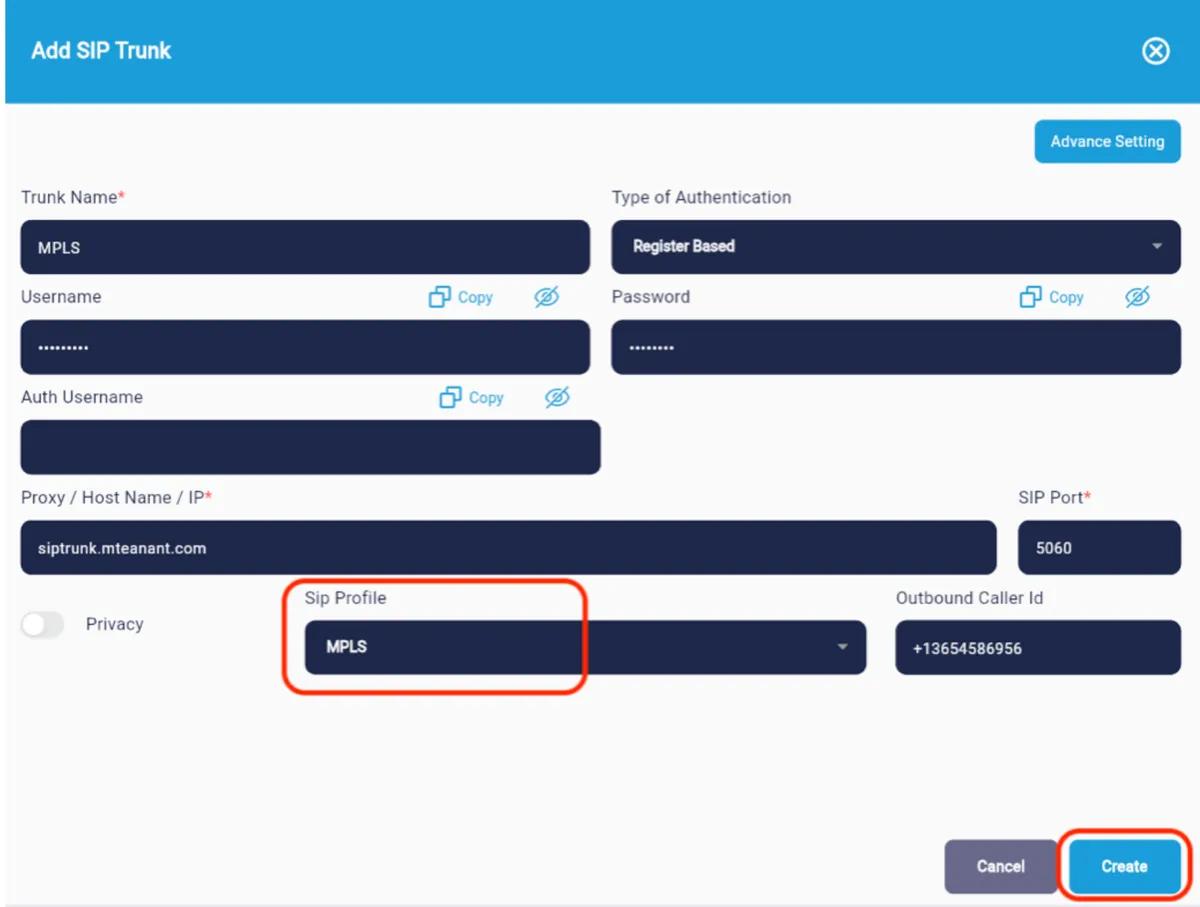
The configuration process covers three main stages: setting up the MPLS network interface and static routing on the RingQ server, creating a SIP profile tied to the MPLS line, and building the SIP trunk with the appropriate authentication method provided by your MPLS carrier. Once complete, you will be able to assign DID numbers and route inbound and outbound calls over the MPLS connection.
MPLS SIP trunk configuration is included in 3 steps:
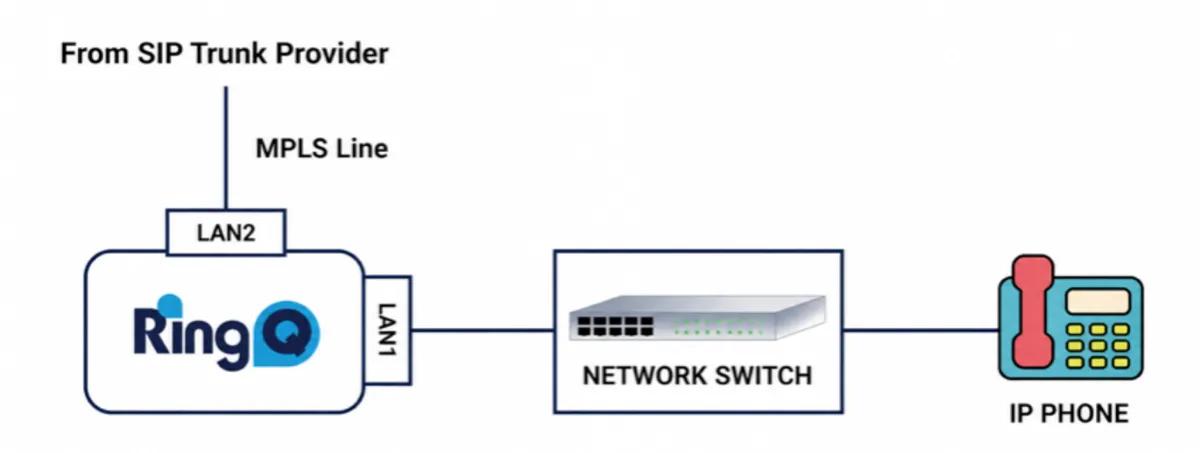
The RingQ Server has more than one interface to connect an MPLS cable. The MPLS provider will provide IP details to configure the second interface. Once the IP address is configured on the interface you will need to create a static route based on SIP/RTP Server IP address.
Use the command to create a static route:
ip route add <network/prefix> via <gateway> dev <interface>
ip route add 192.168.100.0/24 via 172.16.8.1 dev enp3s0
Check routes with: ip route show
Once the static route is created you can ping the SIP/RTP server IP address and check the reachability via MPLS.
To create a SIP Profile, log in to your RingQ Admin dashboard and go to Settings > Global Settings > SIP Profile.
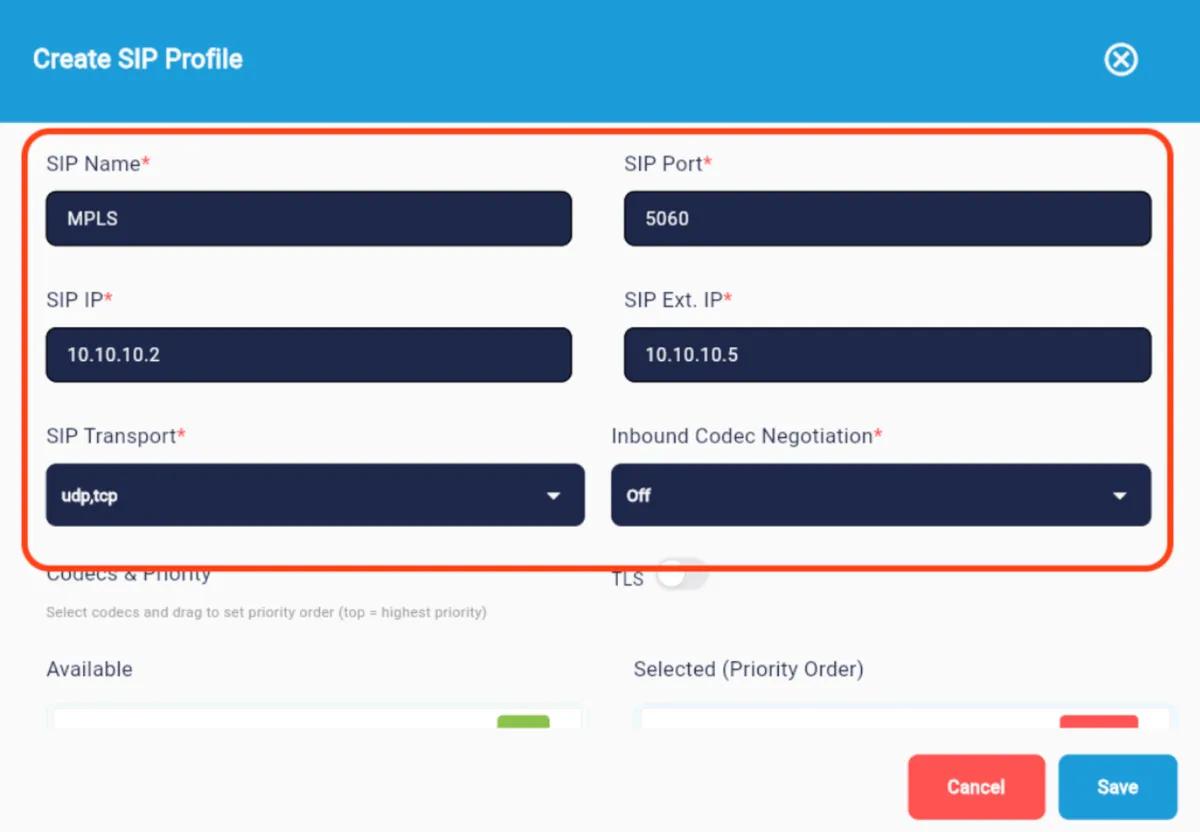
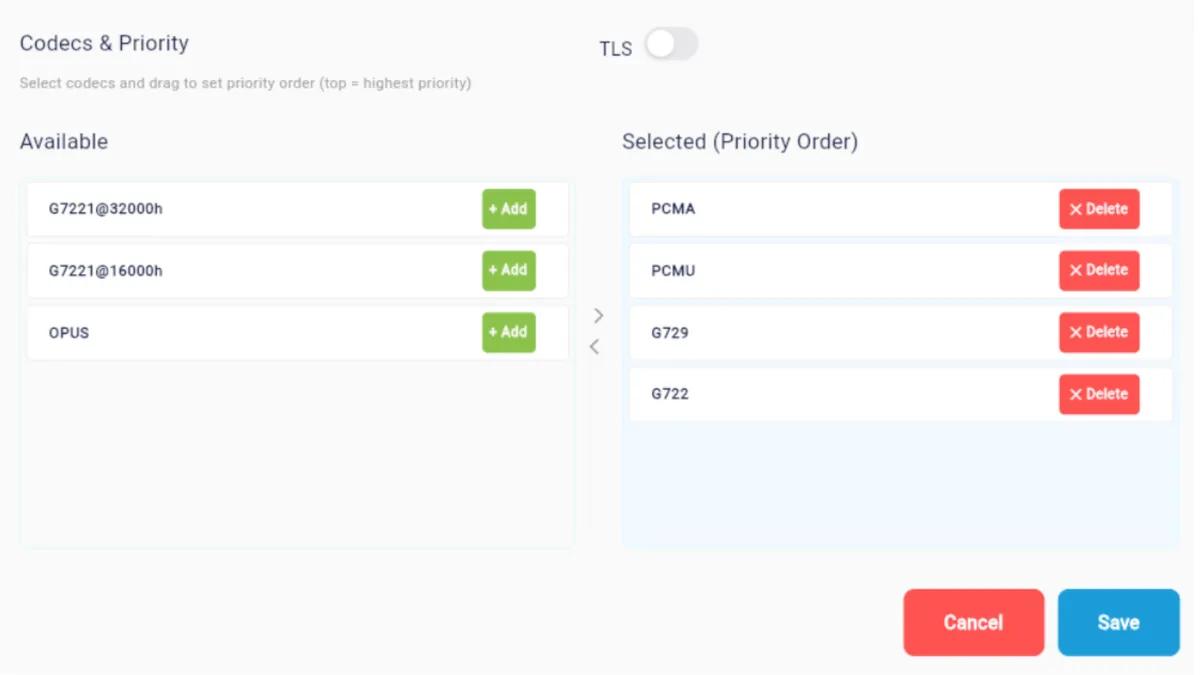
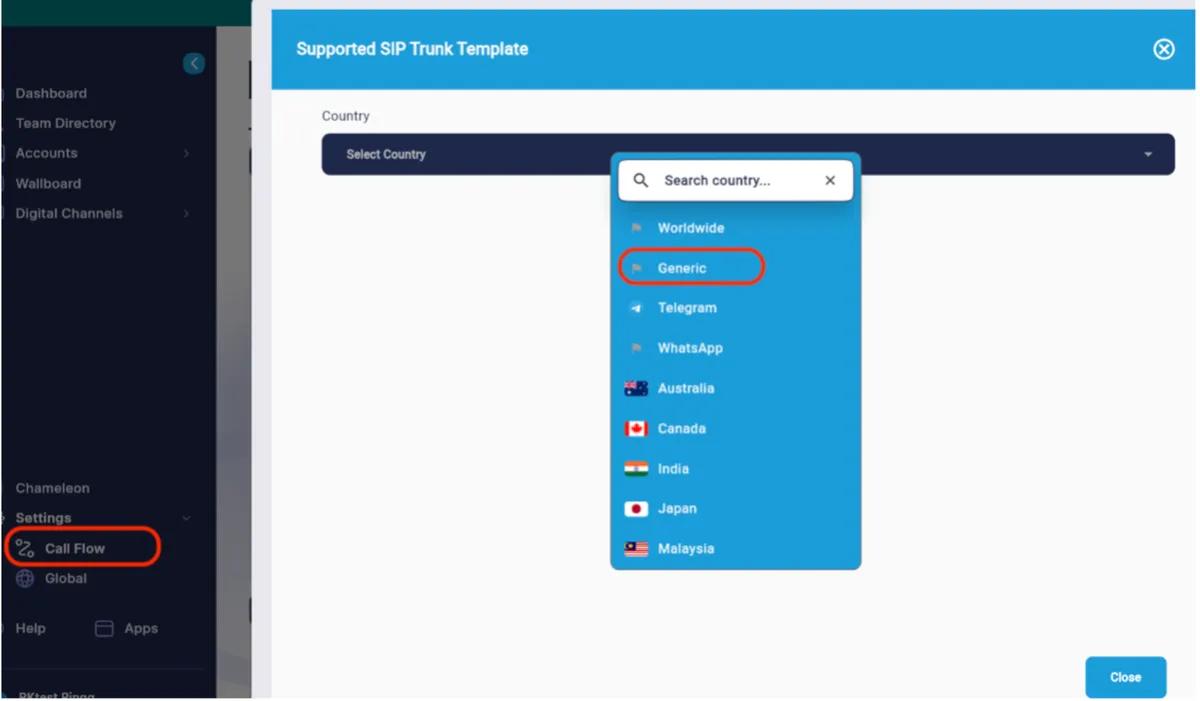
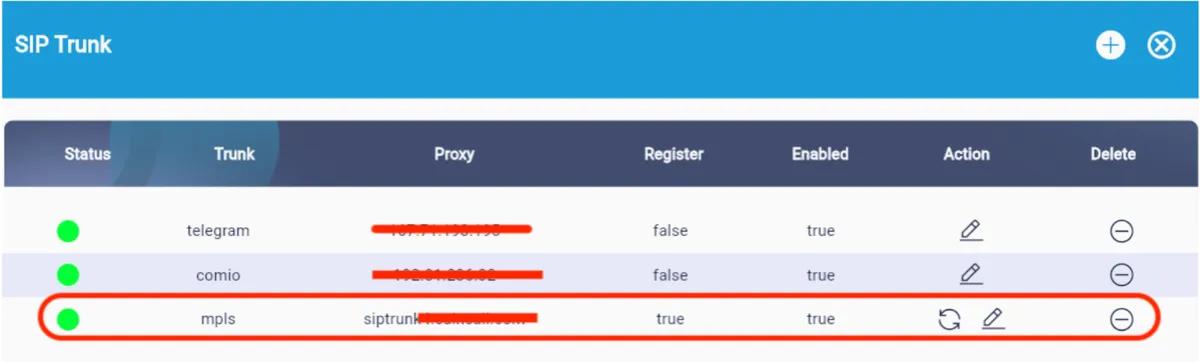
The SIP Trunk status should now appear green.
You can now start adding DID numbers and creating outbound rules based on an MPLS provider dial format.
