This guide explains how to manually install and configure the RingQ Chat Widget WordPress plugin. Manual installation is recommended for administrators who prefer direct control over plugin files or are deploying the widget in environments where automatic installation is restricted.
Follow the steps below to upload, activate, and configure the plugin so the RingQ Chat Widget can be securely integrated into your WordPress site.
Log in to your WordPress Admin Dashboard.
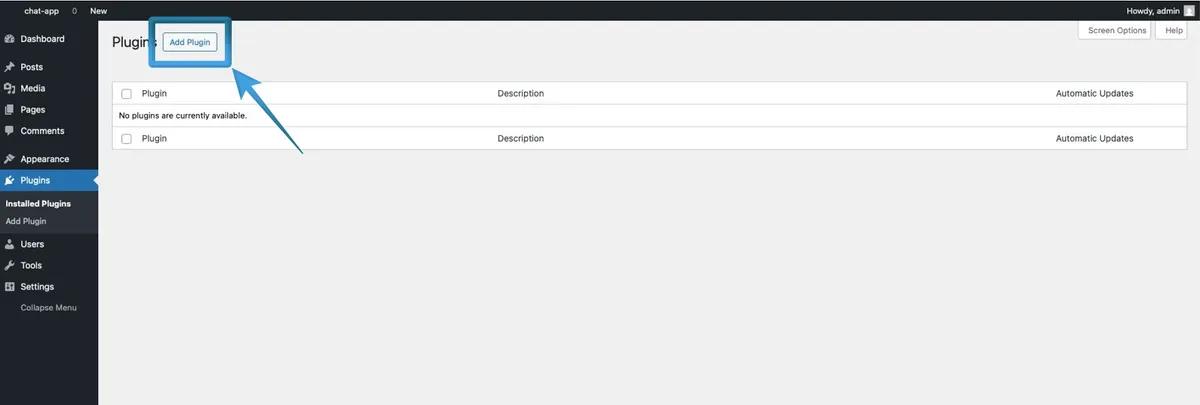
Navigate to Plugins > Add Plugin.
Click the Upload Plugin button at the top of the page.
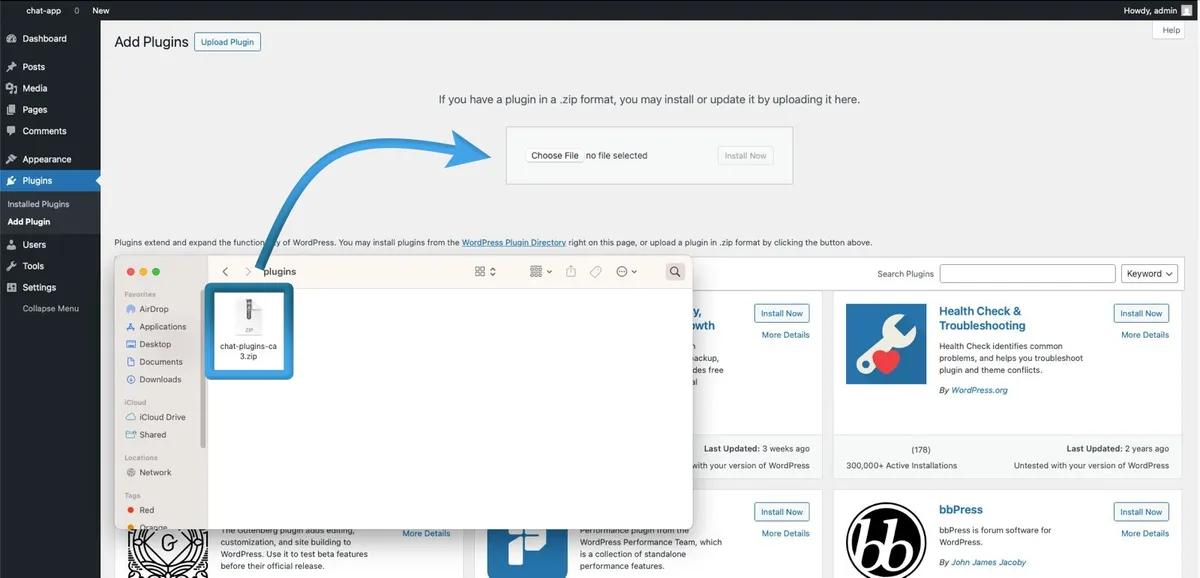
Drag and drop the plugin .zip file into the Upload Plugin section (or click Choose File to browse your computer).
Click Install Now.
Open the plugin settings page.
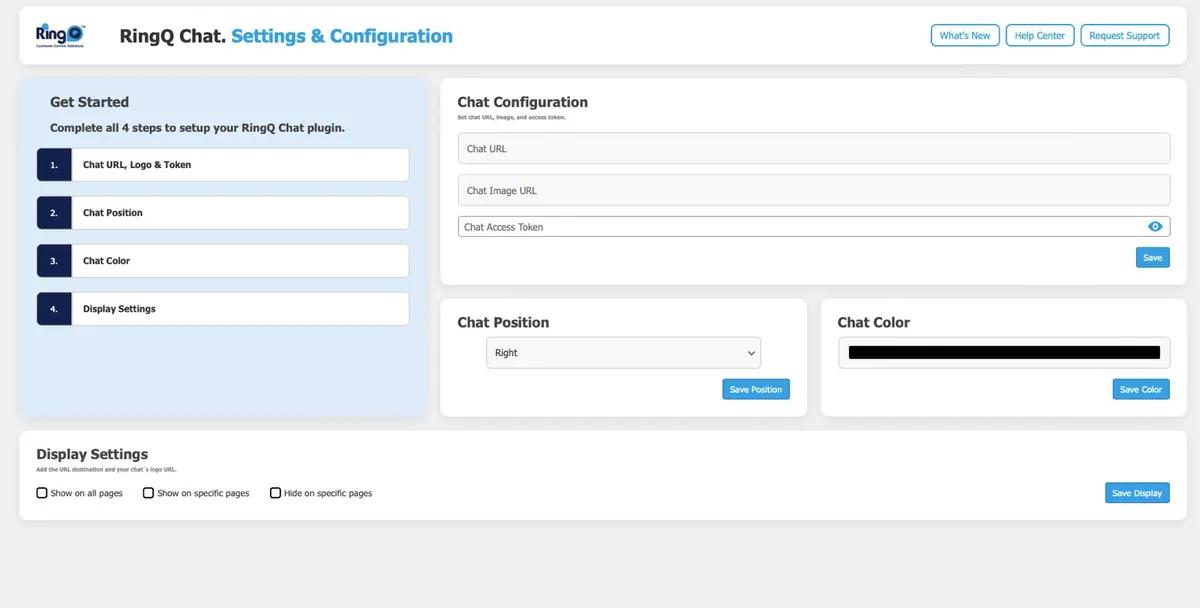
Enter the following required details:
Click Save to apply the settings.
Chat Position – Select where the chat widget appears on the screen. Click Save Position.
Chat Color – Choose the preferred color for the chat widget. Click Save Color.
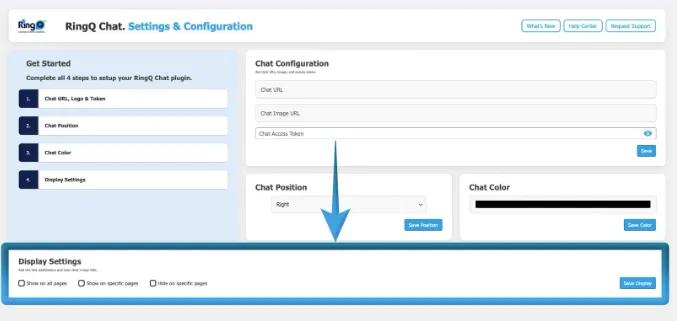
When selecting Show on specific pages, configure the following:
