RingQ Customer Centric Communications

How To Configure Ringq With Telnyx


How to Configure RingQ with Telnyx

Introduction

This guide provides step-by-step instructions on how to integrate and configure Telnyx with your RingQ system. By completing this setup, you will be able to handle messaging services using Telnyx within RingQ.
Prerequisites

  • An active Telnyx account
  • Admin access to the RingQ Web Admin Dashboard
  • A provisioned Numbers in Telnyx

Create a Messaging Profile

  1. Go to the Telnyx Mission Control Portal.
  2. Log in using a sign-in link, your password or with SSO
image13.png
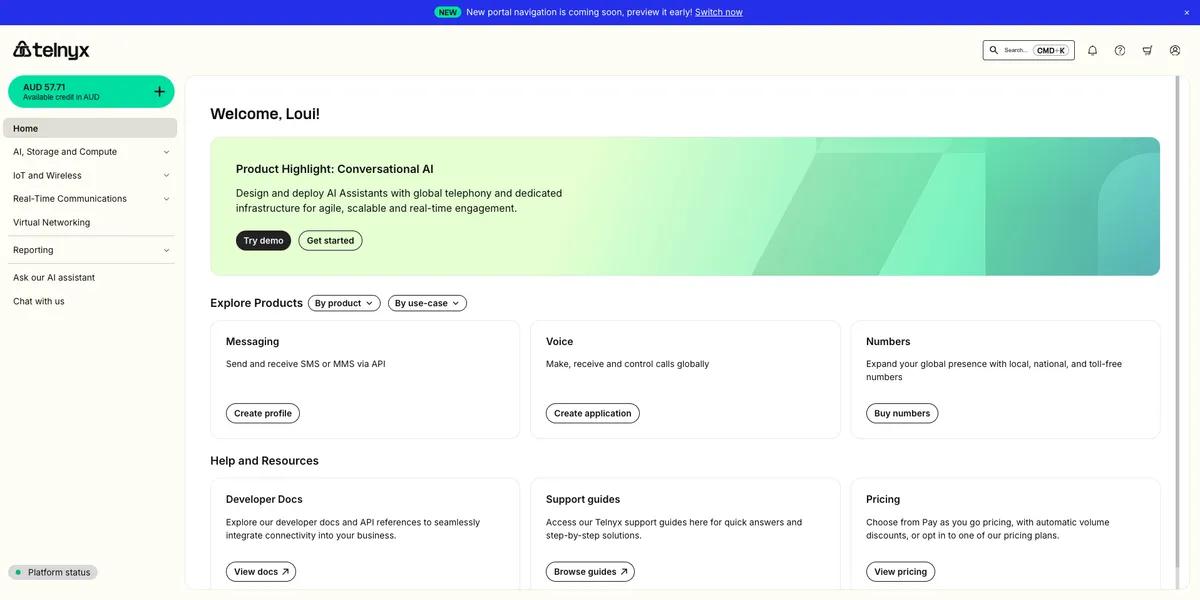
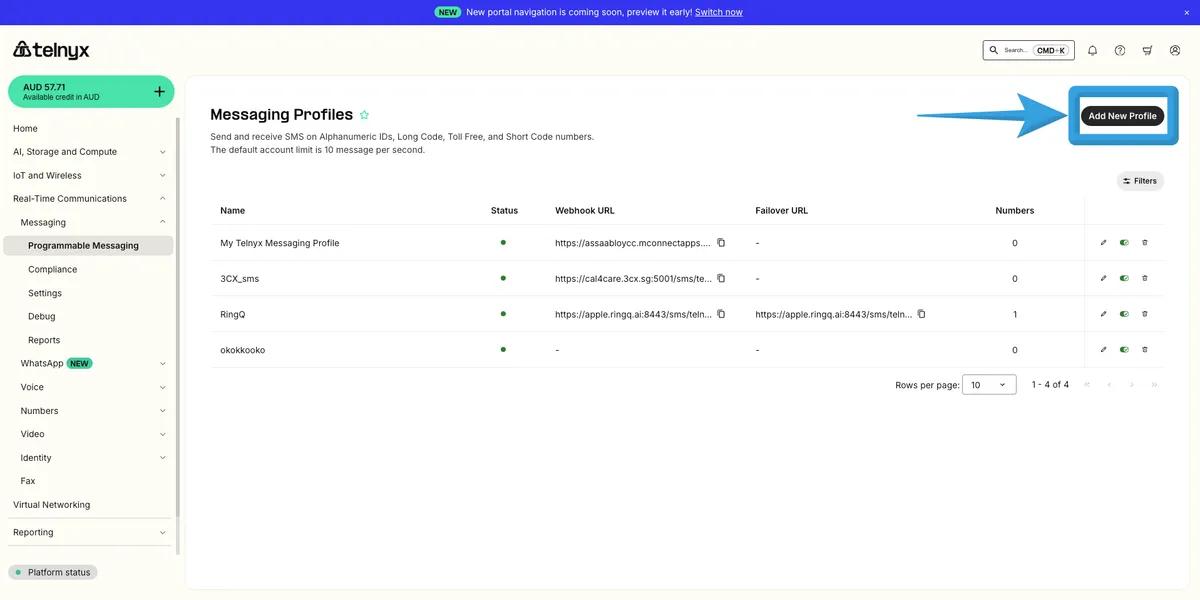
  1. You will be redirected to the Telnyx Admin Dashboard. From the dashboard, navigate to: Real-Time Communications > Messaging > Programmable Messaging
image11.png
  1. Click Add New Profile
  2. Configure the profile:
    • Profile Name: Enter a descriptive name
    • API Version: Select API V2
    • Click NextSelect South-East Asia.png
  3. Destination Settings:
    • Choose South-East Asia
    • Click Next
image8.png
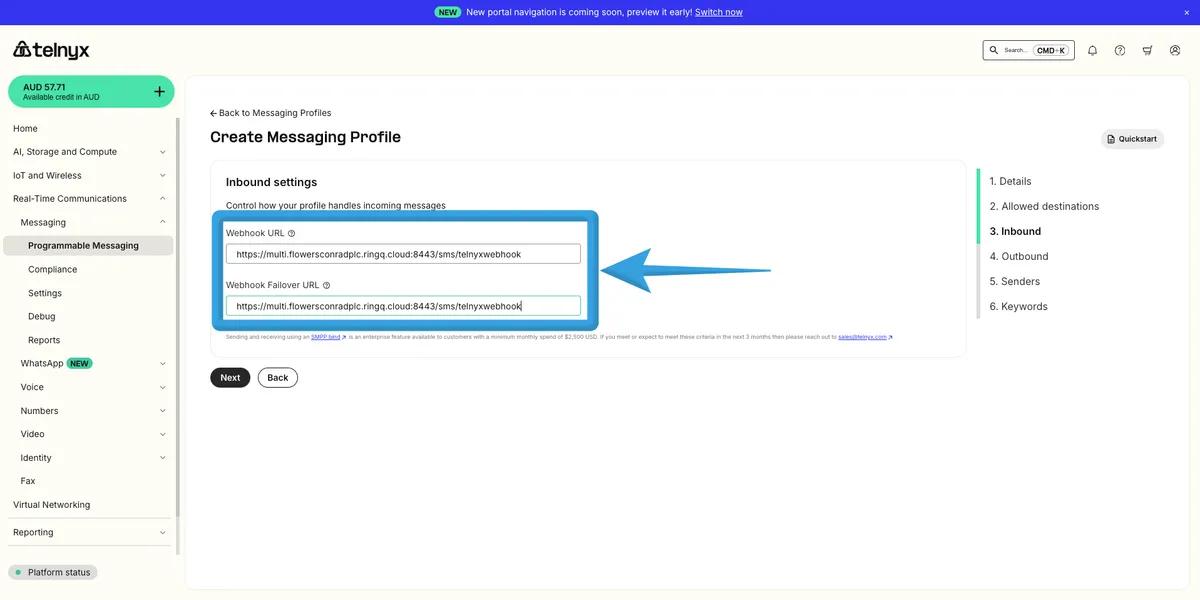
  1. Inbound Settings:
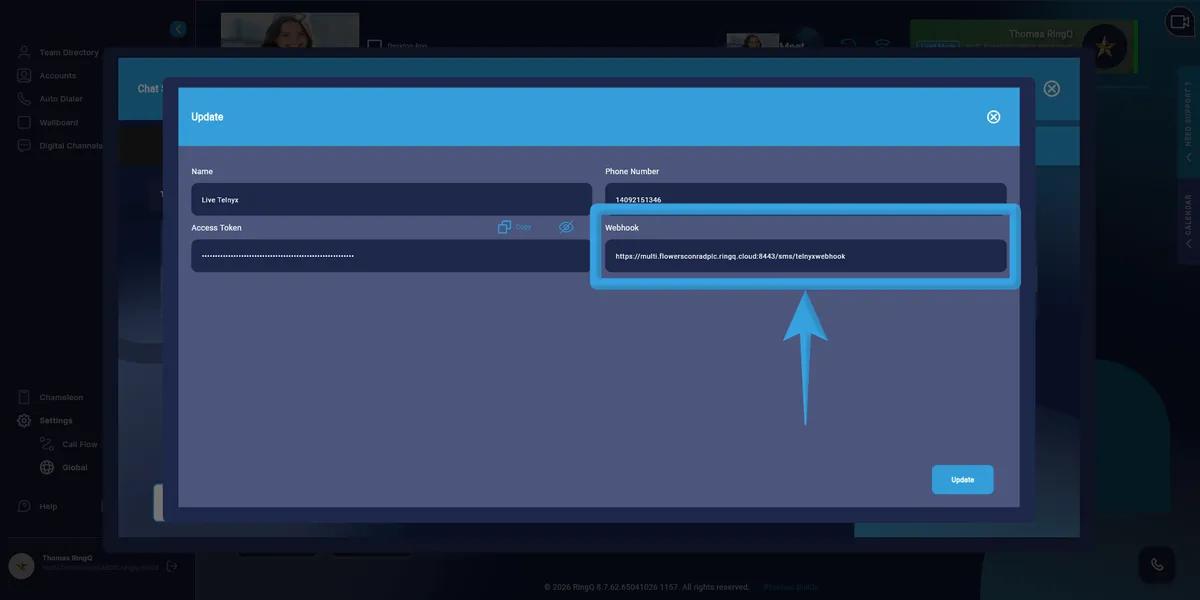
    • Enter the Webhook URL and Webhook Failover URL
image14.png
    • Use the URL provided in the RingQ Chat Settings (Telnyx configuration page)
    • Click Next
image1.png
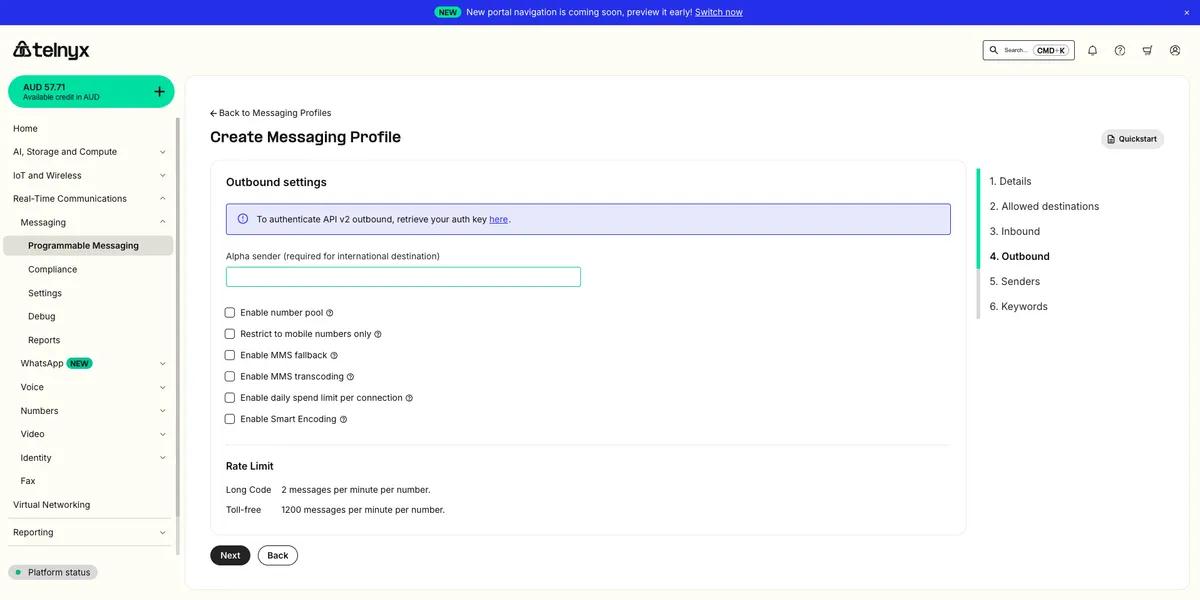
  1. Outbound Settings:
    • Leave default settings
    • Click Next
image18.png
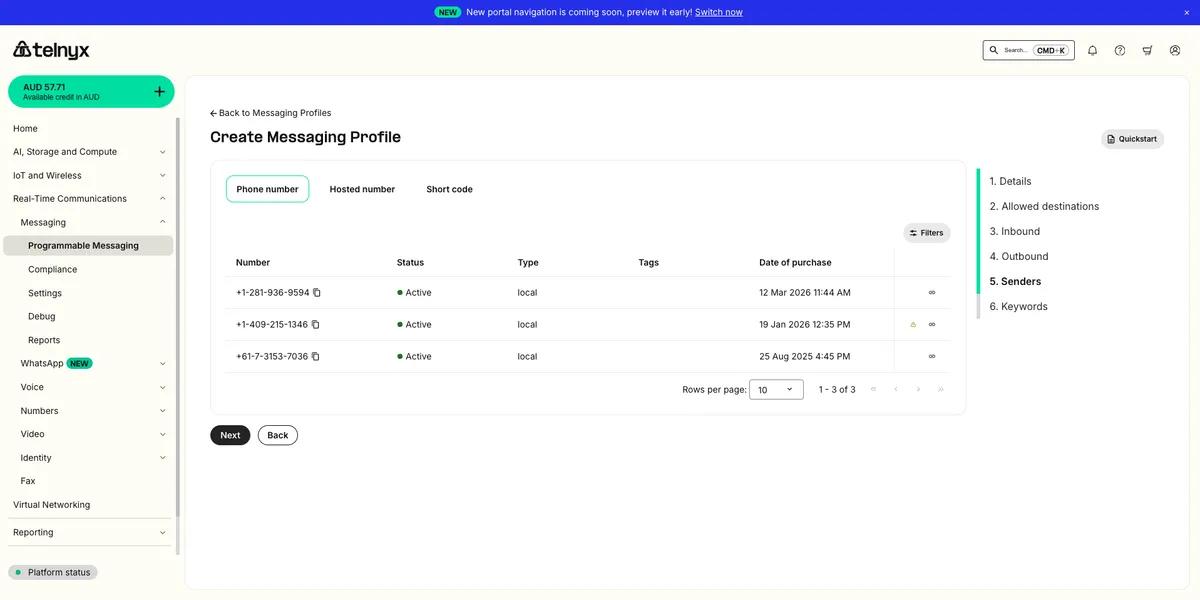
  1. Senders Page:
    • No changes required
    • Click Next
image16.png
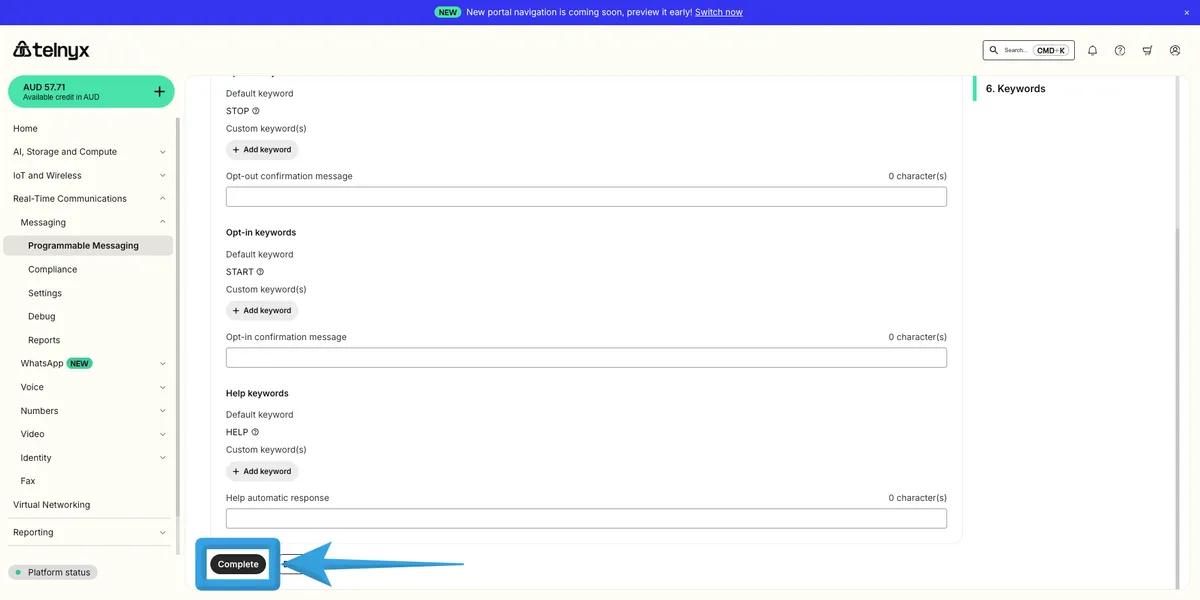
  1. Keywords Page:
    • No changes required
image2.png
  1. Click Complete to finalize the configuration.
image20.png
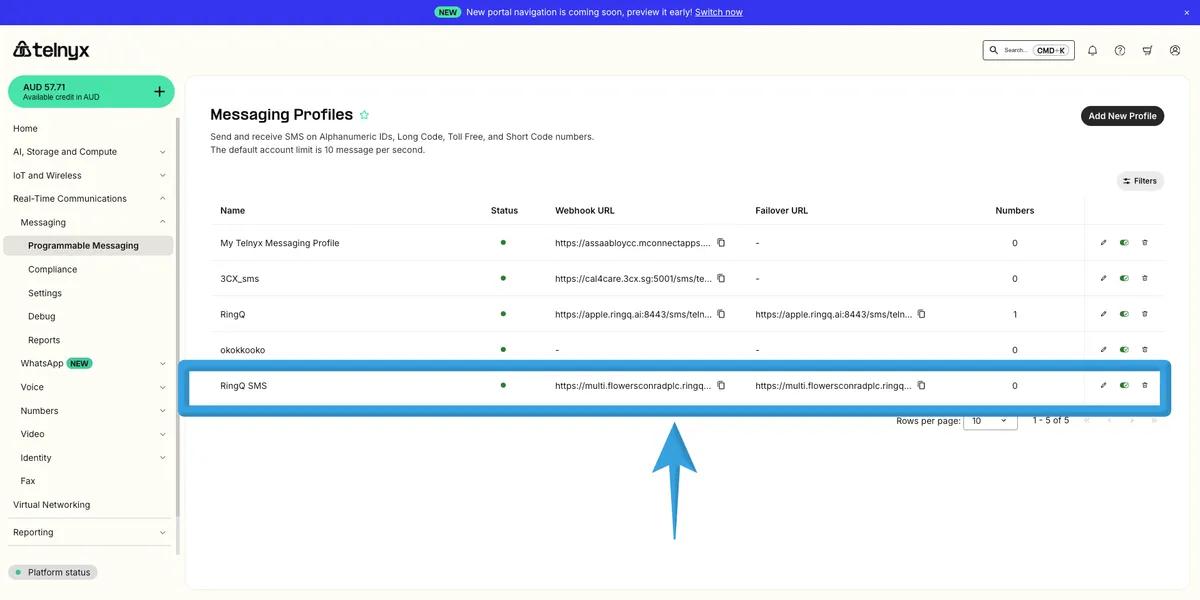
  1. Your Messaging Profile is successfully created and ready for integration with RingQ.

See Also