This guide will take you through the steps of setting up RingQ in your own Microsoft Azure server and running it in your own cloud environment. Whether you’re a system administrator or service provider, this easy-to-follow guide will enable you to deploy RingQ reliably and efficiently on Azure’s infrastructure and allow you to keep full control of your instance and its data.
Navigate here and log in with your Azure credentials. If you don't already have an account, you will need to create one.
Click Get it now, and in the window that appears, select RingQ as the plan, then press Get it now again.
Select the Subscription under which you want to install RingQ, then press Create.
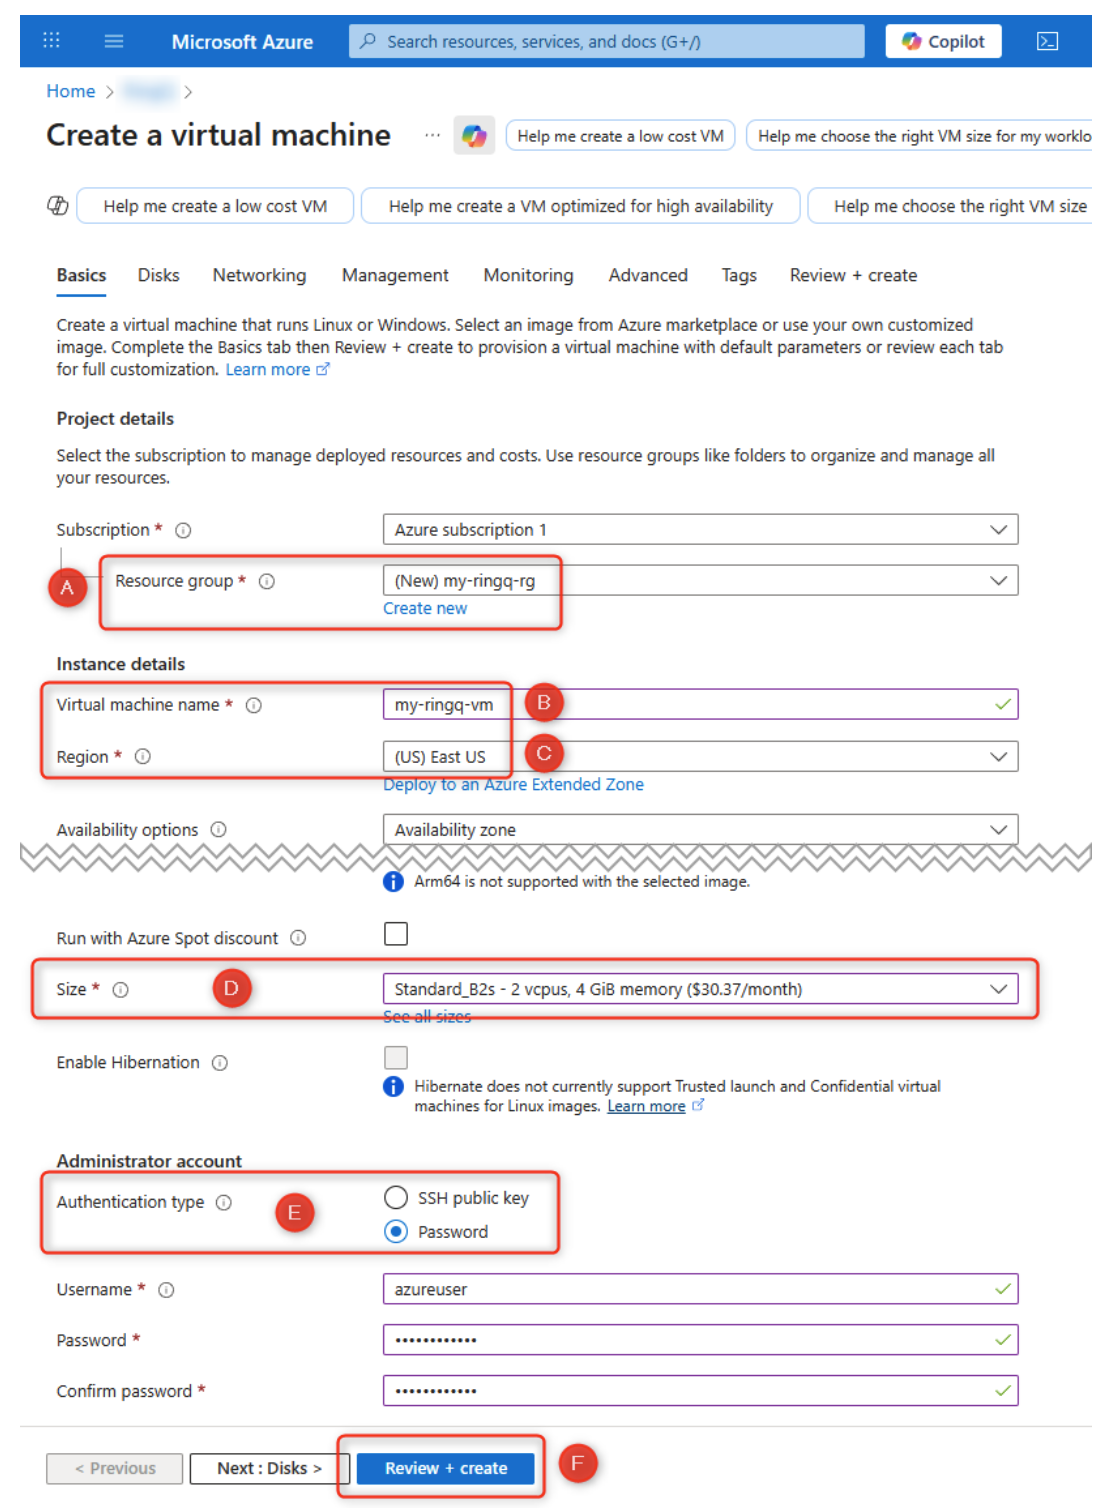
In the Virtual Machine Creation form:
Review your configuration options and press Create.
6. Once the deployment is complete, press Go to resource to open your RingQ VM settings.
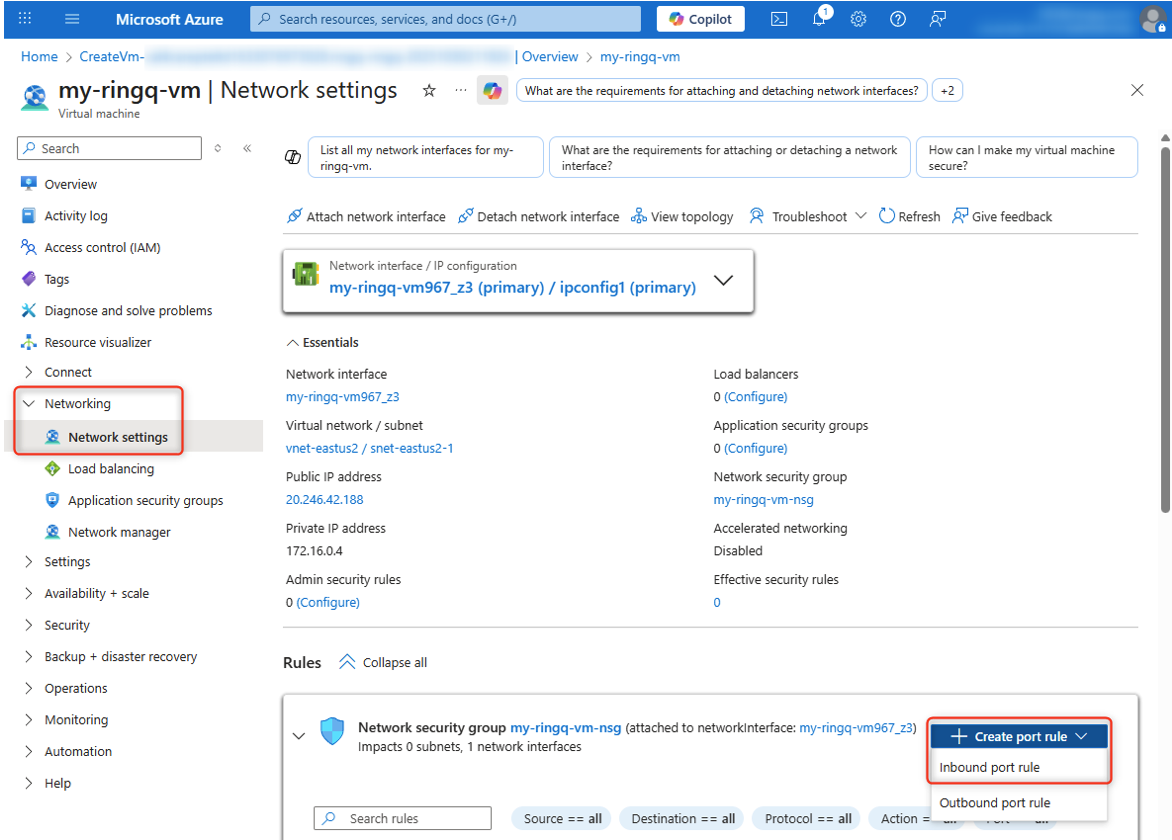
Go to Networking > Network settings, then select Create port rule > Inbound port rule.
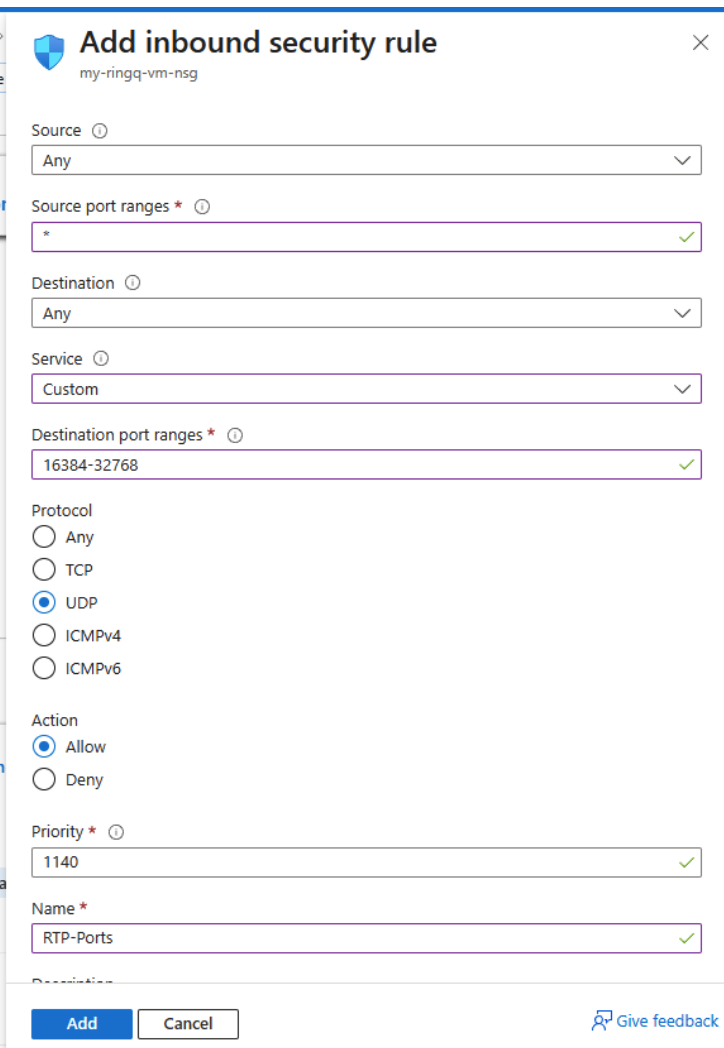
In the form, set:
Press Add.
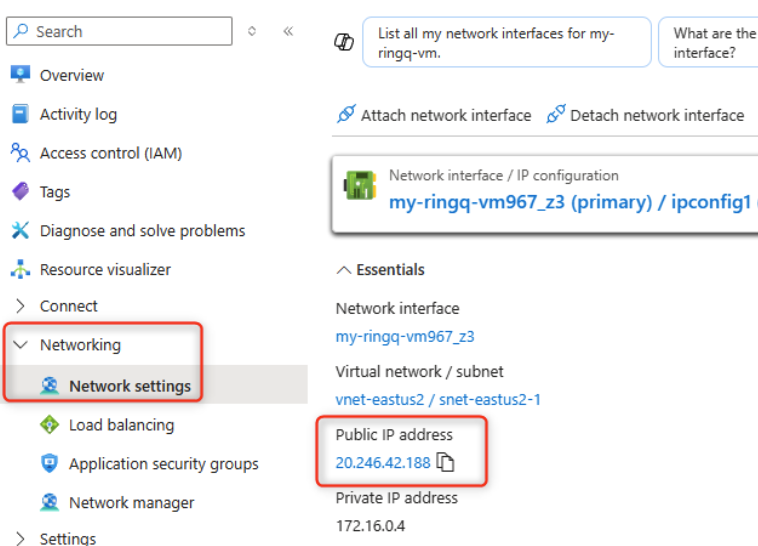
While still in Networking > Network settings, copy the public IP address.
Open a new tab in your browser and go to https://[Public IP Address]:8443/license.
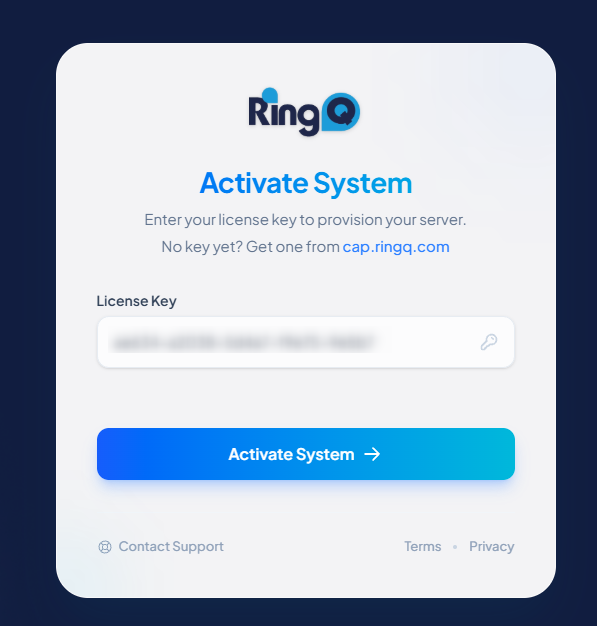
Enter your RingQ License Key and press Activate System, then follow the wizard.
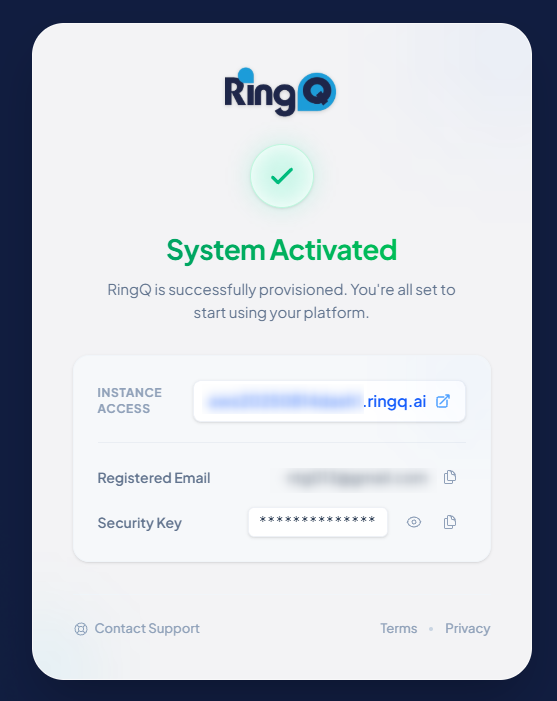
Once the license activation finishes, your RingQ installation is complete and you can access your instance!
