This guide walks you through the steps of deploying RingQ directly from the Google Cloud Marketplace. You’ll learn how to launch, configure, and get your RingQ instance up and running quickly using Google Cloud’s infrastructure.
Navigate to https://console.cloud.google.com/marketplace/product/ringq-public/ringq and log in.
If you don't already have an account, you will need to create one. If you have multiple projects in your Google account, select the one you want to install RingQ in.
Click Get Started, and if you are prompted to enable some Google APIs, enable them to proceed.
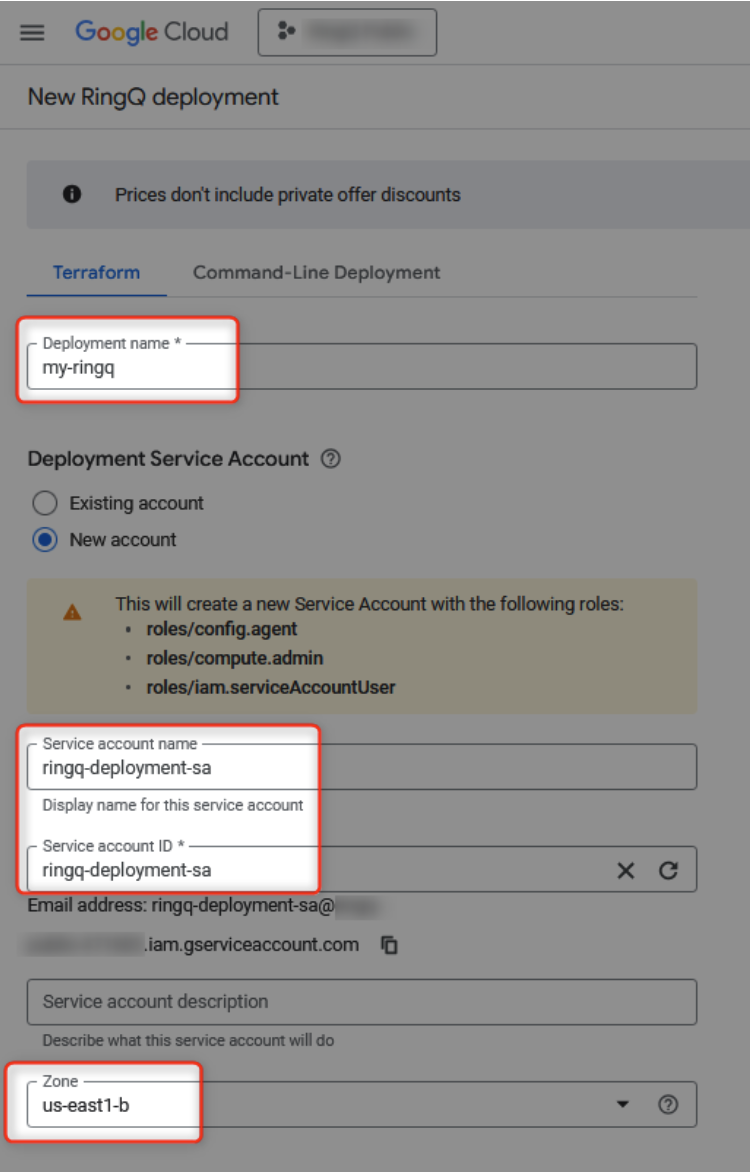
In the deployment form that appears, fill in the:
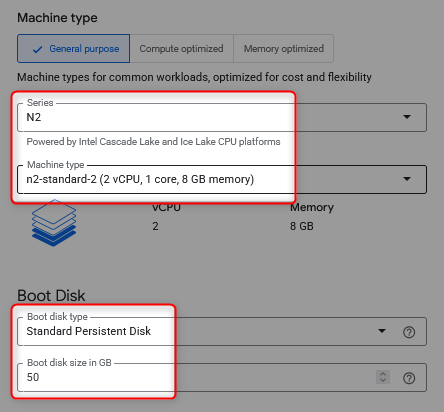
Next, select the Machine type and Boot disk size:
Scroll to the end of the page and press Deploy, then wait for the deployment wizard to create all resources.
From the Google Cloud menu, go to Compute Engine > VM Instances to find your new RingQ VM.
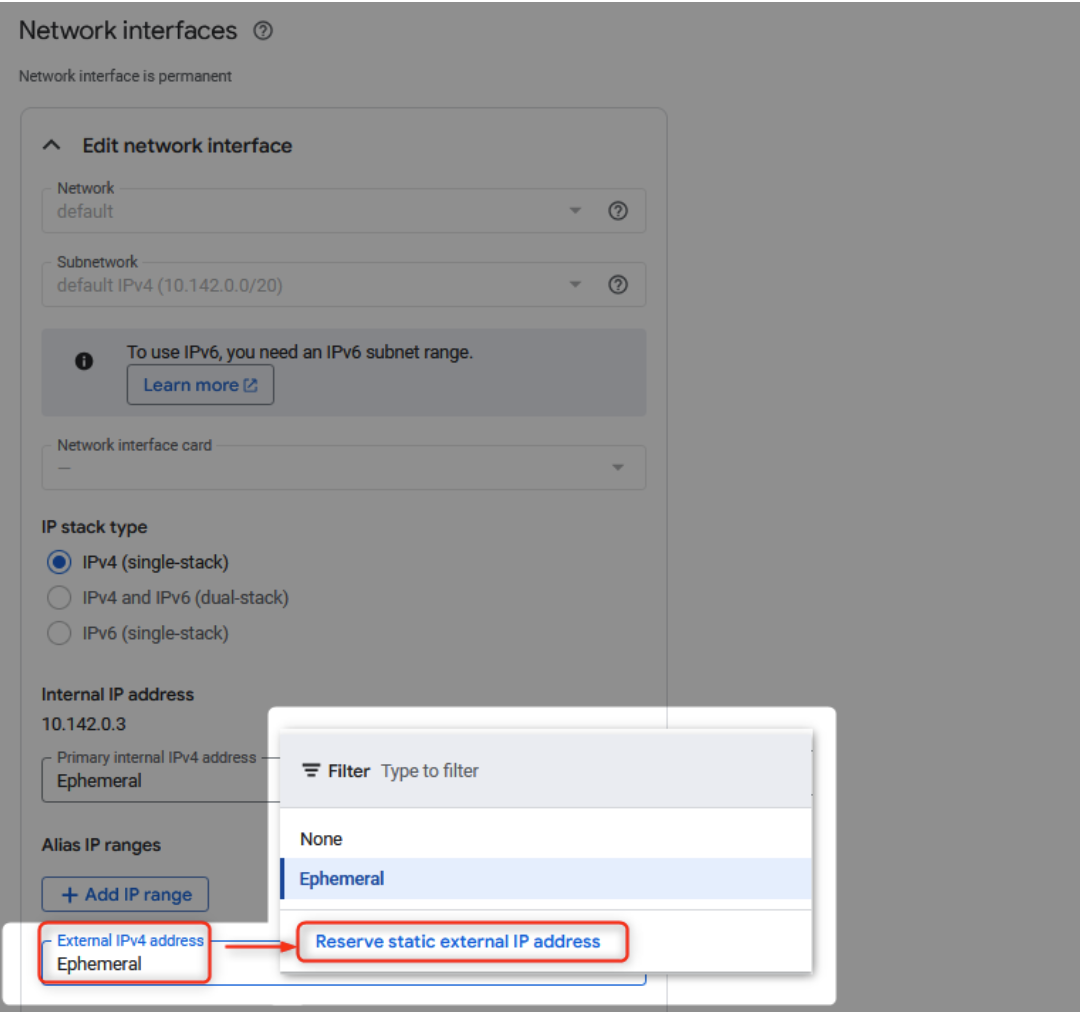
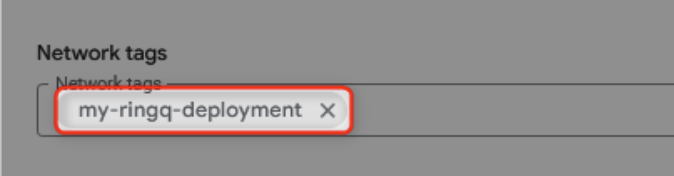
Click your VM, press Edit, and:
Press Deploy, and wait for your VM instance to be created.
From the Google Cloud menu, go to VPC Network > Firewall and press Create firewall rule.
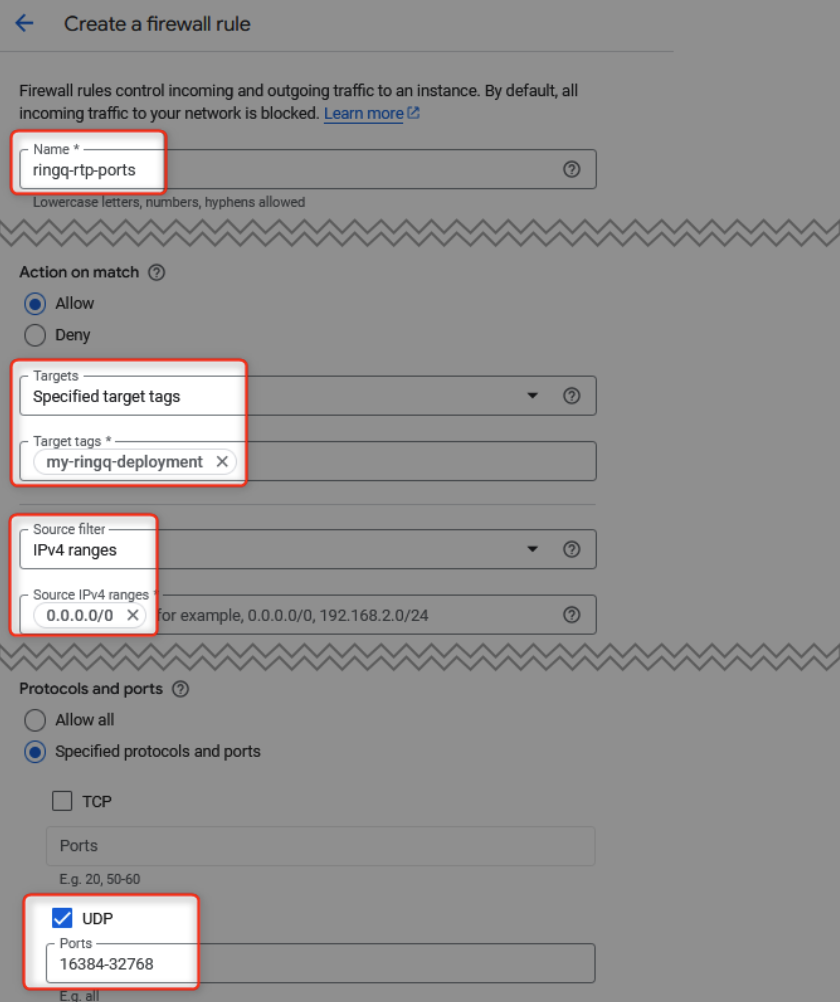
In the rule creation form:
ringq-rtp-ports0.0.0.0/016384-32768Press Create.
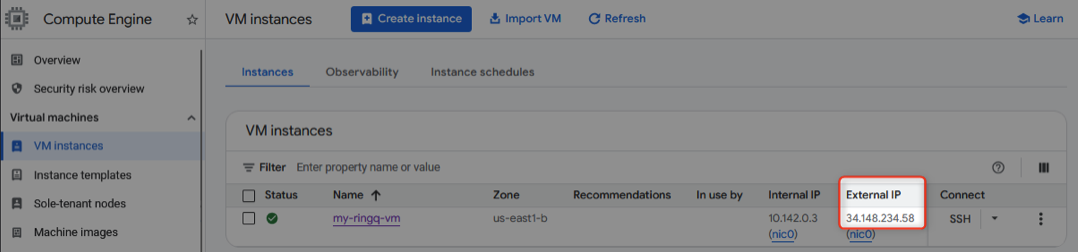
Go back to Compute Engine > VM Instances and find the External IP of your VM.
Open a new tab in your browser and go to https://[External IP]:8443/license.
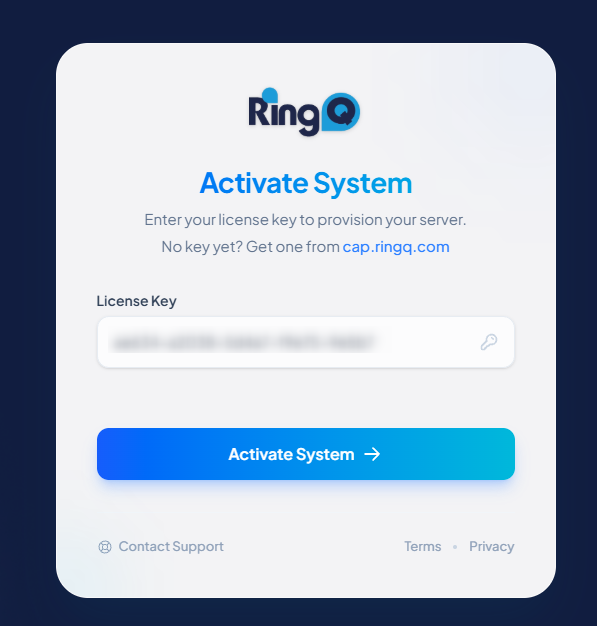
Enter your RingQ License Key and press Activate System, then follow the wizard.
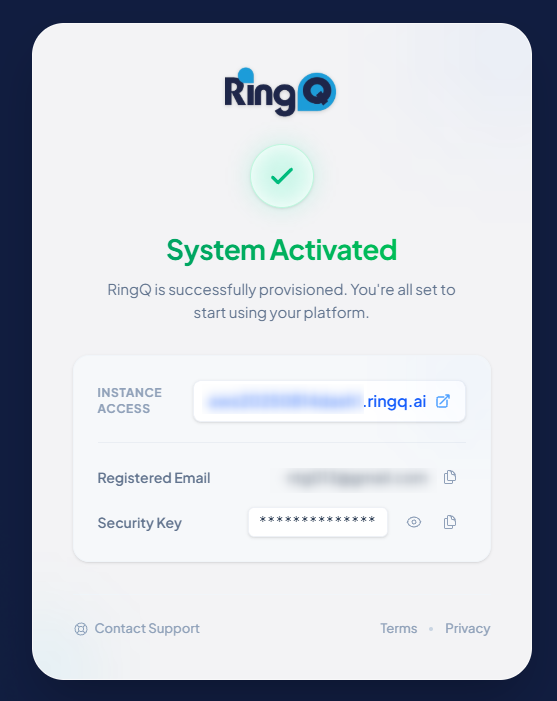
Once the license activation finishes, your RingQ installation is complete, and you can access your instance!
