Introduction
This guide walks you through deploying RingQ on Amazon Lightsail, a simple and cost-effective way to get your communications platform running in your cloud account. Lightsail is recommended for lightweight virtual server setups, making it ideal for hosting RingQ without the overhead of complex infrastructure management. By the end of this guide, you’ll have a fully functional RingQ instance deployed and ready to use.
Follow this guide to purchase and activate a license key.
Navigate to https://lightsail.aws.amazon.com and log in. If you don’t already have an account, you will need to create one.
Go to Instances > Create instance.
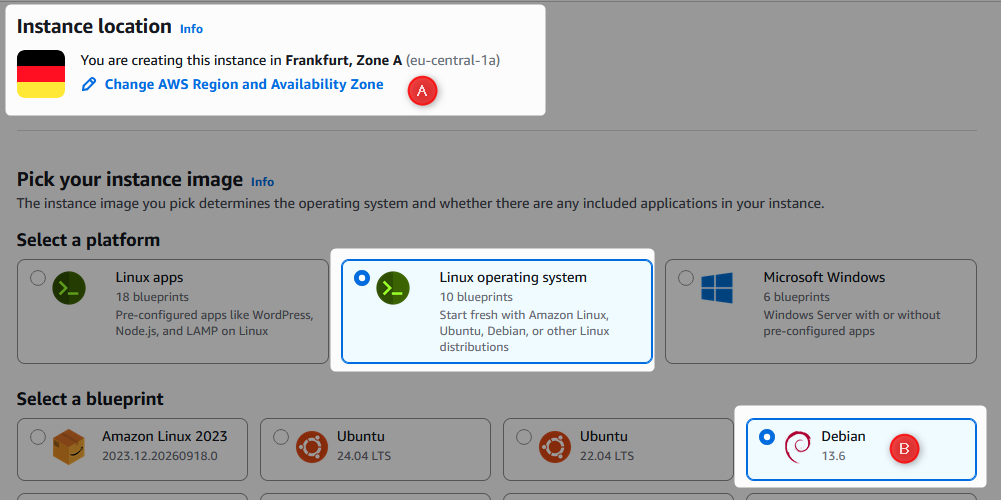
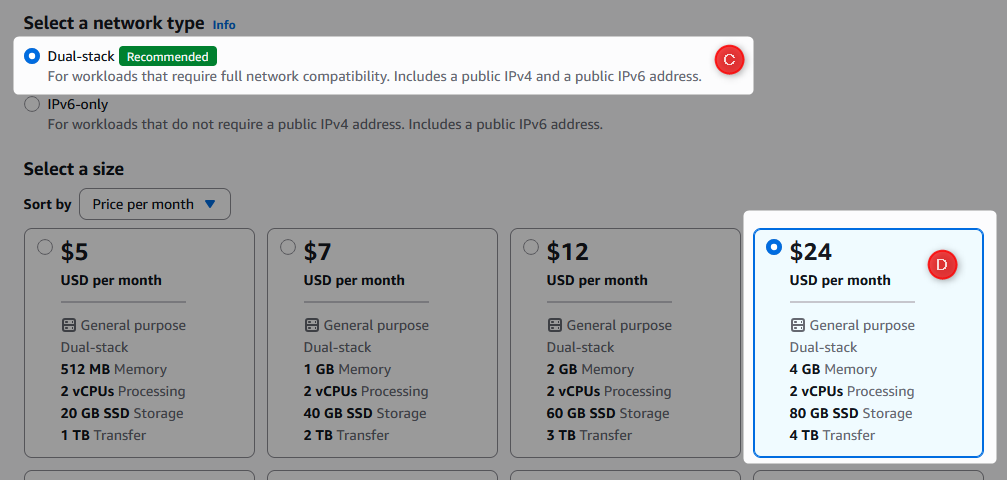


In the instance creation form:
Press Create Instance.
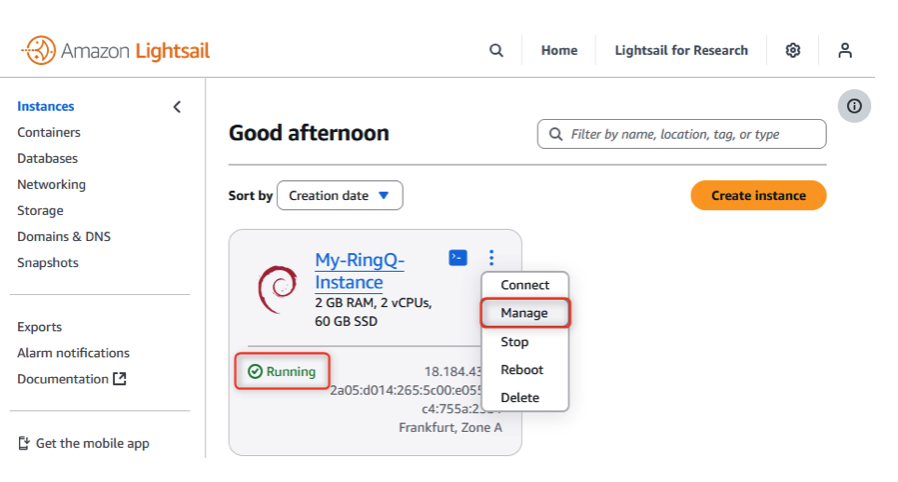
Go back to the Instances menu and wait until your instance is Running, then click Manage inthe instance menu.
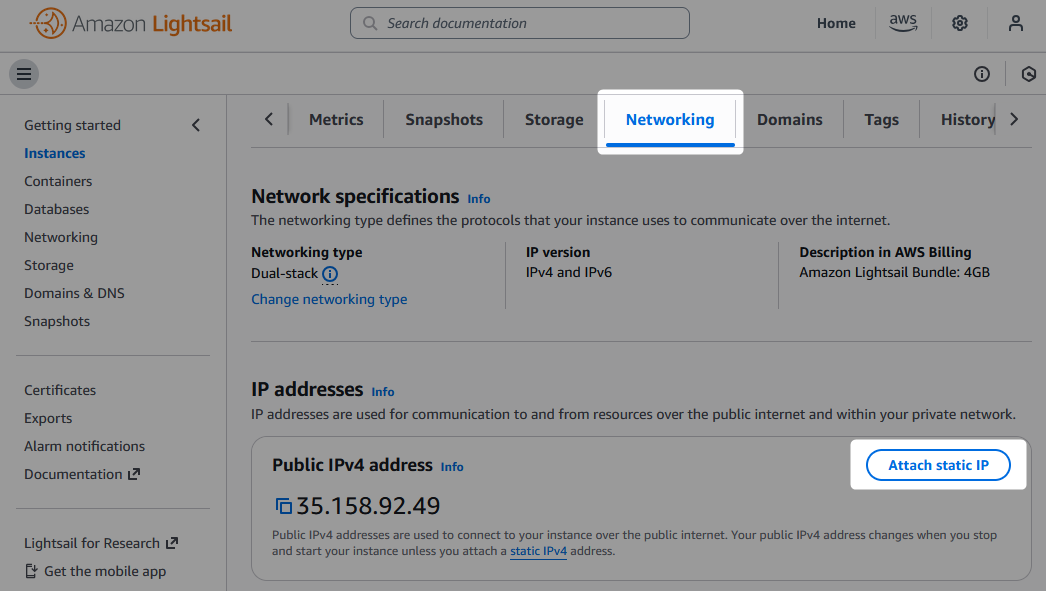
Next, go to the Networking tab, click Attach static IP, and then Create and attach.
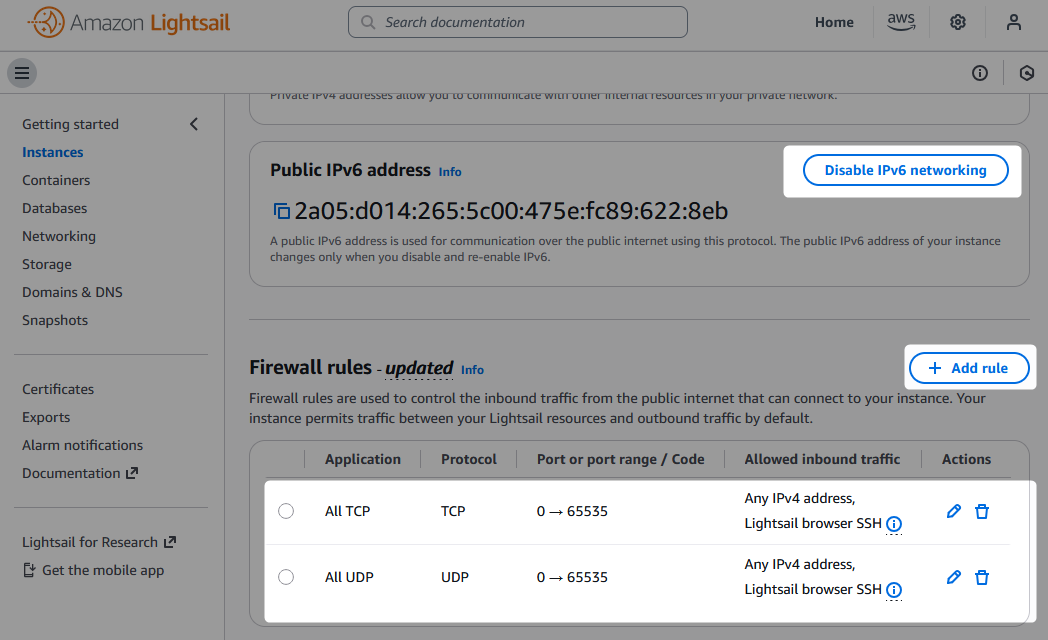
Move further down in the Networking tab and Disable IPv6 networking.
Next, delete all existing Firewall Rules, then create 2 new firewall rules:
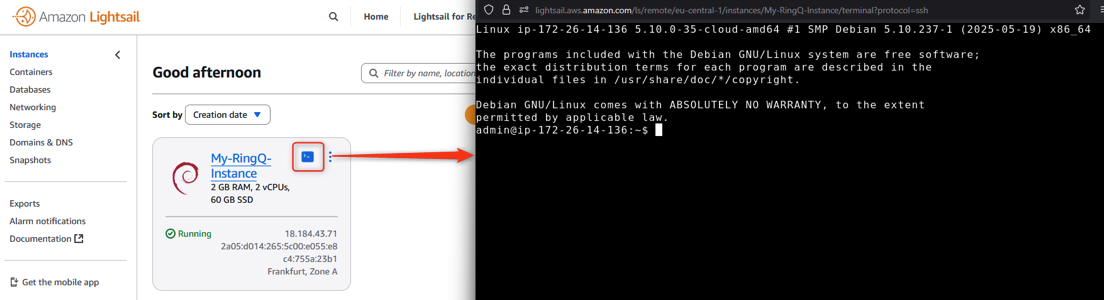
Go back to the Instances and press the console button to open the terminal.

In the Console window that has opened, type the following commands and press Enter:
wget -O - https://download-global.ringq.ai/docker/ringq-docker-install.sh | sudo bash
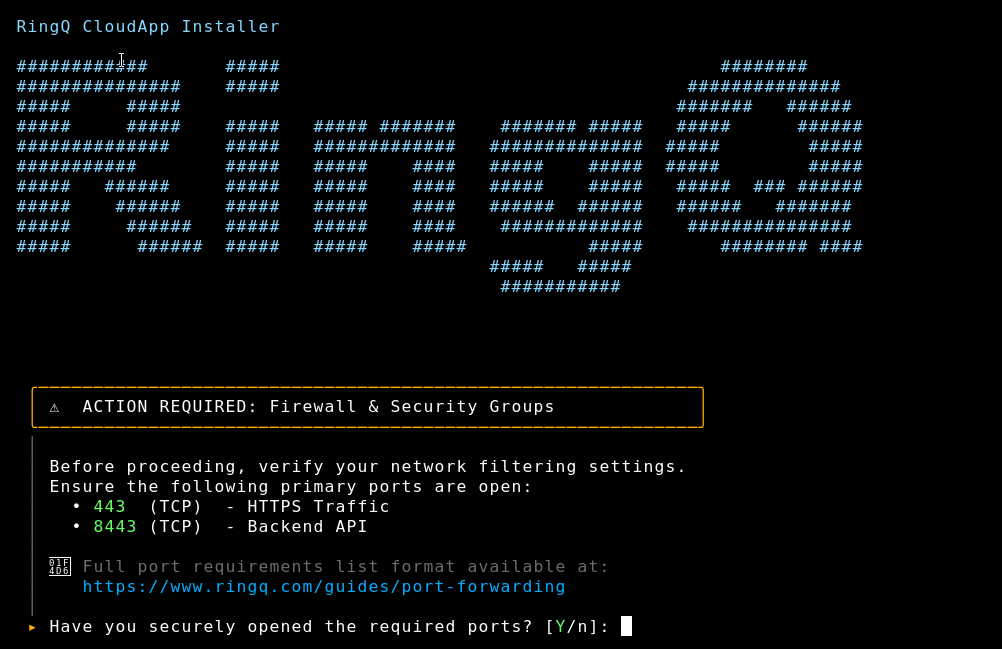
Wait until the installation is finished, and do not close the window. The installation process usually takes between 5-10 minutes.
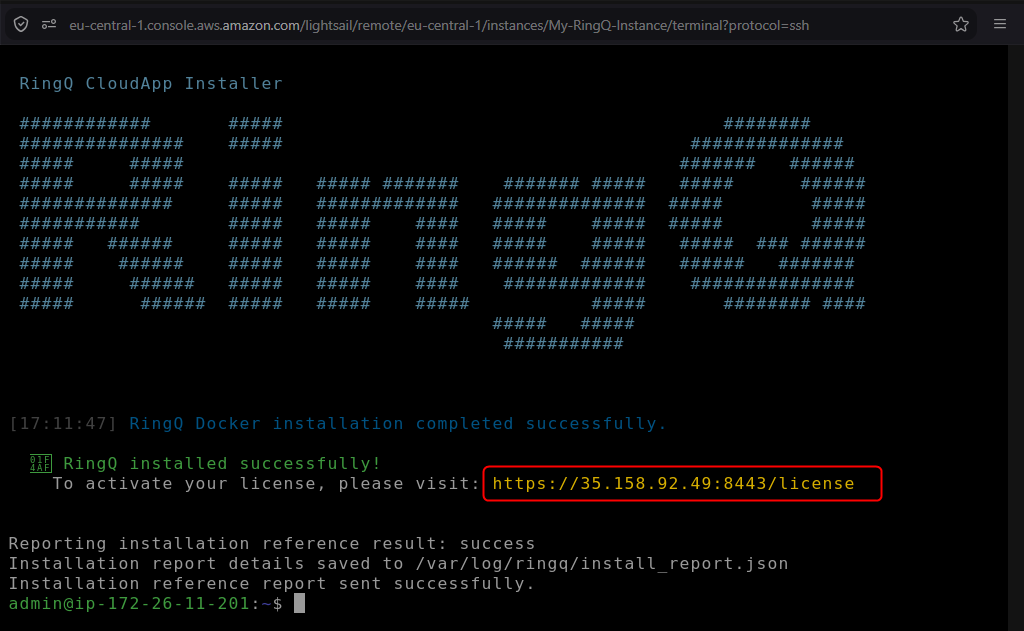
Once the installation is complete, open your browser and navigate to the address displayed. If your browser shows you a warning, select the proceed option so that it takes you to the activation page.
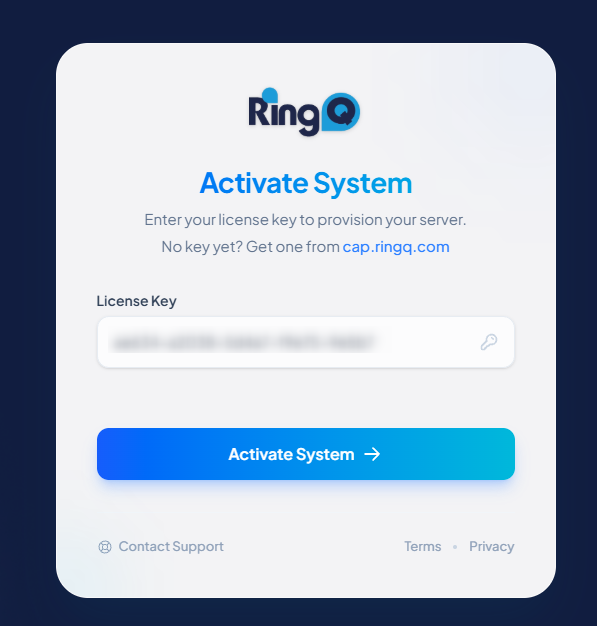
Enter your RingQ License Key and press Activate System, then follow the wizard.
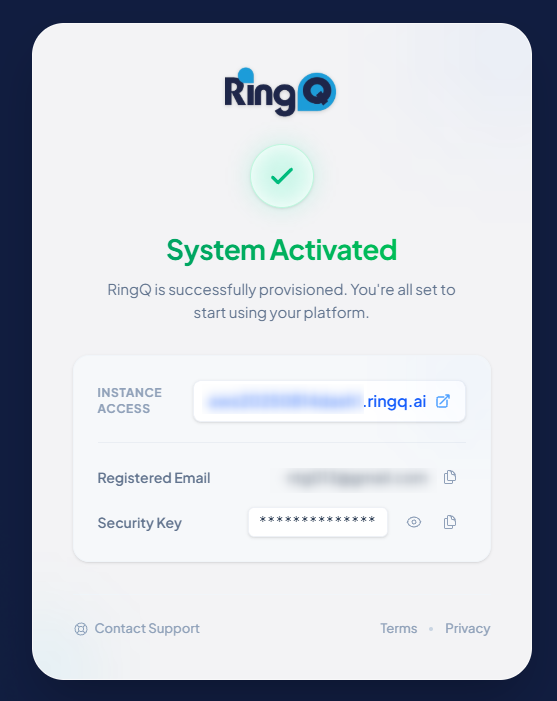
Once the License Activation finishes, your RingQ installation is complete and you can access your instance!
