Integrating Zendesk with RingQ
Integrating Zendesk with RingQ helps businesses deliver faster, more efficient customer support by combining voice communication with a centralized support system. By connecting your help desk platform with your business phone solution, support teams can access customer information instantly, manage interactions more effectively, and improve response times across every communication channel.
This guide will walk you through the process of integrating Zendesk with RingQ, including the setup requirements, configuration steps, and key features available after the integration is complete. From click-to-call functionality and automatic ticket creation to call tracking and interaction history synchronization, this integration helps streamline support workflows and enhance the overall customer experience.
Log in to your Zendesk account. If you do not have an account, you can register for one here.
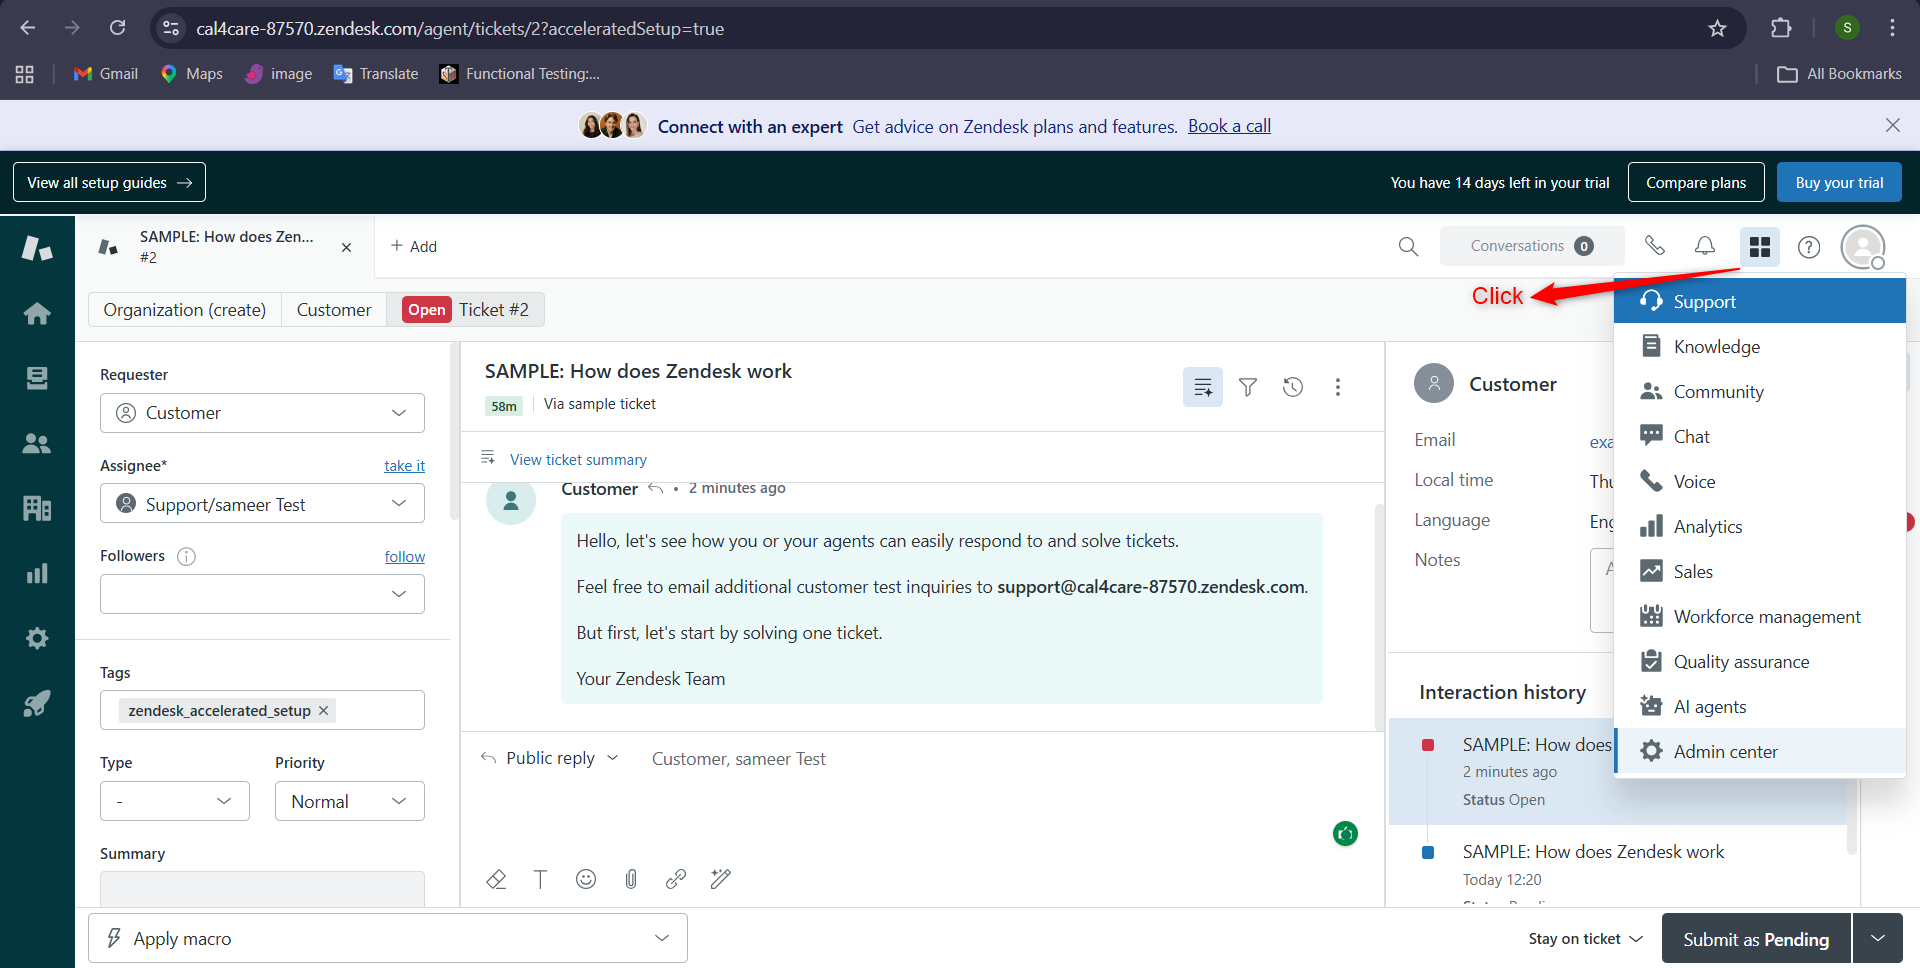
From the dashboard, click the dropdown option in the Admin Center section.
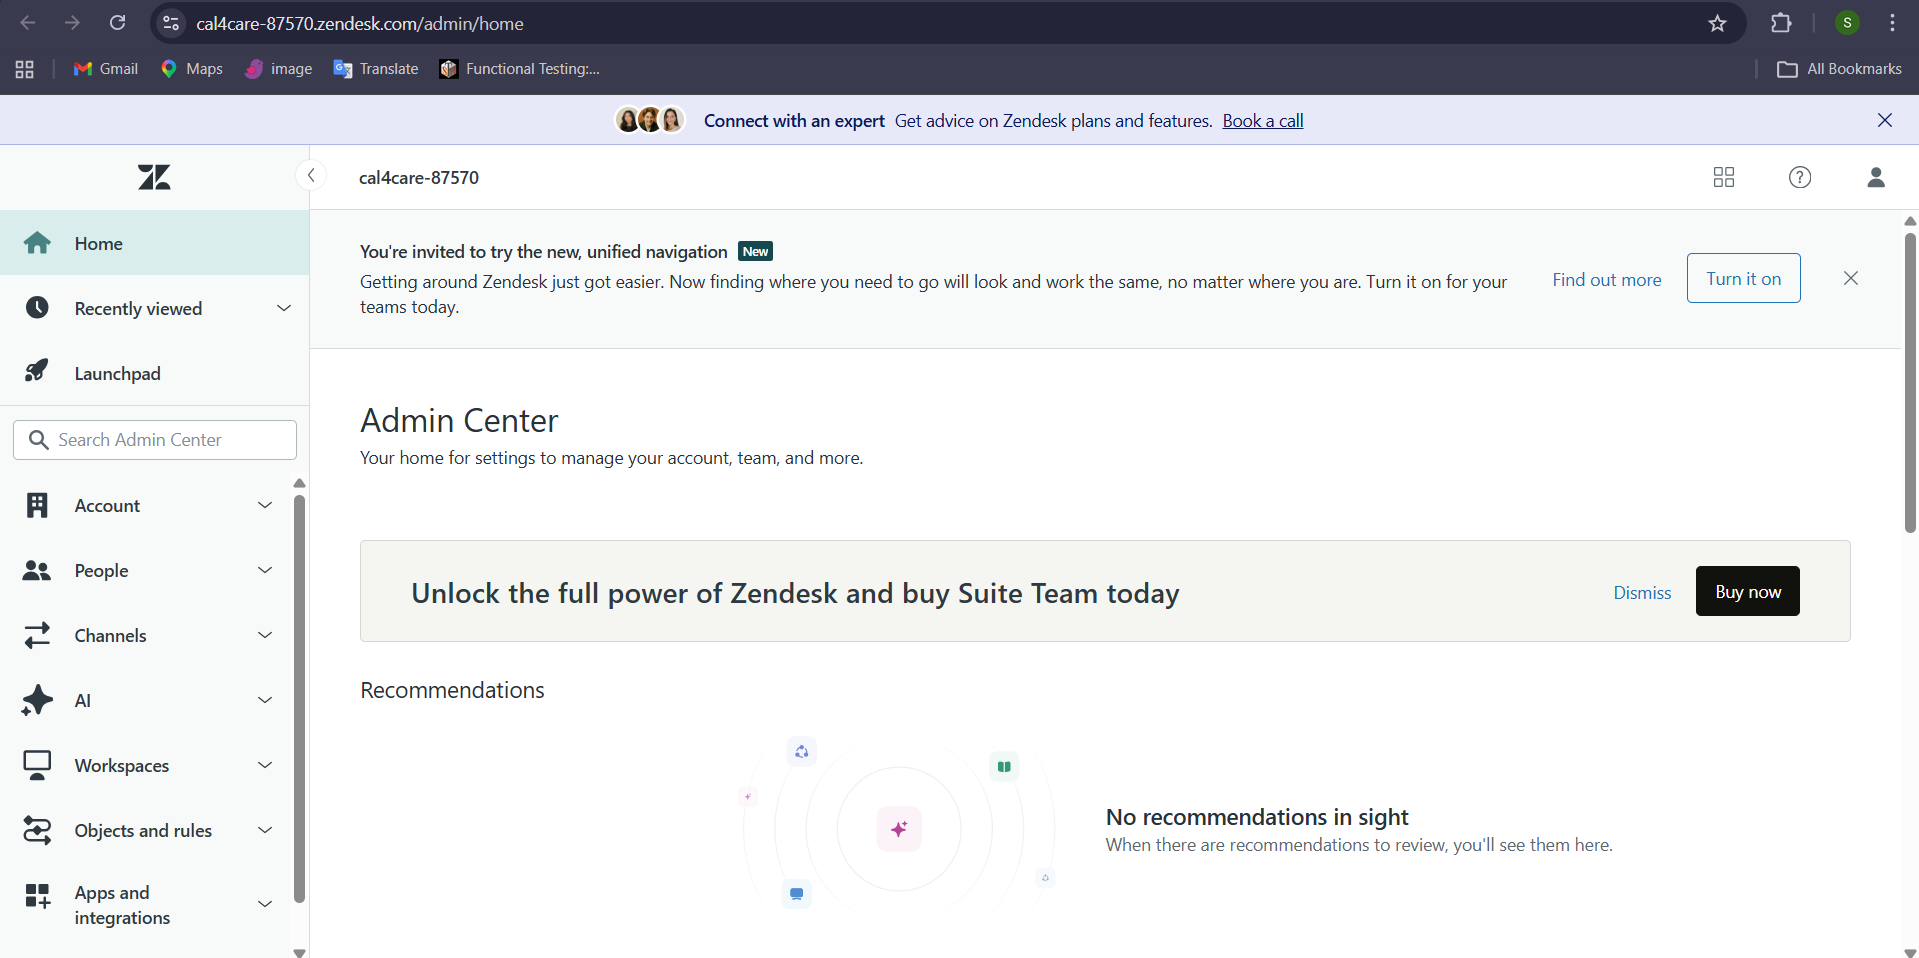
A new tab will open where the Zendesk Admin Center page can be accessed.
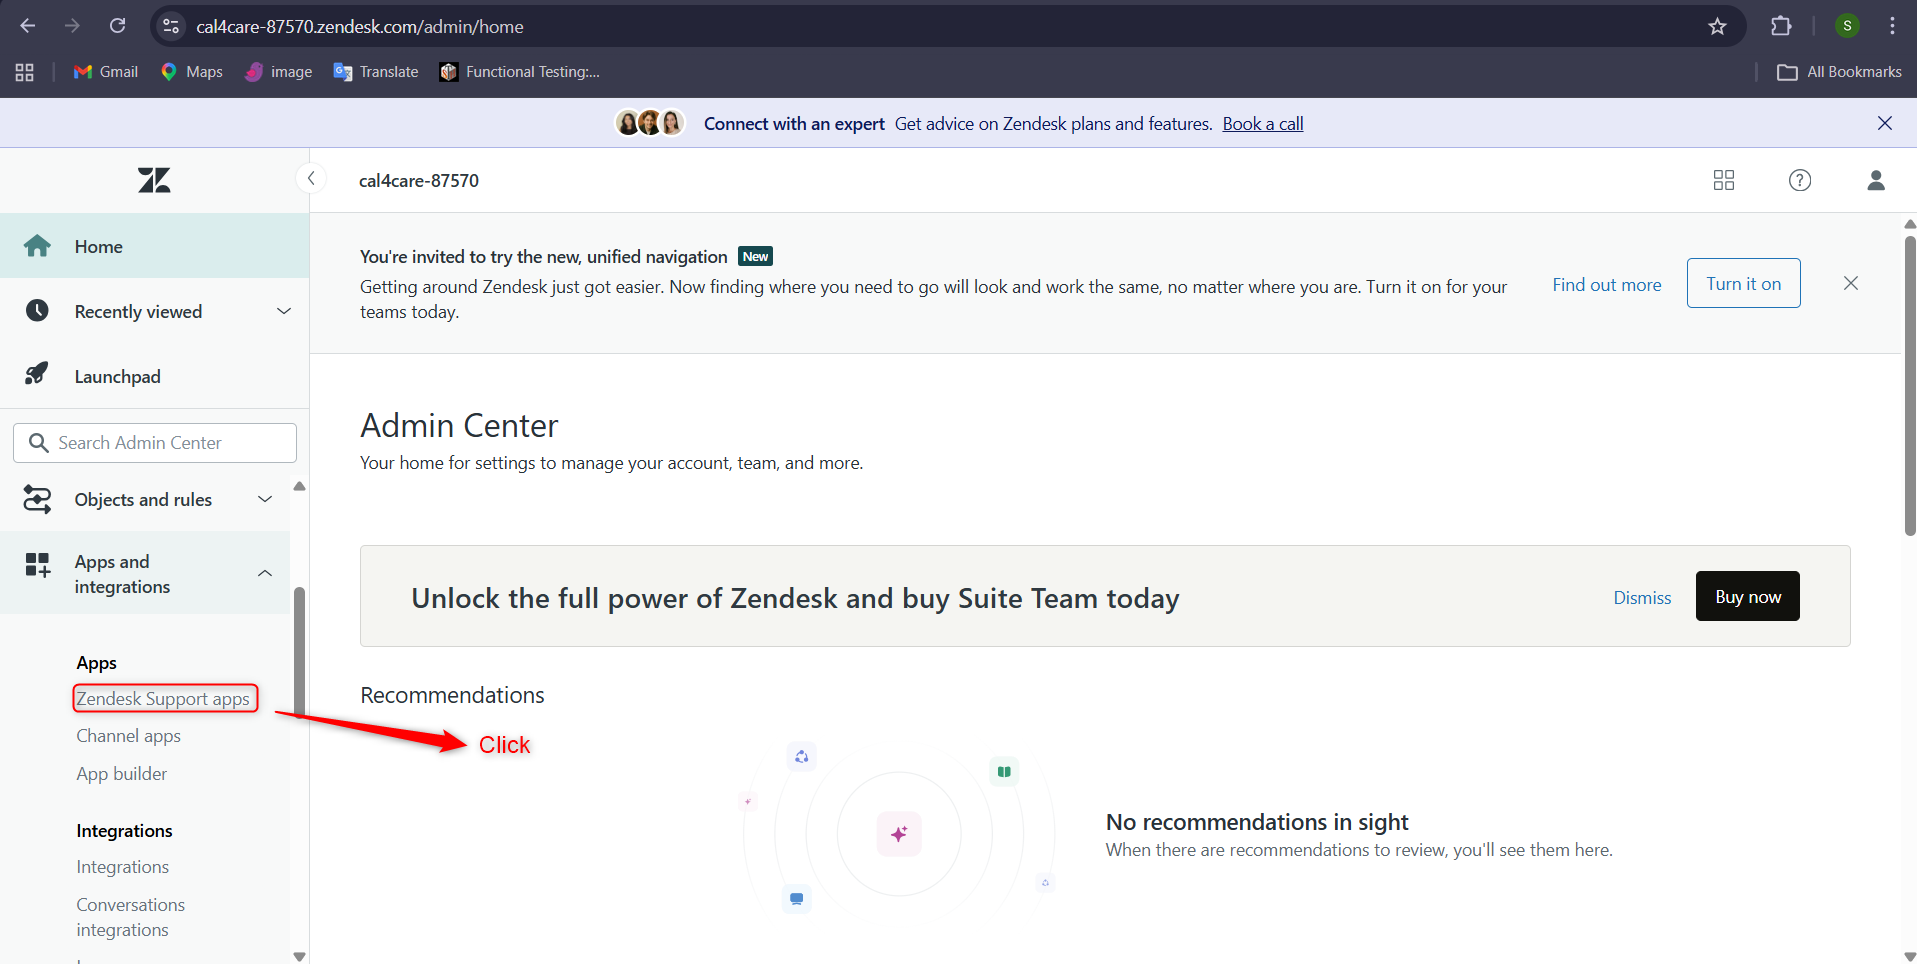
In the Admin Center dropdown, select Apps and Integrations → Apps → Zendesk Support Apps.
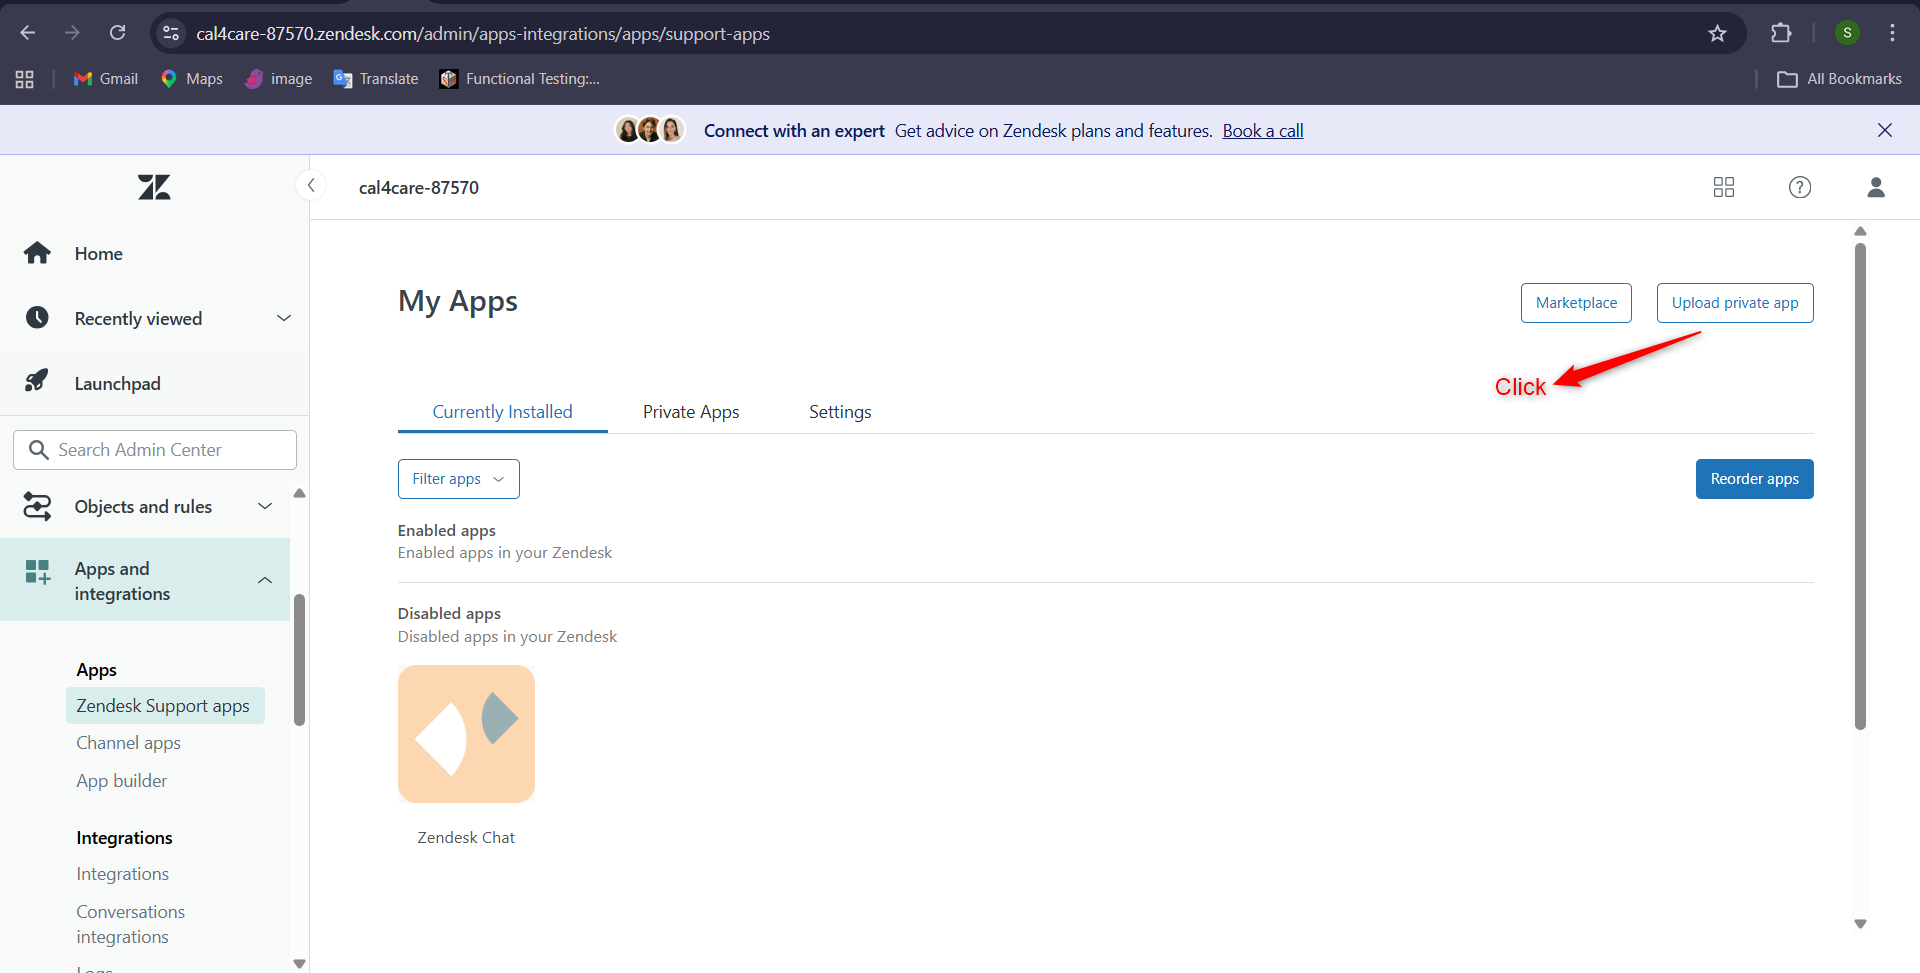
To open the My Apps section, click the Upload Private App button.
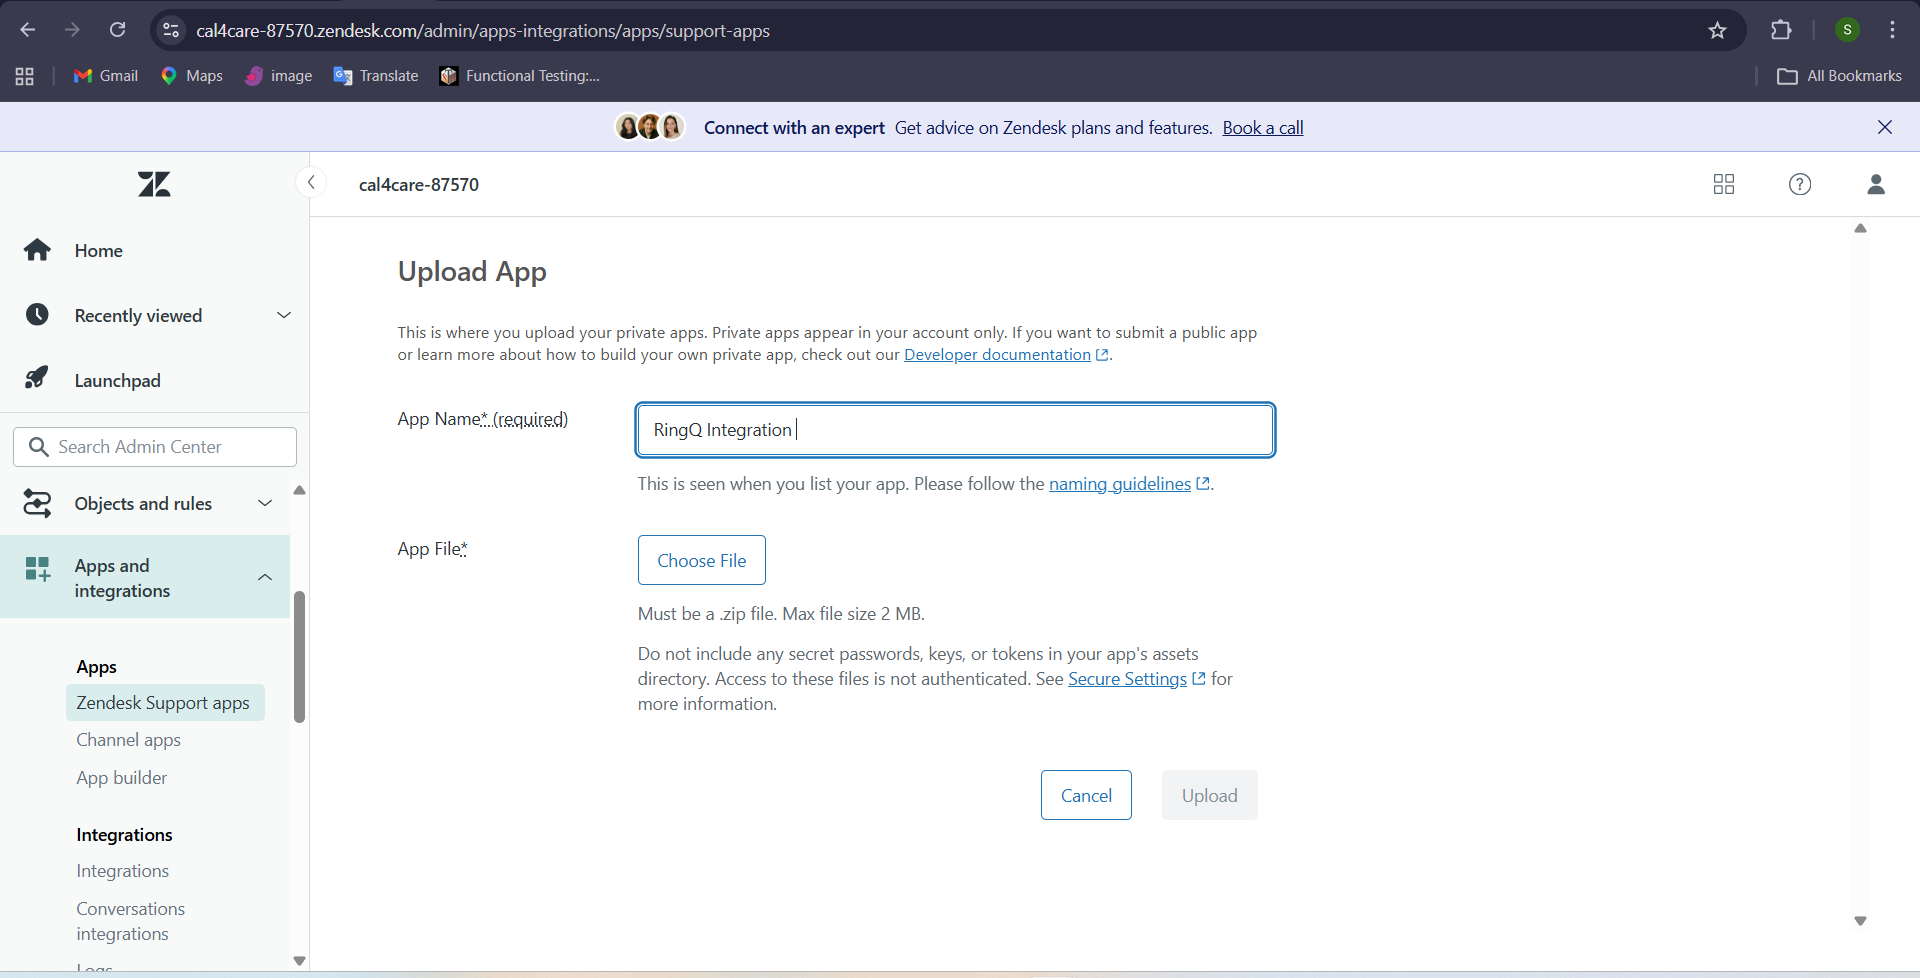
Enter the app name and upload the ZIP file.
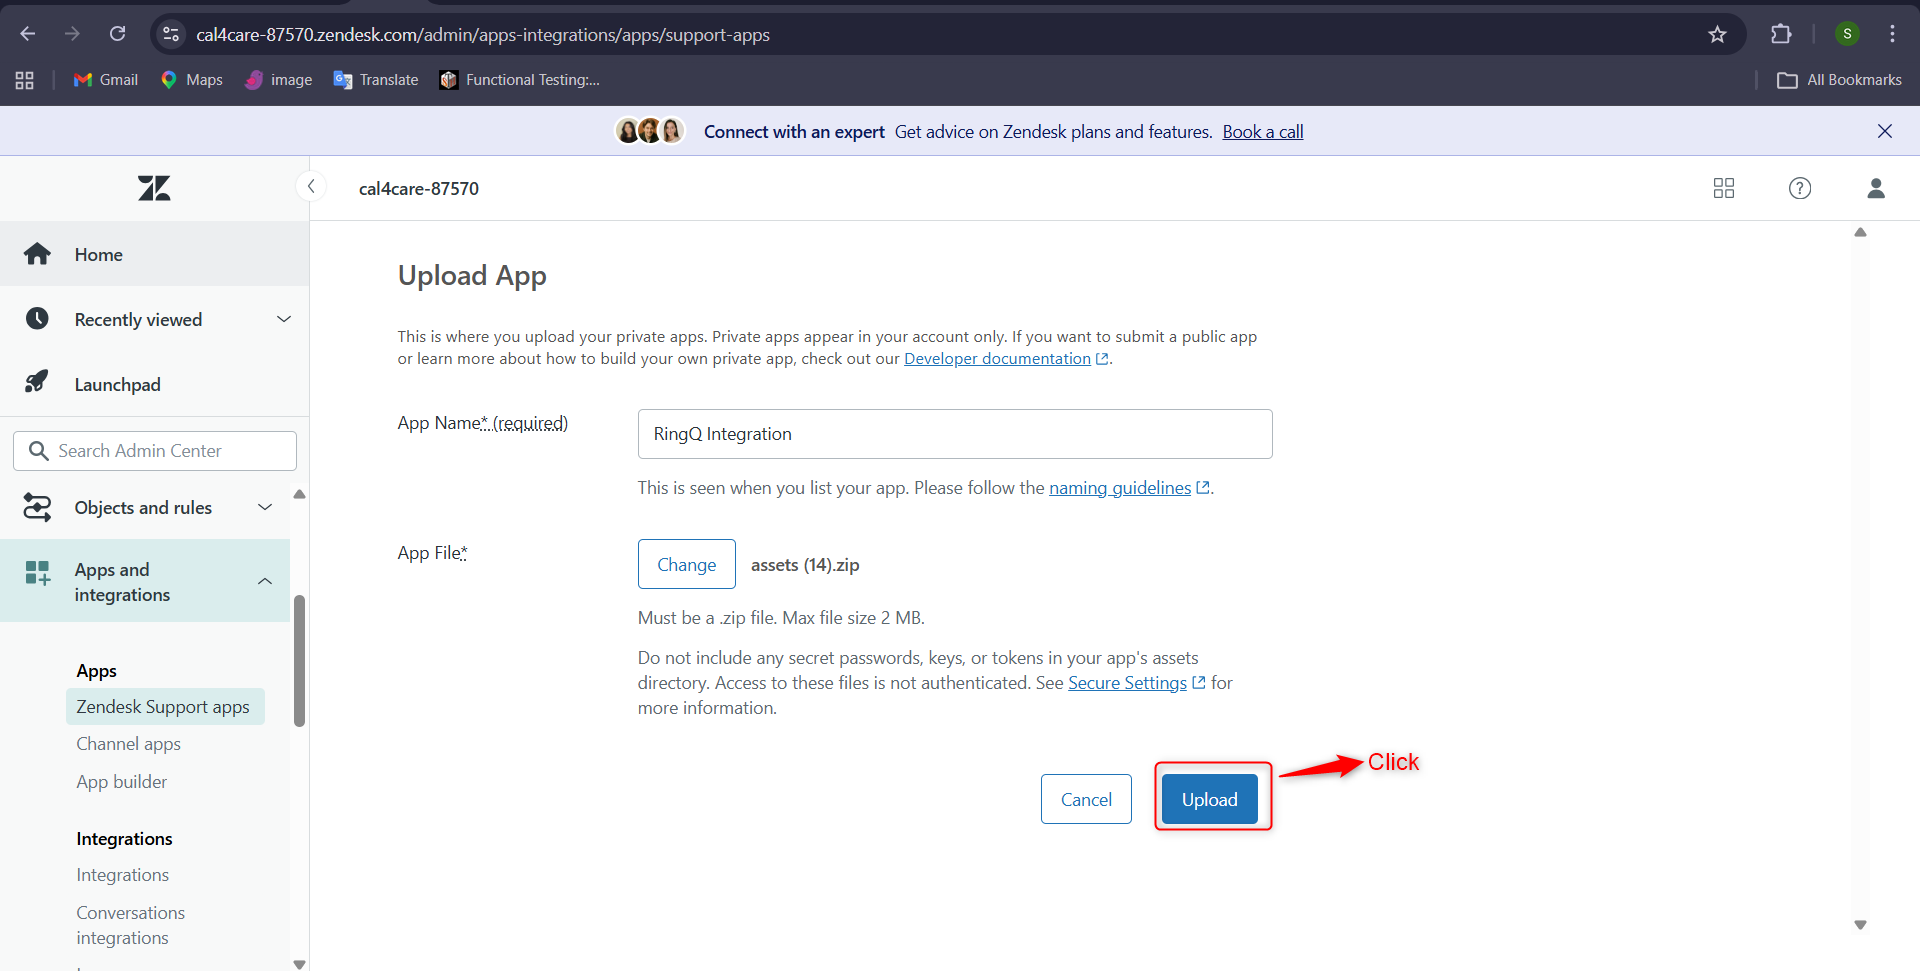
In the Upload ZIP File section, upload the ZIP file provided by our team by clicking the Browse button.
Verify that the Upload button is enabled, then click the Upload button.
Click the Upload button once again to continue the installation process.
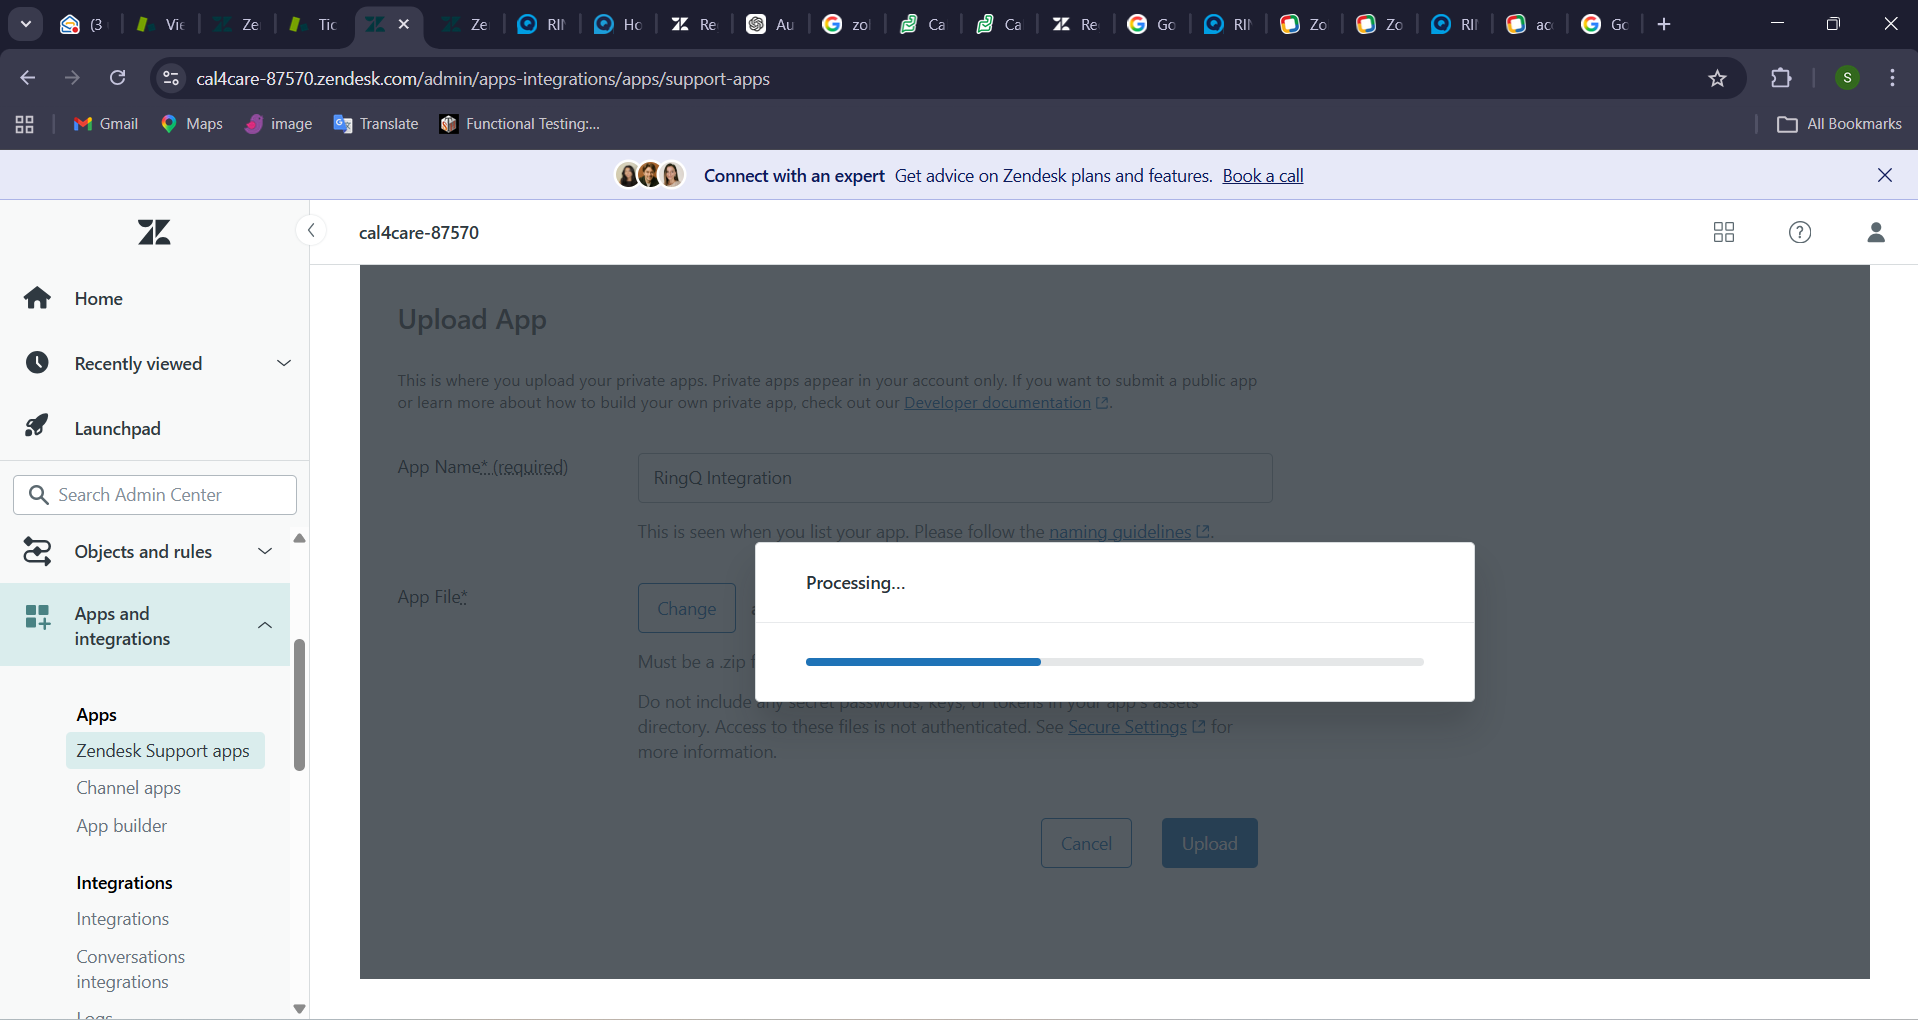
The file will be processed, and the RingQ Integration will be created in the Zendesk Marketplace.
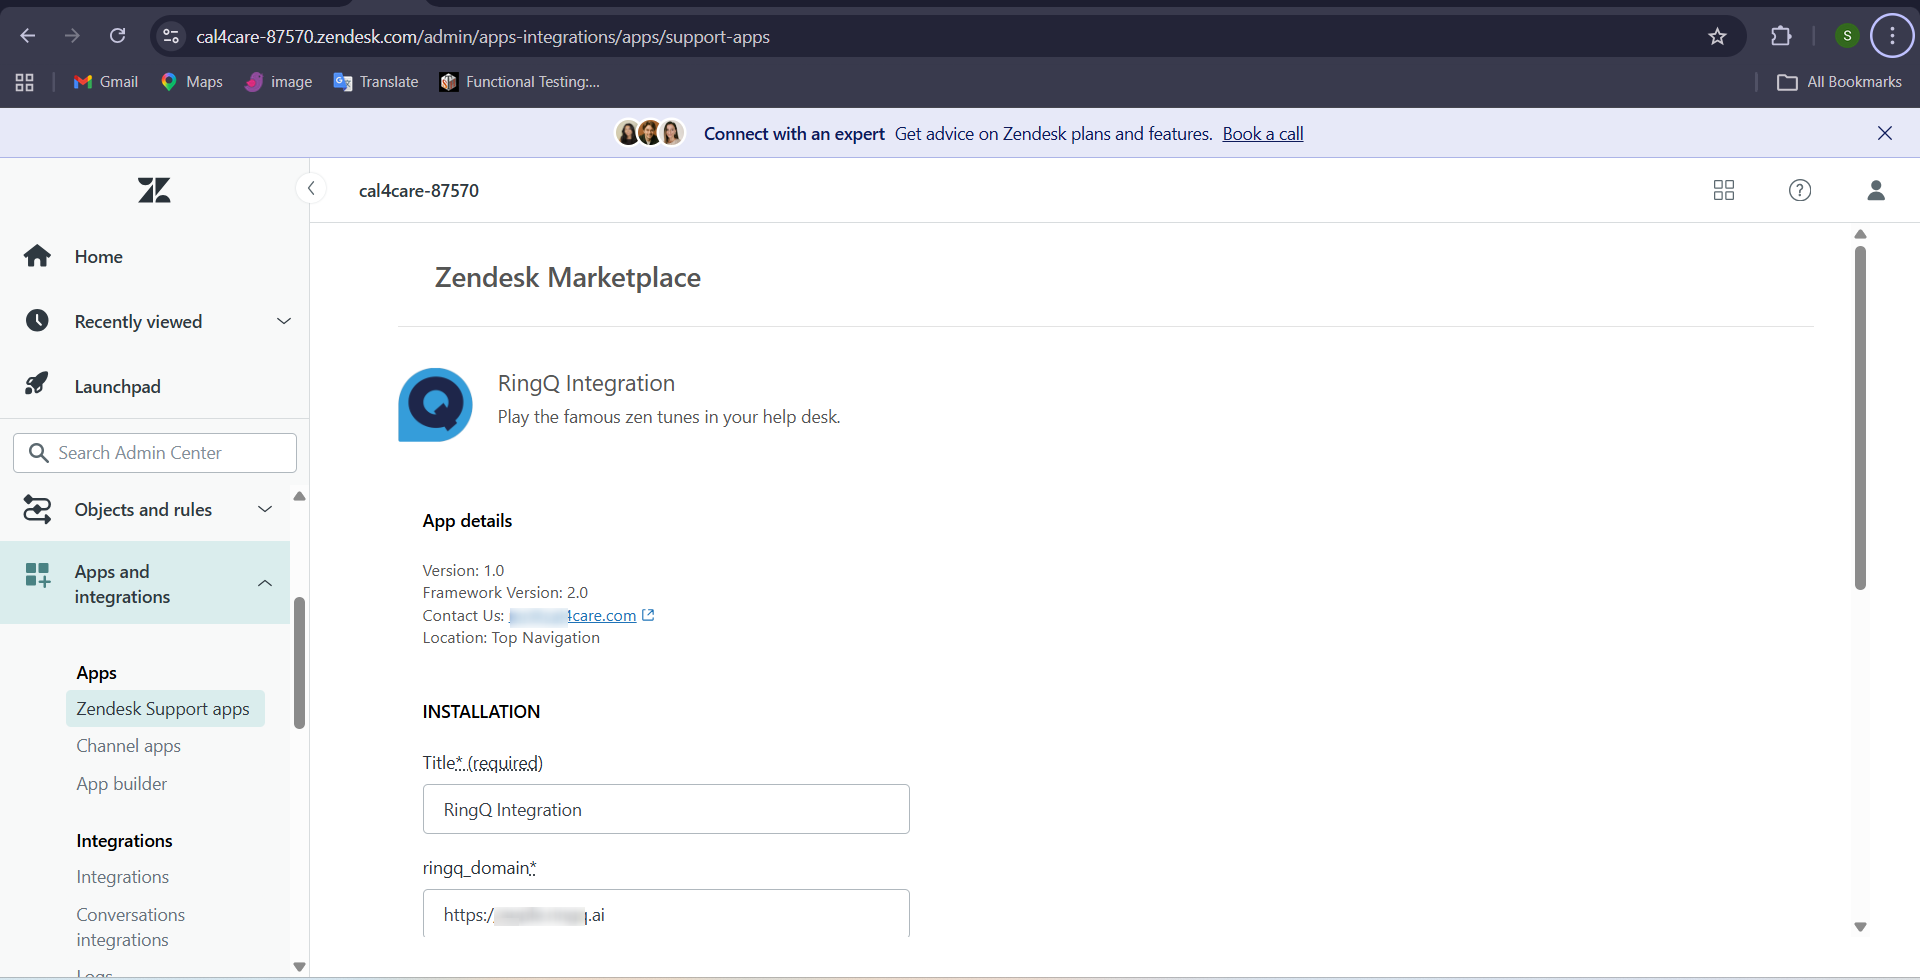
Review all the details carefully. Enter the Title and RingQ Domain, fill in all mandatory fields, and then click the Install button.
The RingQ Integration app has been installed successfully.
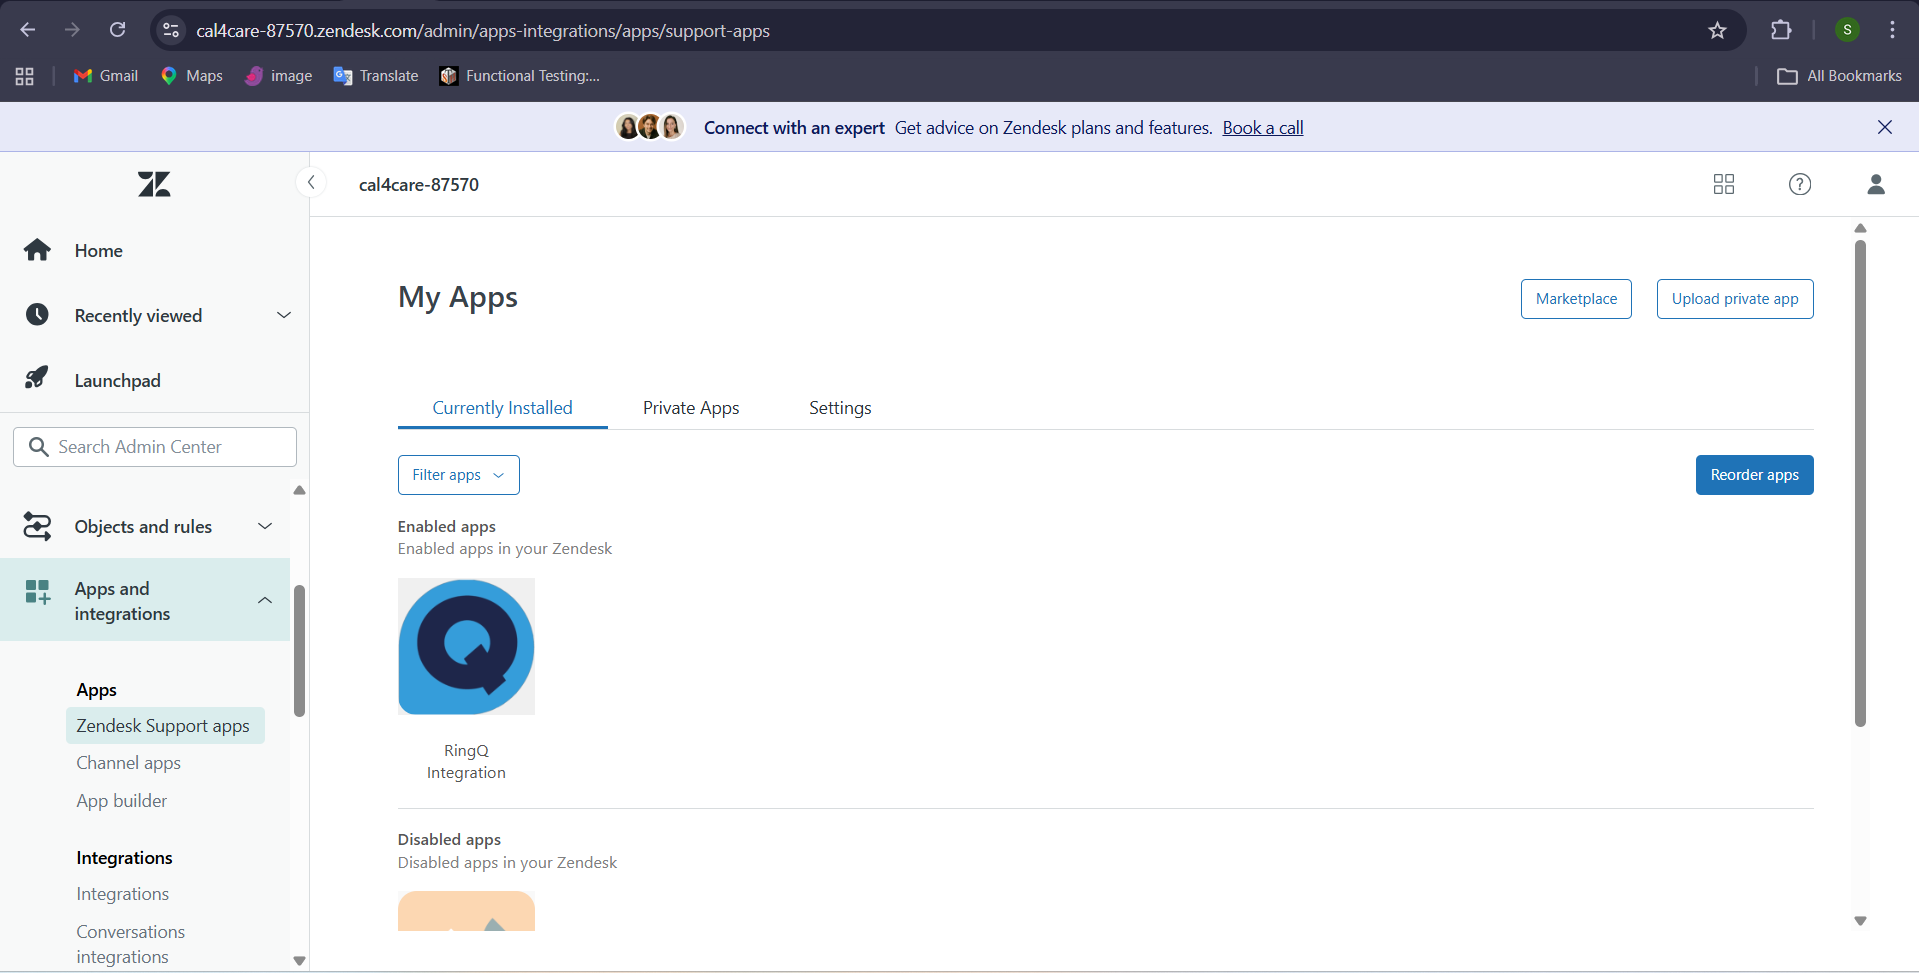
You can view it in the My Apps section.
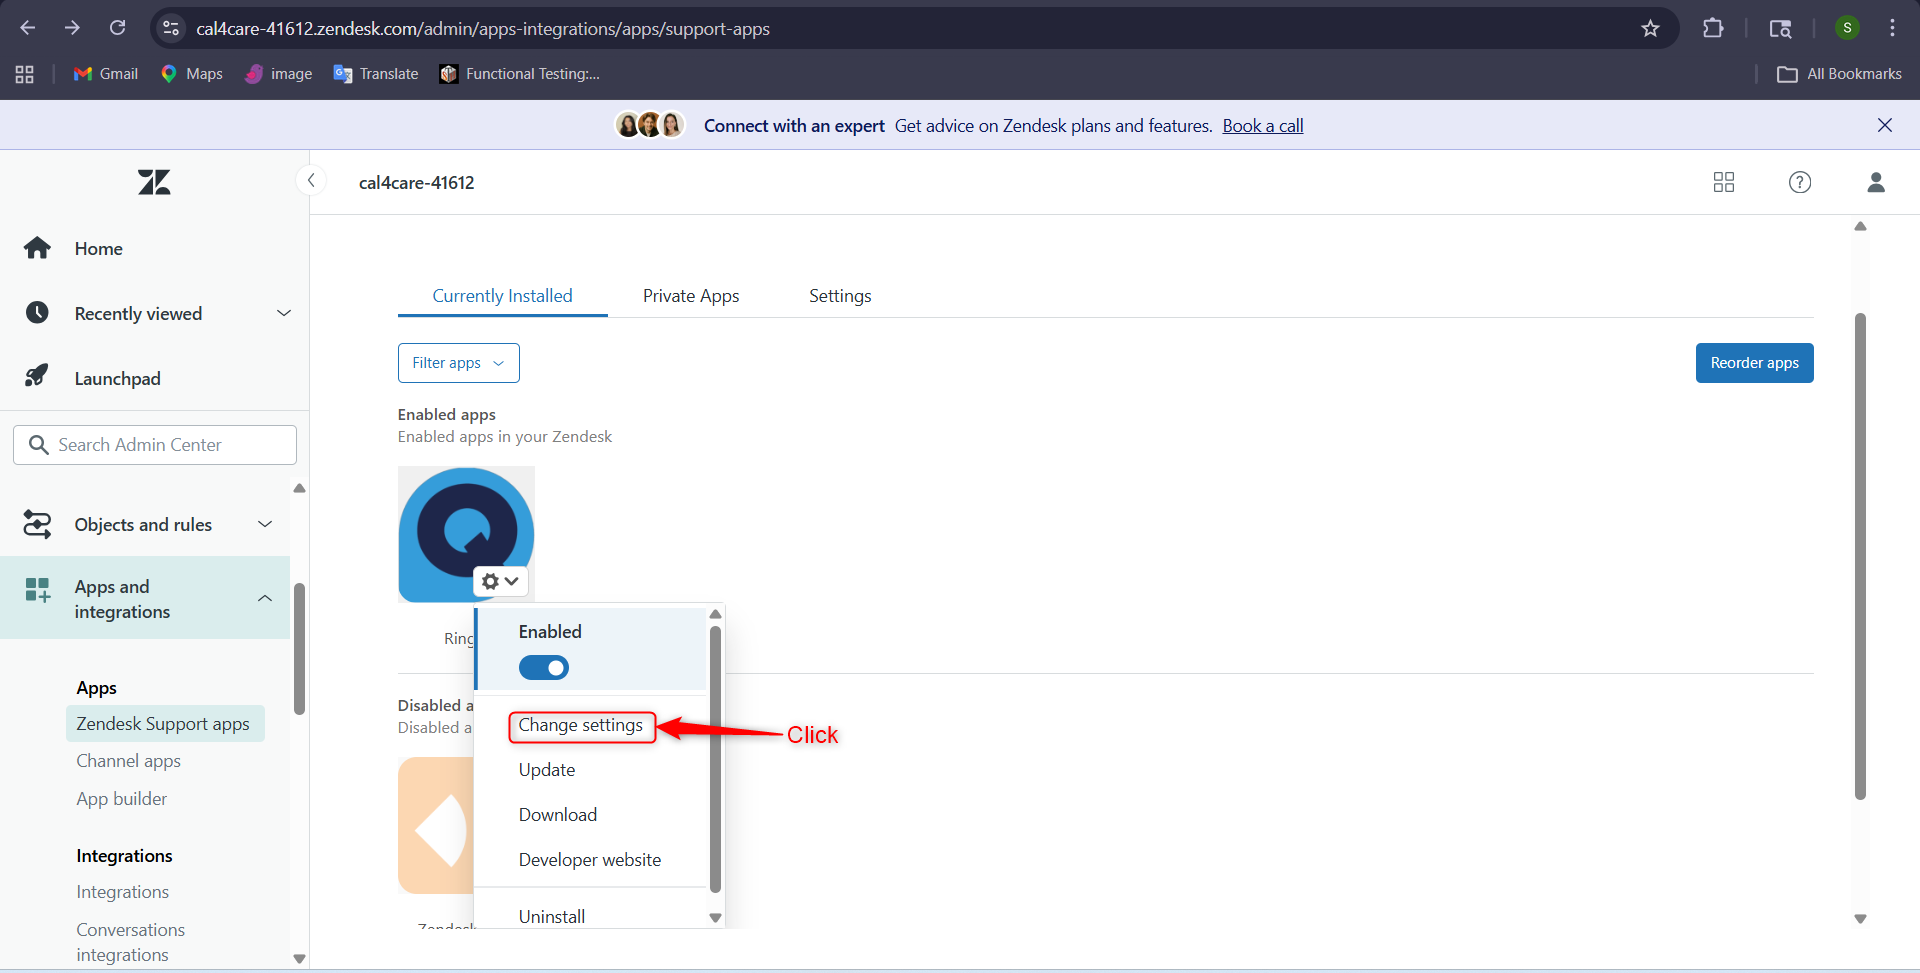
Hover over the RingQ Integration logo to open the dropdown menu, then select Change Settings.
You will be redirected to the Zendesk Marketplace page.
Paste your RingQ Domain URL in the required field.
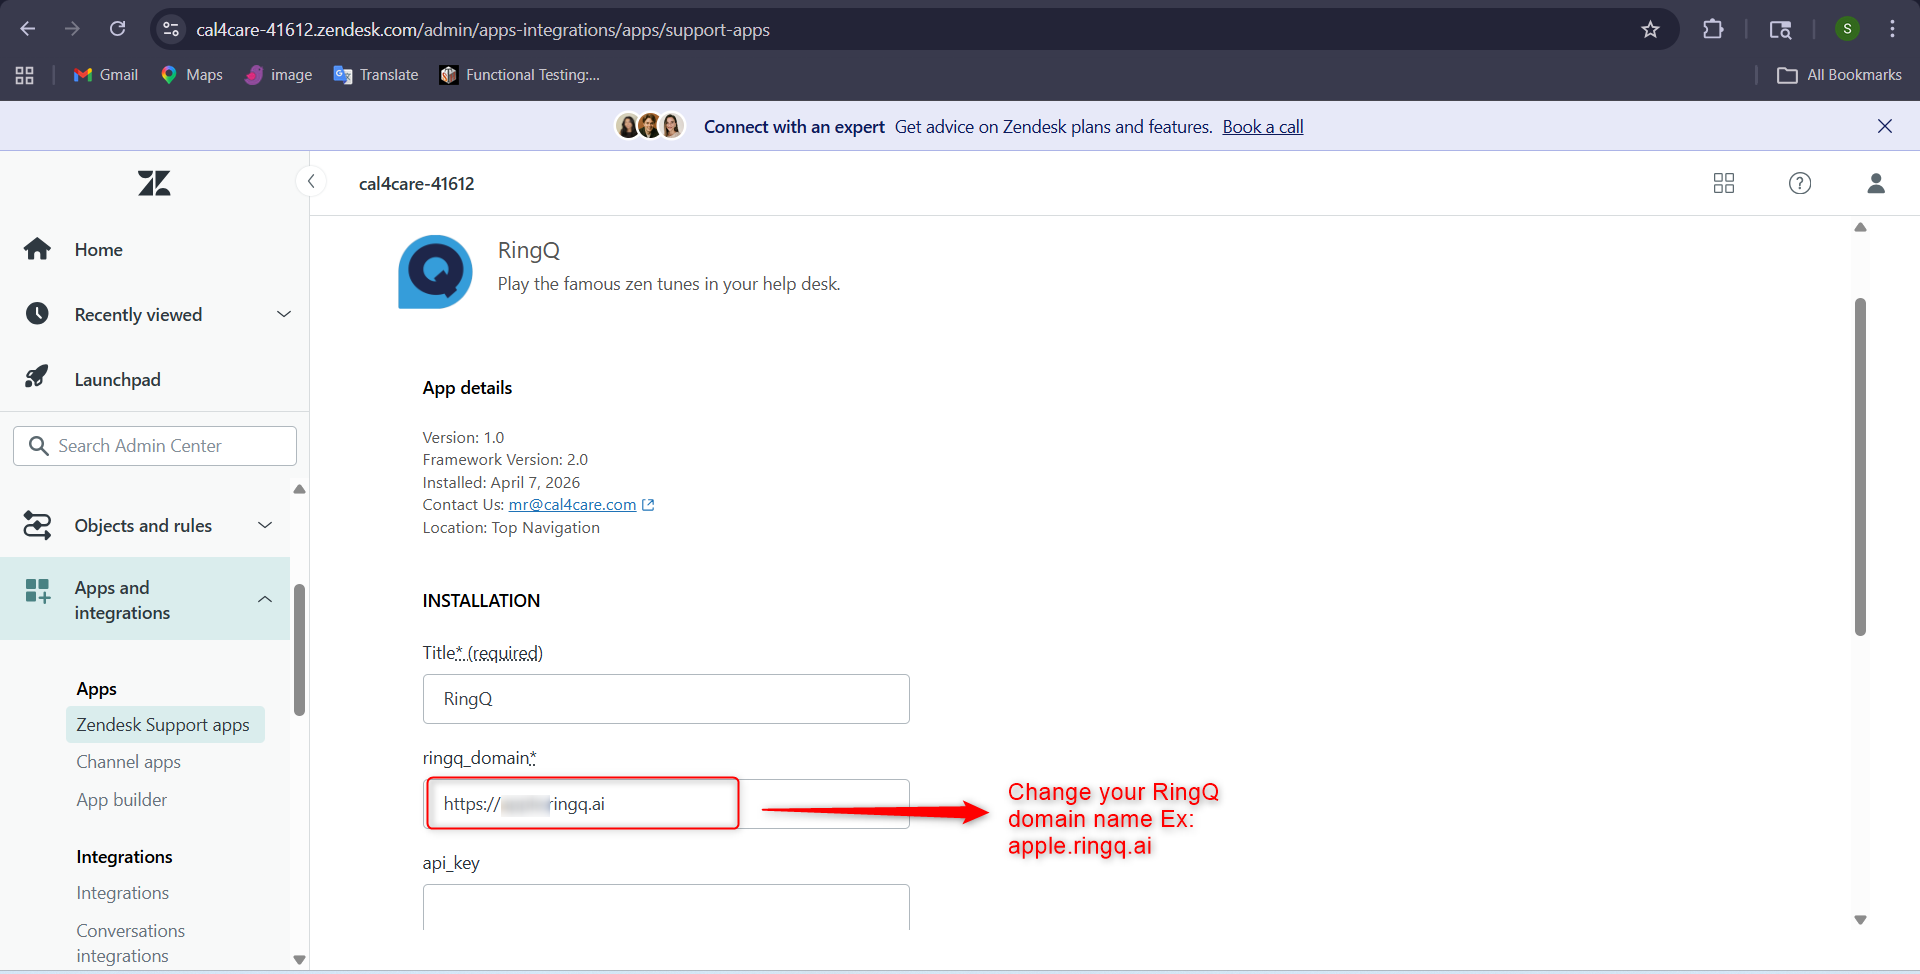
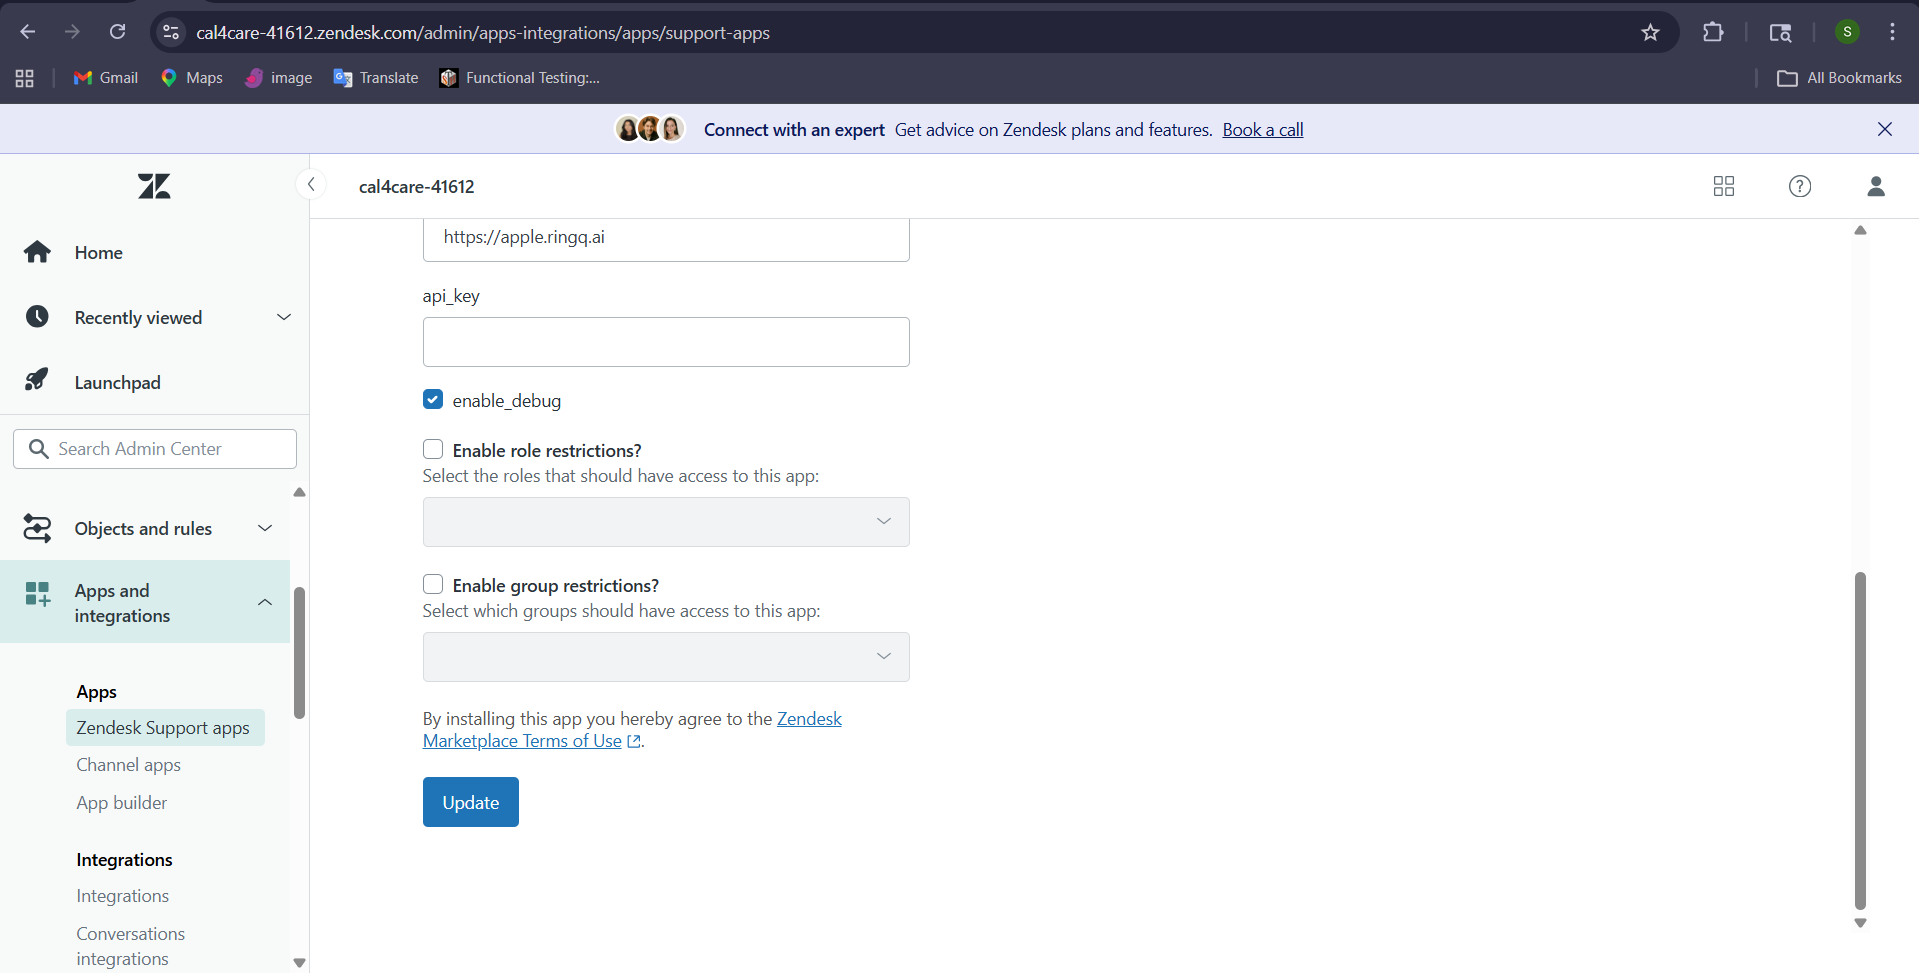
After updating the RingQ domain, click the Update button.
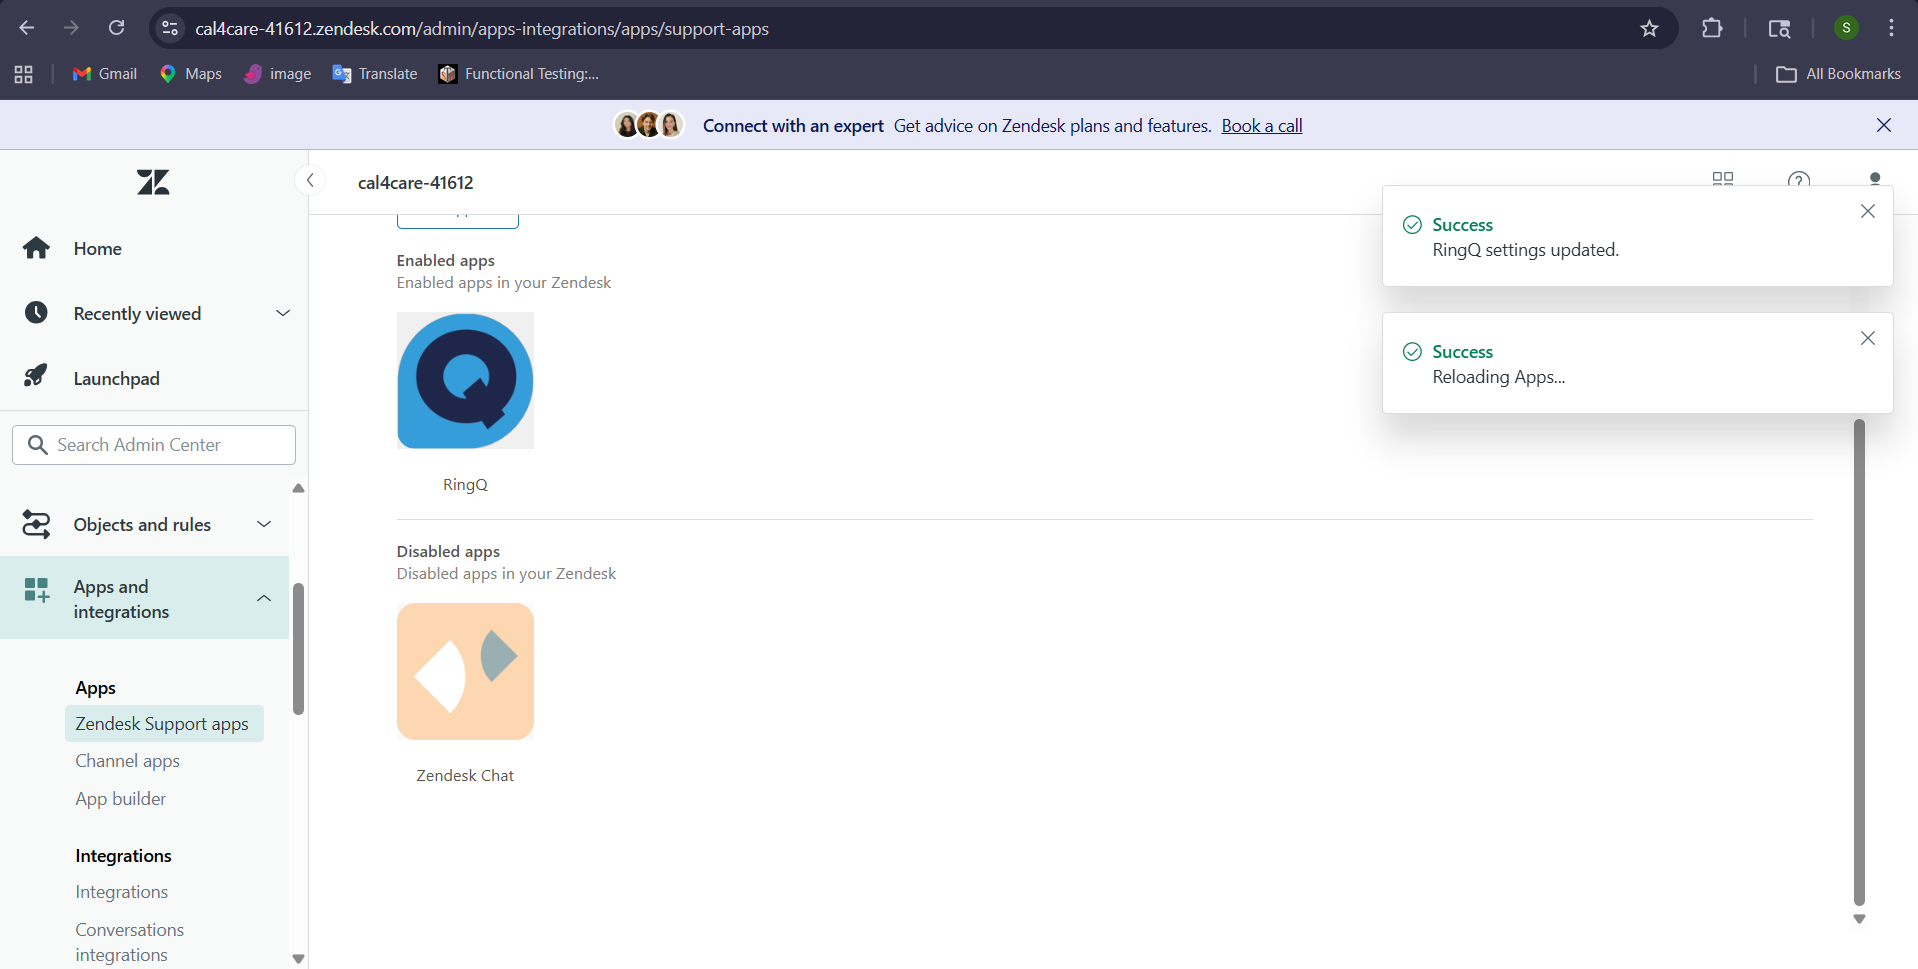
After updating the page, the success message will appear as shown below.
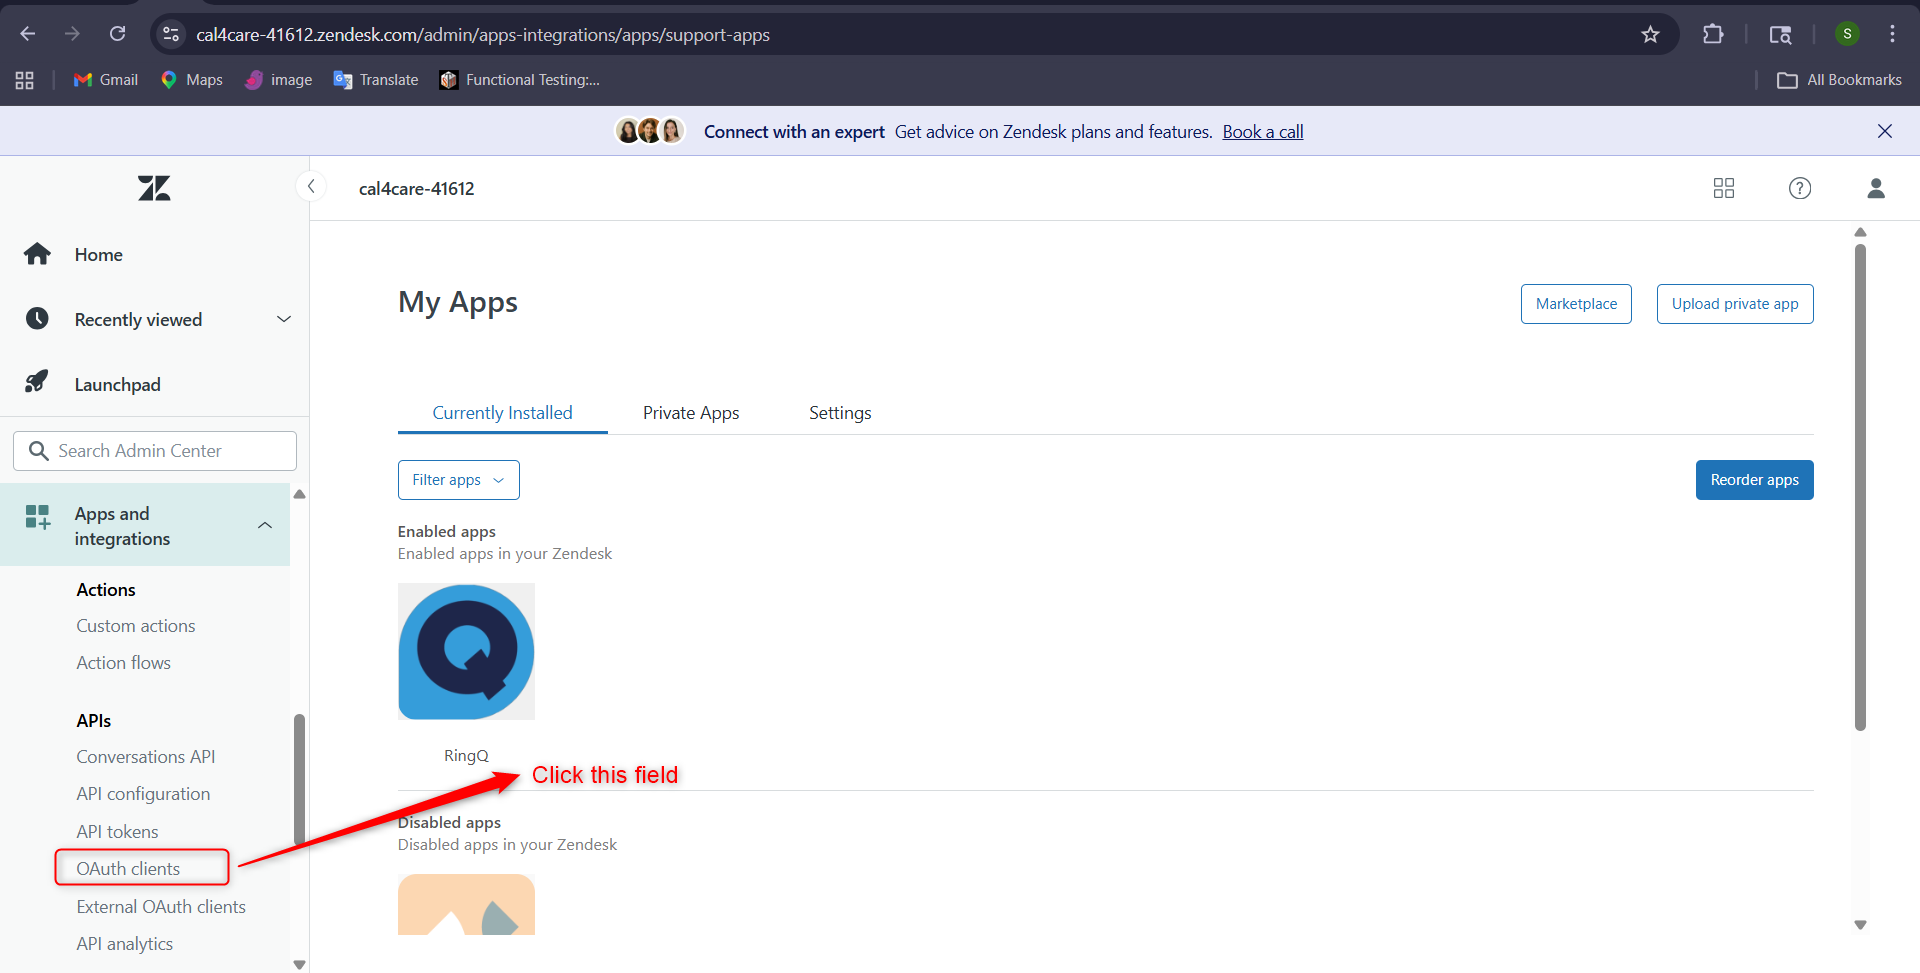
Scroll down to the Admin Center submodule, navigate to APIs, and click OAuth Clients.
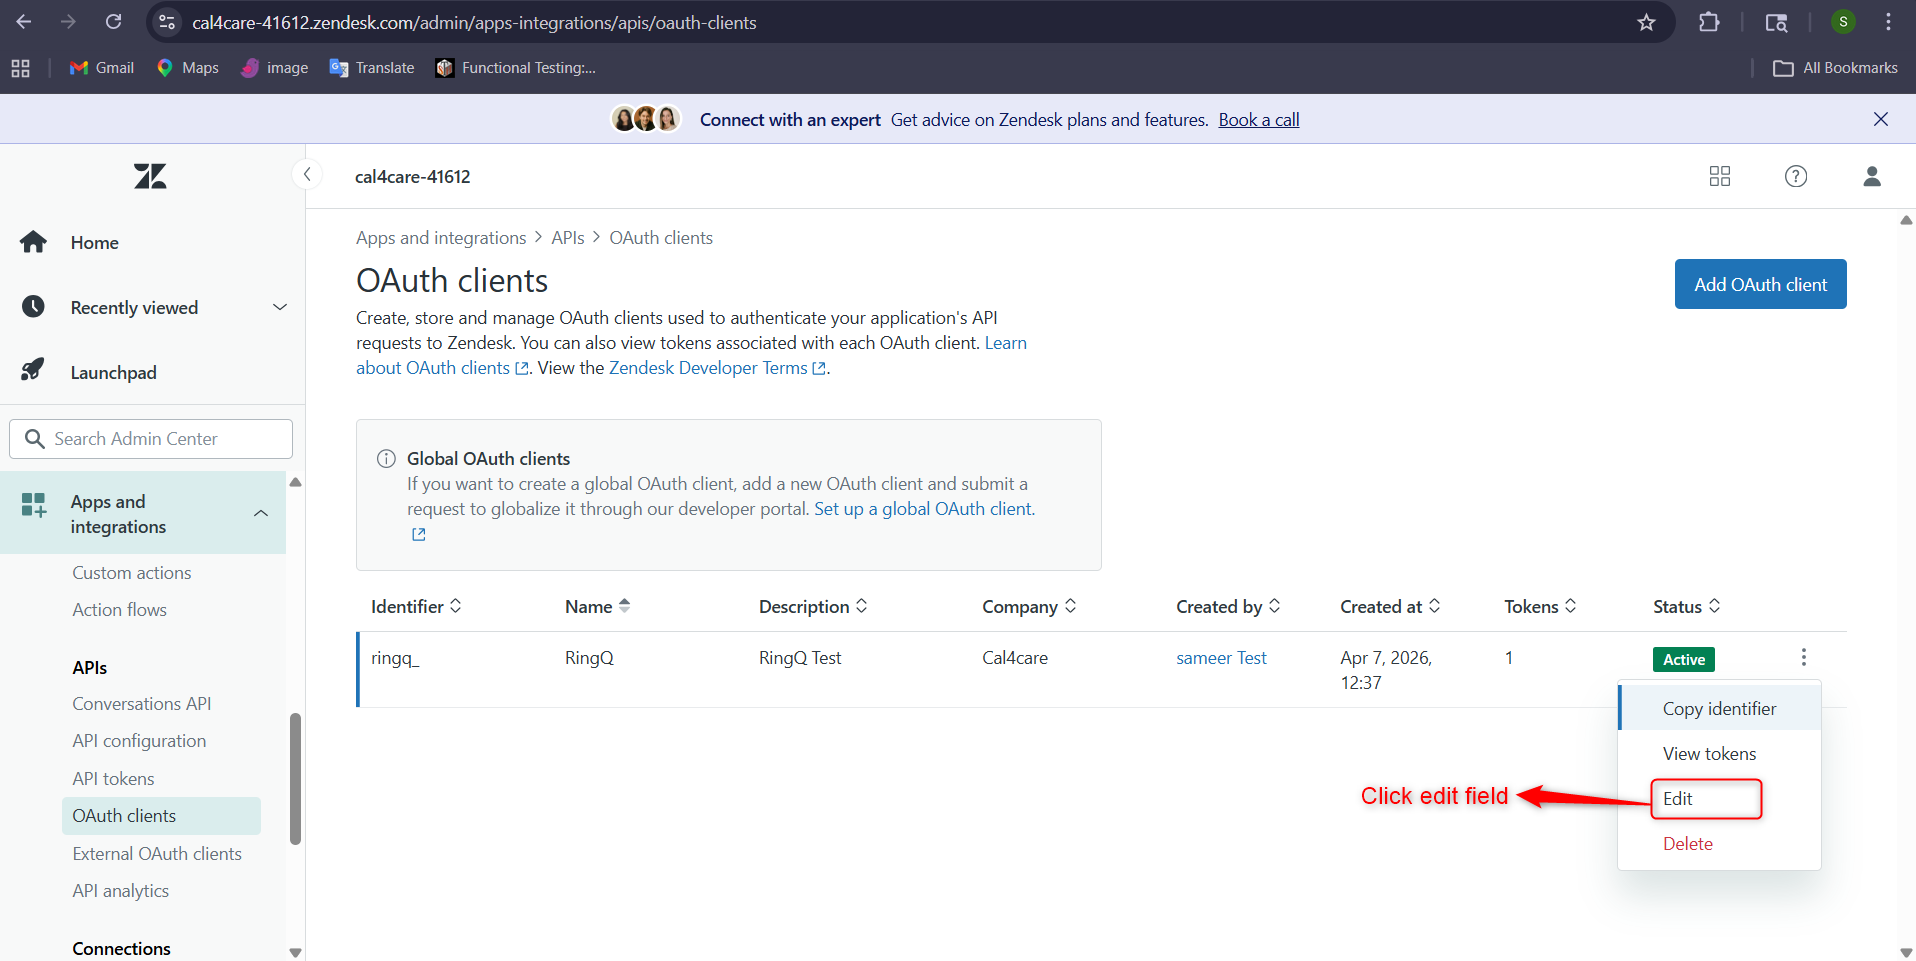
Open the OAuth Clients page and verify all the details, then click the Edit button.
If the OAuth Clients page is not available, click the Add OAuth Client button and create a new OAuth Client.
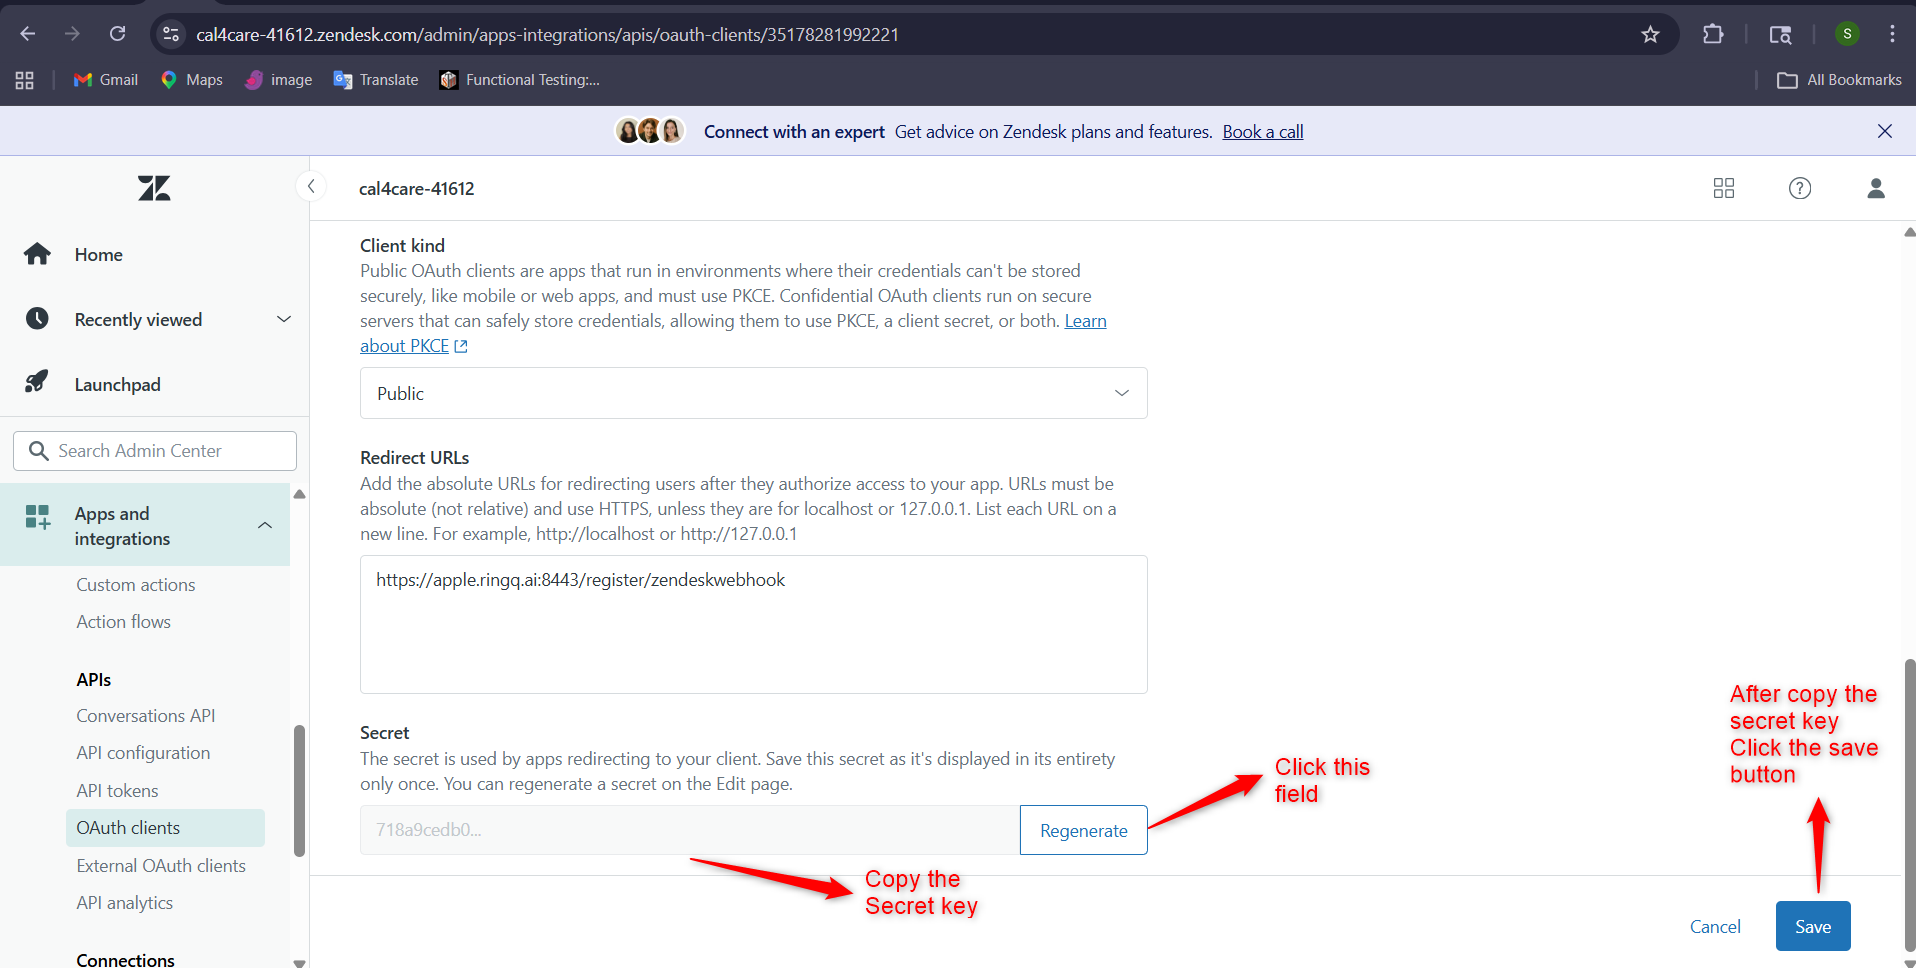
Verify the Name, Description, Company, and Identifier, then regenerate the Client Secret Key.
The Redirect URL is: https://<RINGQURL>:8443/register/zendeskwebhook
Click the Save button.
The Secret Key will be loaded. Copy the Secret Key, then click the Save button.
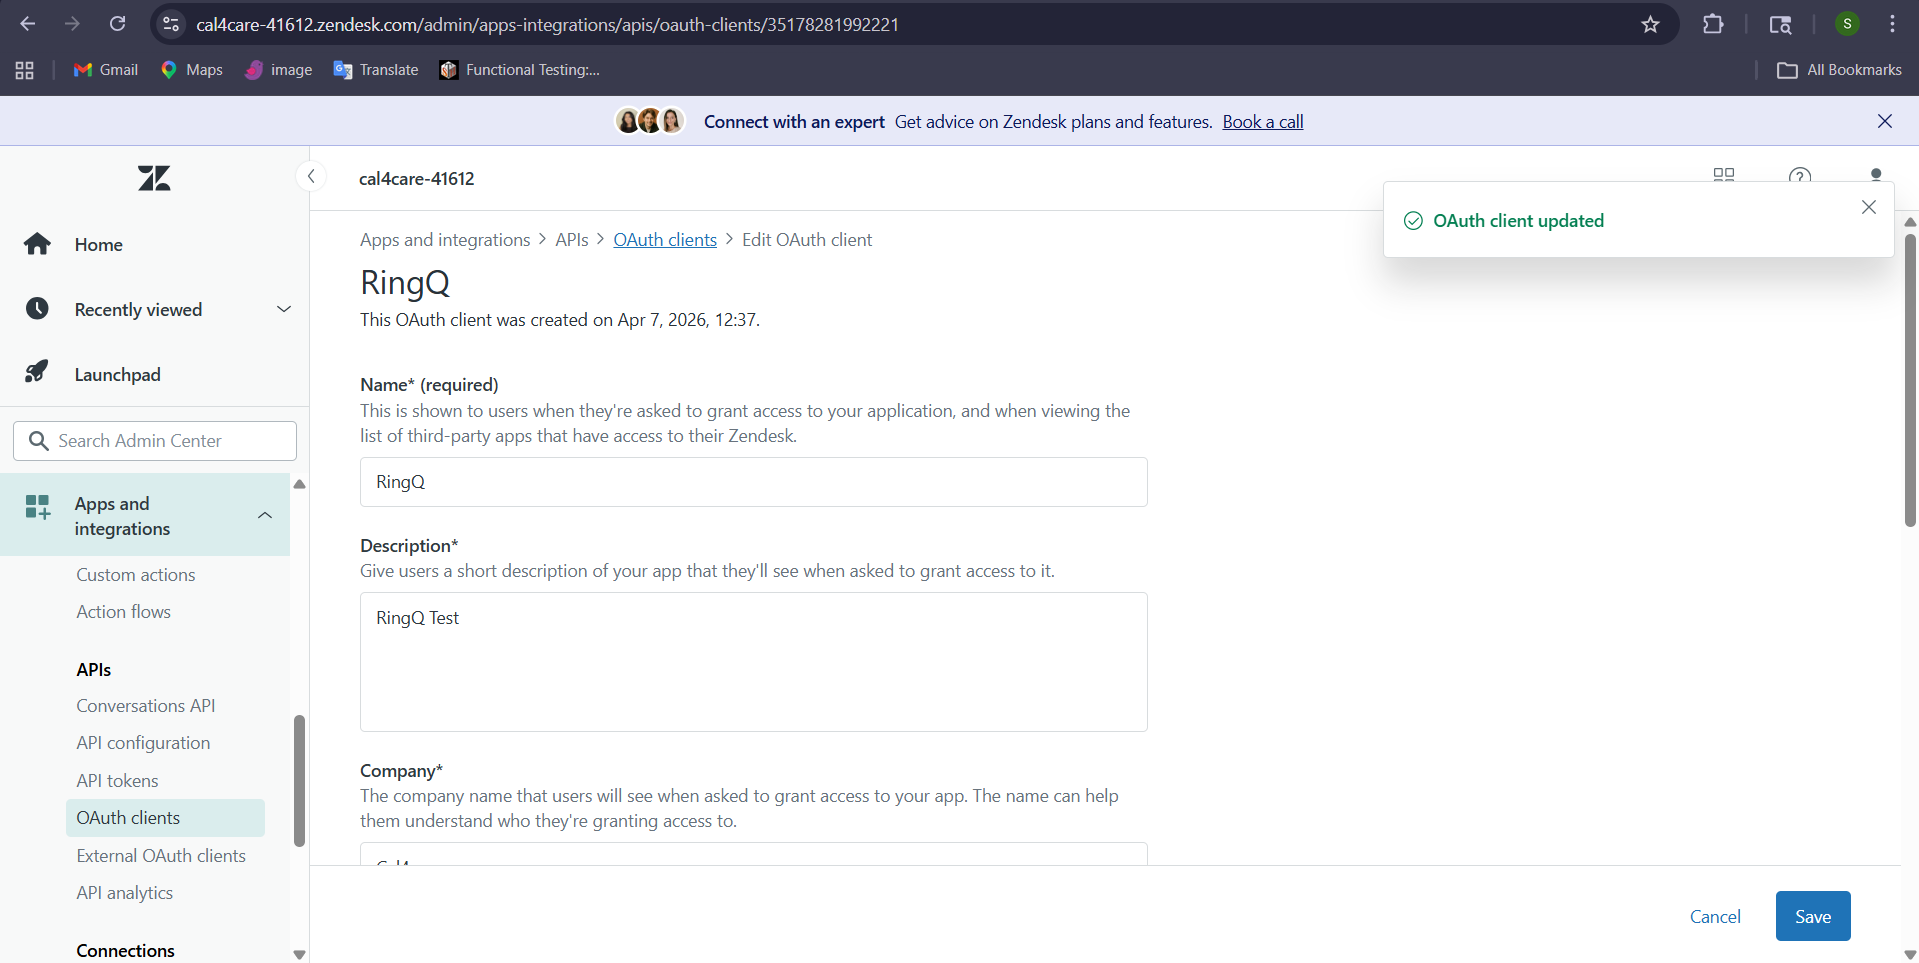
The success message will appear as shown above.
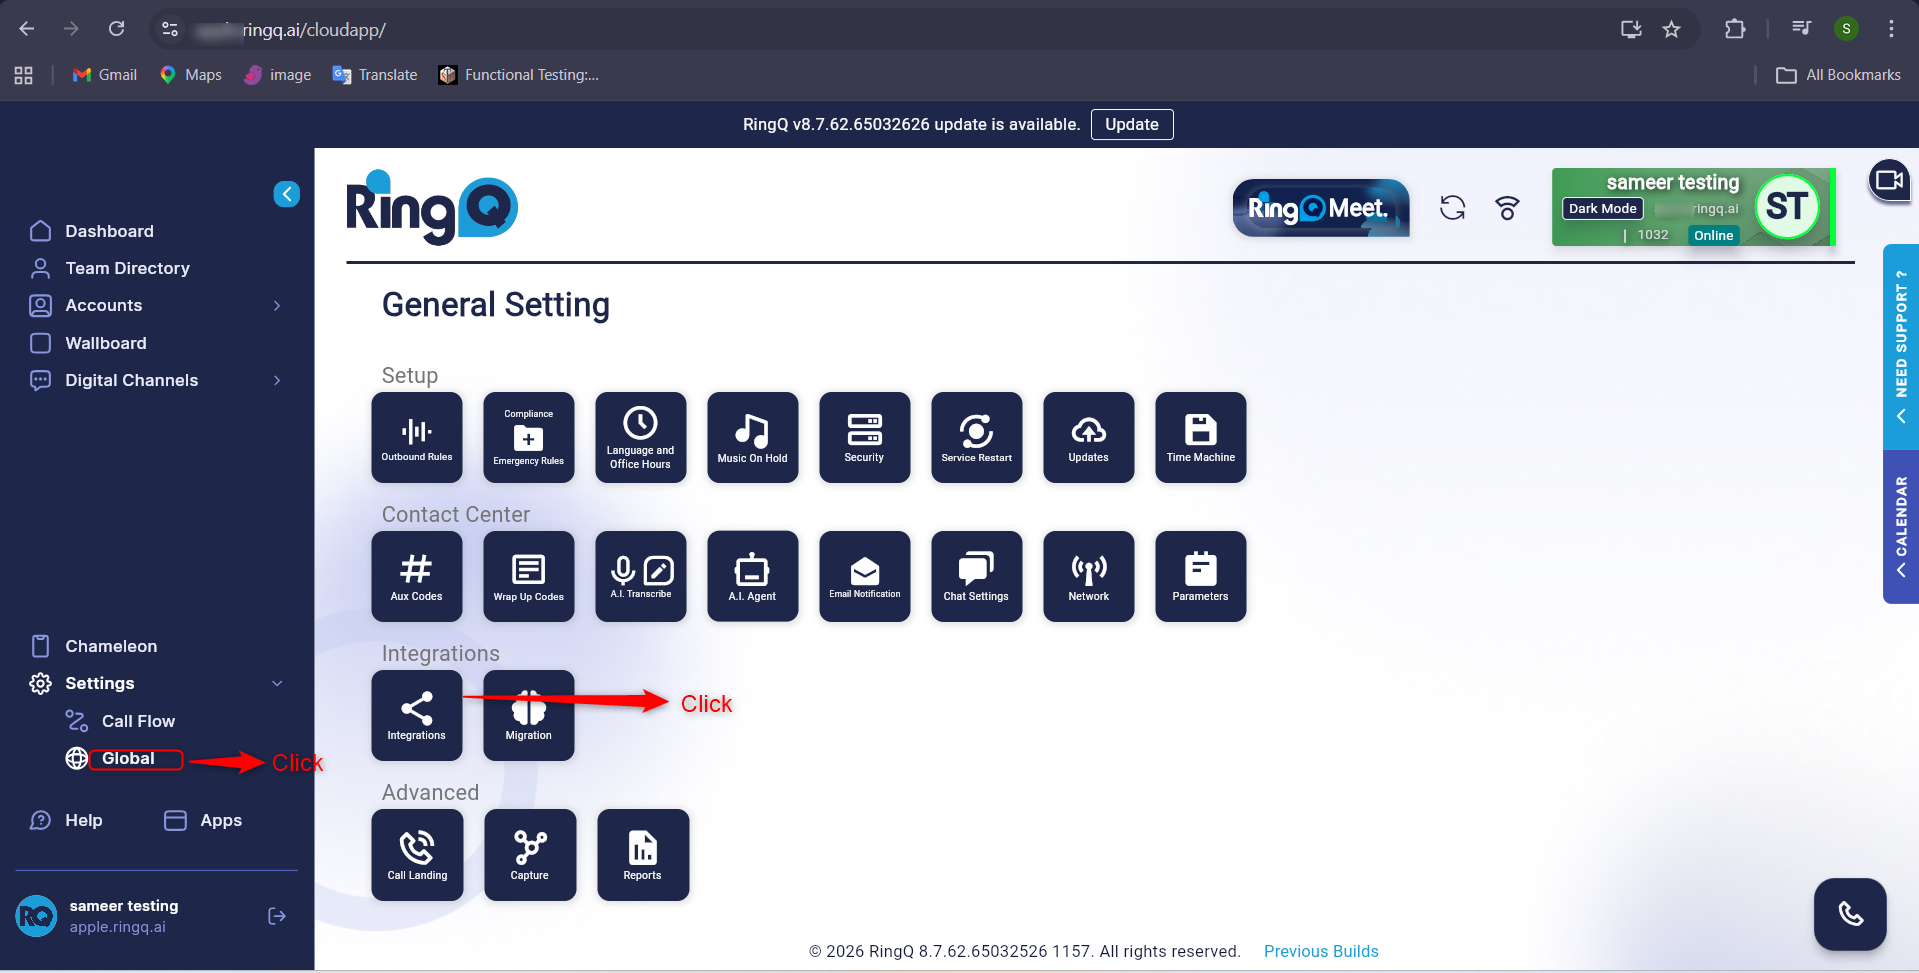
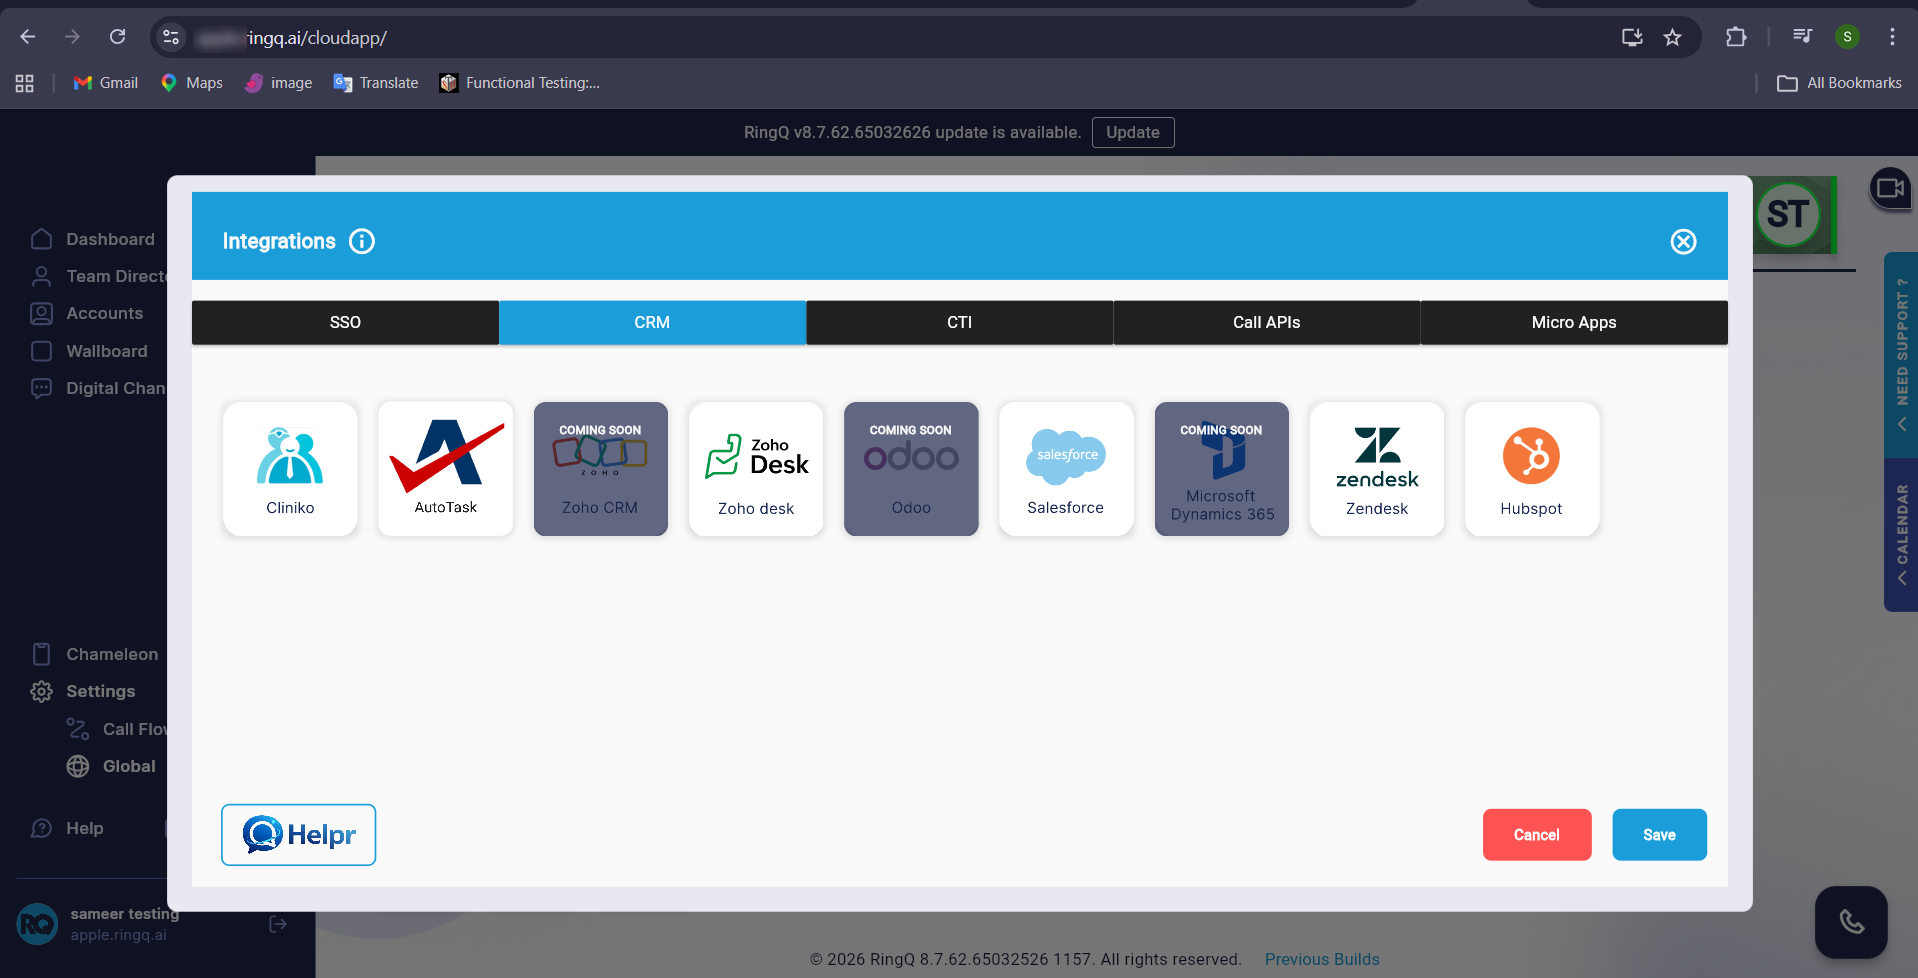
Click Zendesk to open the Zendesk settings page.
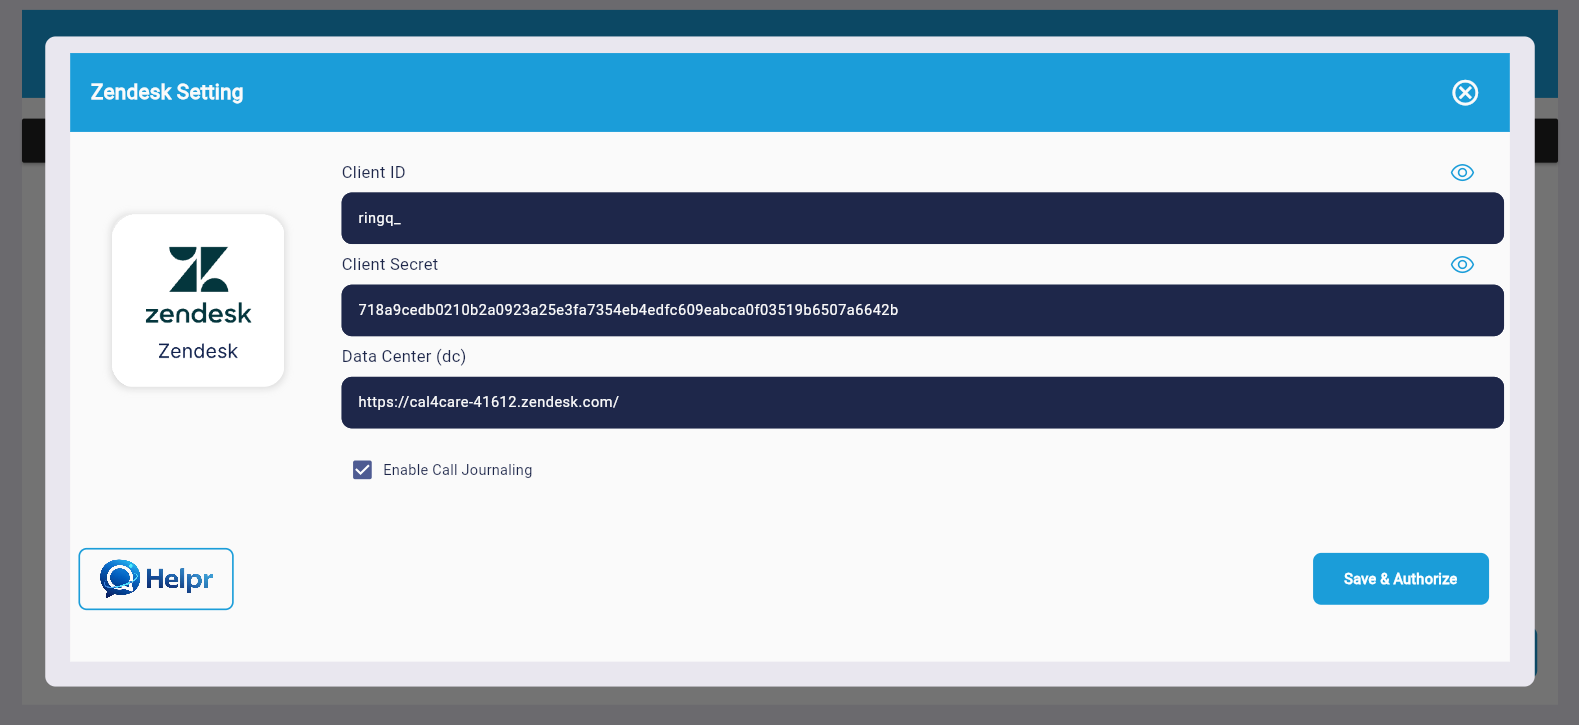
Paste the Client Secret Key, verify the OAuth Client ID, and paste the Zendesk homepage URL into the Data Center field.
Click the Save & Authorize button.
Return to the previous Zendesk tab and refresh the page. Click the call icon in the top-right corner.
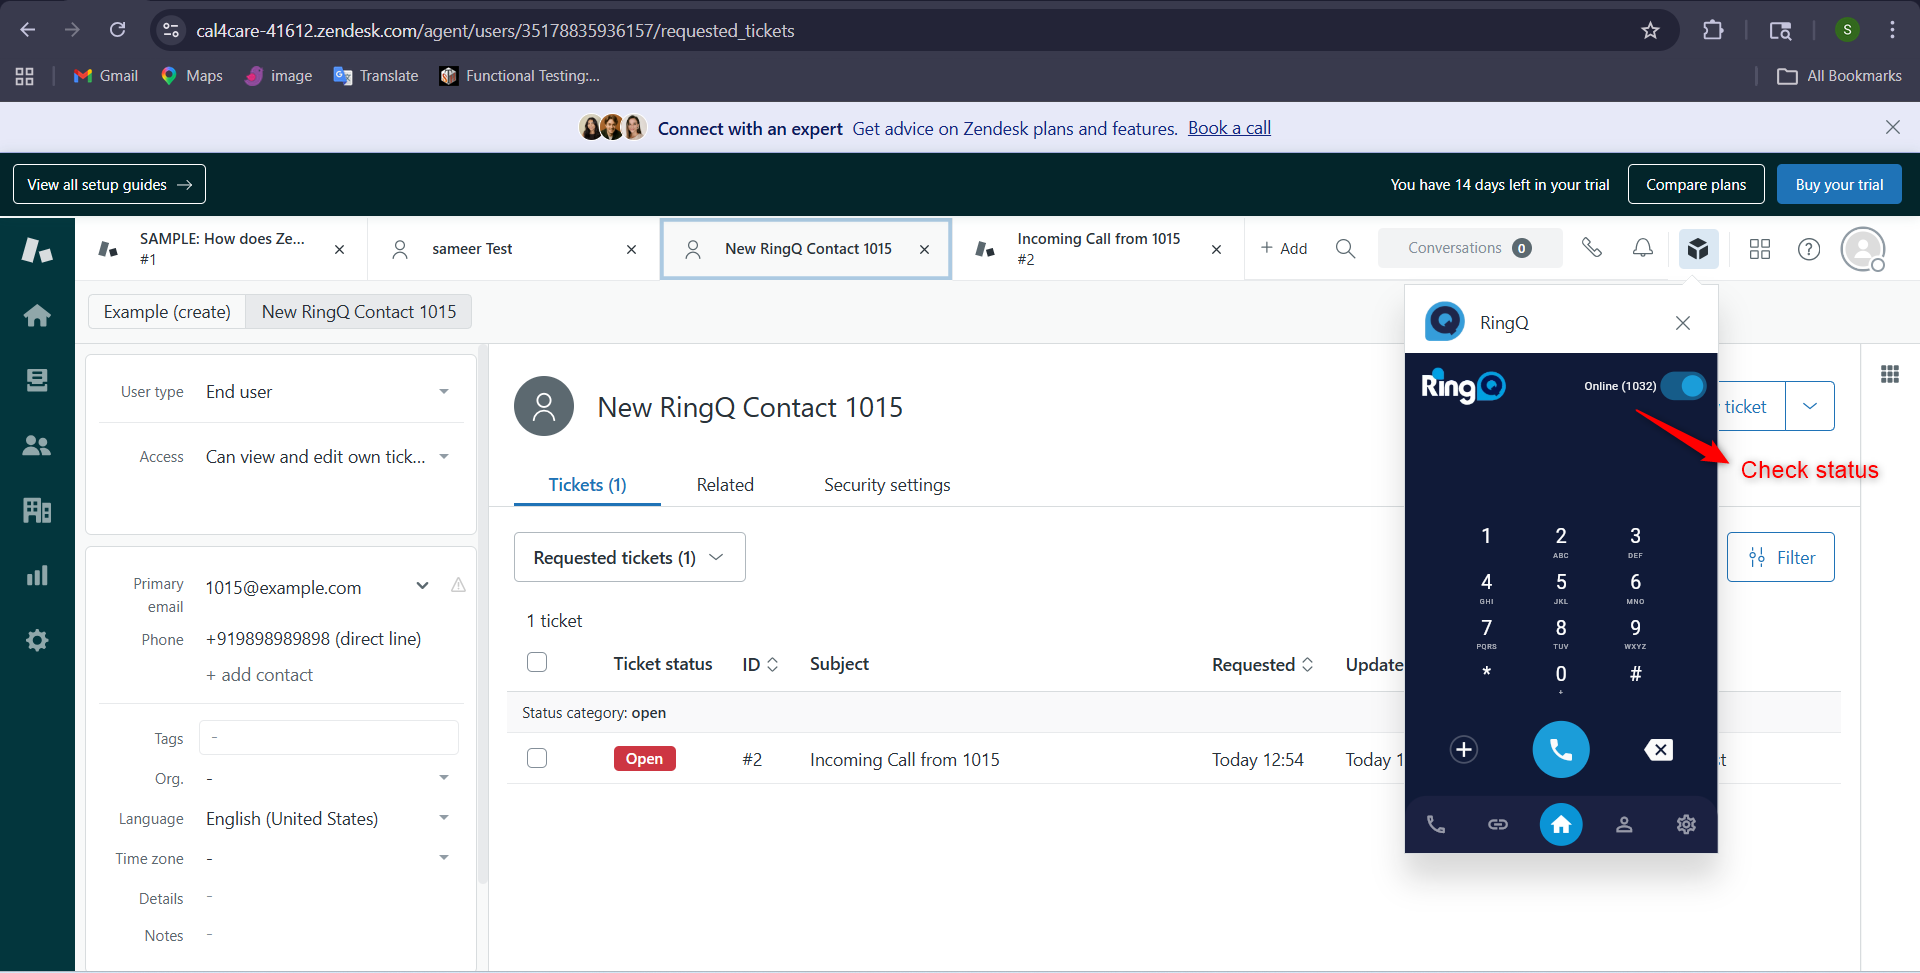
The RingQ call dialer will now appear, confirming that the integration was completed successfully.
Create a new call using the RingQ mobile app or web application.
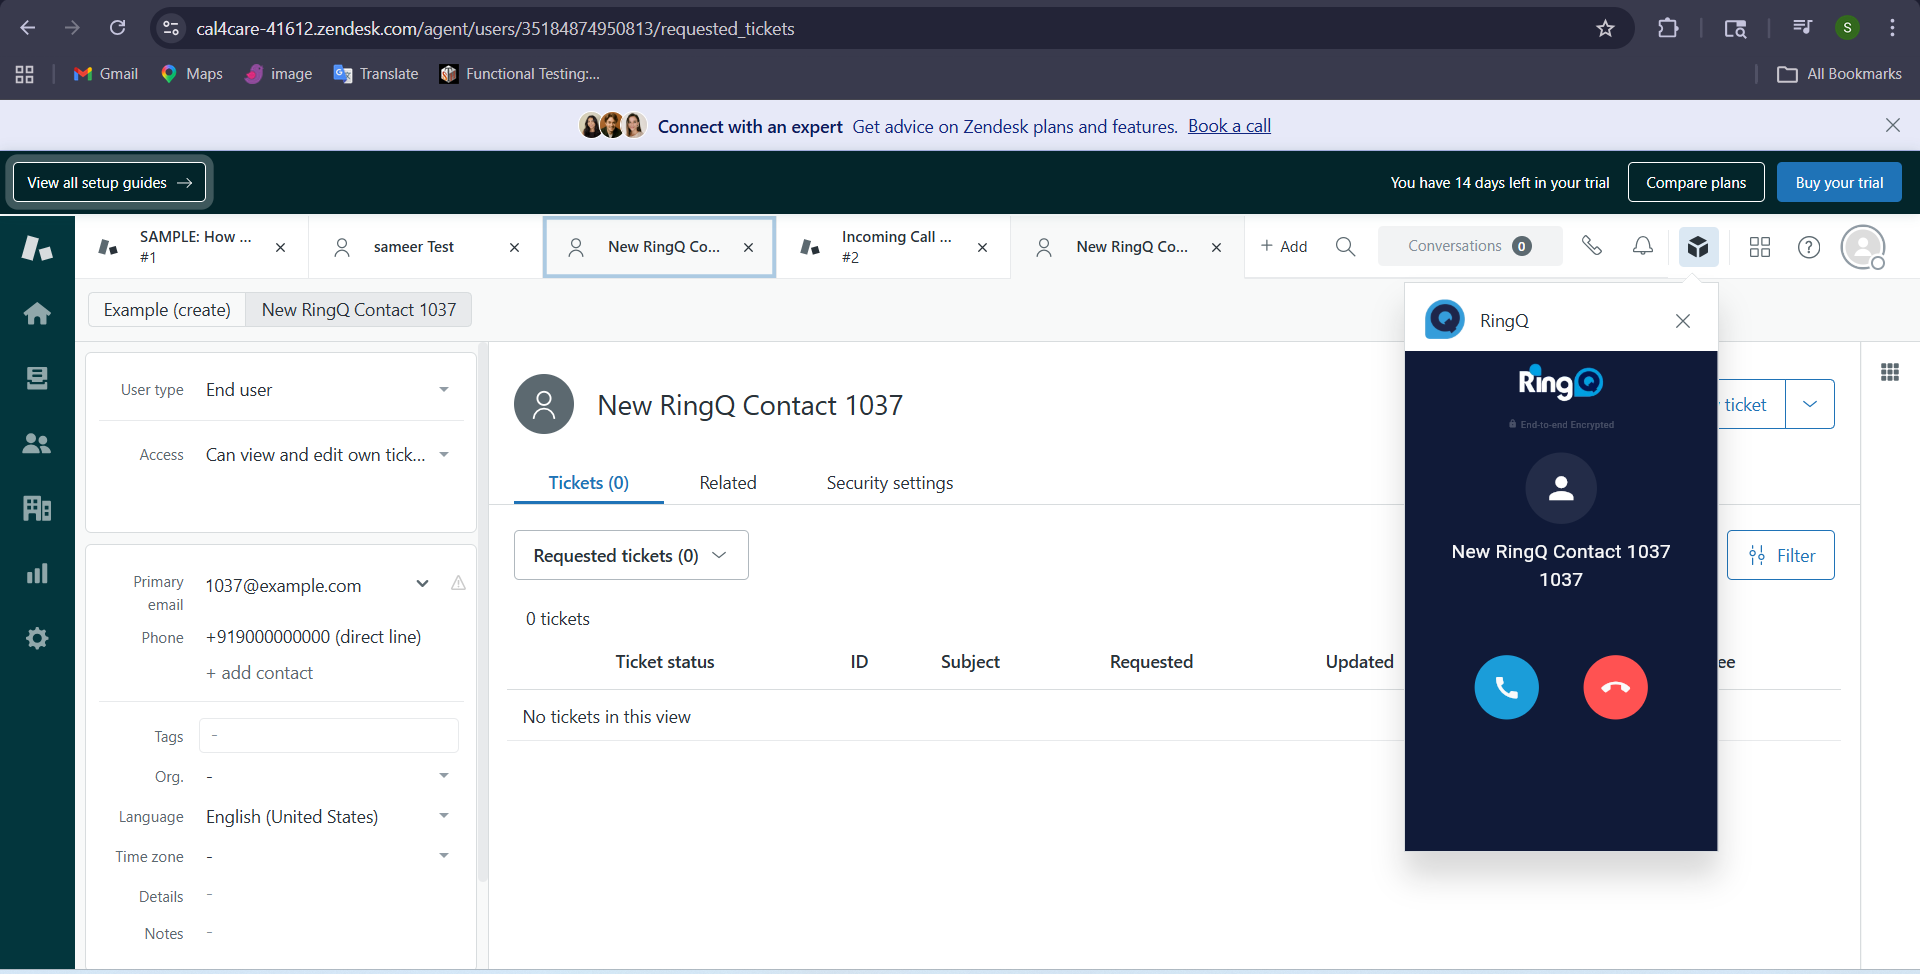
The call will be received in both RingQ and the Zendesk page.
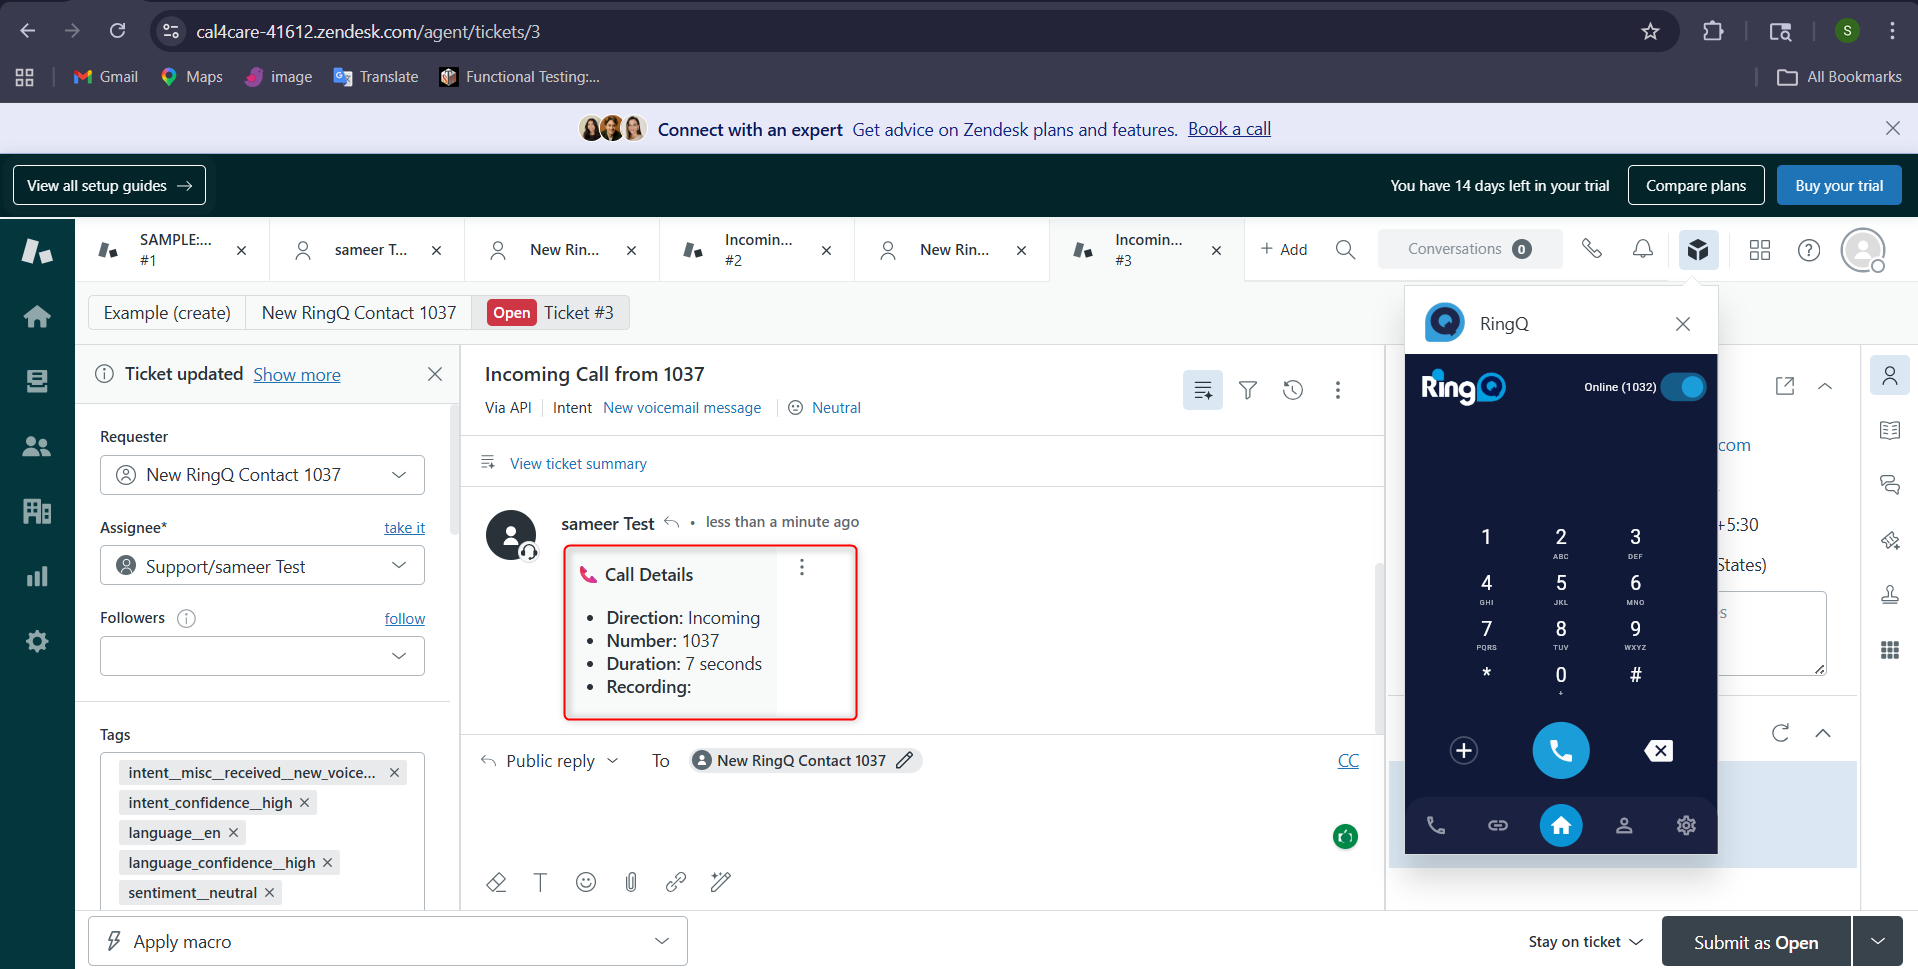
After ending the call, a new ticket will automatically be created in Zendesk, and the call details will be displayed.
