Integrating Cliniko with RingQ lets healthcare practices streamline patient communication, reduce missed calls, and improve the overall appointment experience. By connecting your practice-management system with your business phone platform, your team can access patient information faster, automate call workflows, and deliver more responsive service on every patient interaction.
This guide walks you through integrating Cliniko with RingQ — covering the setup requirements, configuration steps, and the key features you can enable once the integration is complete. Whether you want to improve inbound call handling, enable click-to-call, or synchronize patient communication workflows, this integration helps your clinic run more efficiently while keeping the patient experience professional and seamless.
Go to your Cliniko login URL in your browser and log in to your Cliniko account.
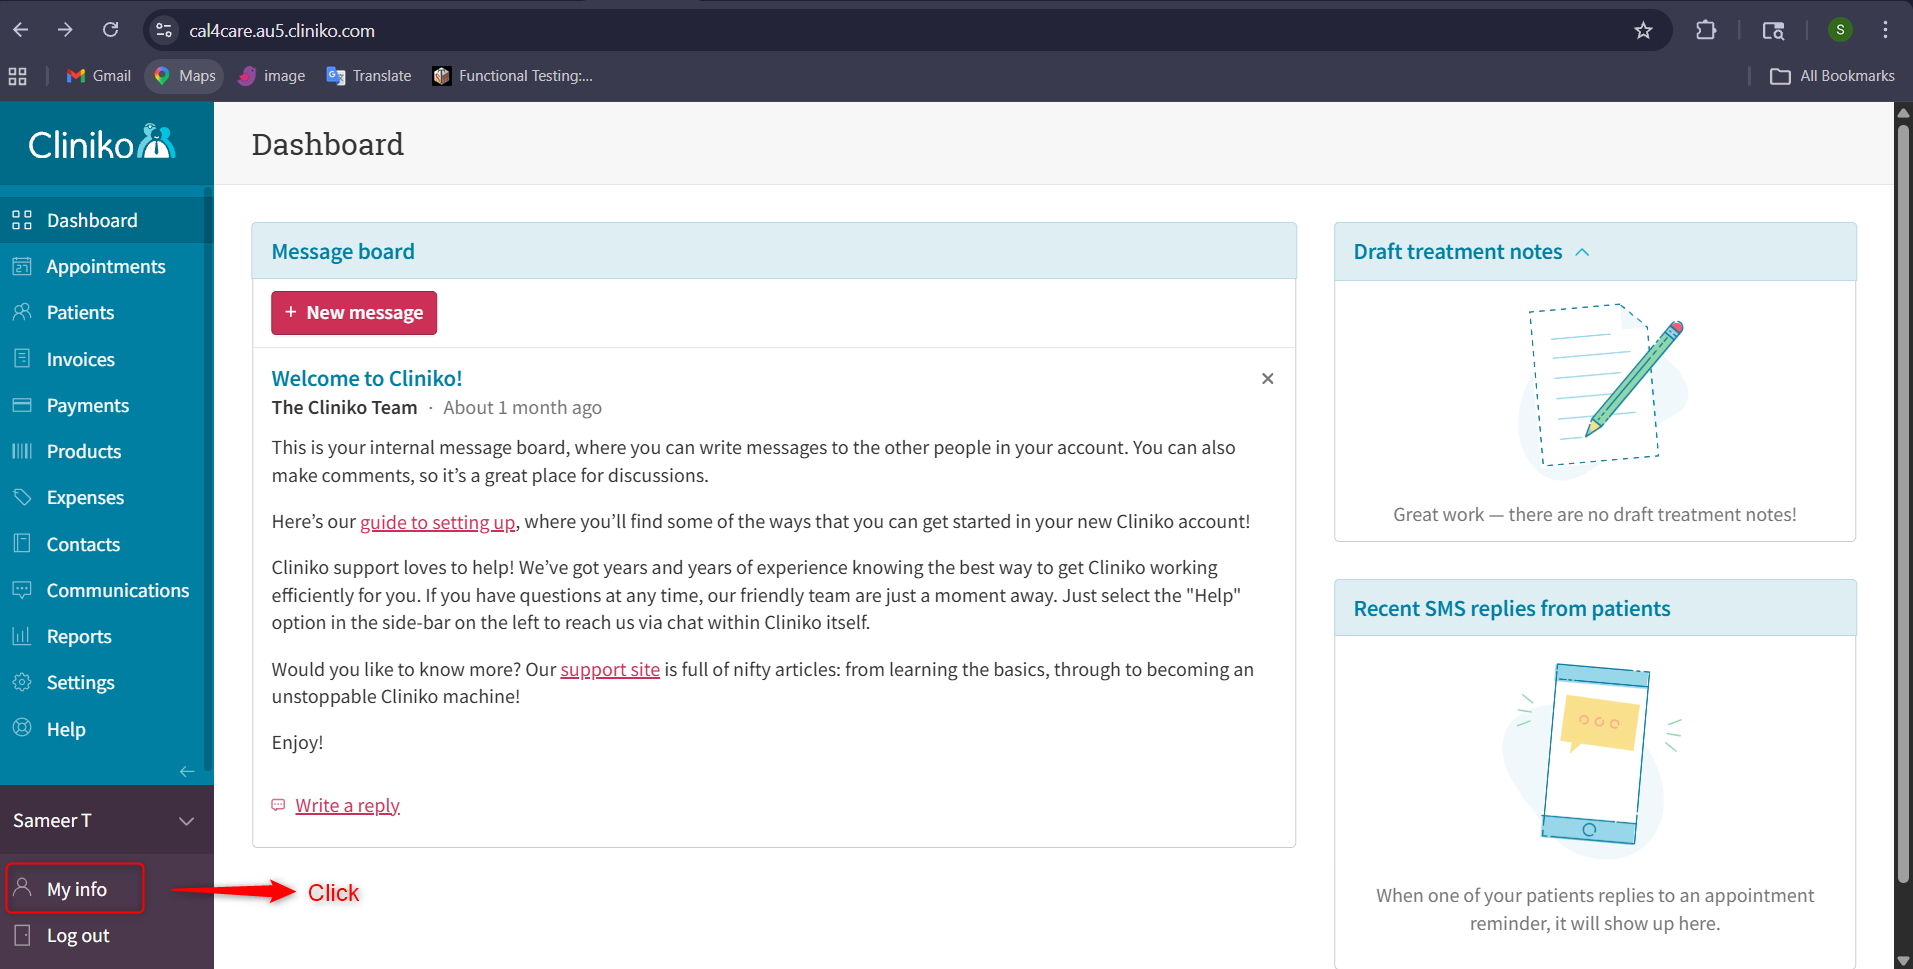
From the dashboard, click My Info under the Modules and Submodules section.
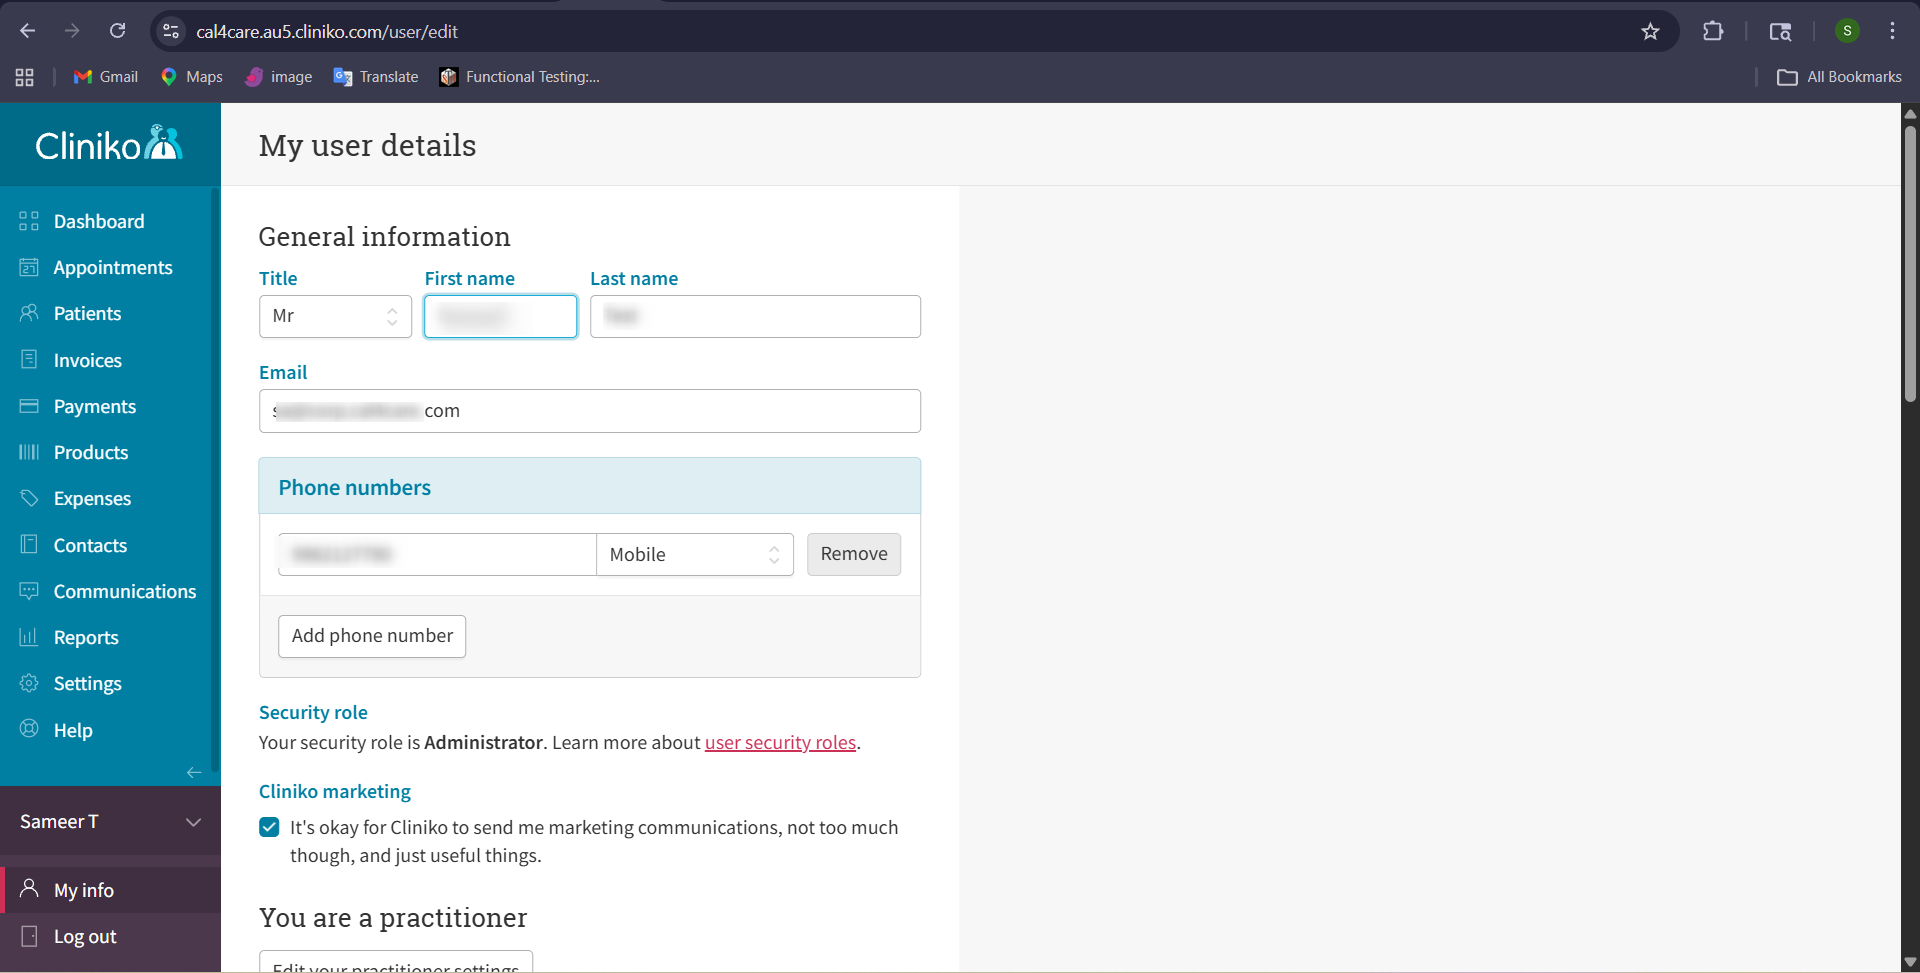
Open the My Info section and update your user details, e.g. first and last name.
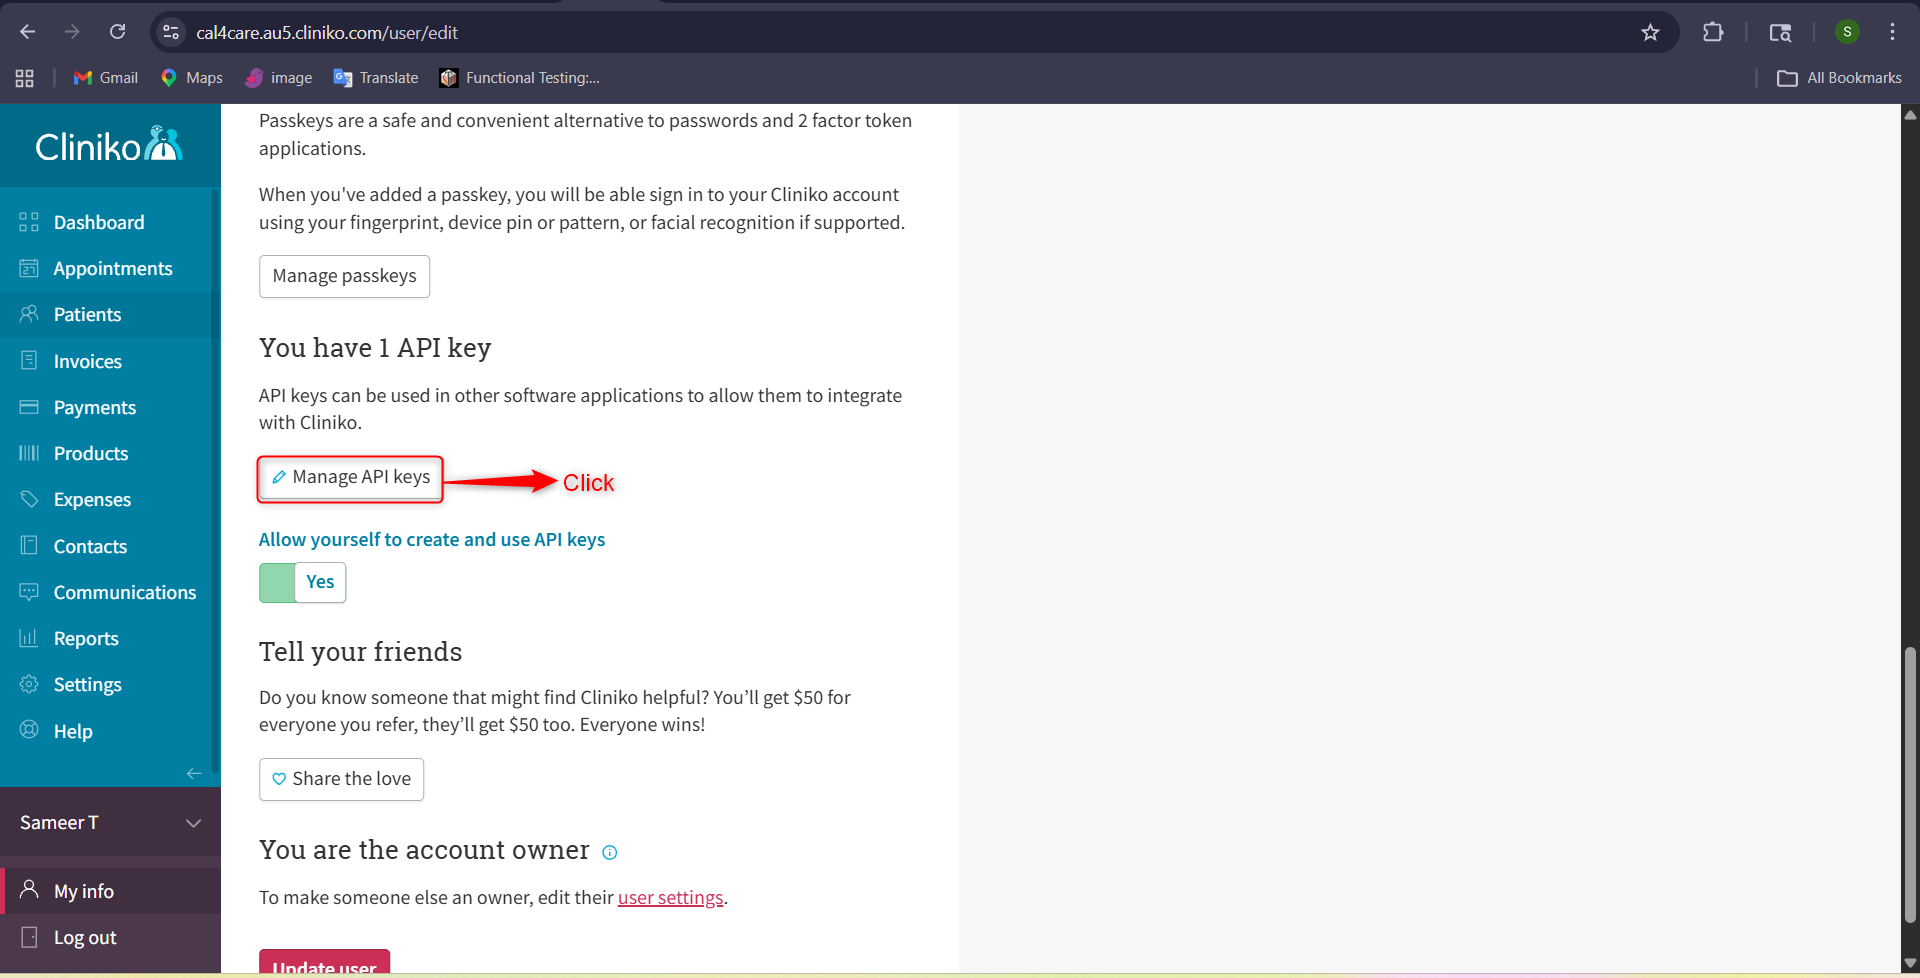
Scroll down and click Manage API Keys. A new page opens with the relevant fields.
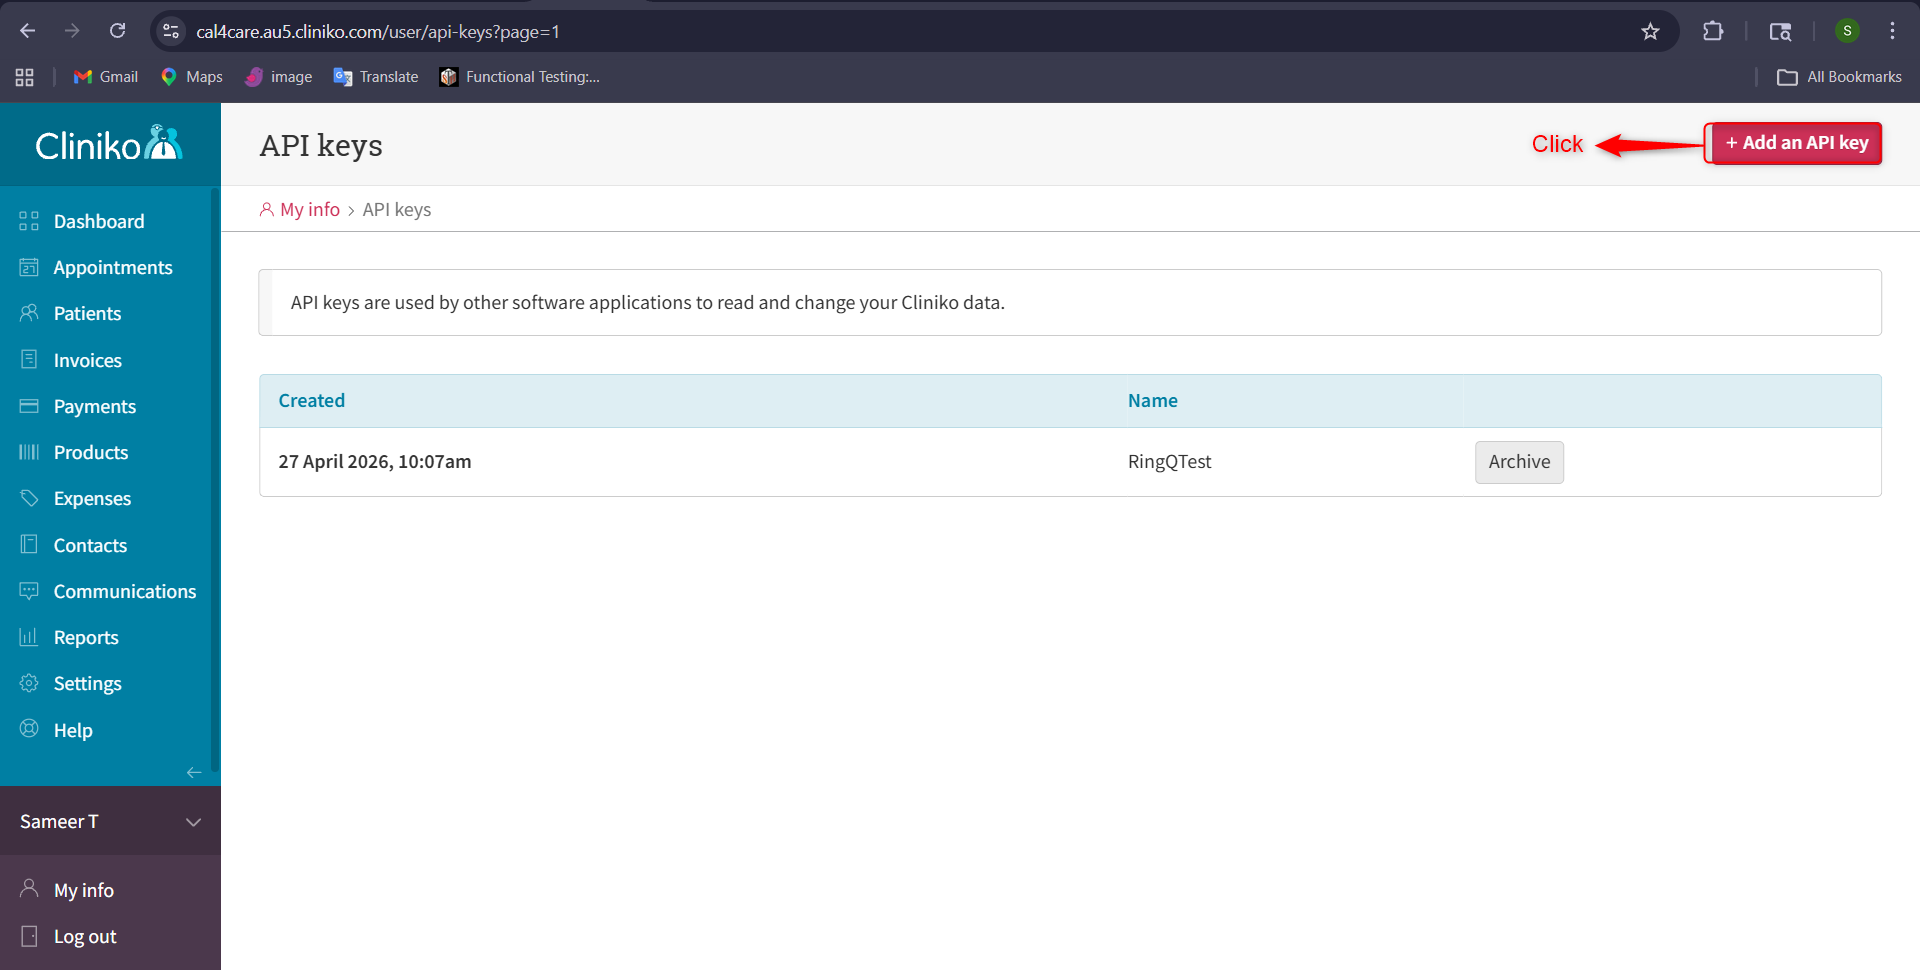
In the top-right corner, click Add an API Key.
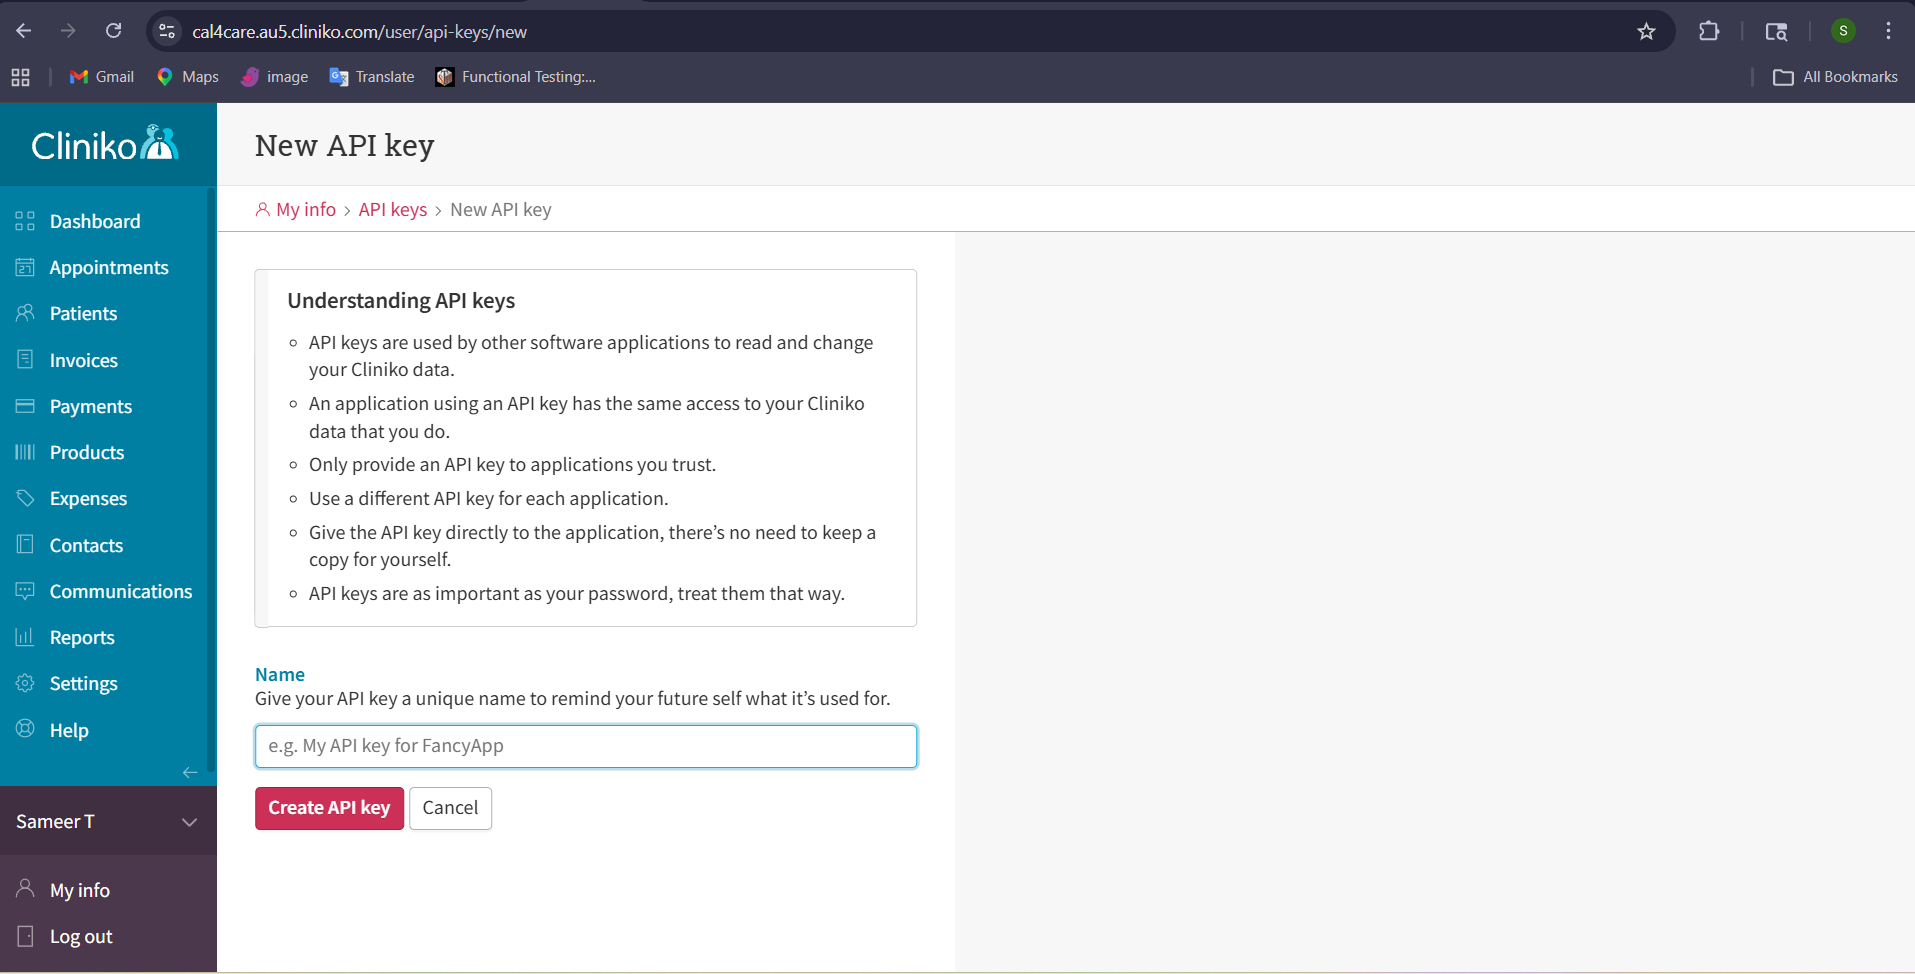
On the New API Key page, enter a unique name in the Name field, then click Create API Key.
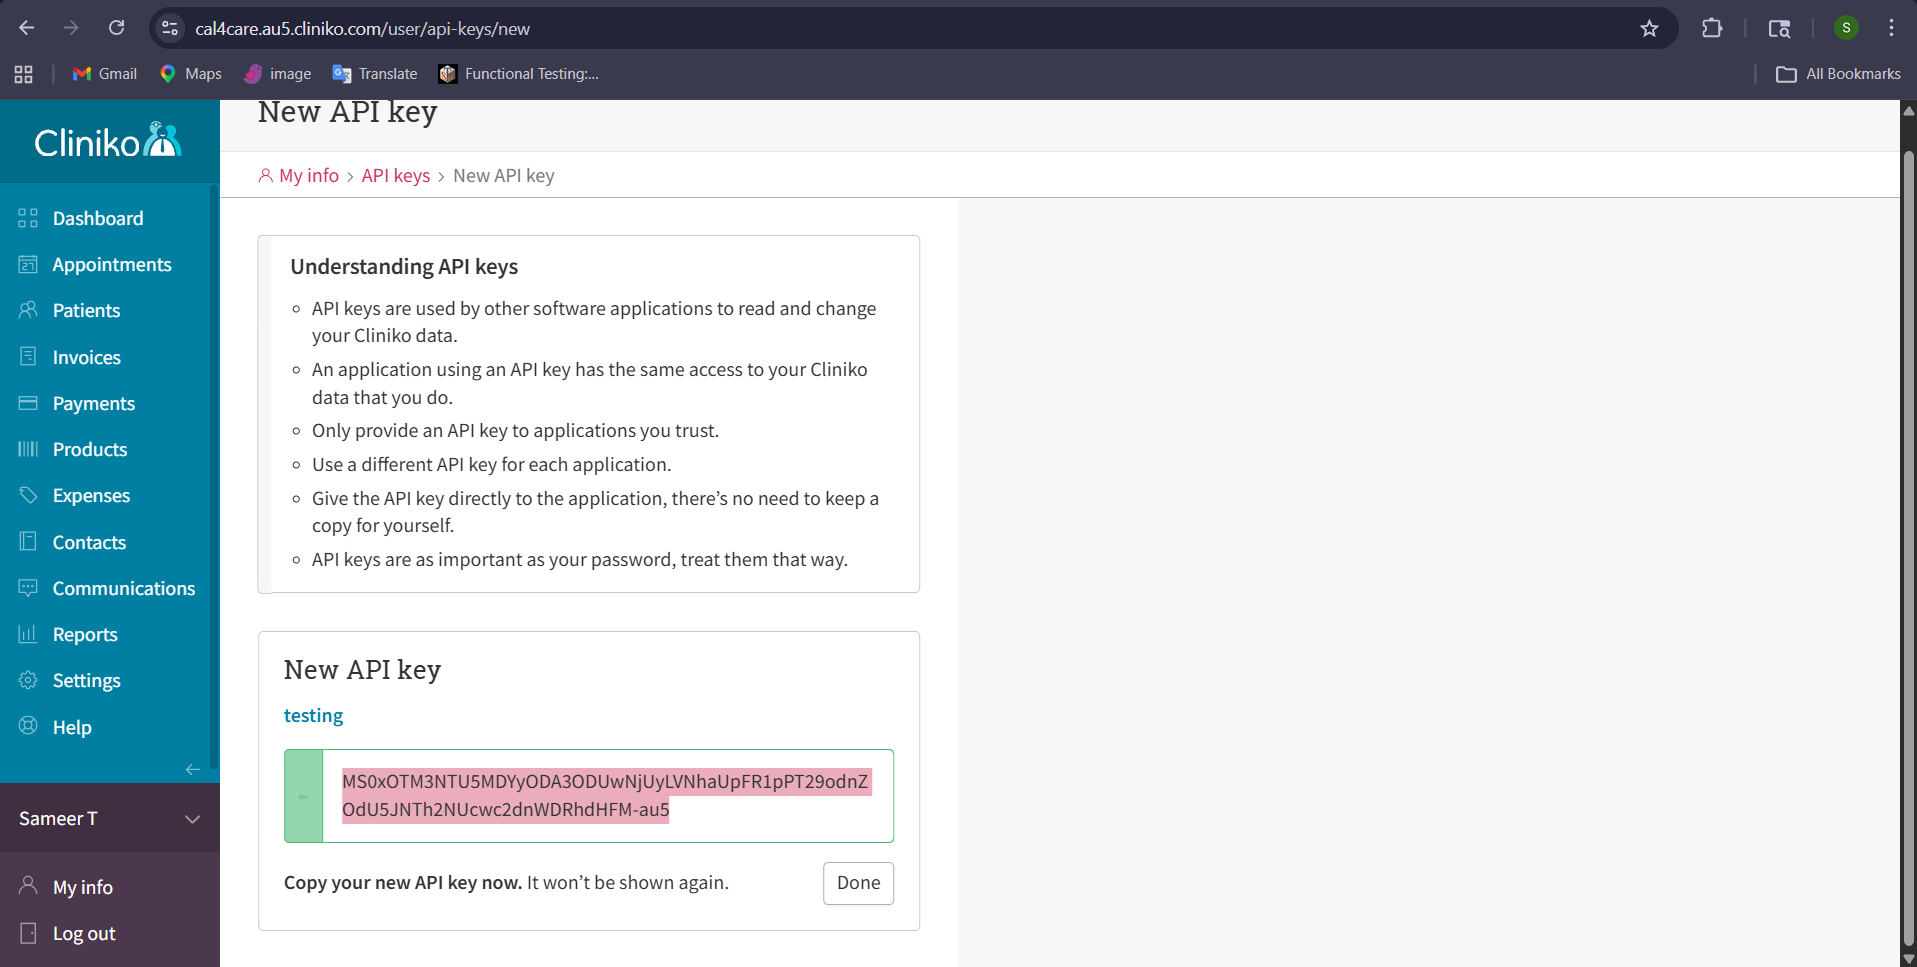
Copy the generated key, then click Done.
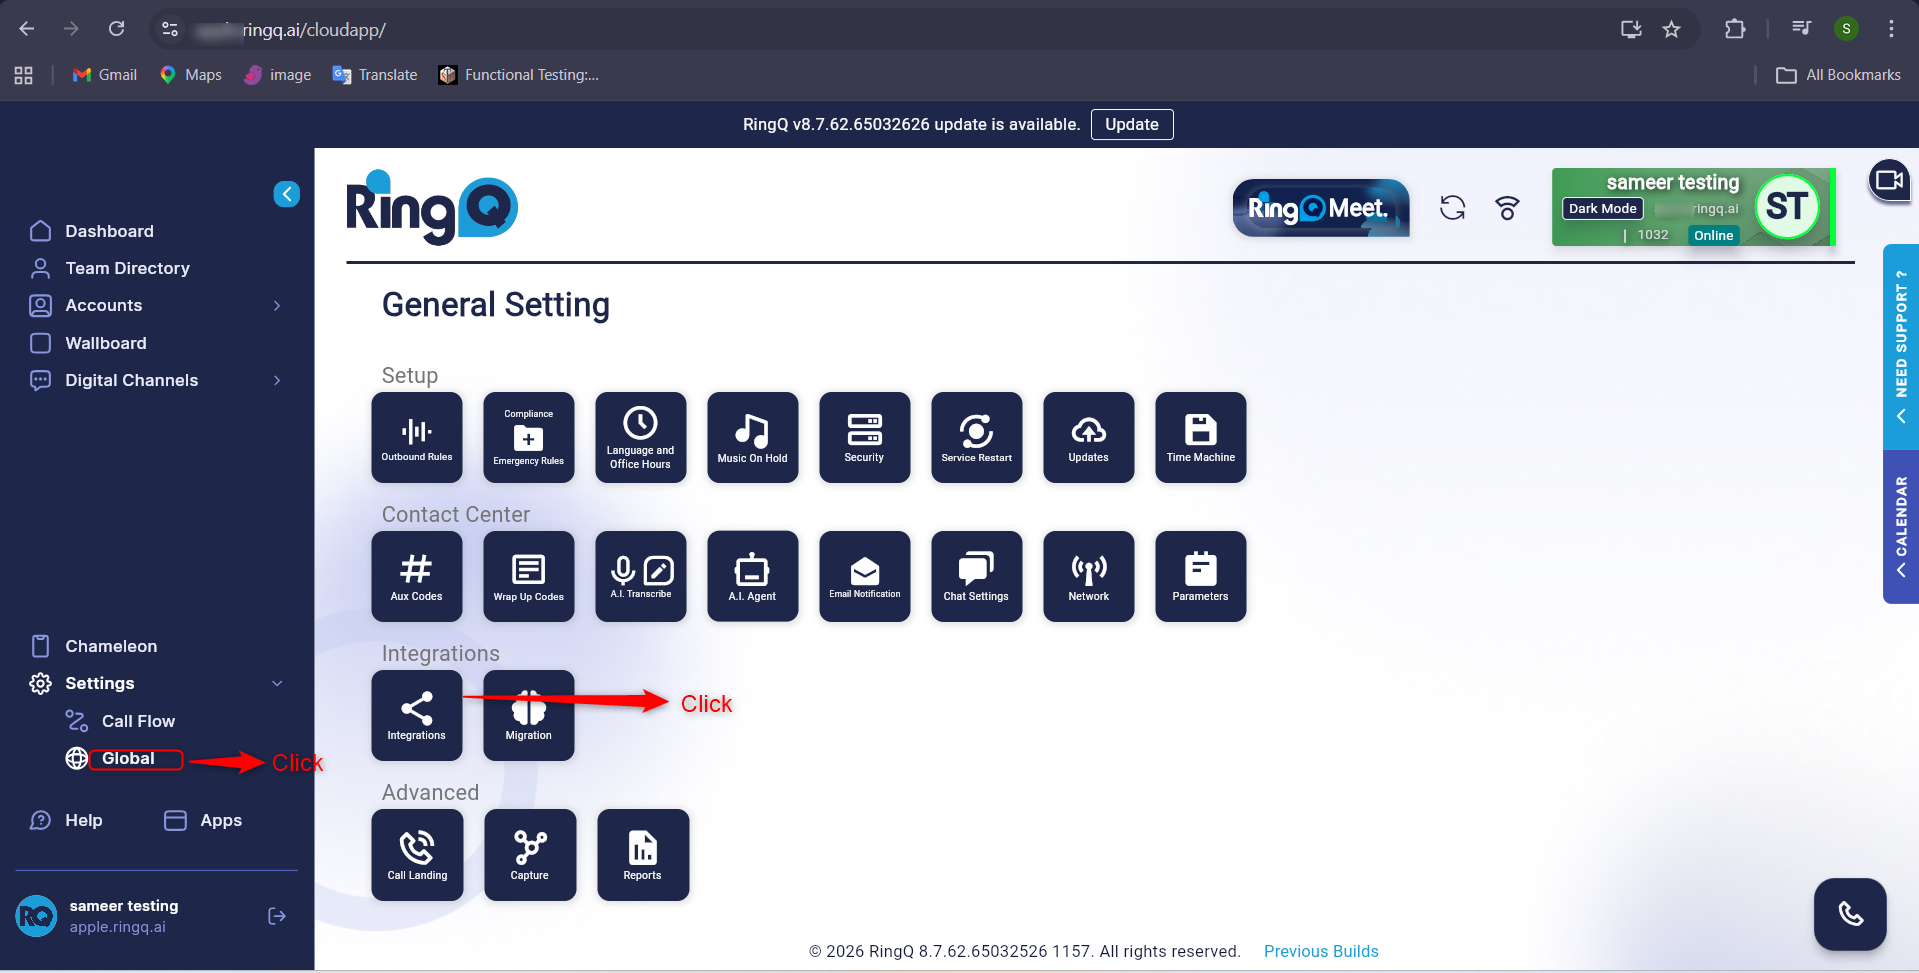
Log in to your RingQ Admin Dashboard and go to Settings → Global Integrations → CRM → Cliniko.
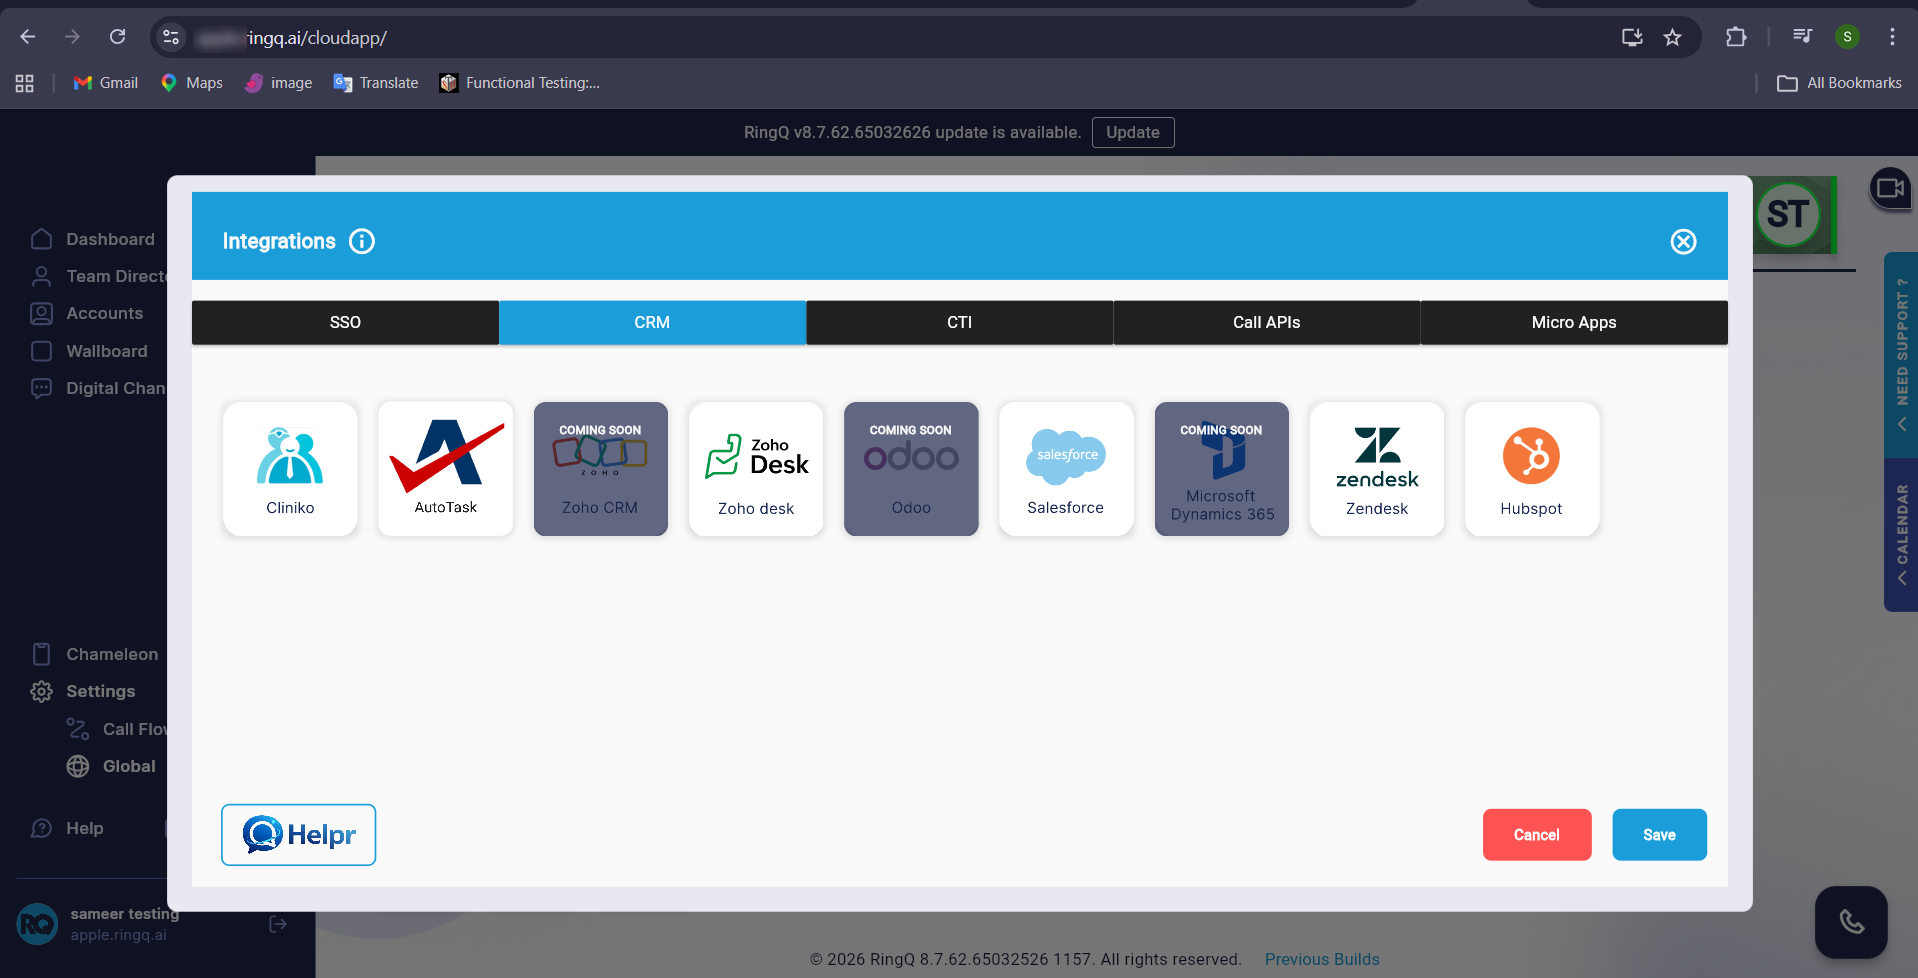
Select Cliniko.
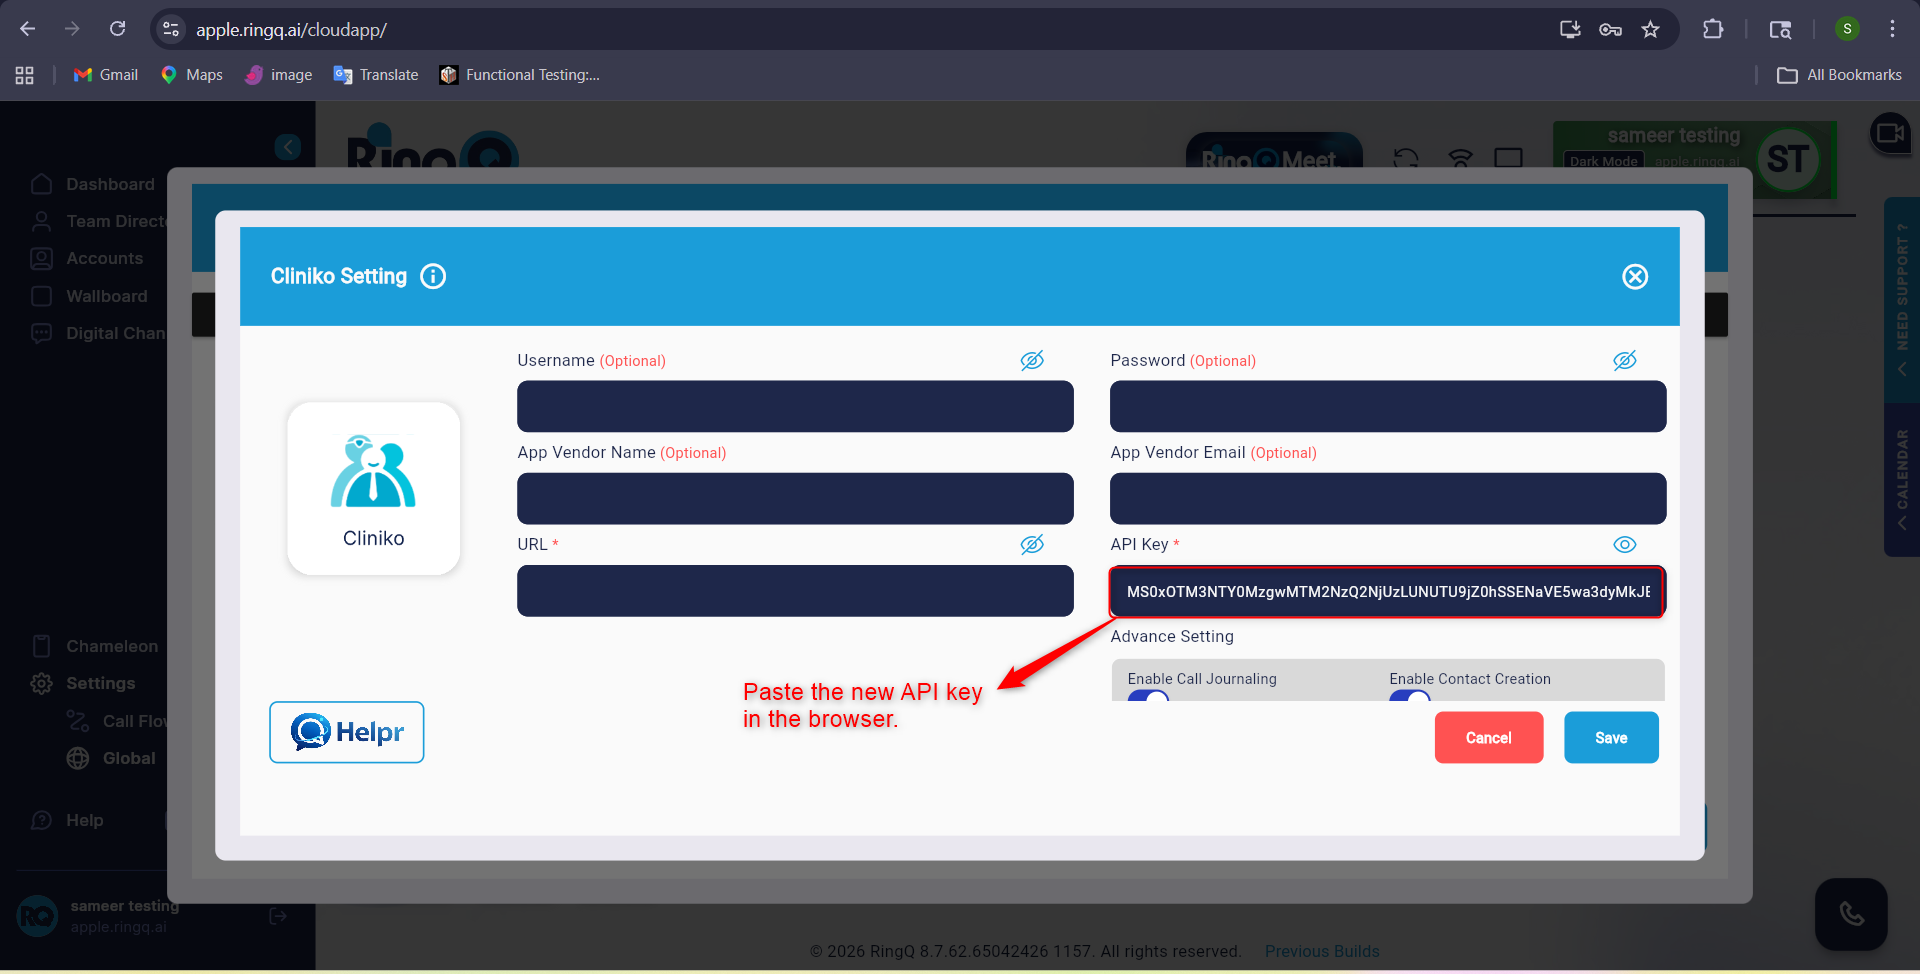
Paste the API key you copied from Cliniko into the field shown above.
Fill in the remaining fields (username, password, etc.).
Enable Call Journaling and Contact Creation.
Click Save. A success message appears: "Successfully updated CRM entry."
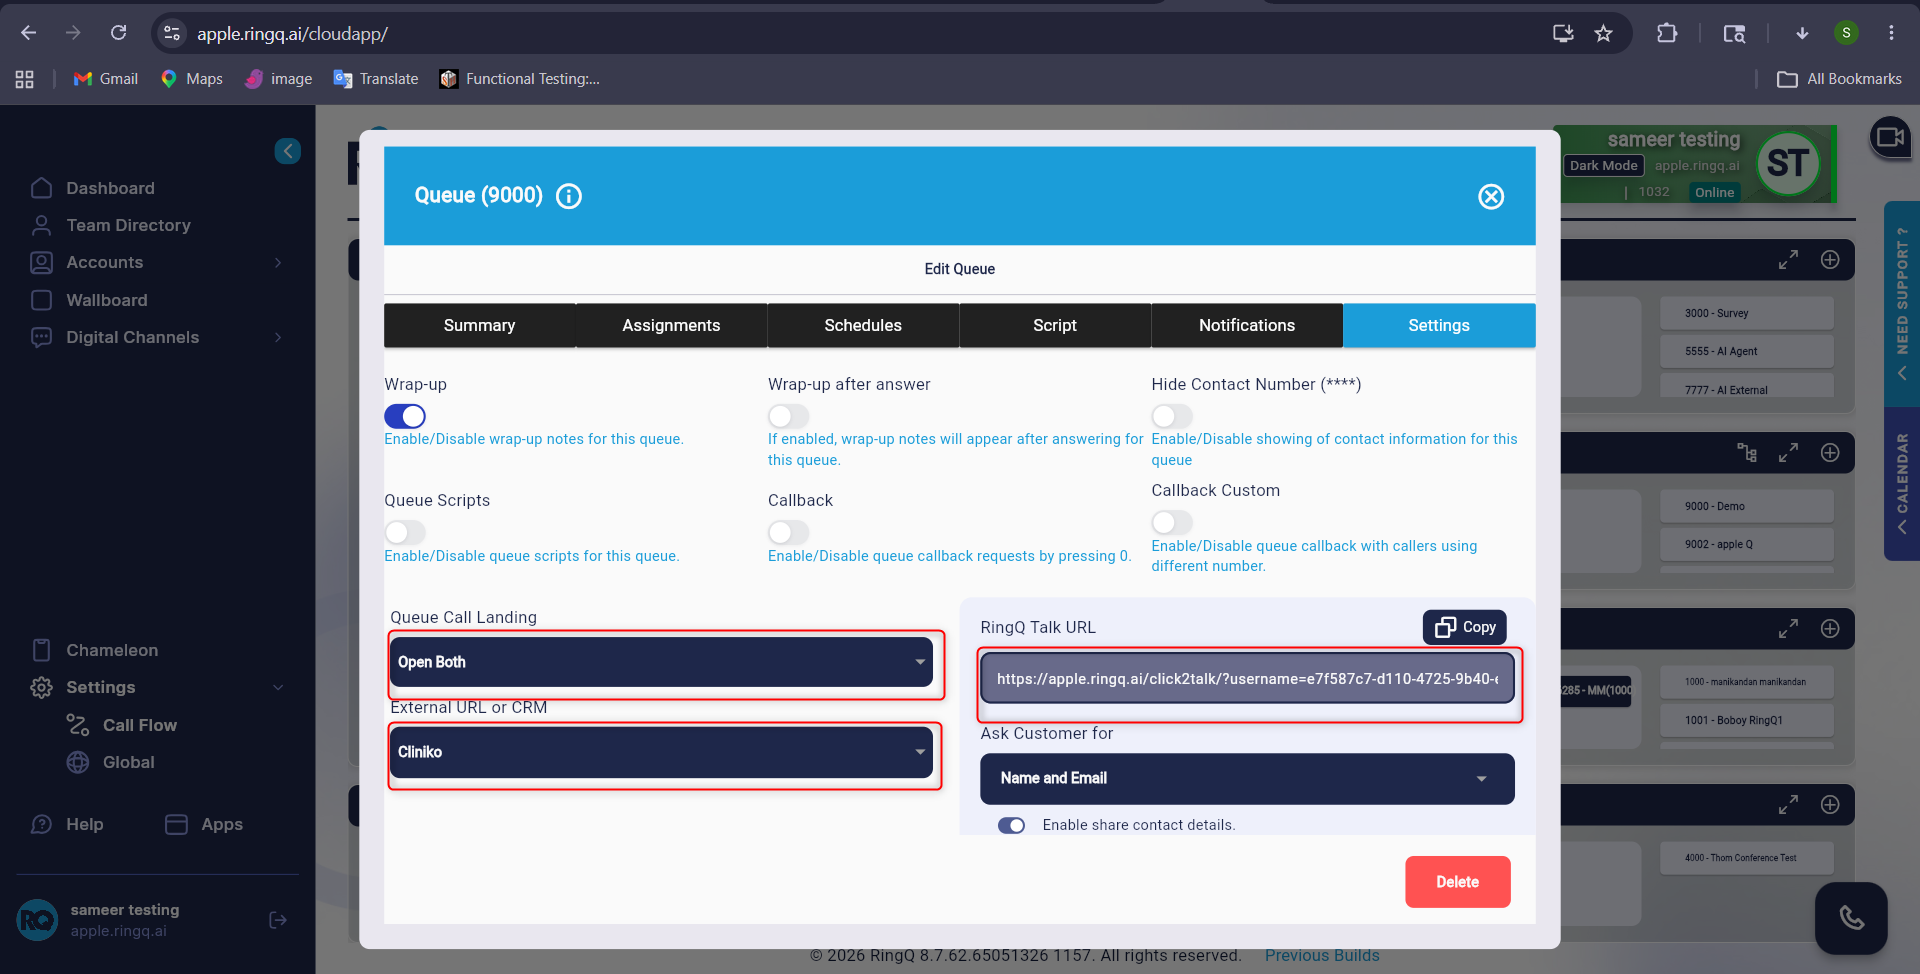
Create a new call to verify the queue permissions for the Cliniko CRM.
On the Call Flow page, click the Queue field and select the Settings tab.
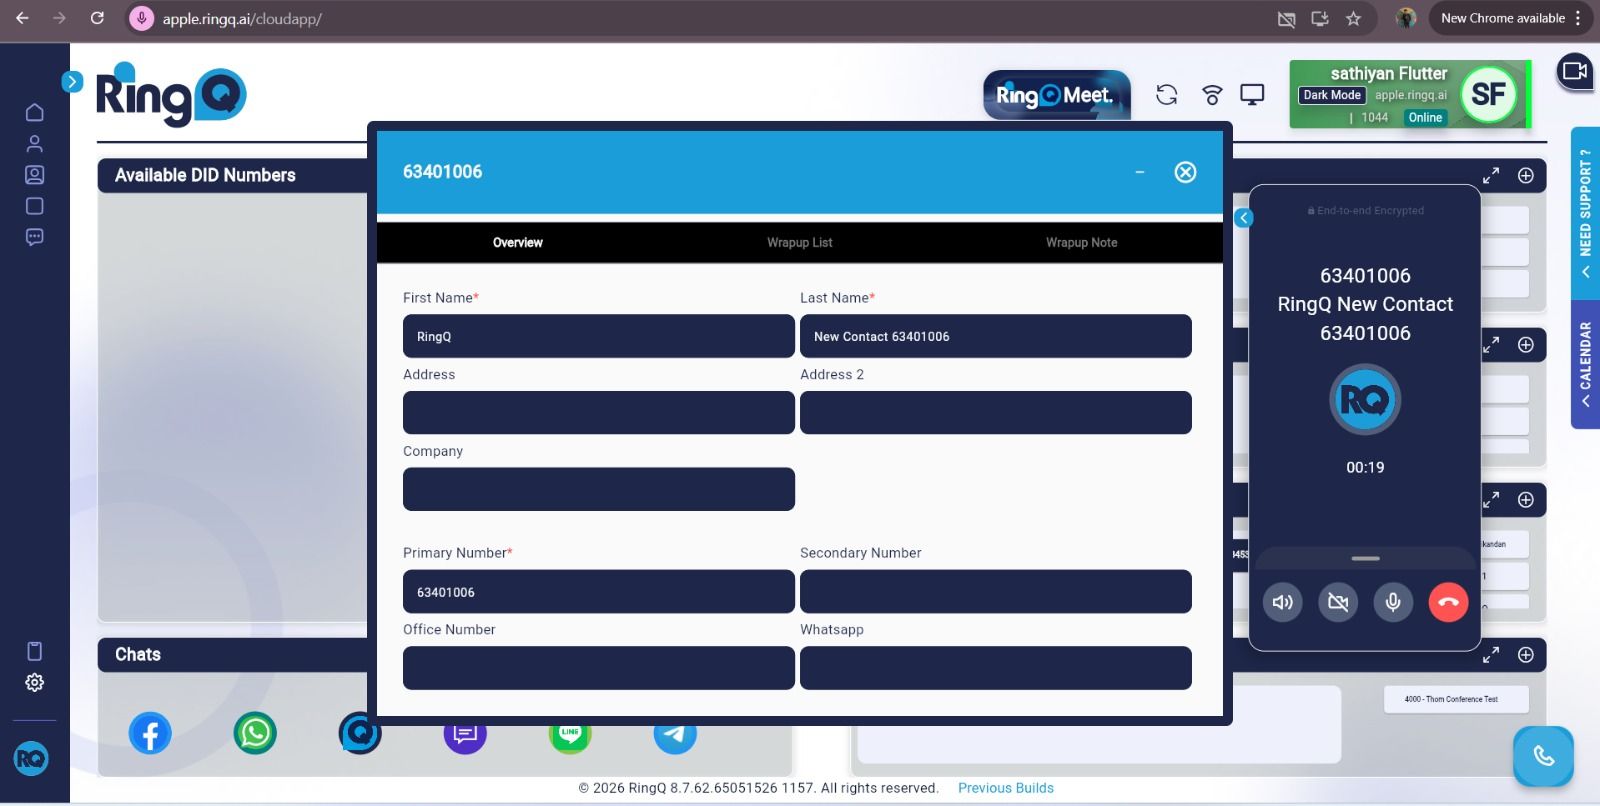
When a call is made through RingQ and answered, the call-details pop-up appears in Cliniko and the patient details are added, where they can be verified.
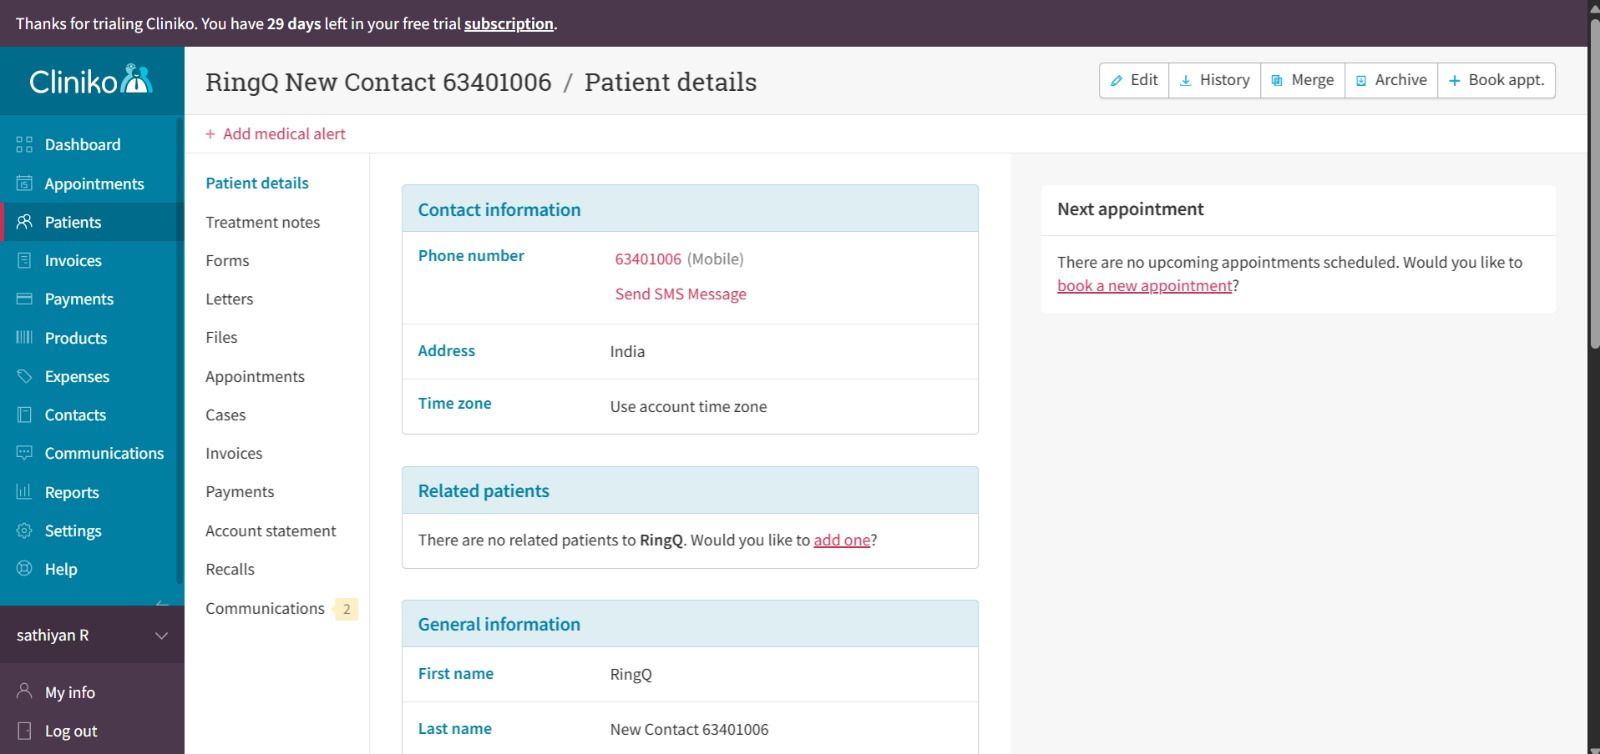
When the call ends, the Cliniko call details are saved.
