Configuring Queues
This guide covers how to configure and manage call queues in RingQ. Queues help you organize incoming calls by placing them in line until an available agent can answer, ensuring efficient call handling and improved customer experience. Whether you’re setting up basic queues or customizing advanced queue behavior, this guide will help you streamline your call flow with ease.
Log in to your RingQ web app. From the left-side menu, go to Settings > Call Flow.
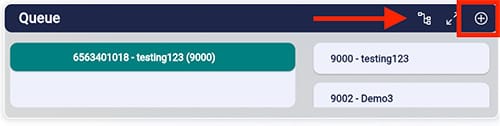
Click the + symbol in the Queue container box.
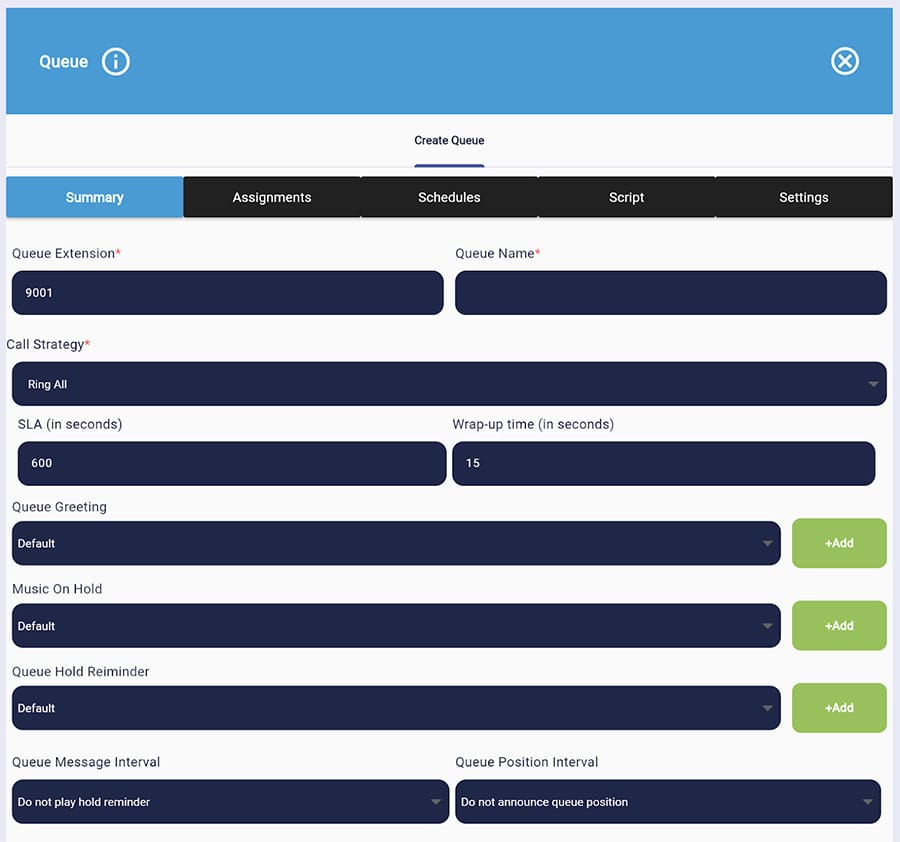
Fill in the fields to create a new queue:
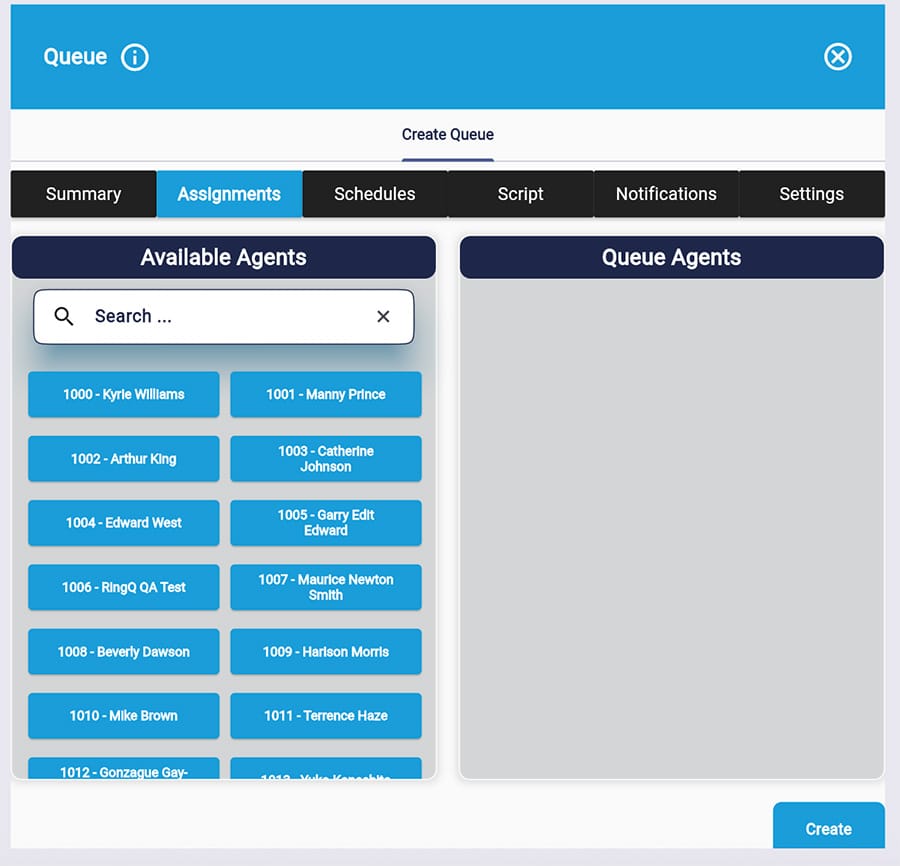
In the Assignments tab, drag and drop the agents who should be members of the queue.
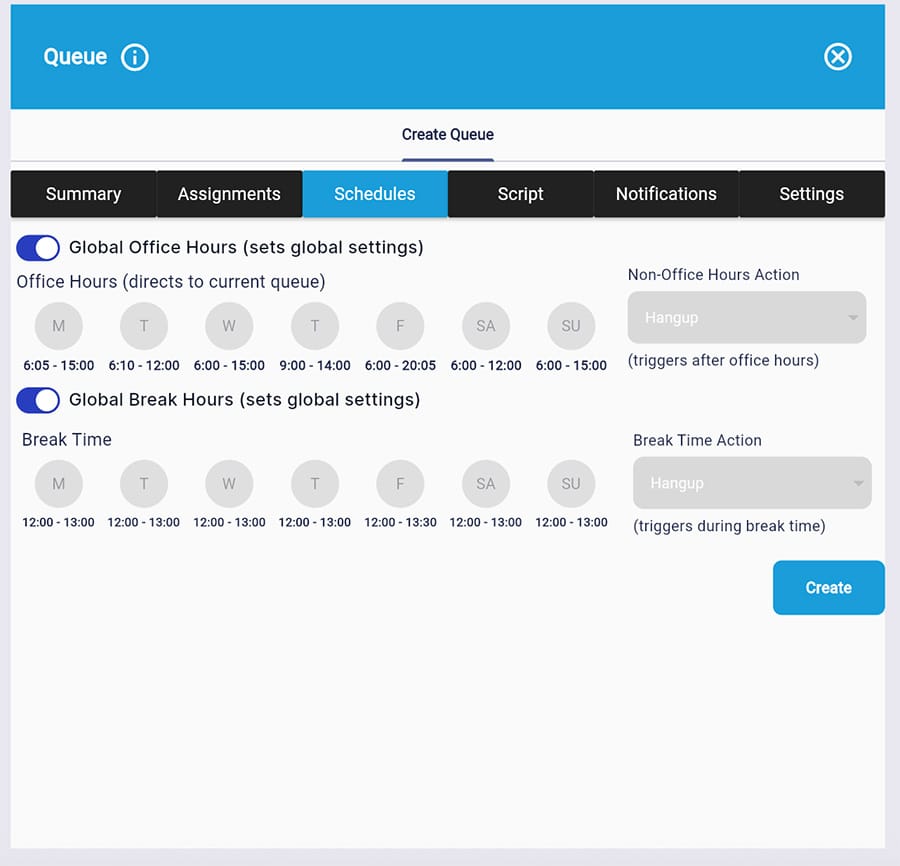
In the Schedules tab, select whether the queue should follow the global office and break hours. If not, manually add the hours the queue is available. Add the non-office and break-time actions.
In the Script tab, enter the script the queue agents should follow when handling a call.
In the Notifications tab, you can select when you want to be notified by email for certain events.
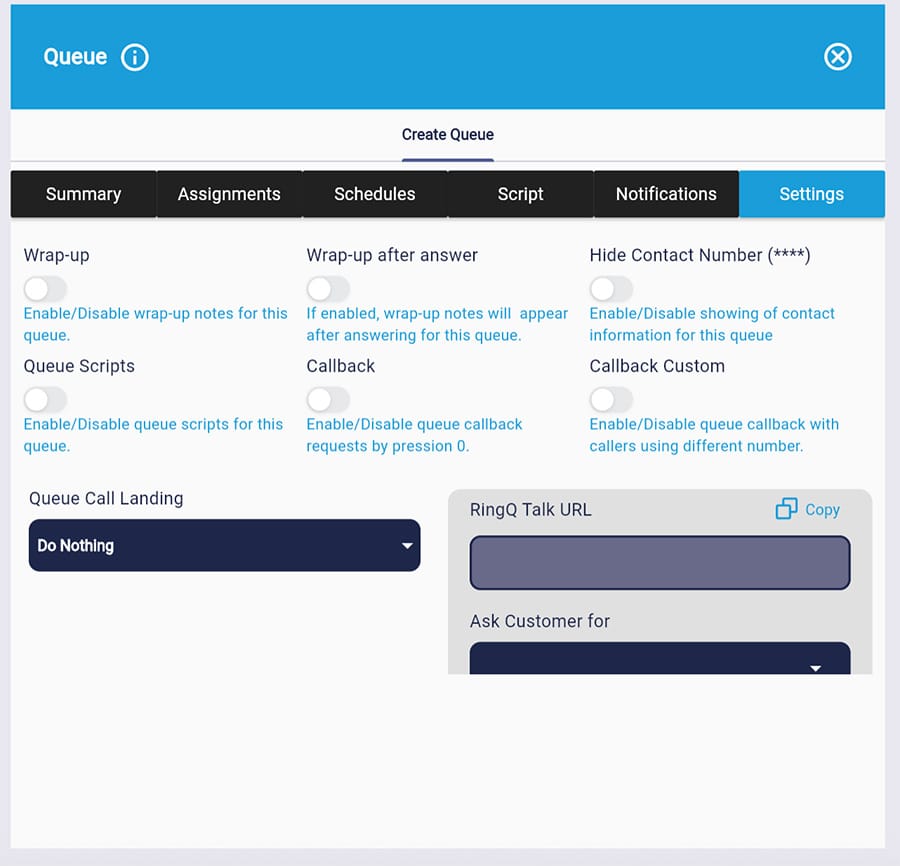
In the Settings tab, you can enable and disable certain queue actions. You can also locate the queue's Talk URL to add to email signatures, social media, and your website. The Talk URL enables customers to call you for free by clicking the URL.
Click Create. To edit a queue, simply click the queue from the main containers page. From the left-side menu, go to Settings > Call Flow and click the queue you want to edit in the Queue container.
