Configuring Outbound Rules
This guide will walk you through the process of configuring outbound rules in RingQ. Outbound rules determine how and when calls are routed through your system, helping you manage call costs, prioritize routes, and ensure reliable connectivity. Whether you’re setting up simple dial patterns or advanced routing logic, this guide will help you get started quickly and efficiently.
1. Login to your RingQ web app
2. Go to the left-hand menu, “Settings” > “Global” > click on the “Outbound Rules” button.
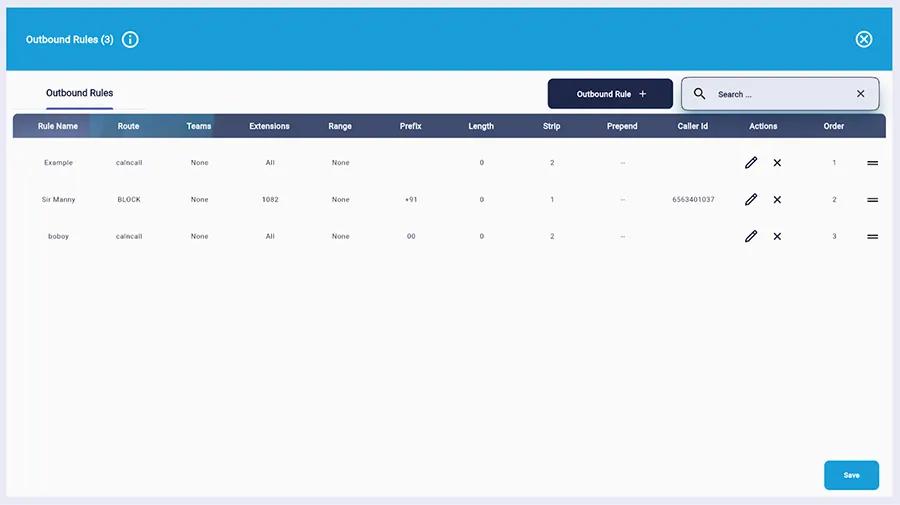
3. Click on the “Outbound Rule +” button and fill in the required fields.

4. In the “Outbound Calls Setting” section you must create the outbound rule, i.e. what should the system do when the criteria you set above are met.
5. Fill in the details and click “Create”.
To edit your rule, go back to the main table in “Settings” > “Global” > click on the “Outbound Rules” button and select an action next to the rule you want to edit.
If you encounter issues with outbound rules, consider the following troubleshooting steps:
