Configuring an IVR
An IVR (Interactive Voice Response) system helps route calls efficiently by allowing callers to interact with a menu using their keypad. This guide will walk you through how to configure your IVR in RingQ to create a smoother, more professional caller experience.
Log in to your RingQ web app. 2. On the left-hand menu, navigate to Settings > Call Flow.
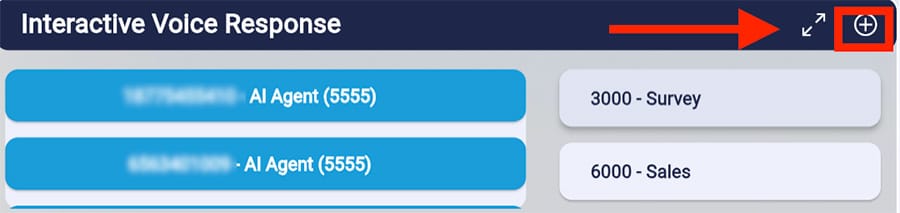
Under Interactive Voice Response, click the + to create a new IVR.
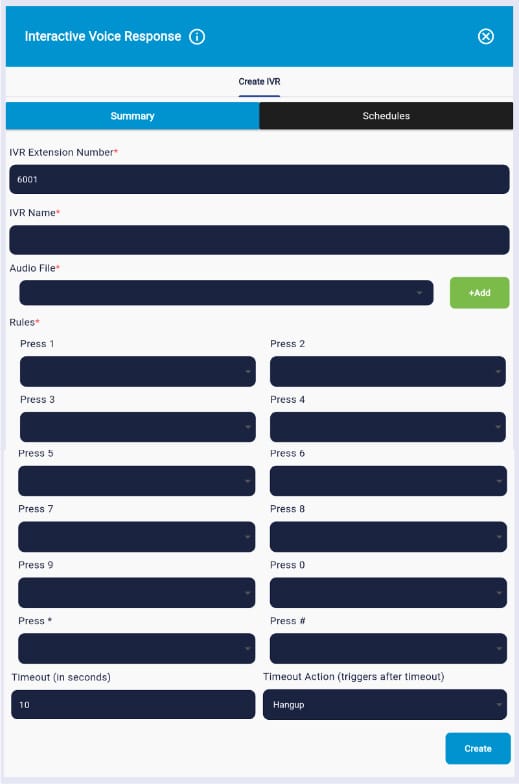
Fill in the fields to create your IVR:

Click the expansion button as shown above.
Click the IVR you want to edit.
A new window will appear for you to make your edits.
Click Save.
