Configuring Call Control Features
RingQ’s call control features include call forwarding and relay as well as parallel ringing and call screening. This guide explains how to set up these features to enable more efficient and effective call control and handling.
Log in to your RingQ web app. From the side menu, navigate to Accounts, then select Extensions.
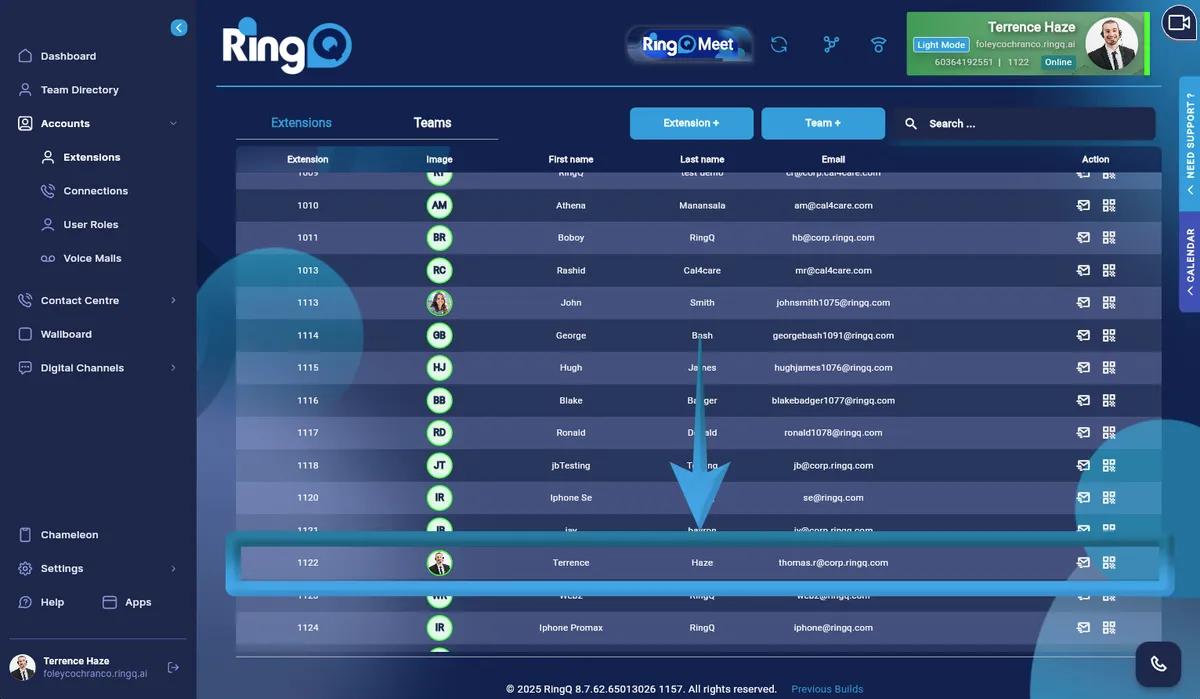
Choose the extension you want to configure call forwarding settings for.
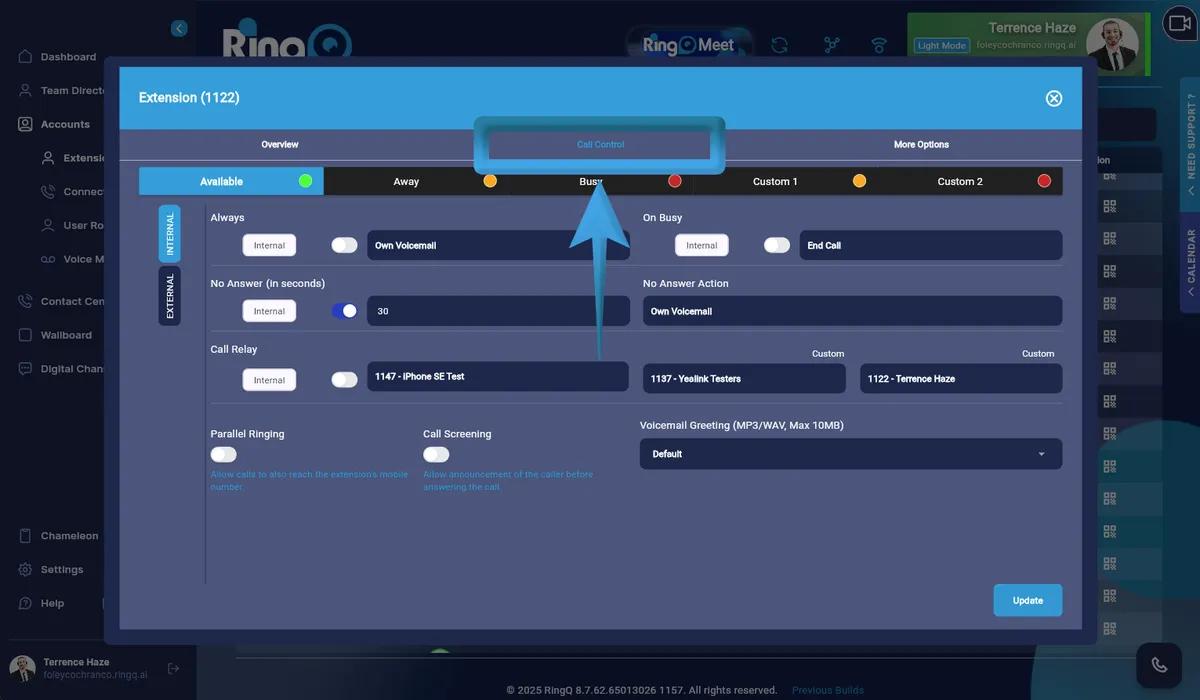
Click Call Control.
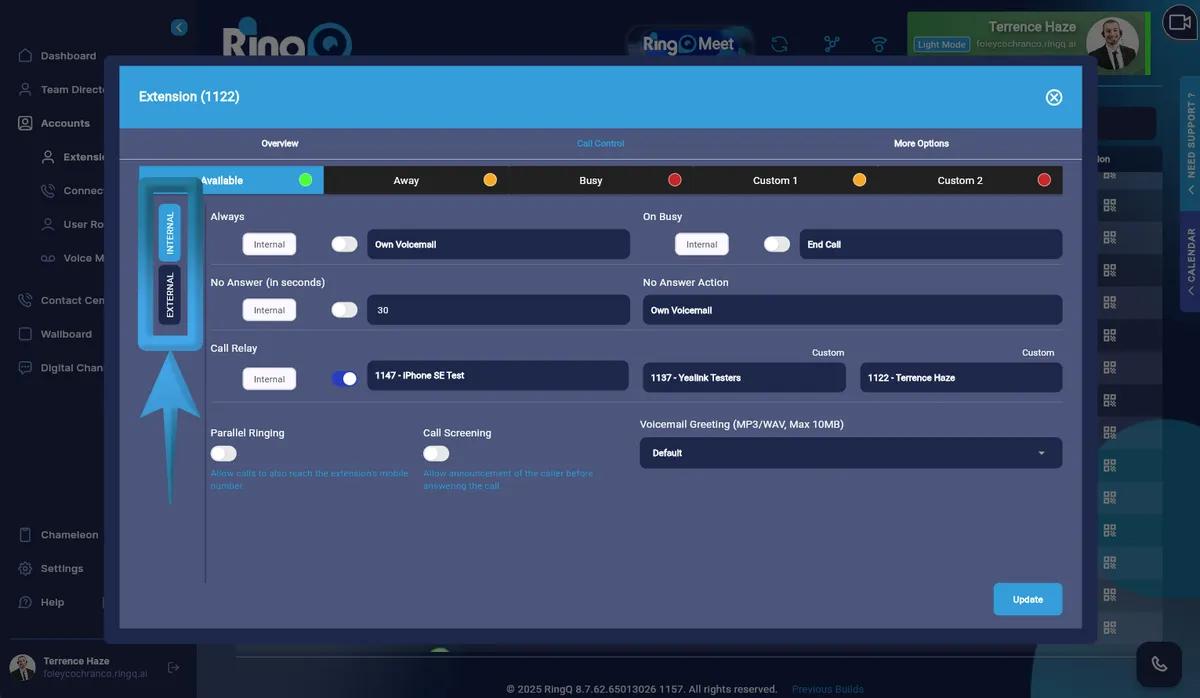
Select External or Internal according to the type of calls you want to forward.
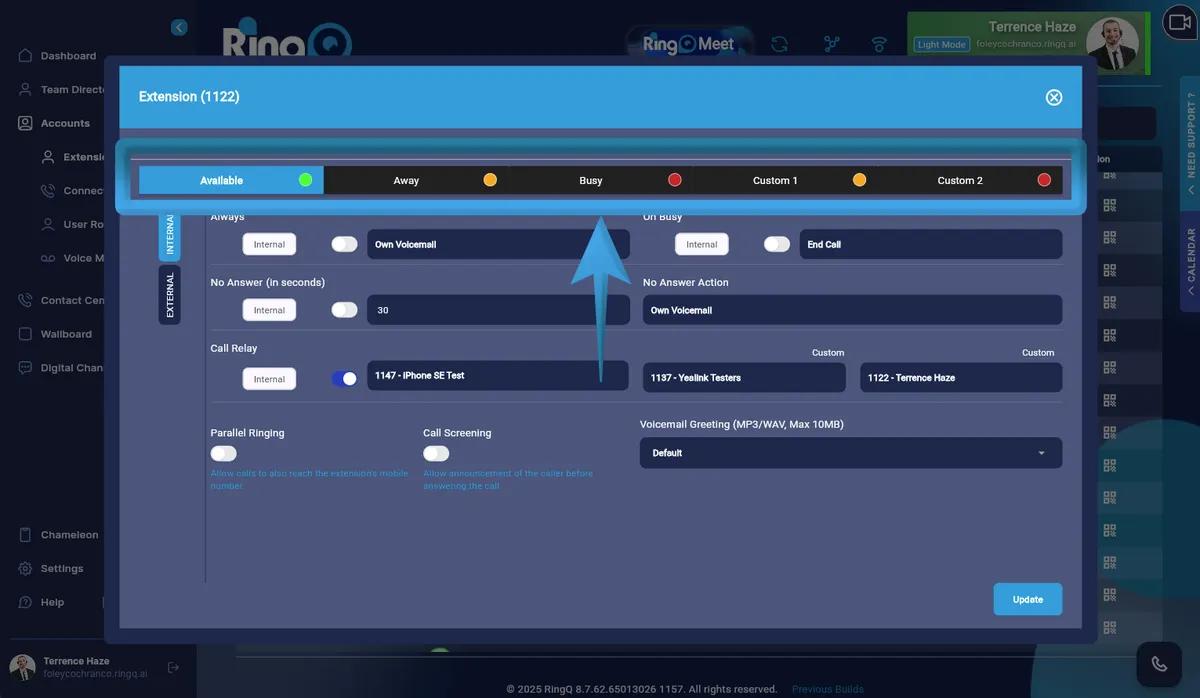
Select a Status (Available, Away, Busy, Custom 1, or Custom 2).
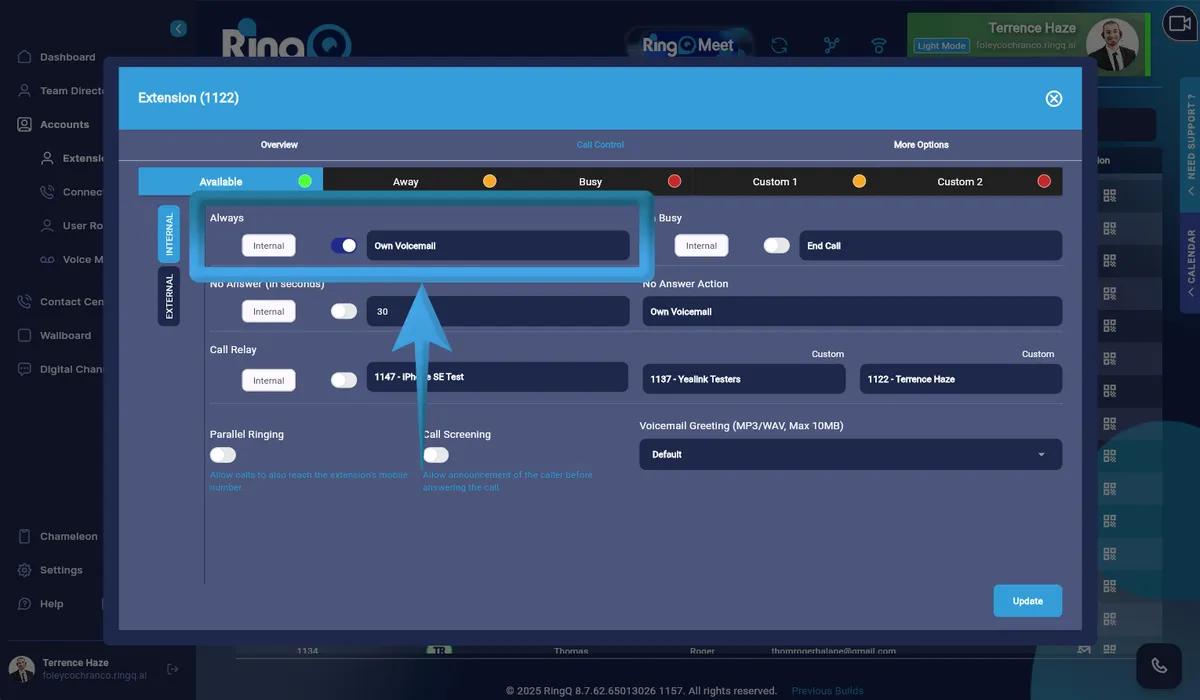
Within the Call Profile settings, enable the Always option to activate continuous call forwarding for external calls. Specify the action you want to take for forwarded calls from external sources:
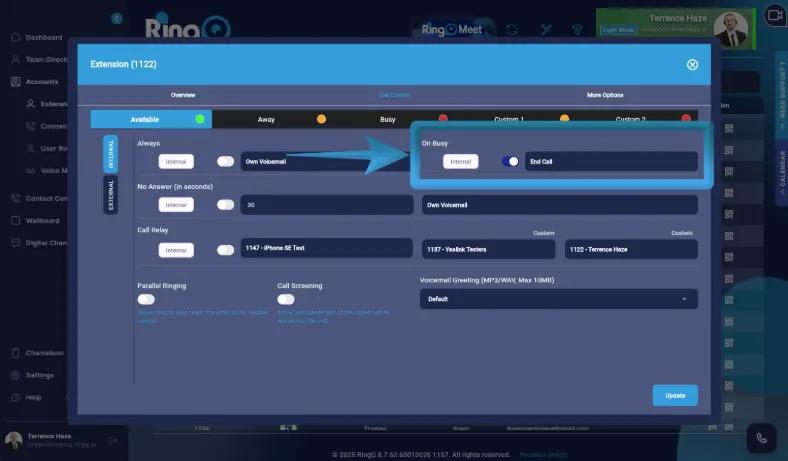
When On Busy is enabled, calls are automatically forwarded to other extensions or predefined actions when the user is busy or declines an incoming call. Specify the action you want to take for forwarded calls from external sources:
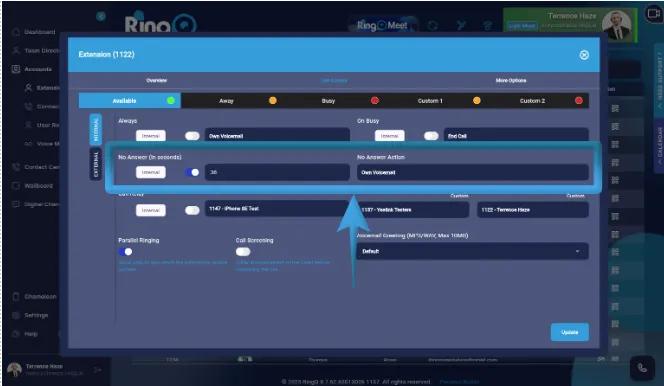
When the No Answer and No Answer Action feature is enabled, you can automatically forward incoming calls to a designated action or destination if a call goes unanswered after a specified duration. Specify the action you want to take for forwarded calls from external sources:
When Call Relay is enabled, RingQ routes incoming external calls to the configured slots in sequential order.
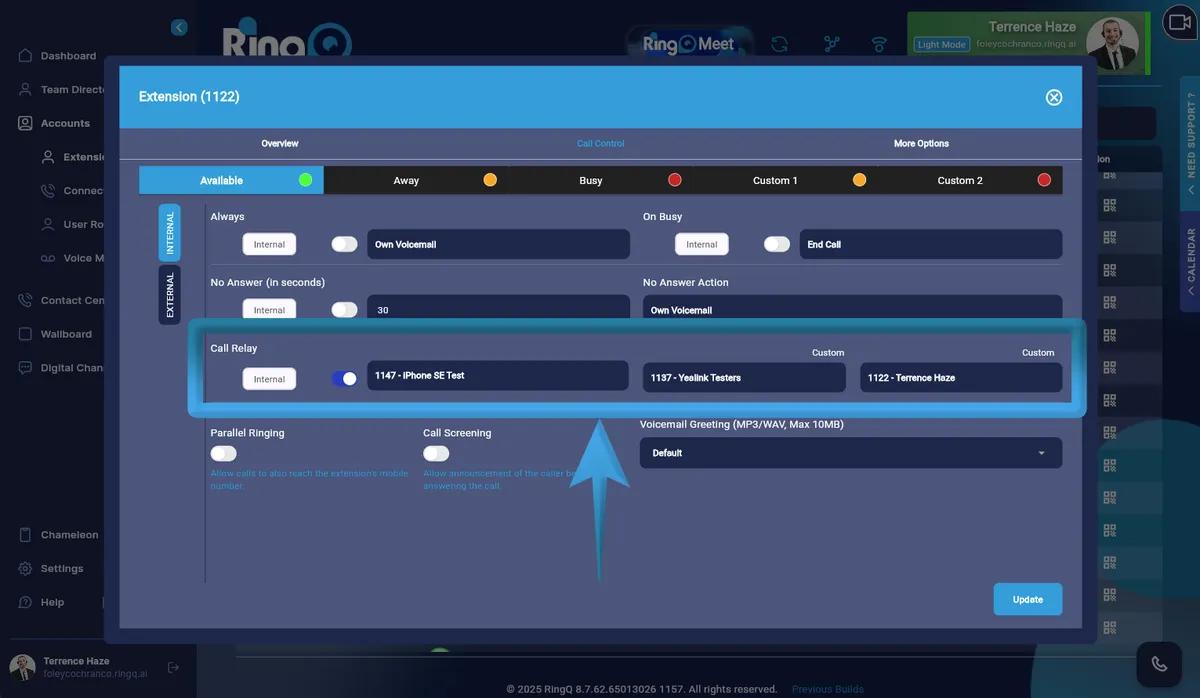
If a call is not answered in Slot 1 within the defined ringing duration, it is automatically forwarded to Slot 2, then continues through the remaining slots until the call is answered or the sequence is completed.
When enabled, Call Screening activates when you assign a custom number to a forwarding action, regardless of the status it is set for (i.e., “Always,” “On Busy,” “Away,” “Custom 1,” or “Custom 2”).
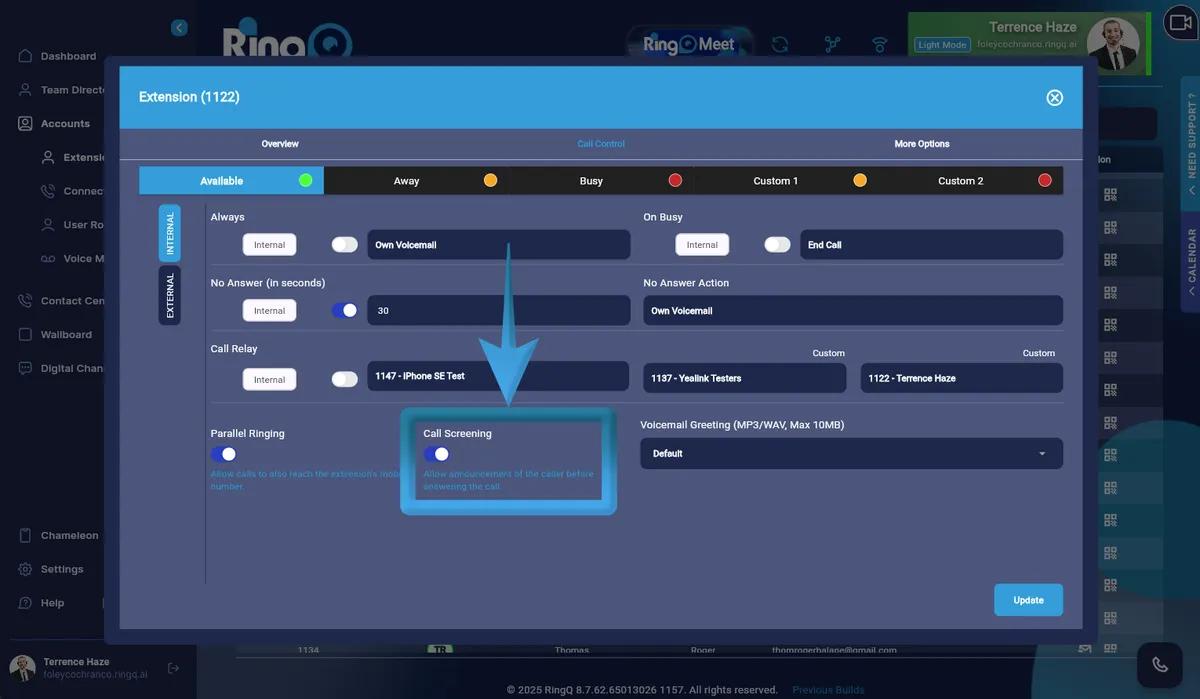
Call Screening allows users to filter incoming calls based on specific criteria or caller information before deciding how to handle them. This setup ensures that calls are screened according to your specified criteria, providing flexibility in managing incoming calls based on different conditions or forwarding scenarios.
When enabled, Parallel Ringing allows incoming calls to ring on multiple destinations simultaneously.
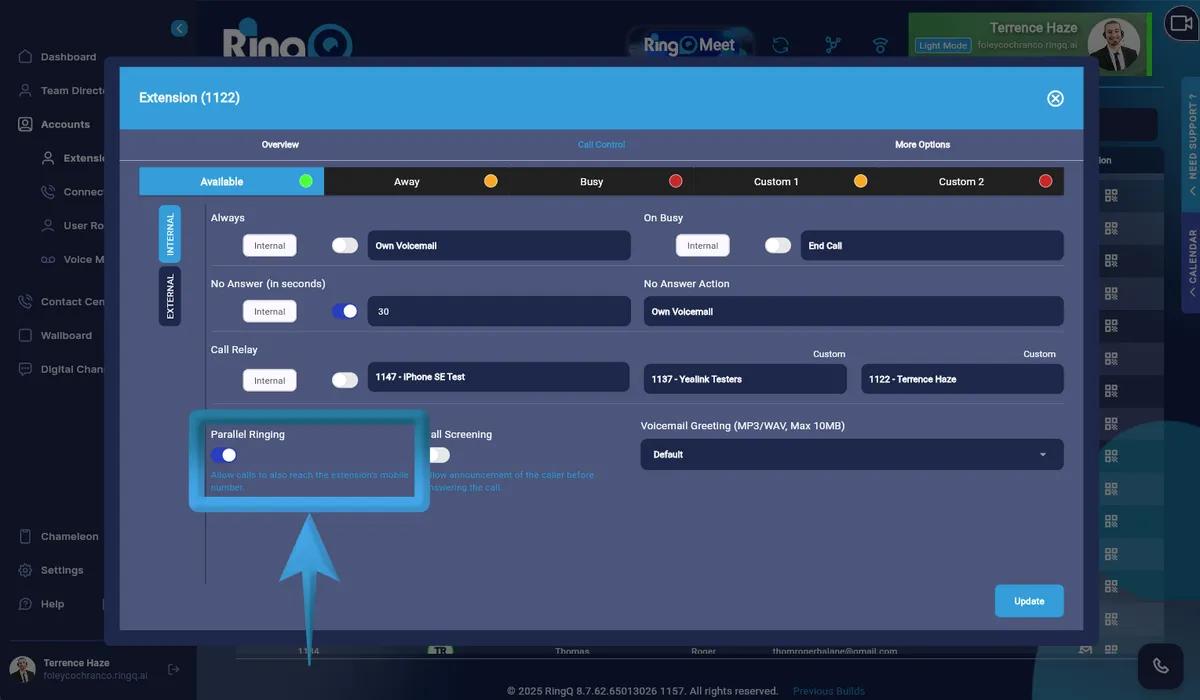
Parallel Ringing ensures that calls are efficiently managed and promptly answered across multiple devices or extensions.
