Migrating from another cloud PBX to RingQ is a straightforward process designed to minimize disruption and get your system up and running quickly. Through the RingQ Admin Dashboard, administrators can easily upload and configure all essential components—including SIP Trunks, Extensions, DIDs, and Outbound Rules—in just a few steps. With everything managed from a single interface, transitioning your communications environment to RingQ is simple, fast, and fully under your control.
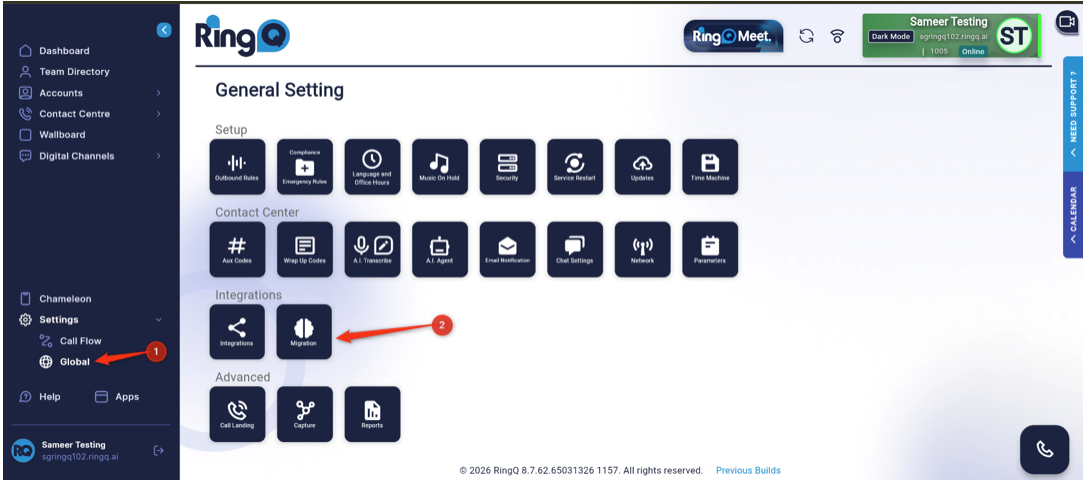
Log in to your RingQ admin dashboard and navigate to Settings > Global > Migration.
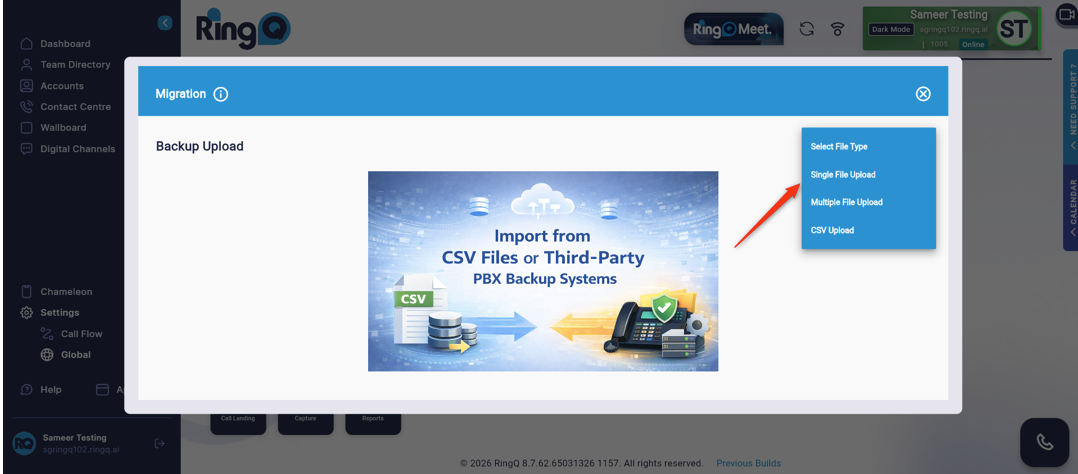
In the right-side corner, click the dropdown field:
a. Single File Upload
b. Multiple File Upload
c. CSV Upload
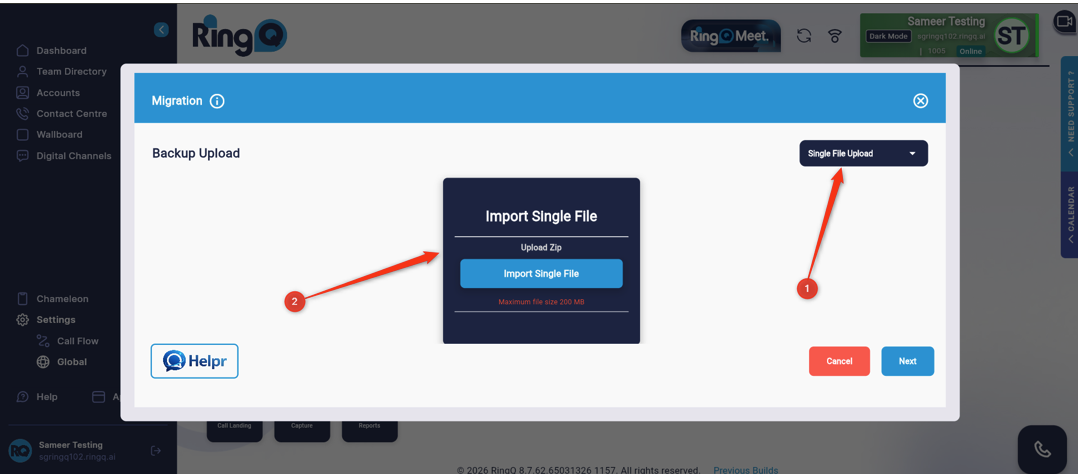
Click the Import Single File button. Note that only ZIP files are supported.
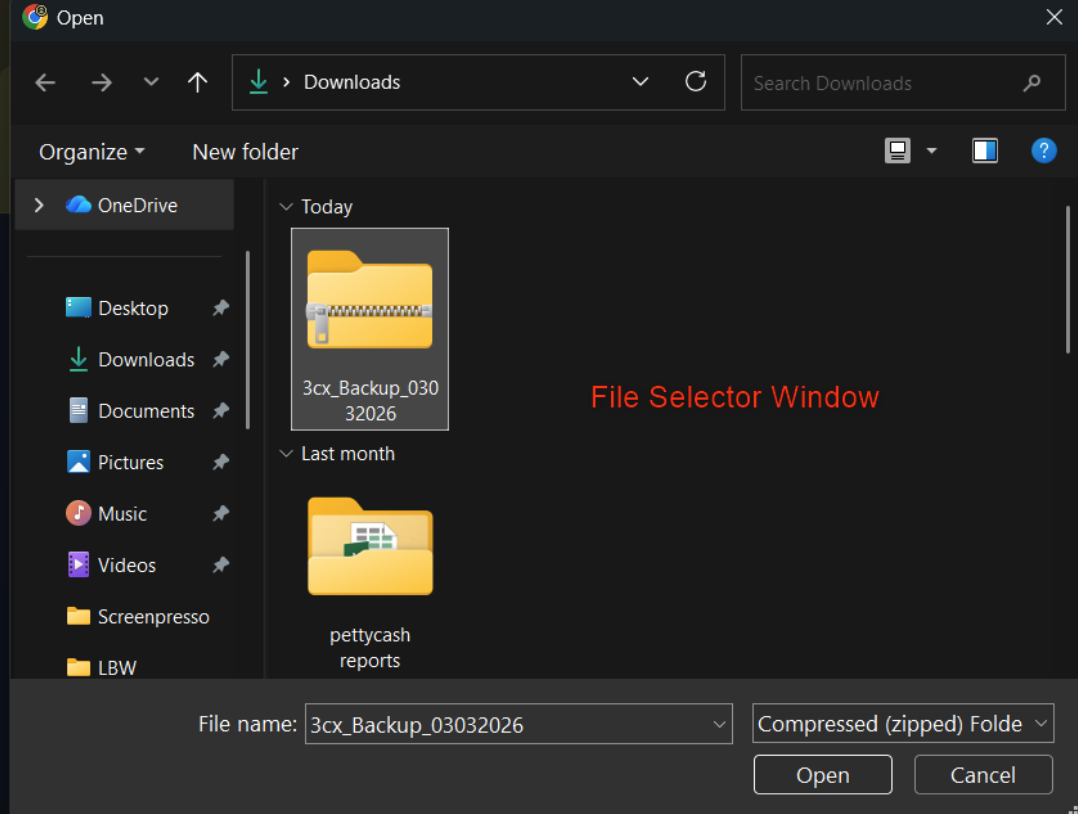
Select the ZIP file containing your backup and click Open.
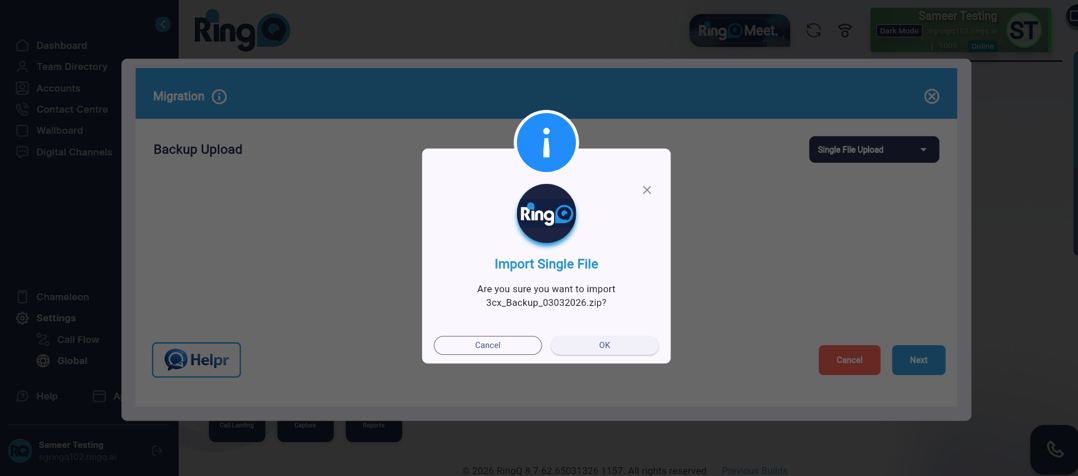
In the next window, click OK.
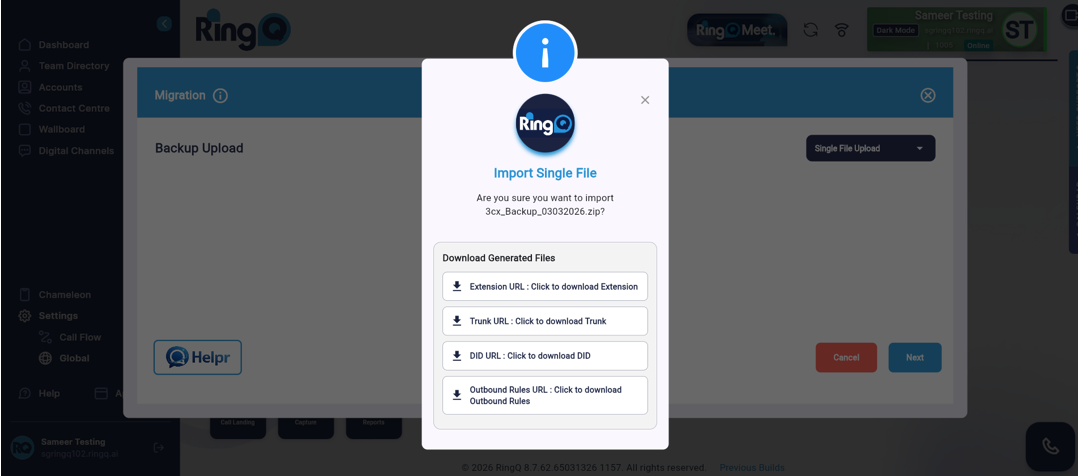
Four different files will appear on four tabs. Download and save each file.
Close the popup and click the Next button.
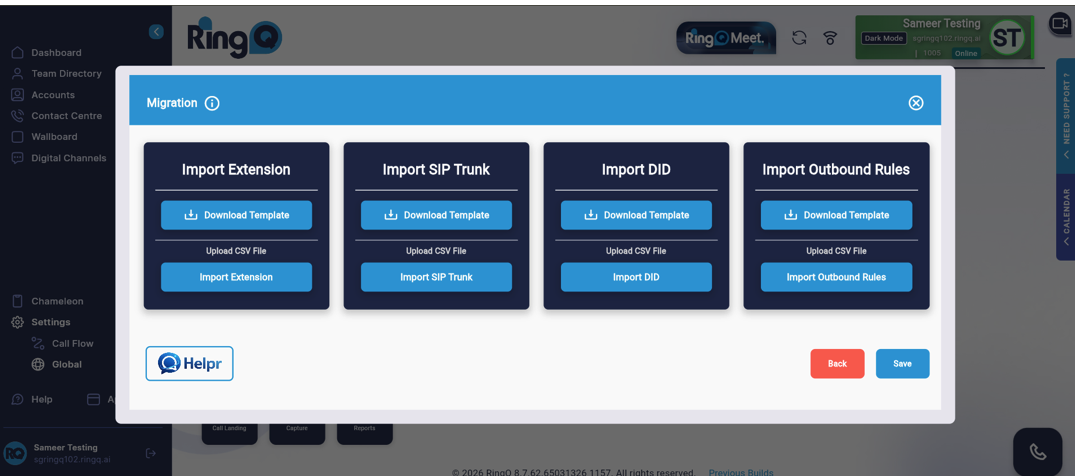
From here you can download the CSV file format, add or edit details, and upload/import files. Alternatively, you can upload/import previously downloaded files.
All tabs/boxes have Download Template and Import buttons. You can download any CSV template, edit the file, and import it again.
When the file is imported and the Save button is clicked, it returns to the General Settings page.
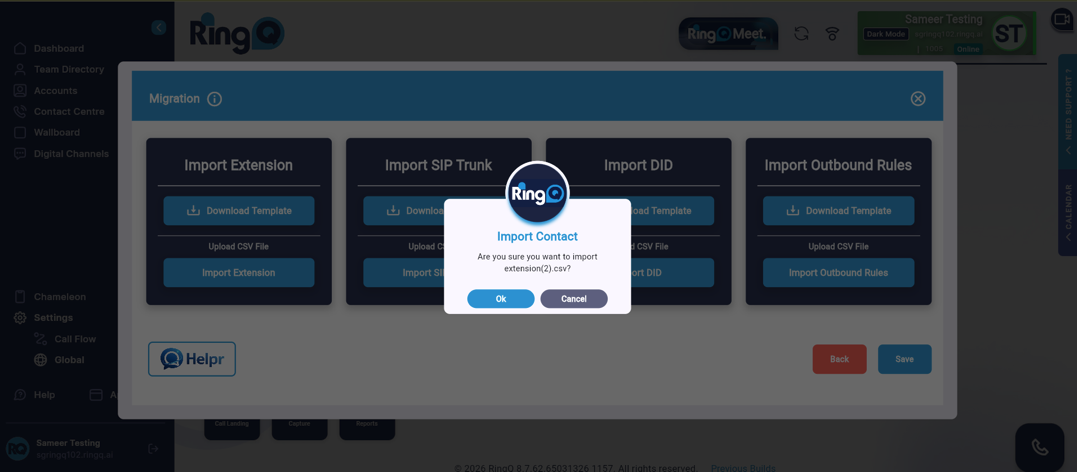
When a ZIP/CSV file is imported, a confirmation popup will appear.
Click OK for the file to upload.
Here you can upload separate files in each tab and save them in a single step.
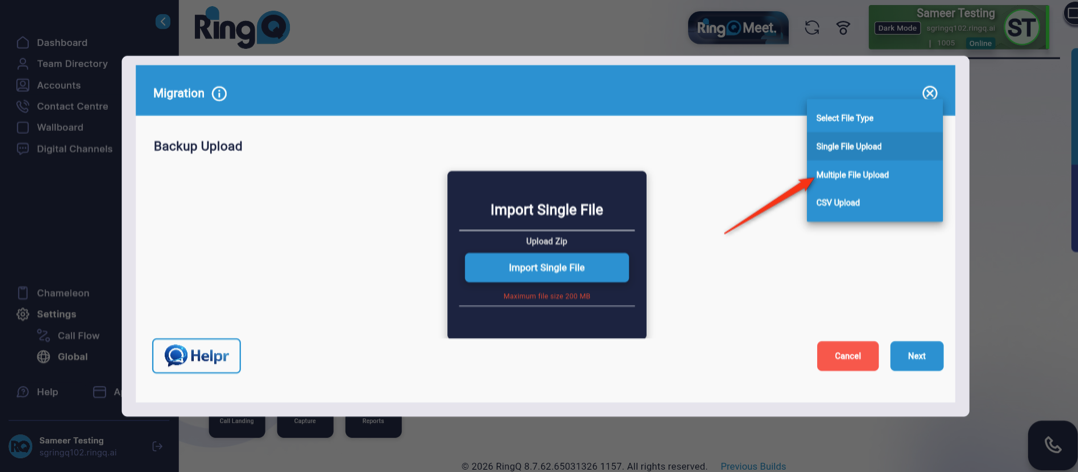
Click Multiple File Upload.
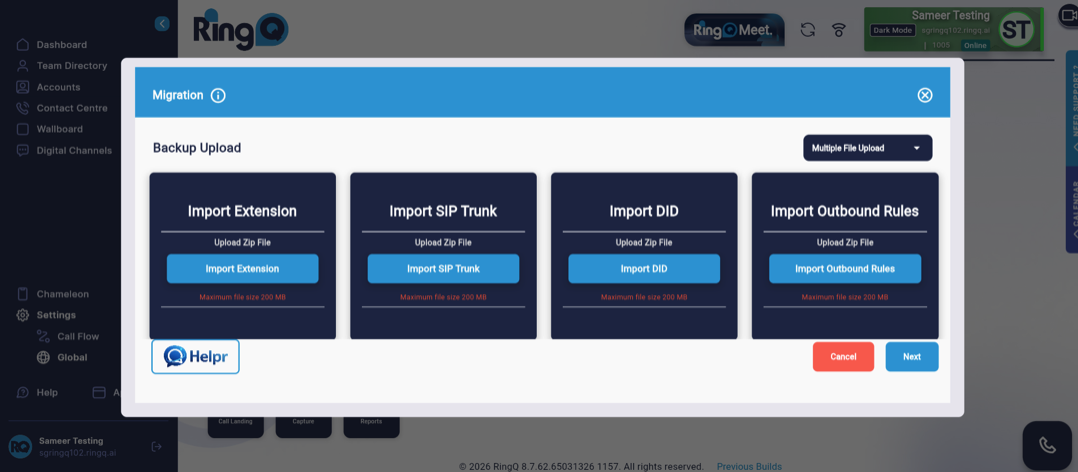
Click Import Extension.
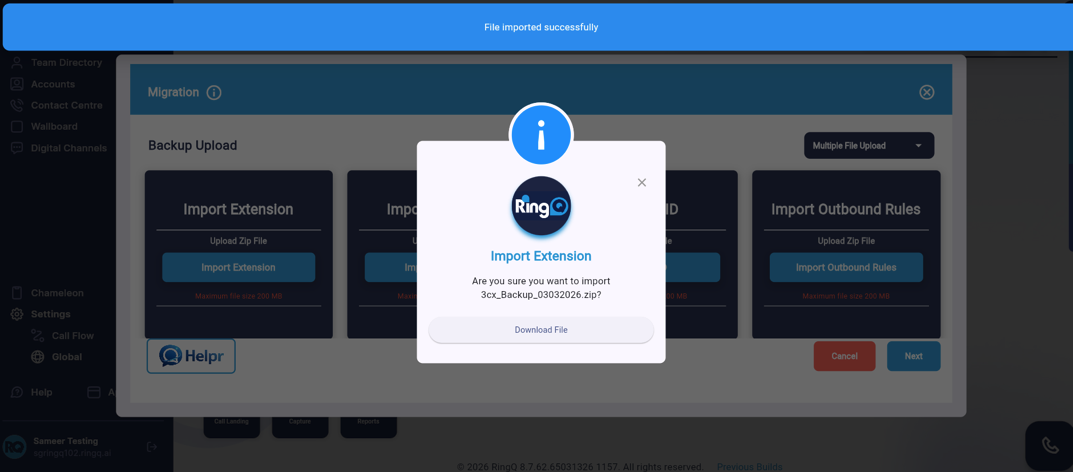
After importing the file, the page will be displayed as shown above. 4. Click the Download File button.
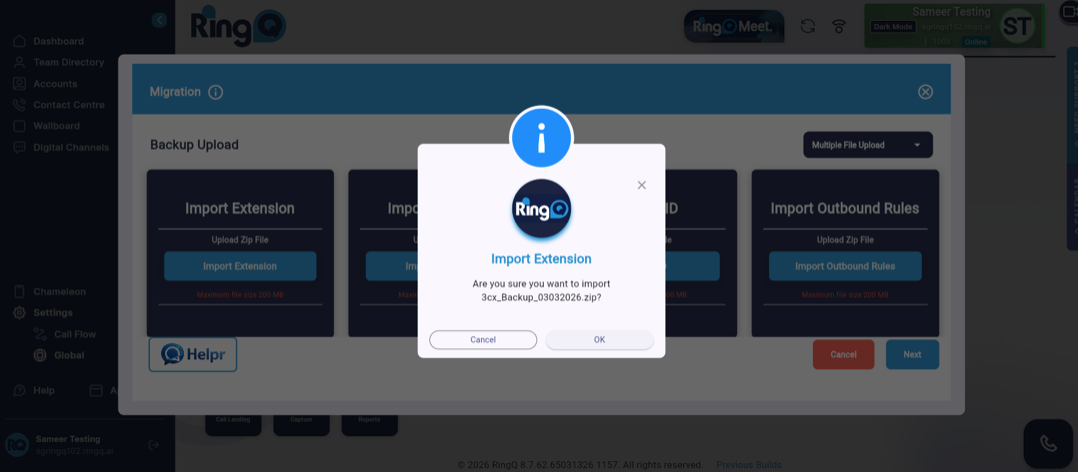
The above screen will appear. Click OK to download the file.
From here you can download the CSV file format, add or edit details, and upload/import files. Alternatively, you can upload/import previously downloaded files.
All tabs/boxes have Download Template and Import buttons. You can download any CSV template, edit the file, and import it again.
When the file is imported and the Save button is clicked, it returns to the General Settings page.
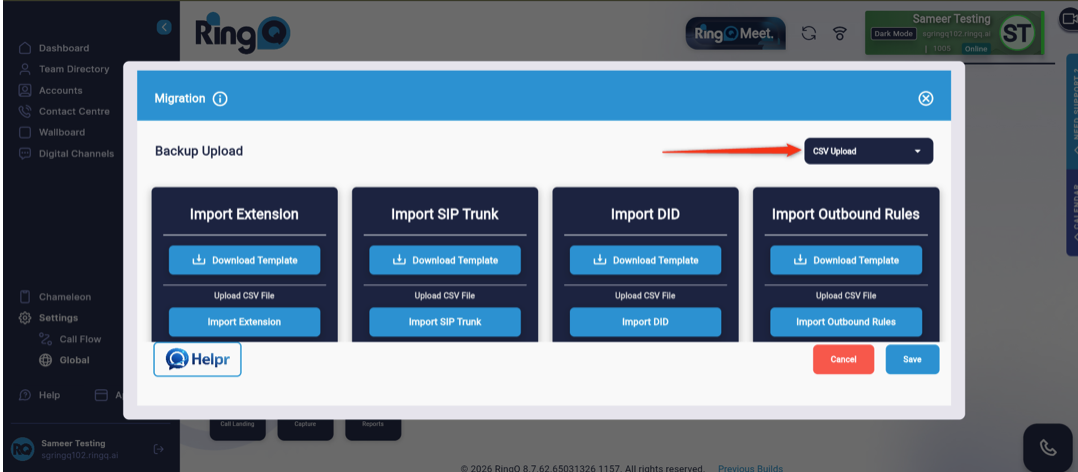
Click the CSV file upload option.
This page also has four tabs/boxes: Import Extension, Import SIP Trunk, Import DID, and Import Outbound Rules.
When you hover over an Import button, a tooltip displays “Backup Upload”. Above the button, it says “Upload CSV file”.
From here you can download the CSV file format, add or edit details, and upload/import files. Alternatively, you can upload/import previously downloaded files.
All tabs/boxes have Download Template and Import buttons. You can download any CSV template, edit the file, and import it again.
When the file is imported and the Save button is clicked, it returns to the General Settings page.
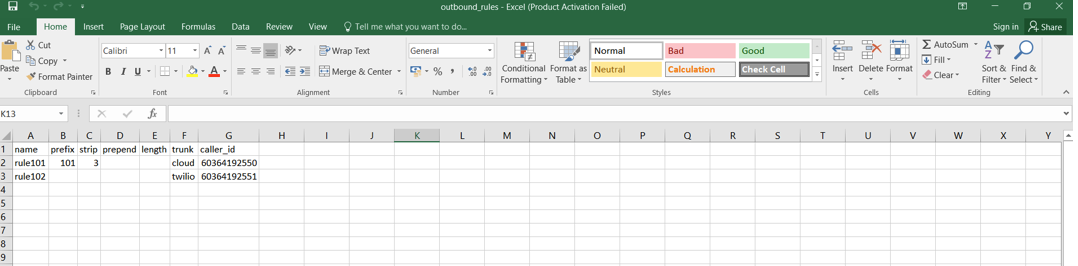
Outbound Rules, Extensions, SIP Trunks, and DIDs are downloaded in Excel format and displayed as shown above.
