RingQ Customer Centric Communications

Creating & Managing Extensions


Introduction

Managing your team’s communication efficiently starts with setting up the right extensions. In this RingQ guide, you’ll learn how to create, configure, and manage extensions for your users, whether you’re onboarding new team members or optimizing call flows. We’ll walk you through the entire process step by step—ensuring your business stays connected, streamlined, and scalable.

Adding an Extension

1

Log in to your web app. Navigate to Accounts > Extensions.

2

Click the Extension XX/XXX button above the table (shown above).

3

Fill in the form with the following information:

  • First and Last name
  • Email Address
  • Mobile number
4

Click Create.

Editing an Extension

1

From the Extensions page in your web app, find the extension you want to edit and click on it.
2

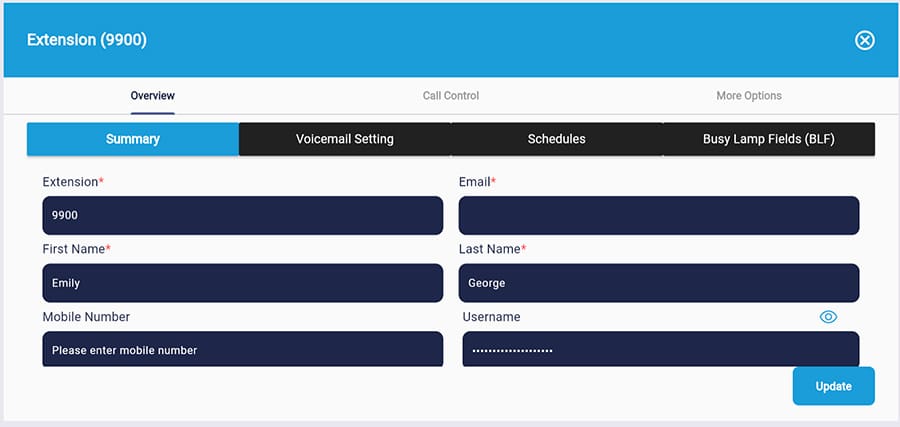
There are three tabs at the top: Overview, Call Control, and More Options.
  • Overview: edit basic information about the user, adjust voicemail settings, and add and edit work schedules and BLF.
  • Call Control: edit internal and external call actions, such as how long before an unanswered call is sent to voicemail.
  • More Options: access the extension’s RingQ Talk URL, enable smartphone notifications, and more.

Creating Schedules

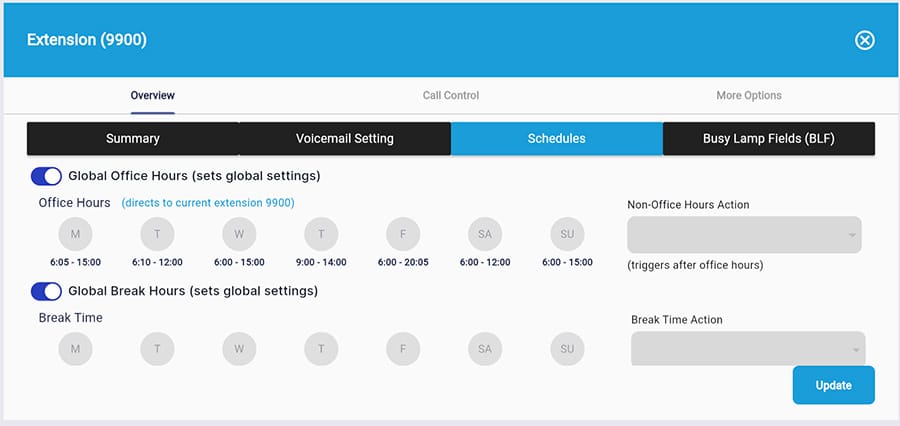
  • Global Office Hours (sets global settings) – when triggered, the extension will follow the global office hours and cannot modify this.
  • When Global Office Hours is disabled, the user can adjust the office hours, and each time of day is set to the default (All Day).
  • Non-Office Hours Action (triggers after office hours). Click the dropdown to select an extension, custom number, or action.
  • Global Break Hours (sets global settings). When Global Break Hours is enabled, the user cannot adjust the office hours, and each time of day is set to the default (All Day). When Global Break Hours is disabled, the user can adjust the office hours, and each time of day is set to the default (None).
  • Break Time Action (triggers during break time). Click the dropdown to select an extension, custom number, or action.
  • Exempt from Global Holidays. When enabled, the local holiday won’t apply to the extension. When disabled, the local holiday will apply to the extension.

Creating Holidays

1

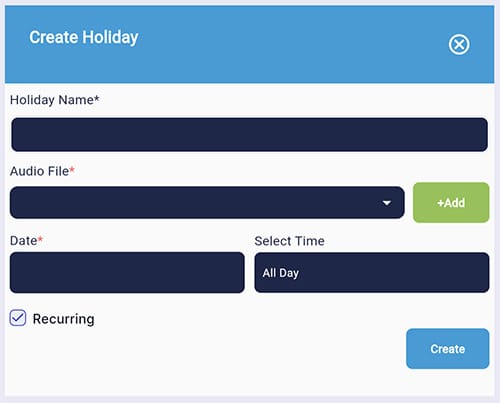
Scroll to the bottom of the Schedules page and click the Create Holiday button.
2

Fill in the fields in the form.

3

Recurring – check the box if you would like the holiday to repeat annually.

4

Click Create.