Login to the RingQ application and navigate to Settings → Global Settings→ Integration → CRM → Custom CRM Integration. Enable the Custom CRM Integration toggle to activate webhook automation.
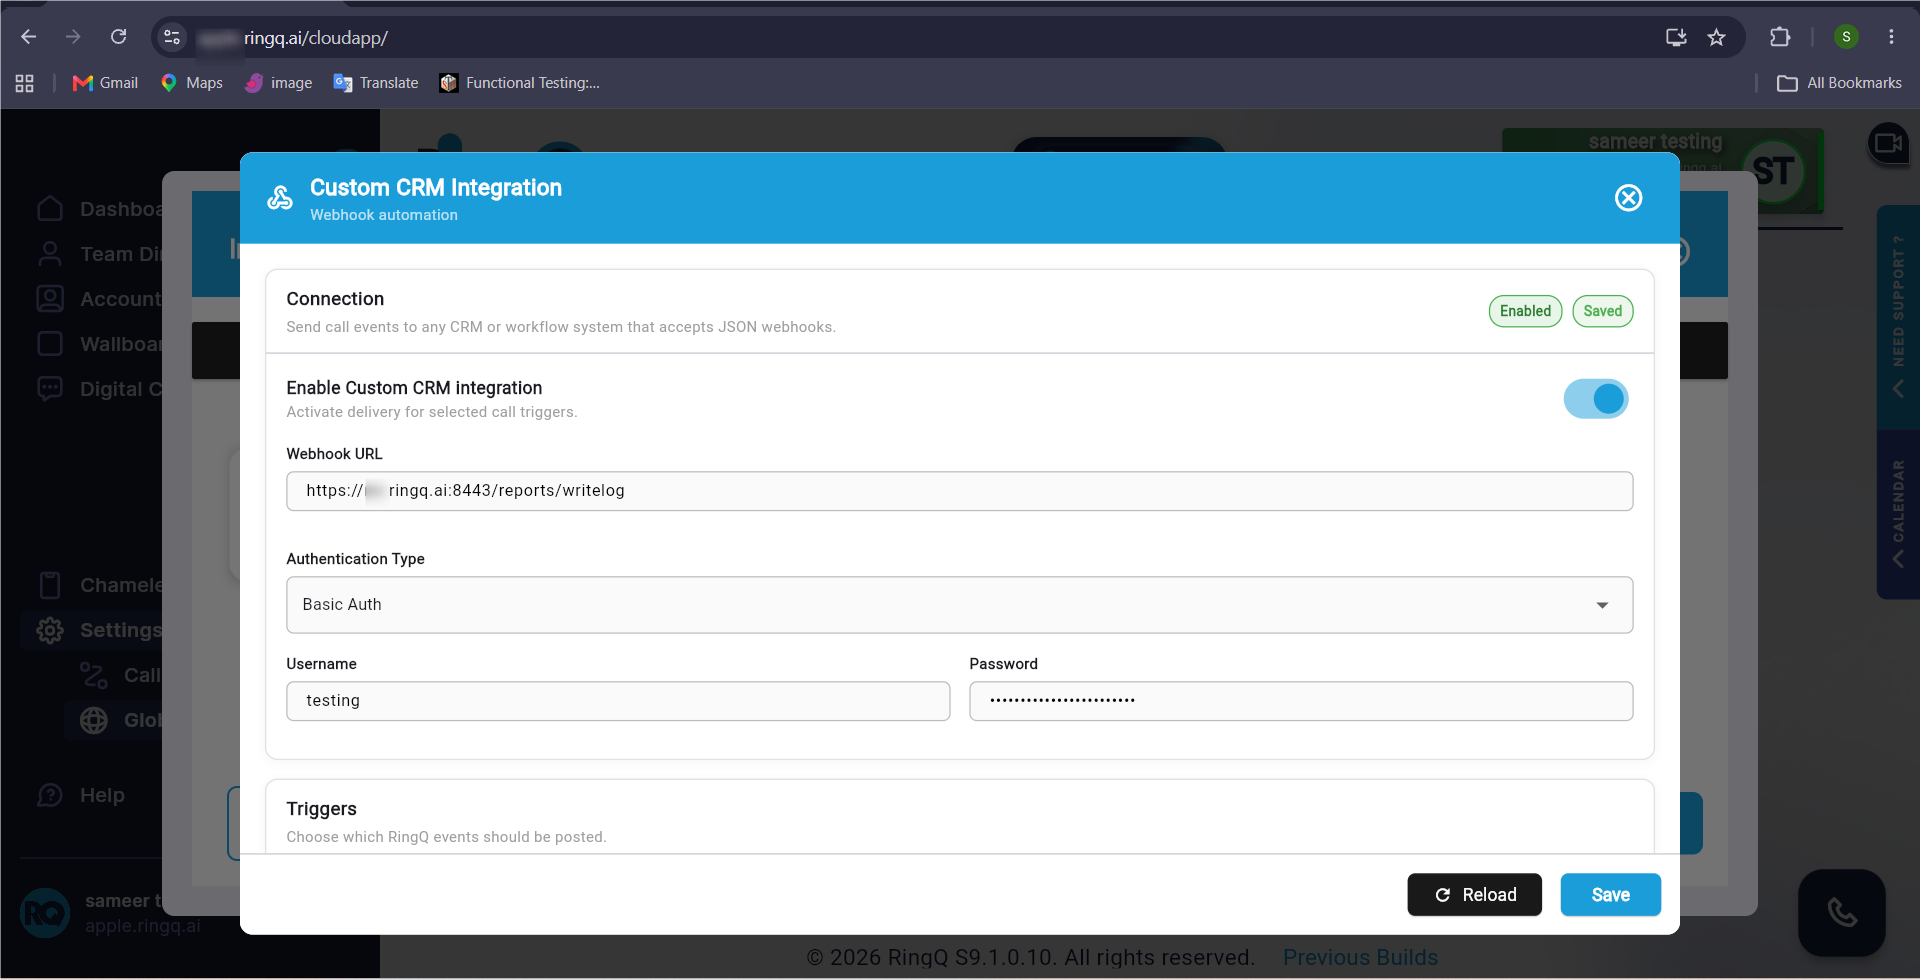
In the Webhook URL field, enter the destination webhook URL where RingQ should send the call event details.
https://test.ringq.ai:8443/reports/writelog
Choose the required authentication method from the Authentication Type dropdown.
Available authentication methods:
Select the authentication type based on your webhook server configuration.
If Basic Auth is selected, enter the required Username and Password.
If Bearer Token or Custom Header is selected, provide the required authentication details based on your server configuration.
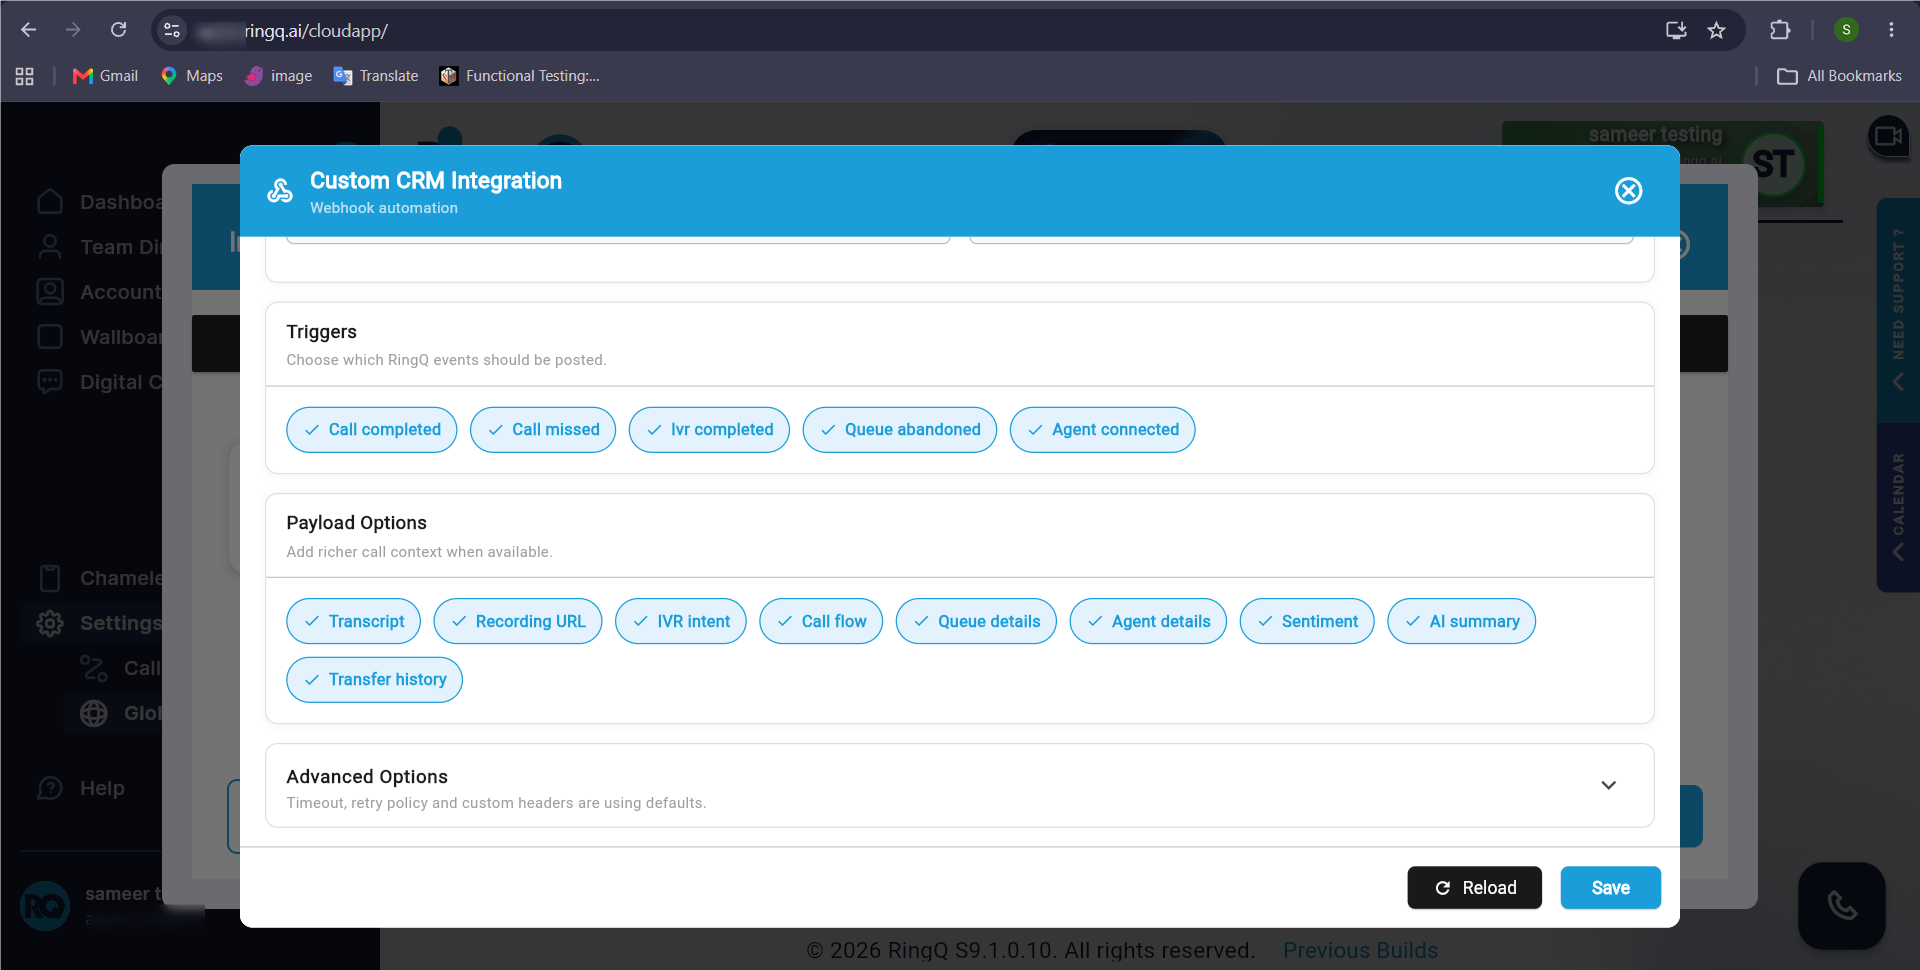
In the Triggers section, select the call events that should trigger the webhook request.
Available trigger options include:
For example, if Call Completed is selected, RingQ will send the webhook request whenever a call is completed.
The Payload Options section allows you to include additional information in the webhook request.
Available payload options include:
Select the required payload options based on your CRM requirements.
Expand the Advanced Options section to configure additional webhook settings.
You can configure:
The timeout value specifies how long RingQ waits for a response from the webhook server before the request times out.
The retry count specifies how many times RingQ should retry the webhook request if it fails.
Scroll down to the Example JSON Payload section.
Click Simulate Payload to generate a sample payload.
Click Test Webhook to send a test request to the configured webhook URL and verify the connection.
The Example JSON Payload section displays the sample JSON data that will be sent to the configured webhook URL.
Example:
{
"json_body": {
"call_id": "0a28c160-e3b1-4dc7-8f4e-c225f34de3be",
"CallFrom": "1012",
"CallTo": "1023",
"Status": "completed",
"DialCallStatus": "completed",
"DialCallDuration": "7",
"event_type": "call.completed",
"recordingurl": "https://sgringq96.ringq.ai:8443/register/zohoplayrecoding/0a28c160-e3b1-4dc7-8f4e-c225f34de3be",
"secret": "sec_1784803988780"
}
}
This JSON payload is sent to the configured webhook whenever the selected trigger event occurs.
The Last Webhook Status section displays the result of the most recent webhook request.
If the request is successful, the status will be displayed as Success.
If the request fails, the status will be displayed as Failed, along with the corresponding error message for troubleshooting.
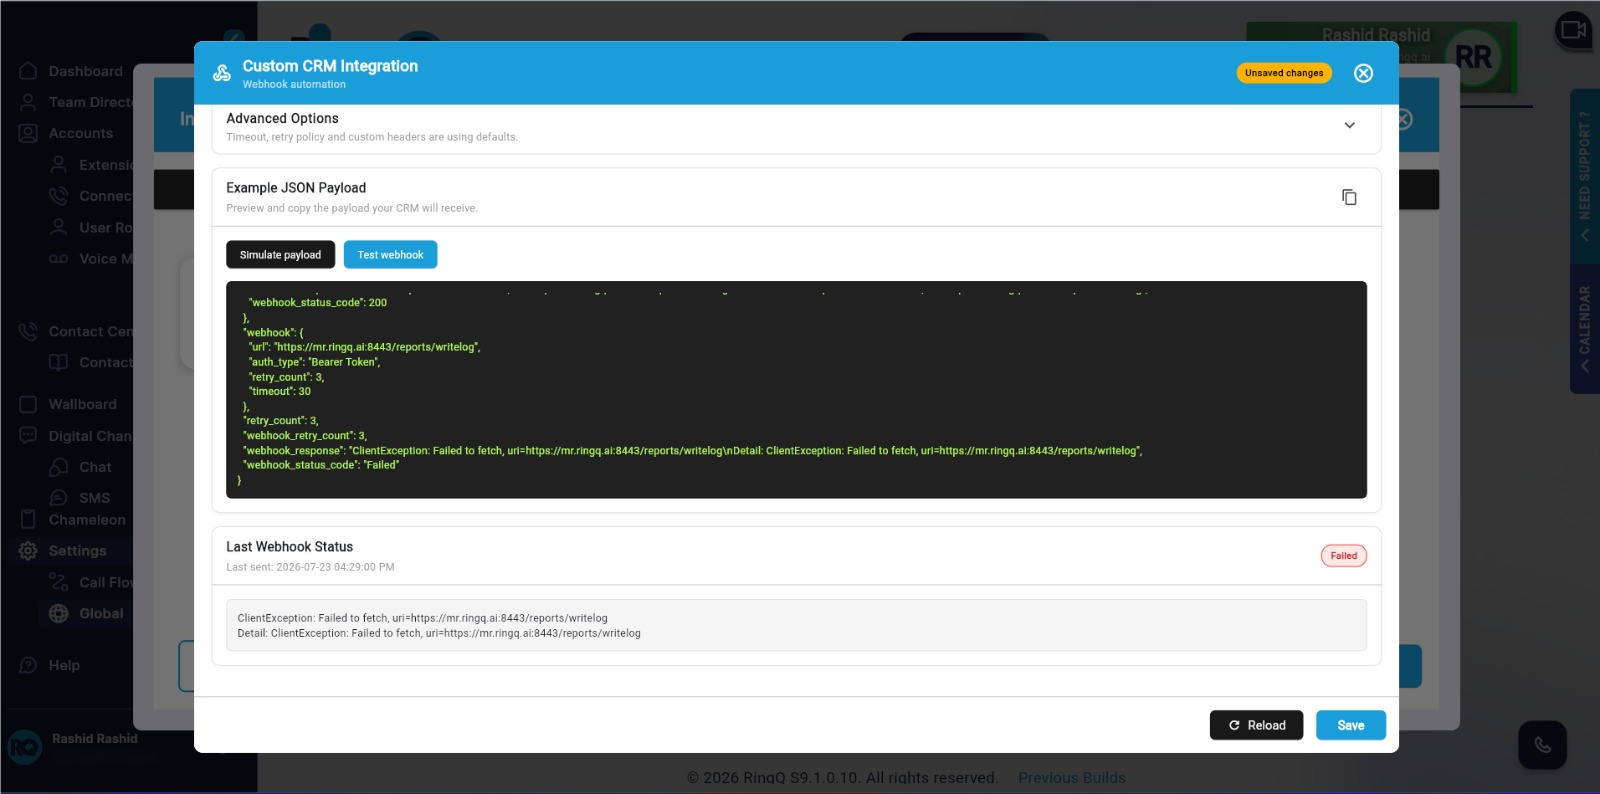
Click Reload to refresh the webhook configuration and update the latest webhook status.
After completing all the required settings, click Save.
The webhook configuration will be saved successfully, and RingQ will automatically send the selected call events to the configured webhook URL based on the selected trigger events.
