Security update: RingQ is patched against the critical PHP vulnerabilities. Update your servers today.
Read nowMicrosoft 365 Integration Configuration Guide for RingQ
Open your preferred web browser and navigate to https://portal.azure.com/. Sign in using your Azure account credentials to access the Azure Portal.
In the Azure Portal, use the search bar at the top of the page to search for App registrations, then select App registrations from the search results.
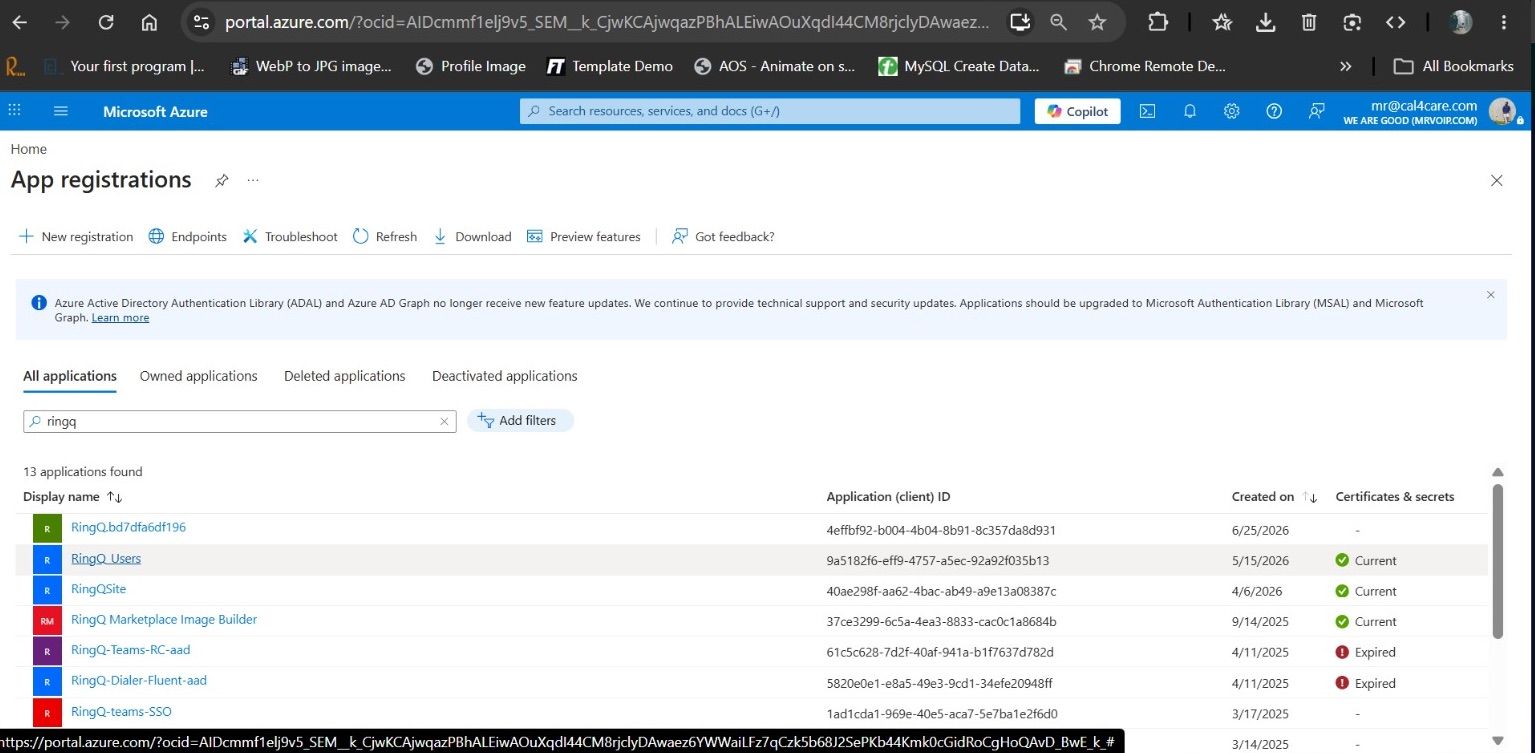
From the All applications tab, search for RingQ Users and select the application.
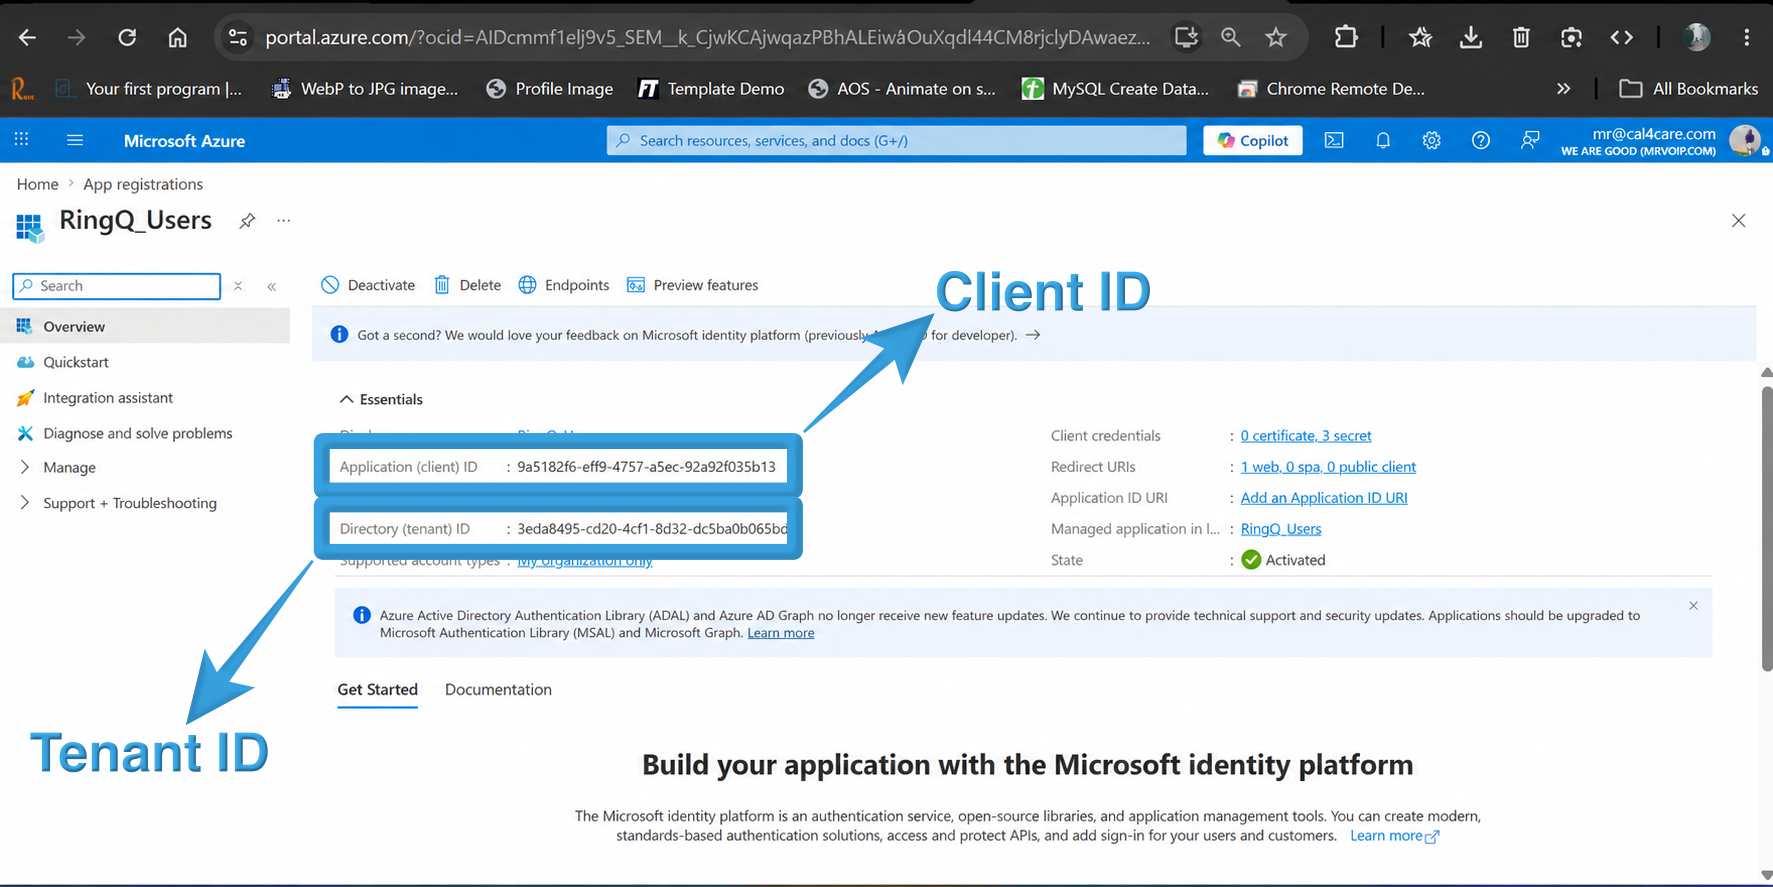
After opening the RingQ Users application, copy the Application (Client) ID and Directory (Tenant) ID from the Overview page.
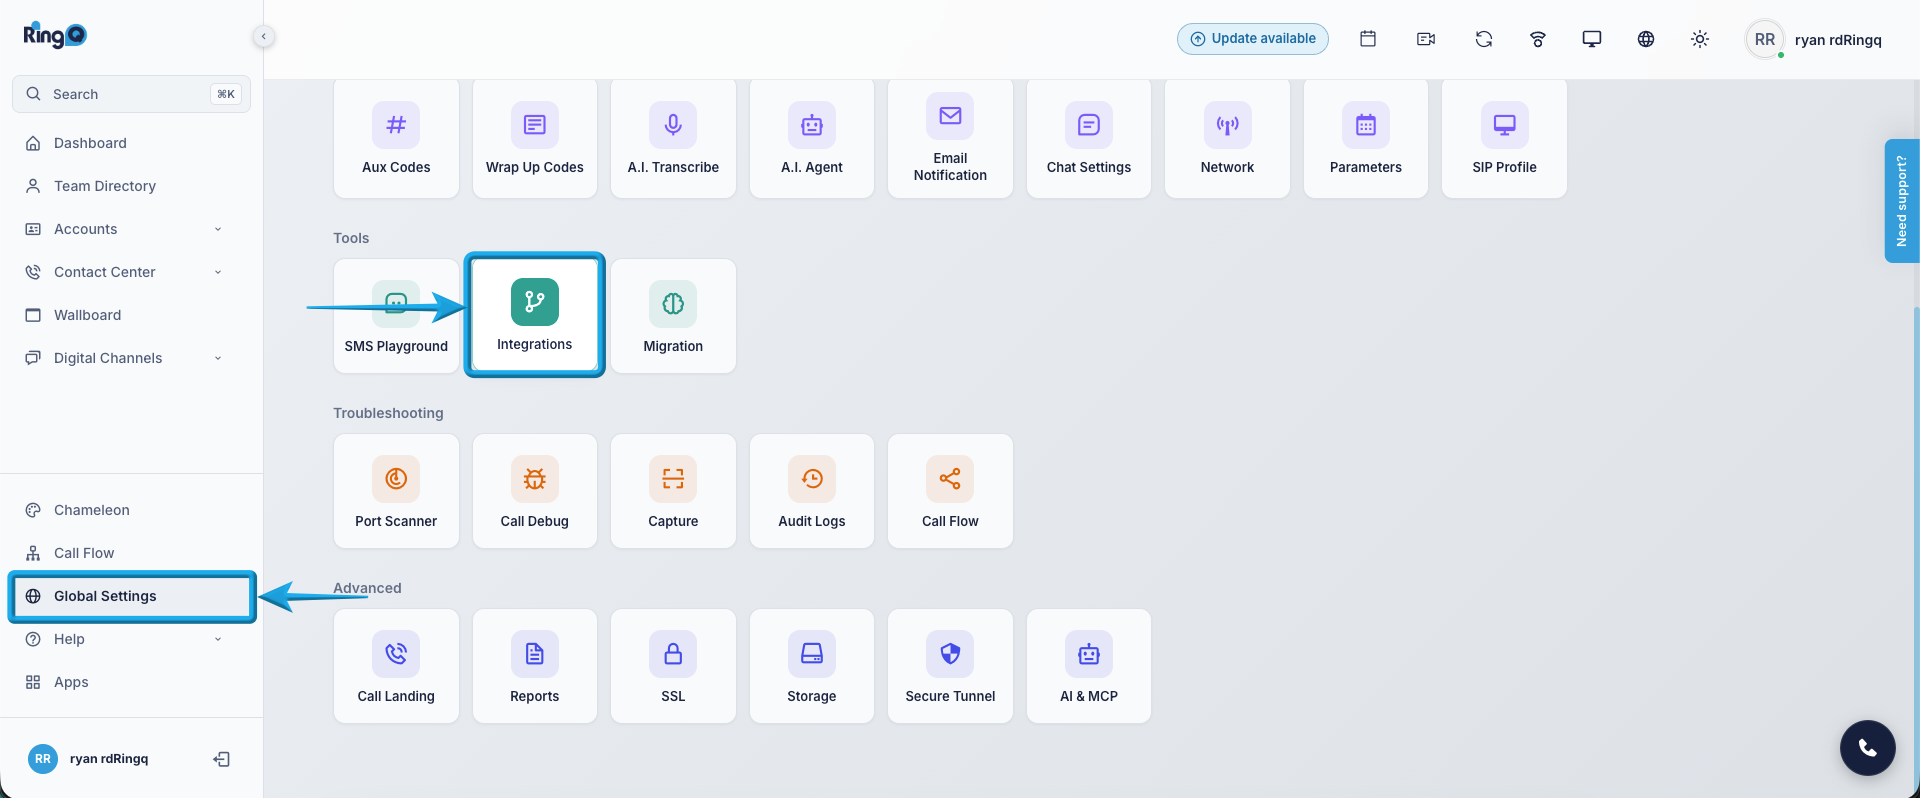
Log in to the RingQ portal. From the left navigation pane, select Settings, then open the required Submodule and click Integration. On the Integration page, select the Microsoft icon.
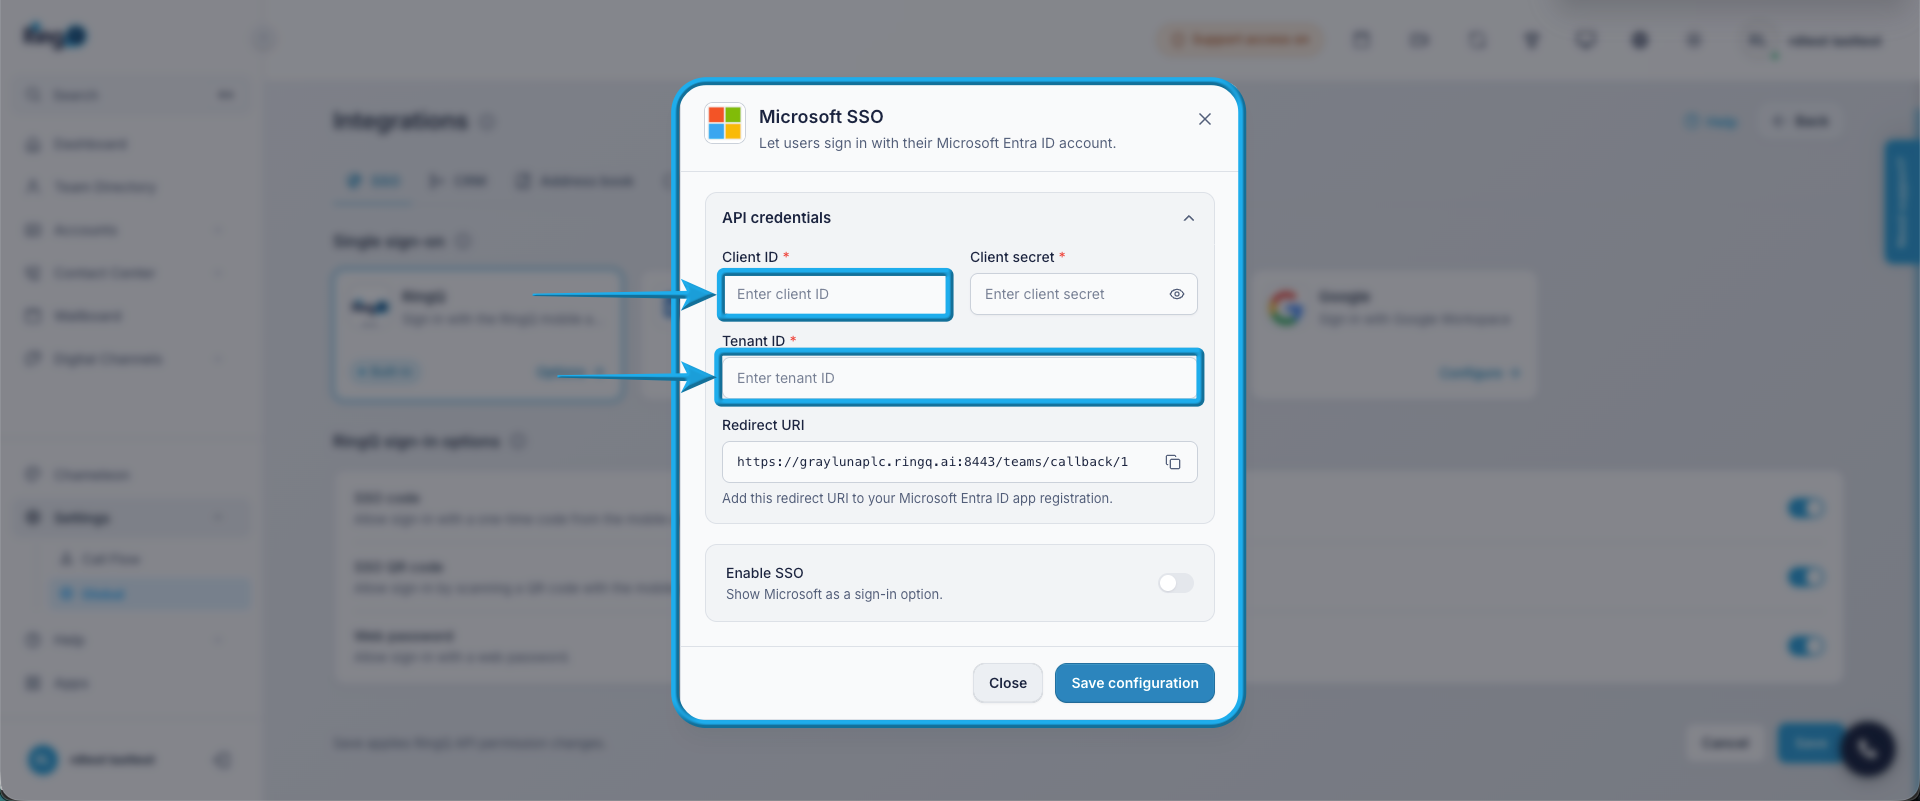
Paste the copied Client ID and Tenant ID into their respective fields, then save the configuration.
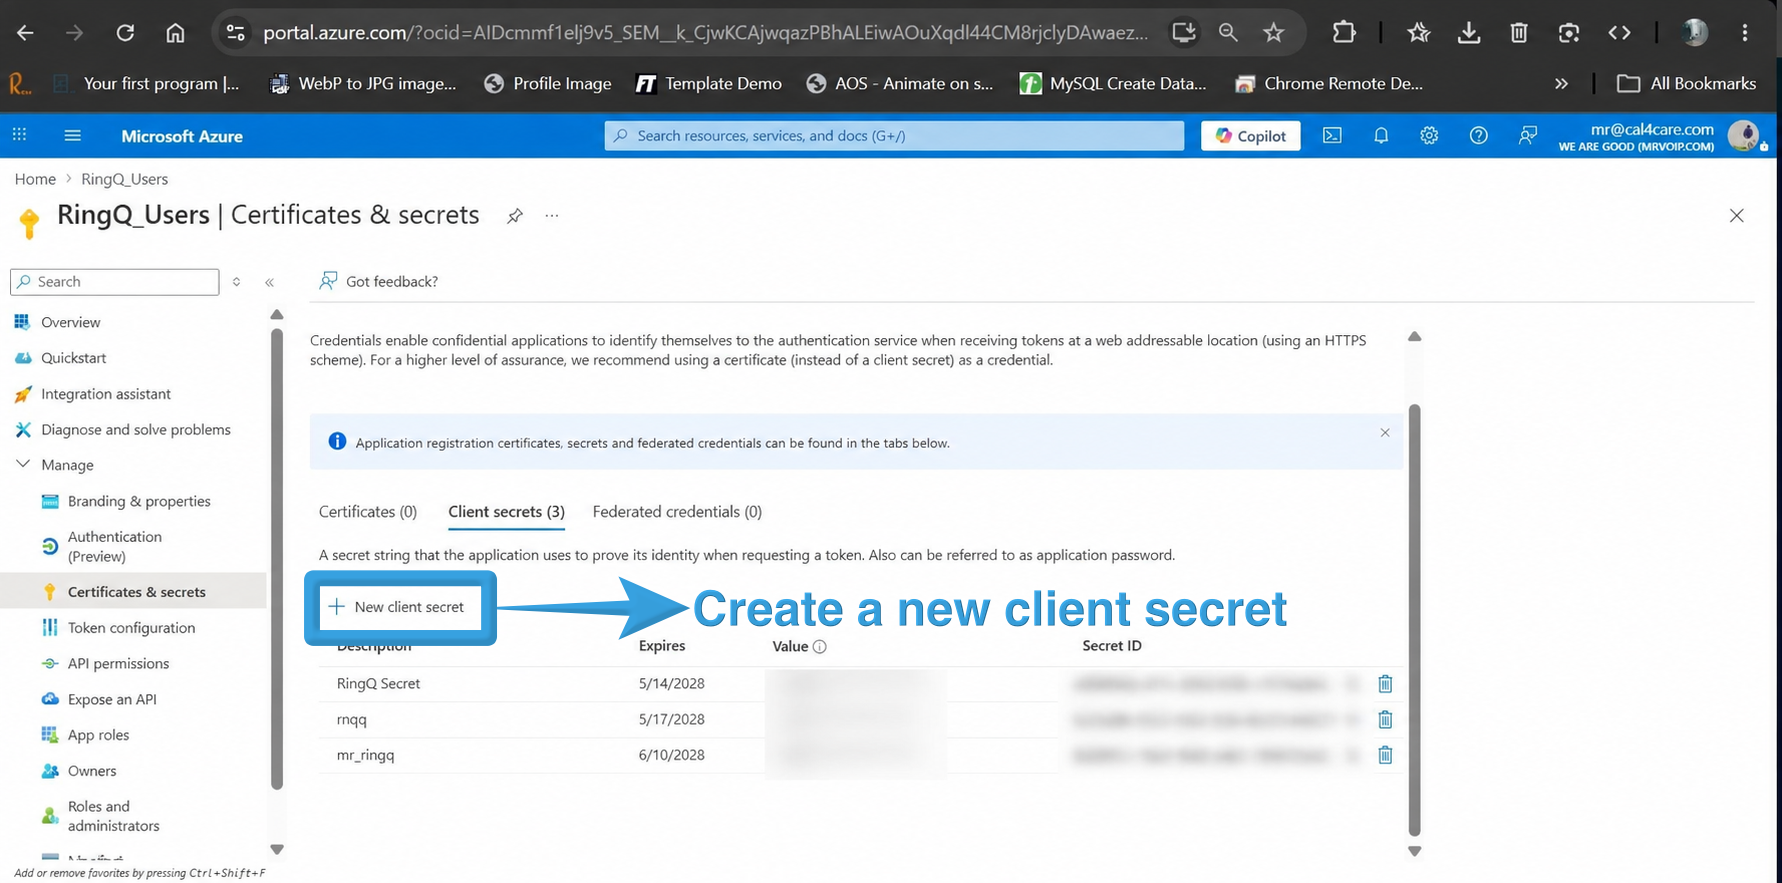
In the Azure Portal, open the RingQ Users application, navigate to Certificates & secrets from the left navigation pane. Select the Client secrets tab, then click + New client secret to create a new client secret.
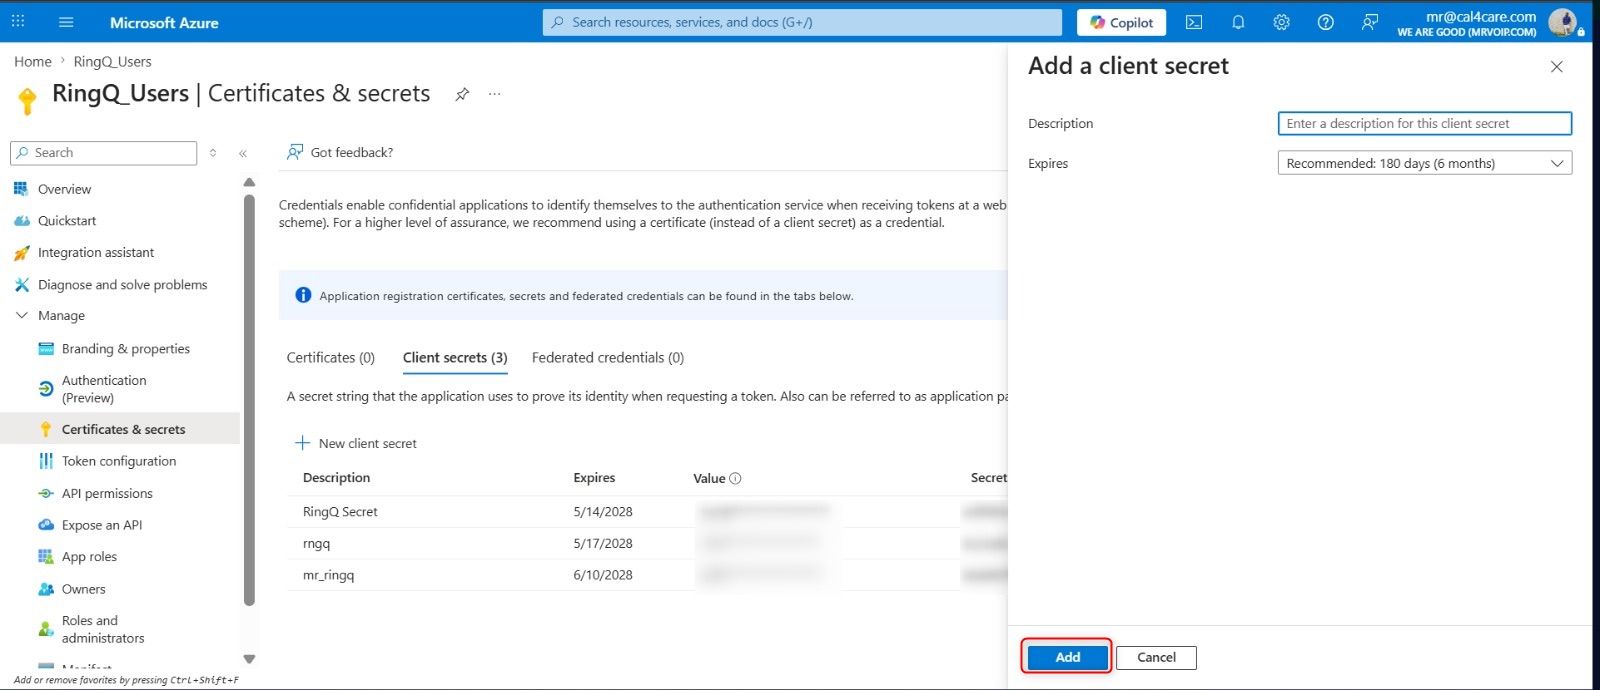
On the Add a client secret pane, enter a description for the client secret. You may provide any meaningful description based on your organization's naming convention. Select the preferred expiration period, then click Add.
After the client secret is created, copy the Value of the newly generated client secret.
Note: The client secret Value is displayed only once when it is created. Make sure to copy and store it securely before leaving the page.
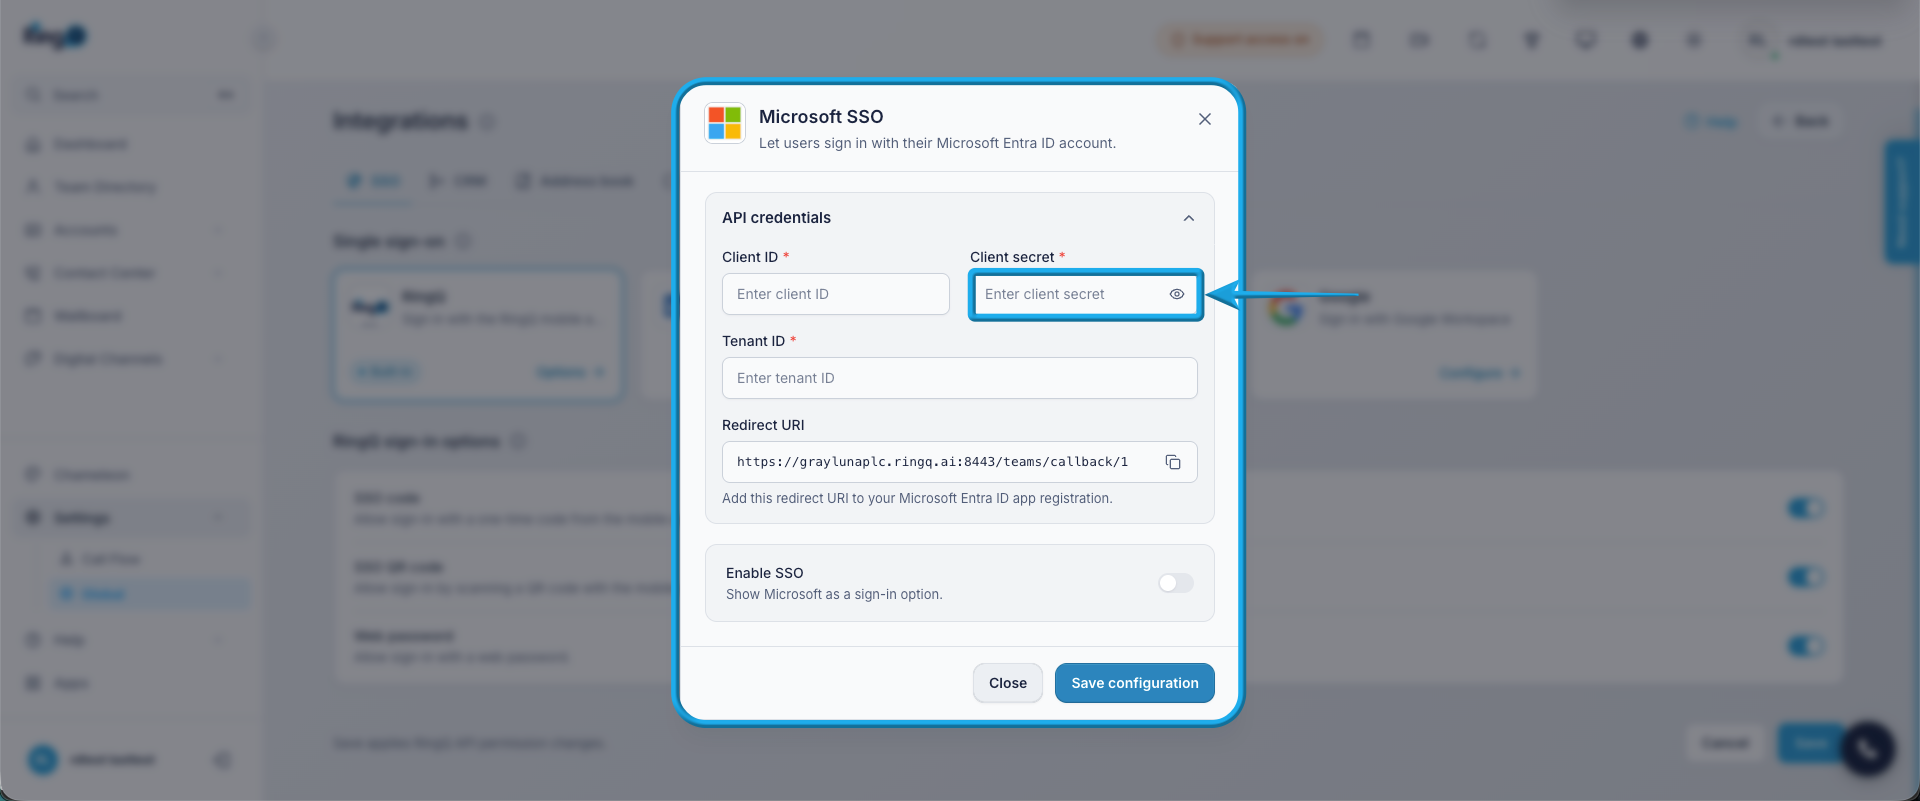
Return to the RingQ portal and paste the copied Client Secret Value into the Client Secret field.
After entering the Client ID, Tenant ID, and Client Secret, select the preferred Contact Source:
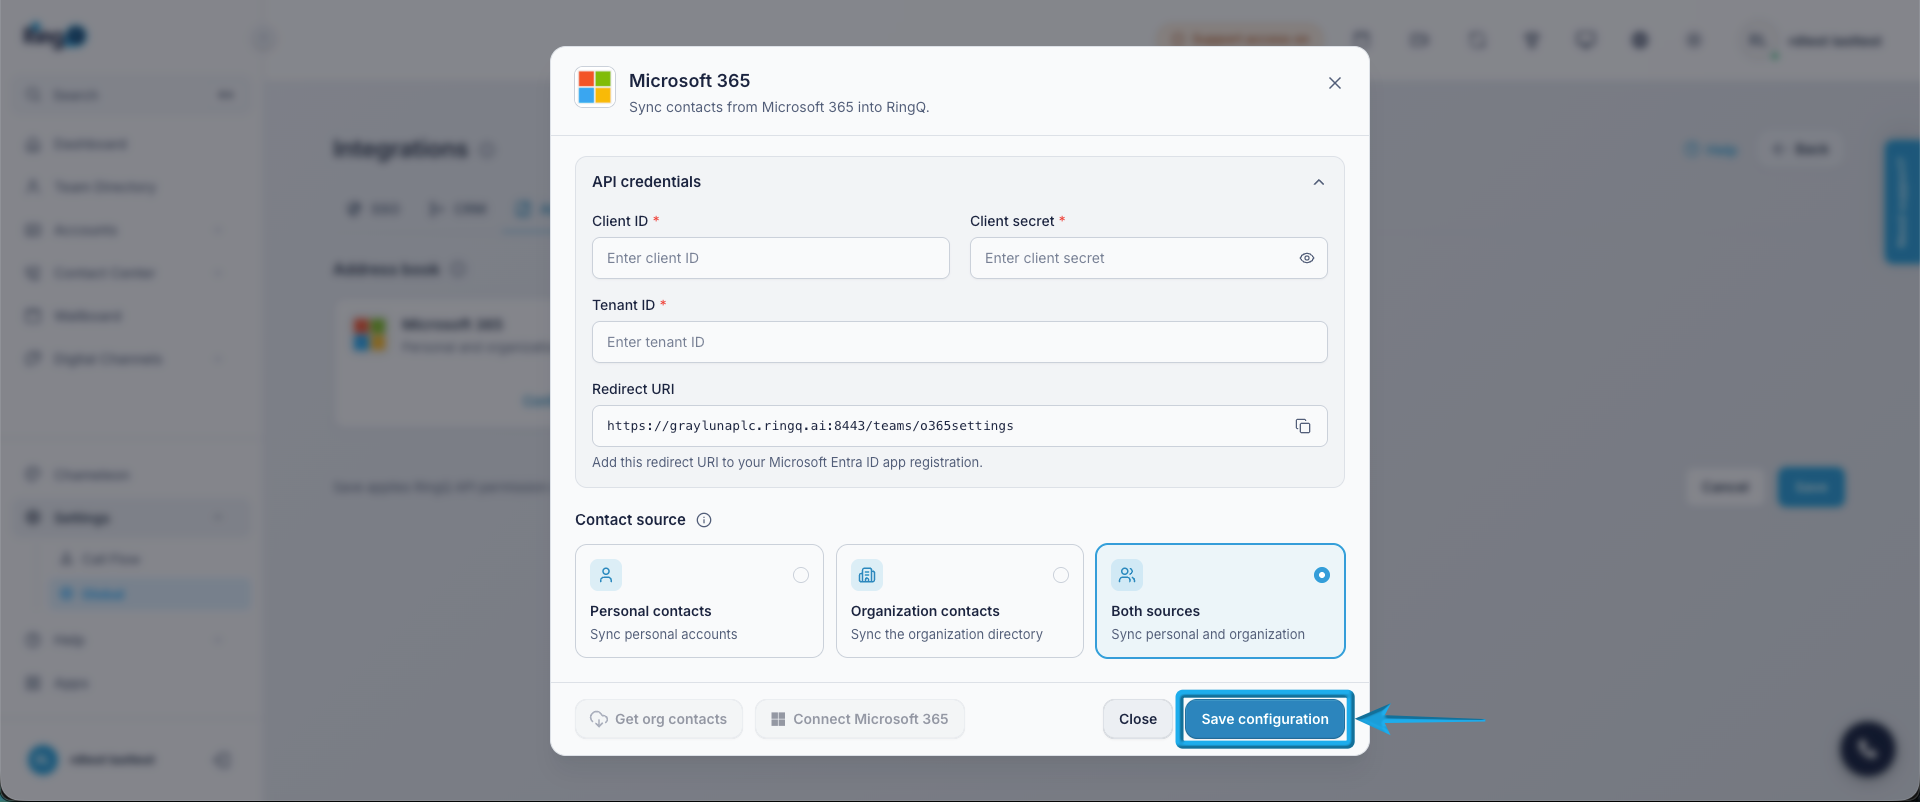
After selecting the desired contact source, click Connect Microsoft 365 to complete the integration. The selected contacts will be synchronized and added to RingQ.
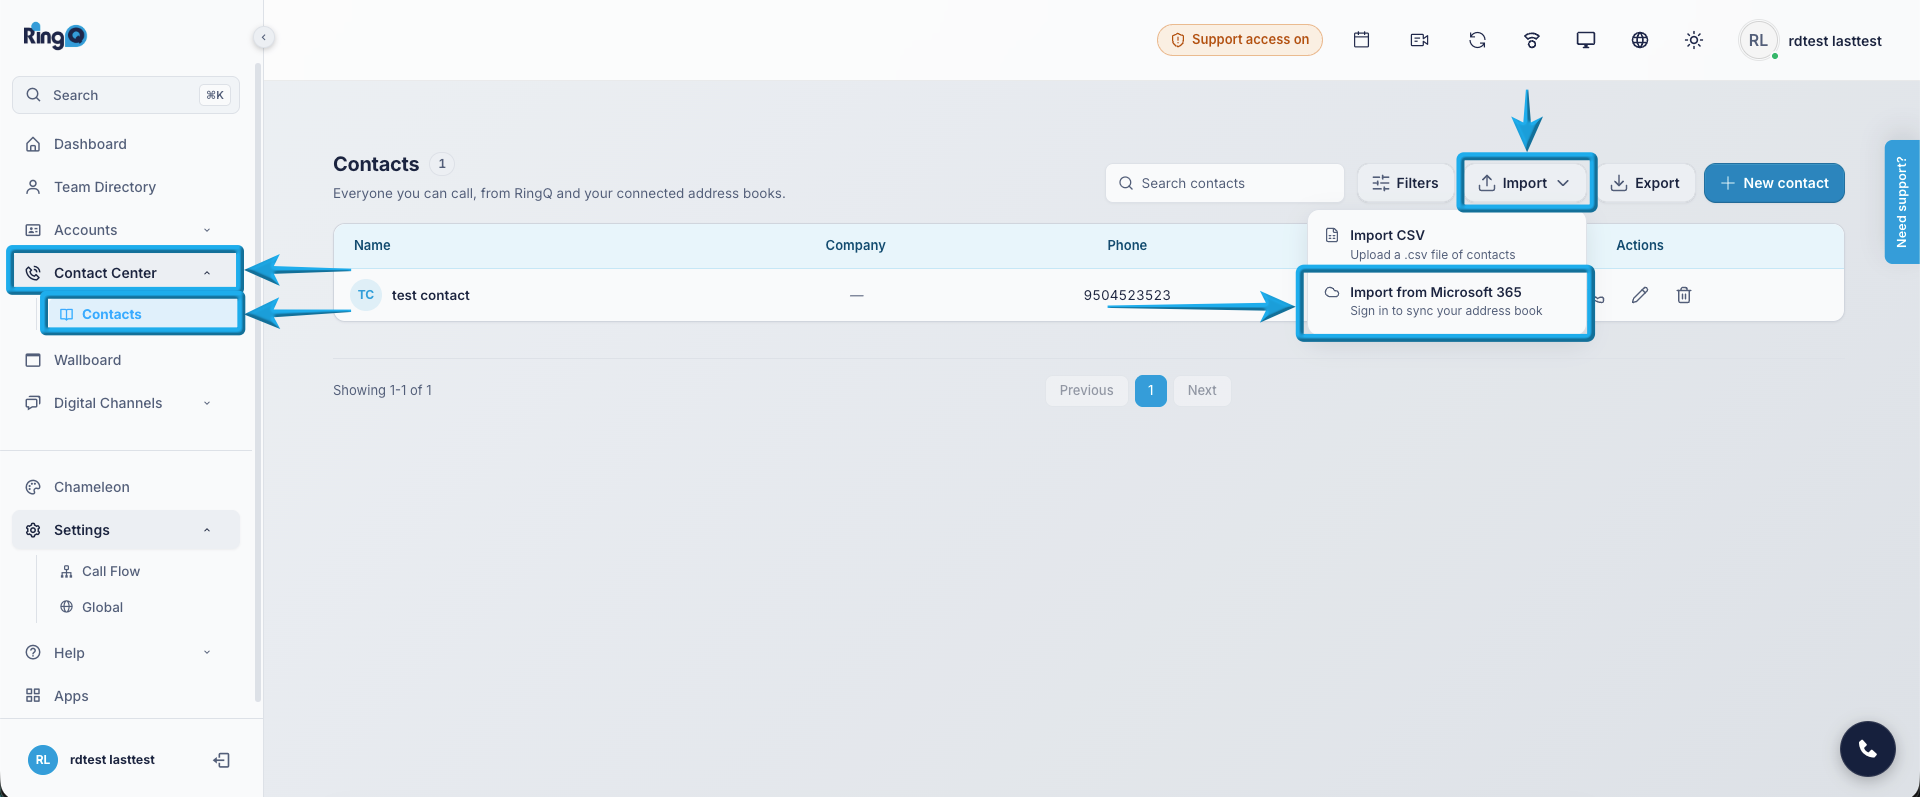
From the left navigation pane, select Contact Centre and open the Contacts page. All synchronized contacts will be displayed on this page.
Contacts can be imported using either Import CSV or Import from Microsoft 365.
To verify the imported contacts, use the Search field to search for a contact. If the contact appears in the search results, the synchronization has been completed successfully.