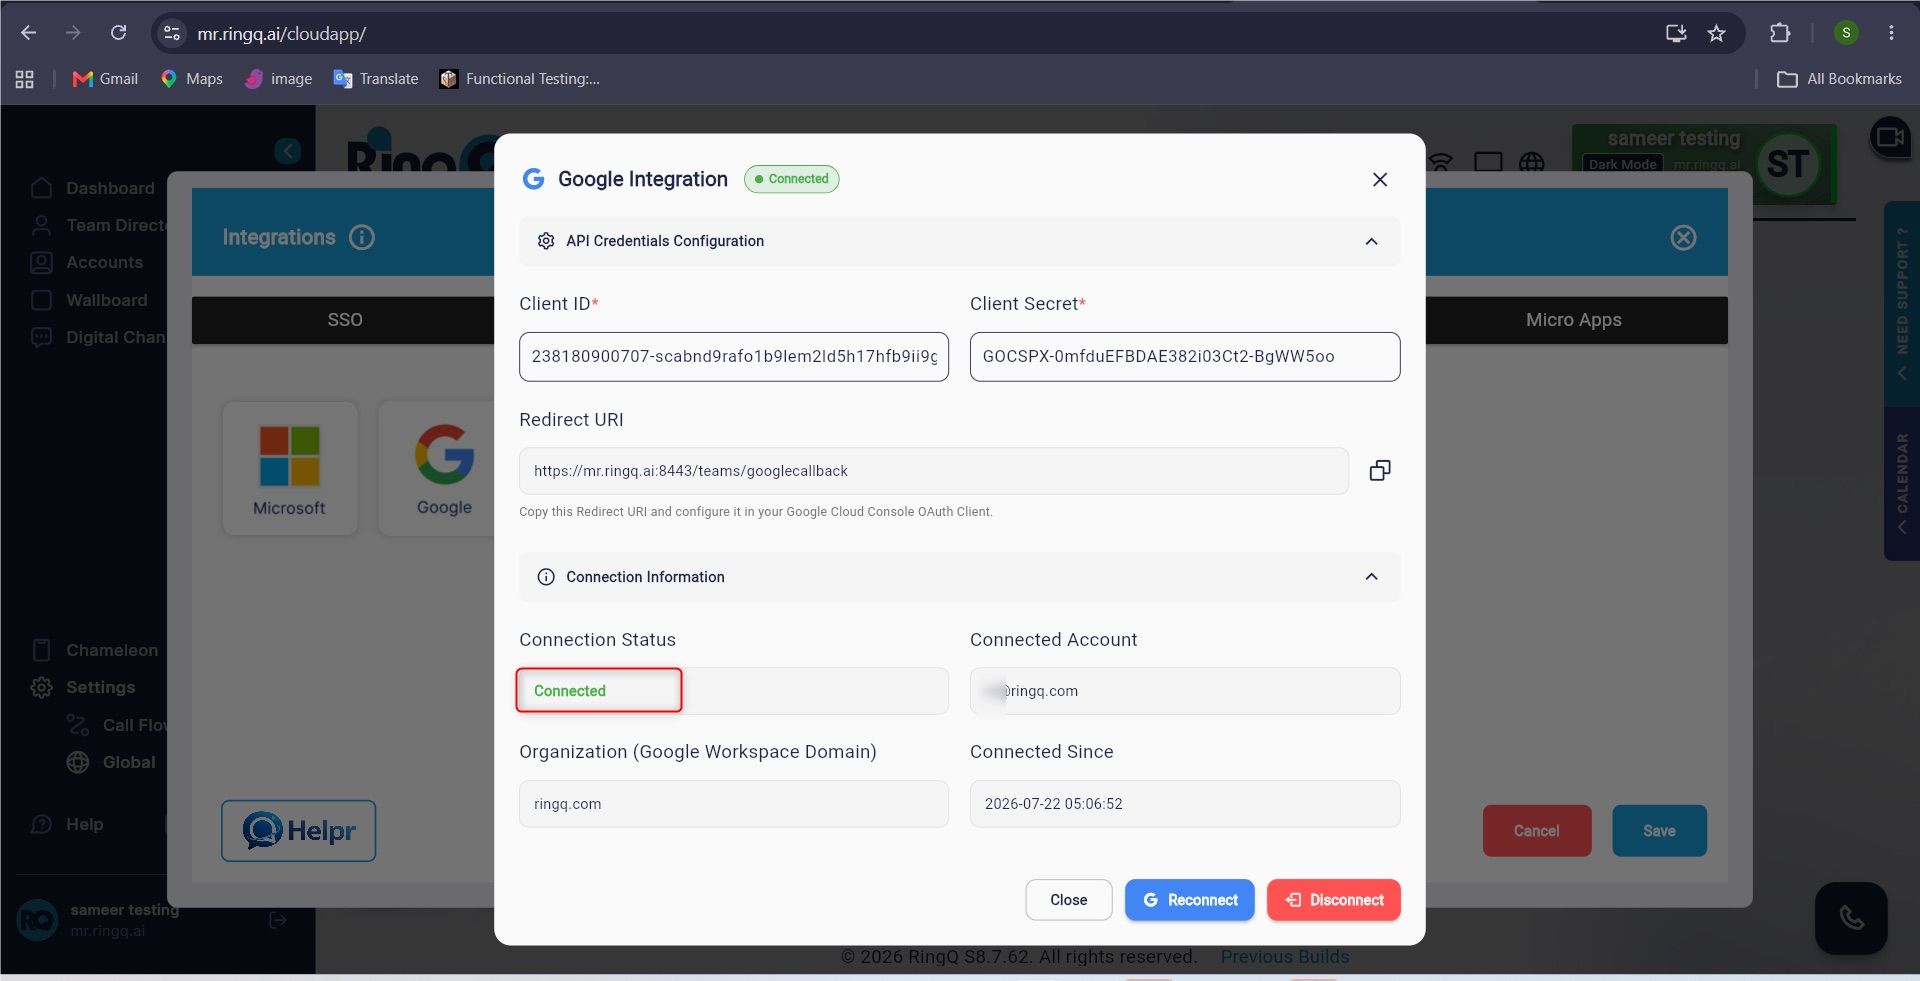
Google cloud Integration Configuration Guide for RingQ
Open your preferred web browser and navigate to https://console.cloud.google.com/. Sign in with your Google account if prompted.
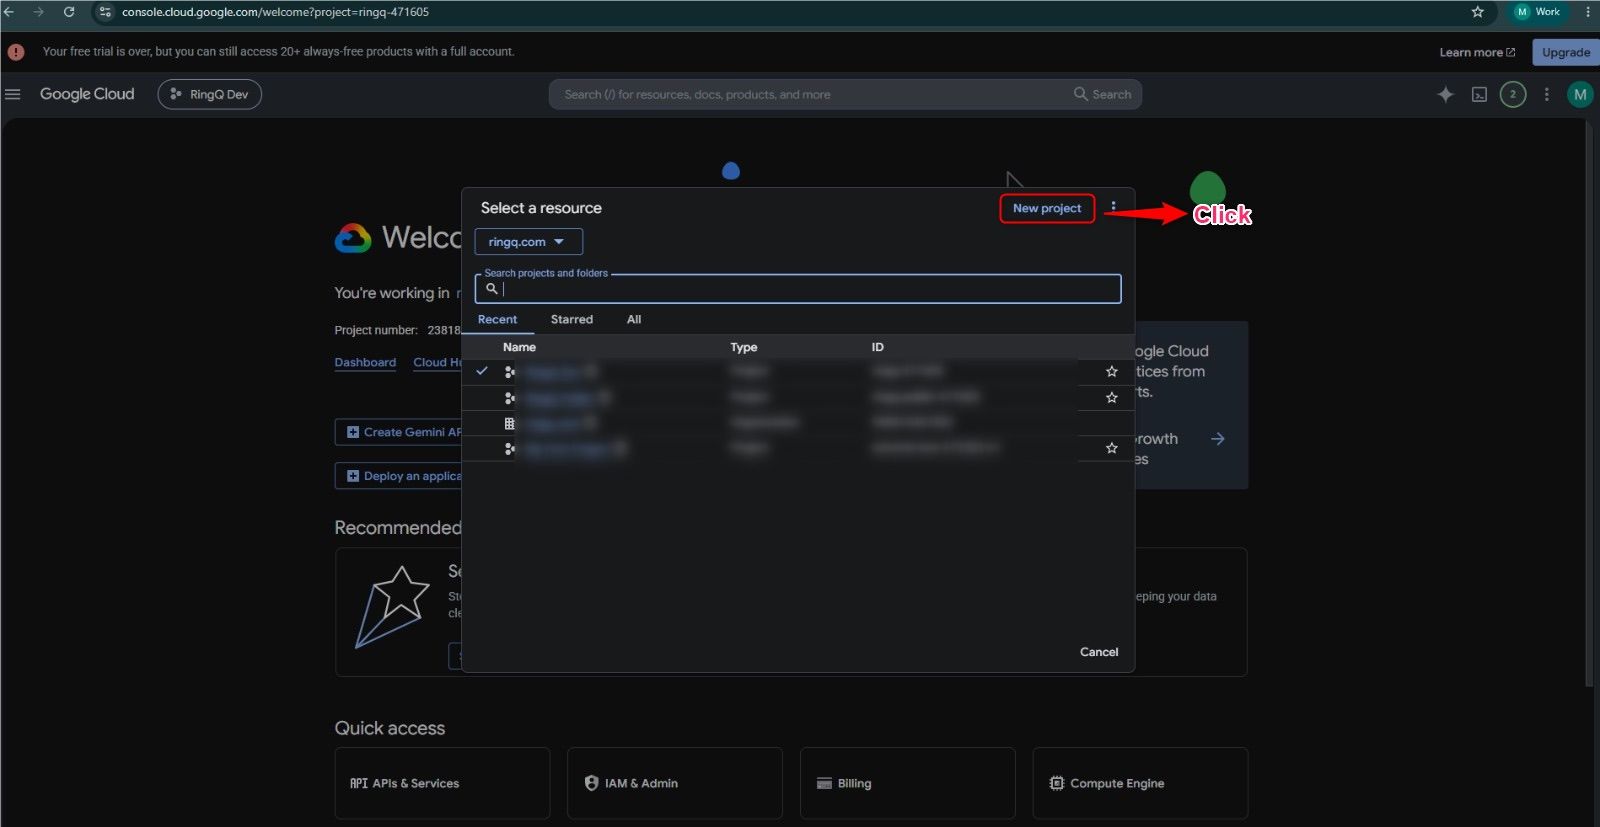
Once the Google Cloud Console home page is displayed, click the New project at the top of the page and select the required Google Cloud project (e.g., RingQ) to continue the integration.
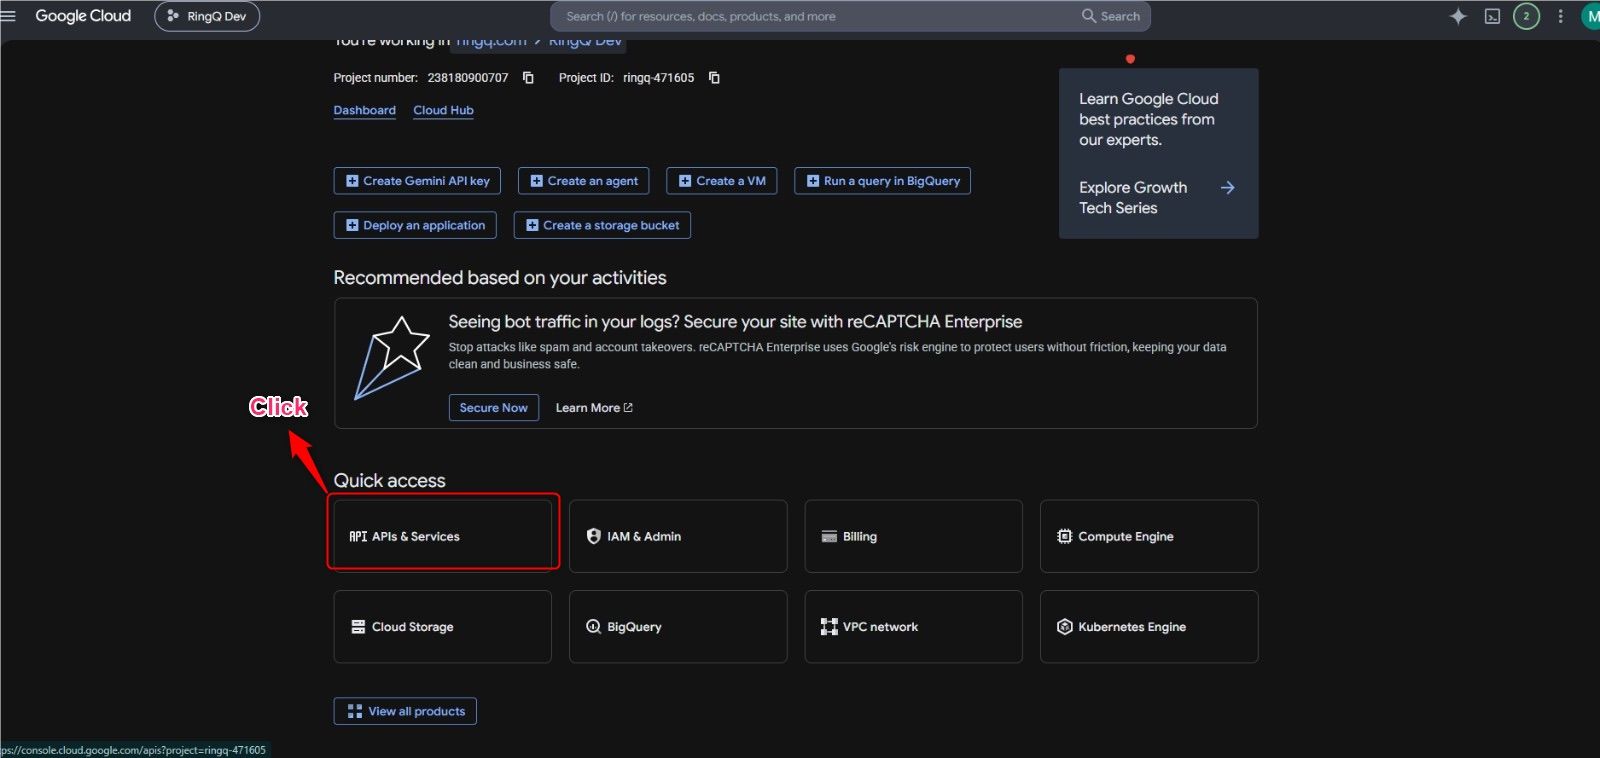
From the Google Cloud Console home page, navigate to the Quick access section and click APIs & Services. This will open the API management page,
Where you can enable and configure the APIs required for the RingQ integration.
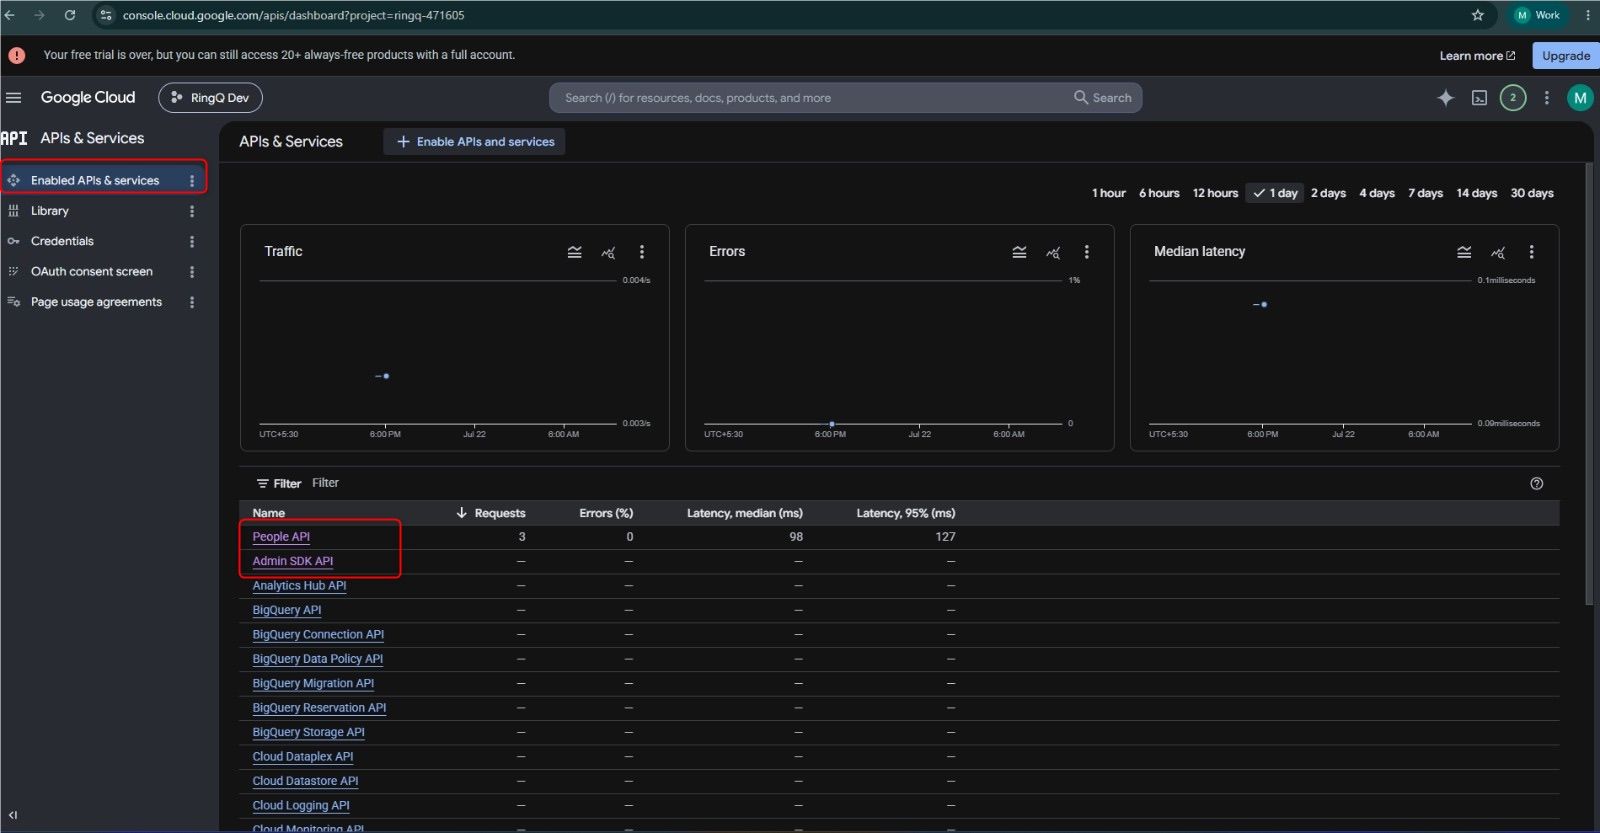
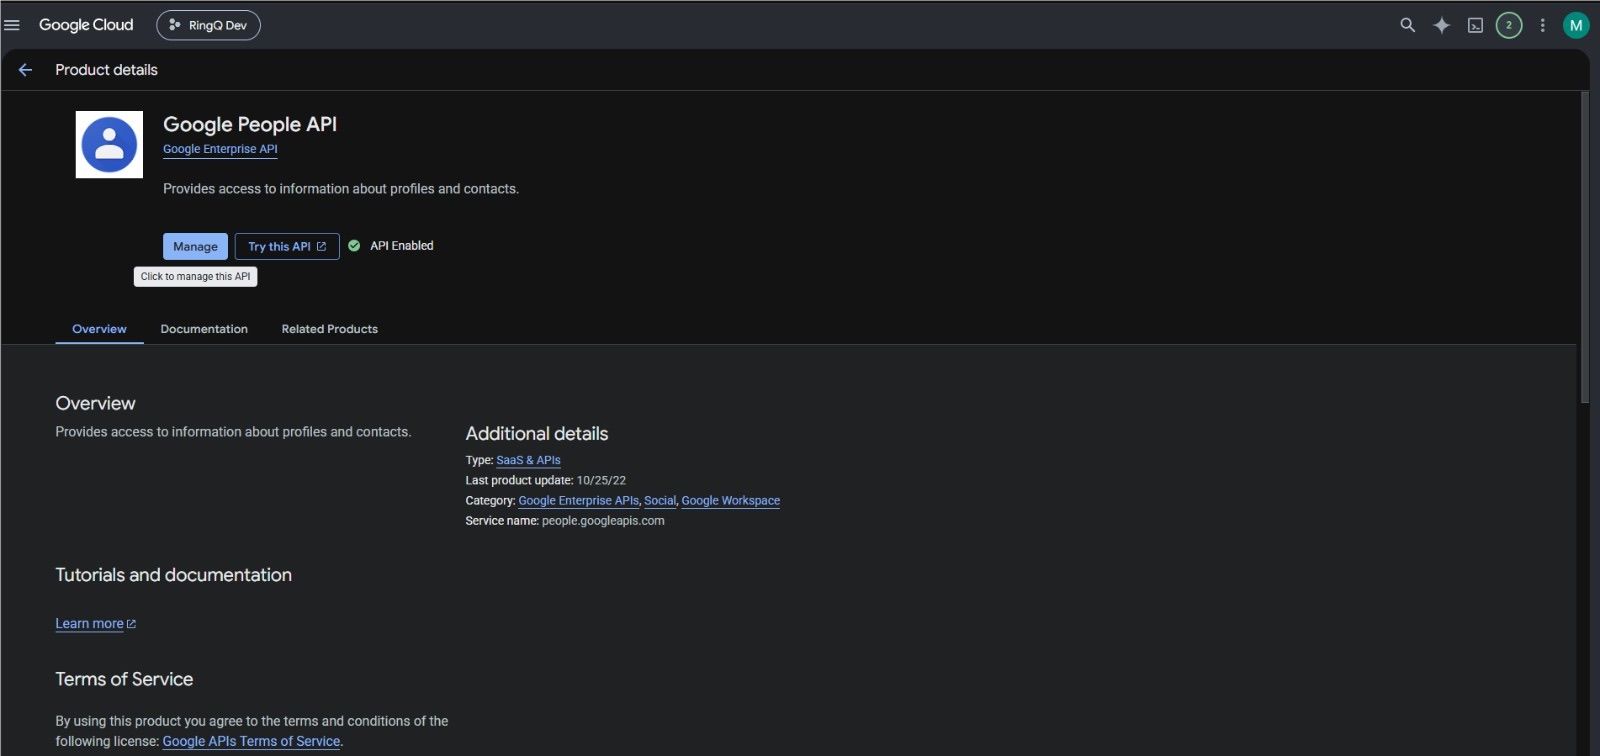
In the APIs & Services page, locate People API from the list of enabled APIs and click on it. On the API details page, click the Enable button if it is not already enabled. Repeat the same process for the Admin SDK API by opening it from the list and clicking Enable.
After enabling the People API, the API details page will display the API Enabled status with the Manage button. This confirms that the API has been successfully enabled.
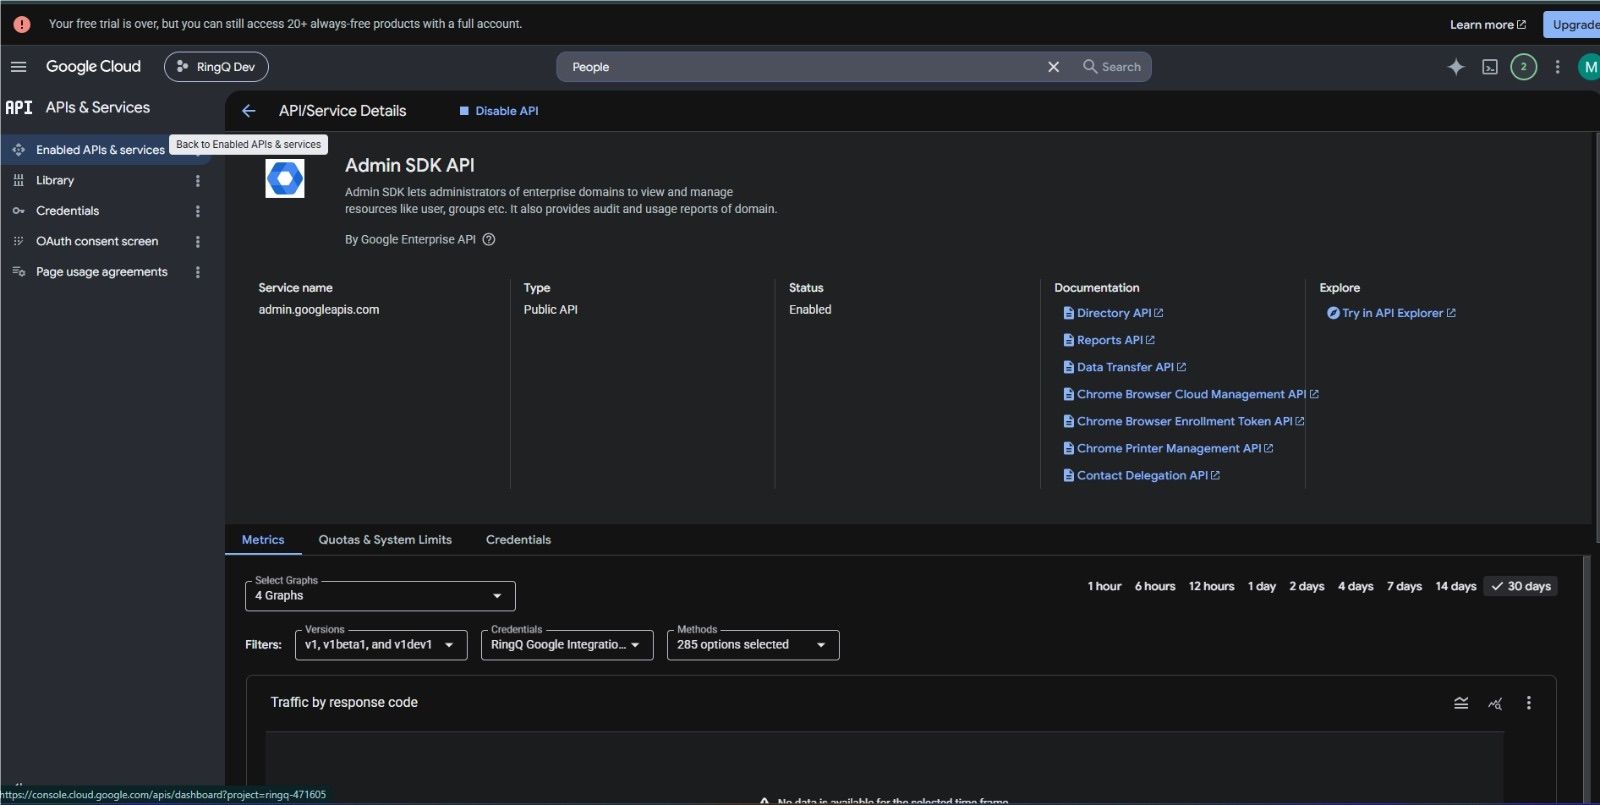
Repeat the same process for the Admin SDK API and verify that it also shows API Enabled.
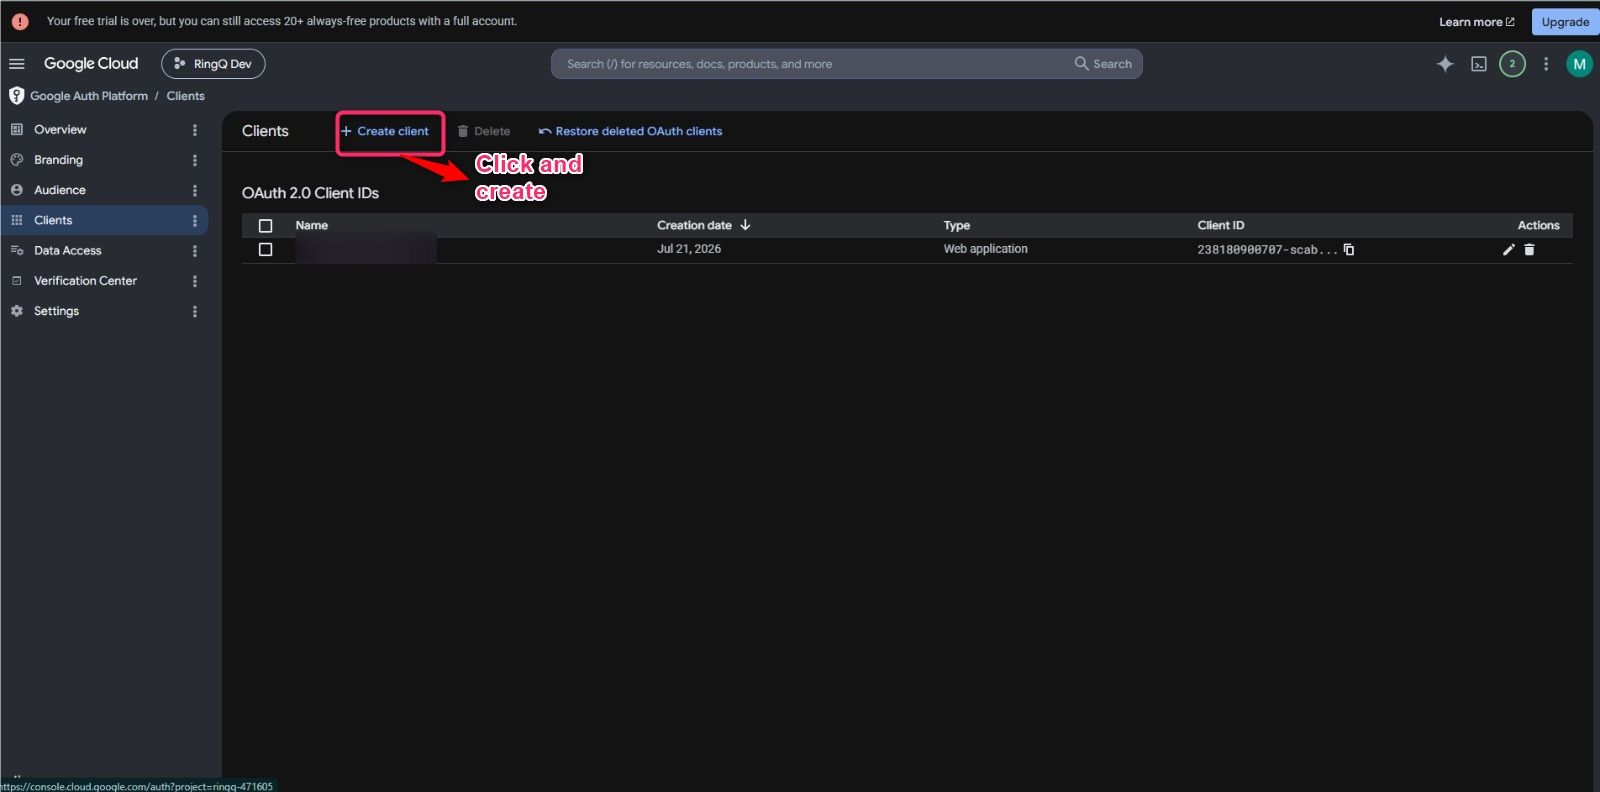
From the left navigation menu, open OAuth Consent Screen and select Clients. On the Clients page, click + Create Client to create a new OAuth 2.0 client for the RingQ integration.
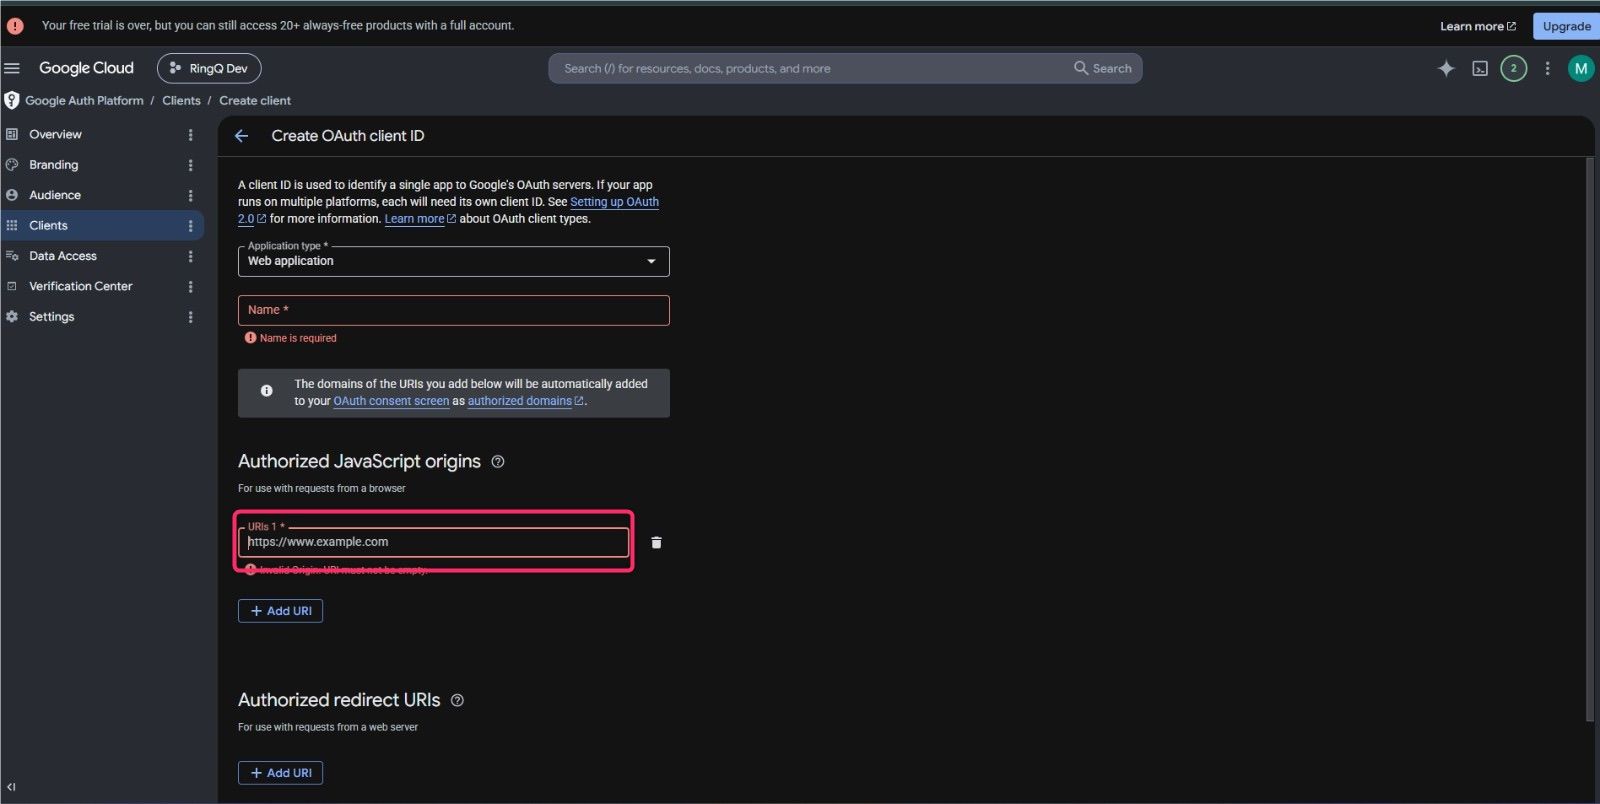
On the Create OAuth Client ID page, click the Application type drop-down list and select Web application. This option is required to configure the OAuth client for the RingQ web integration.
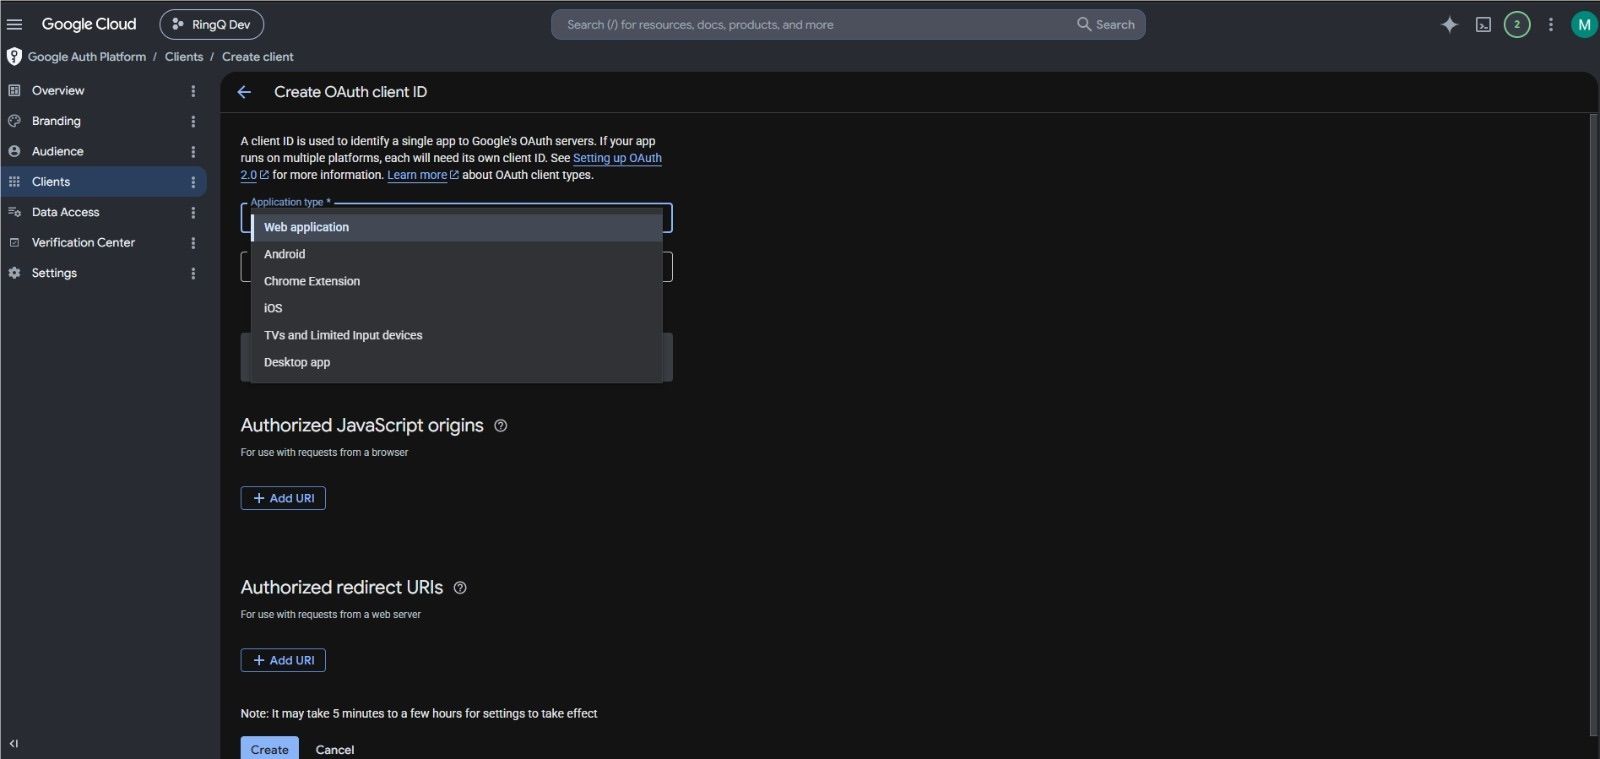
the Name field will be displayed. Enter a name for the OAuth client. You can use any preferred name, such as your company name or a project name, to easily identify the client.
In the Authorized JavaScript origins section, click + Add URI. Enter your RingQ application URL (FQDN) in the URI field.
Example: https://test.ringq.ai
Note: Replace the example URL with your own RingQ domain (FQDN).
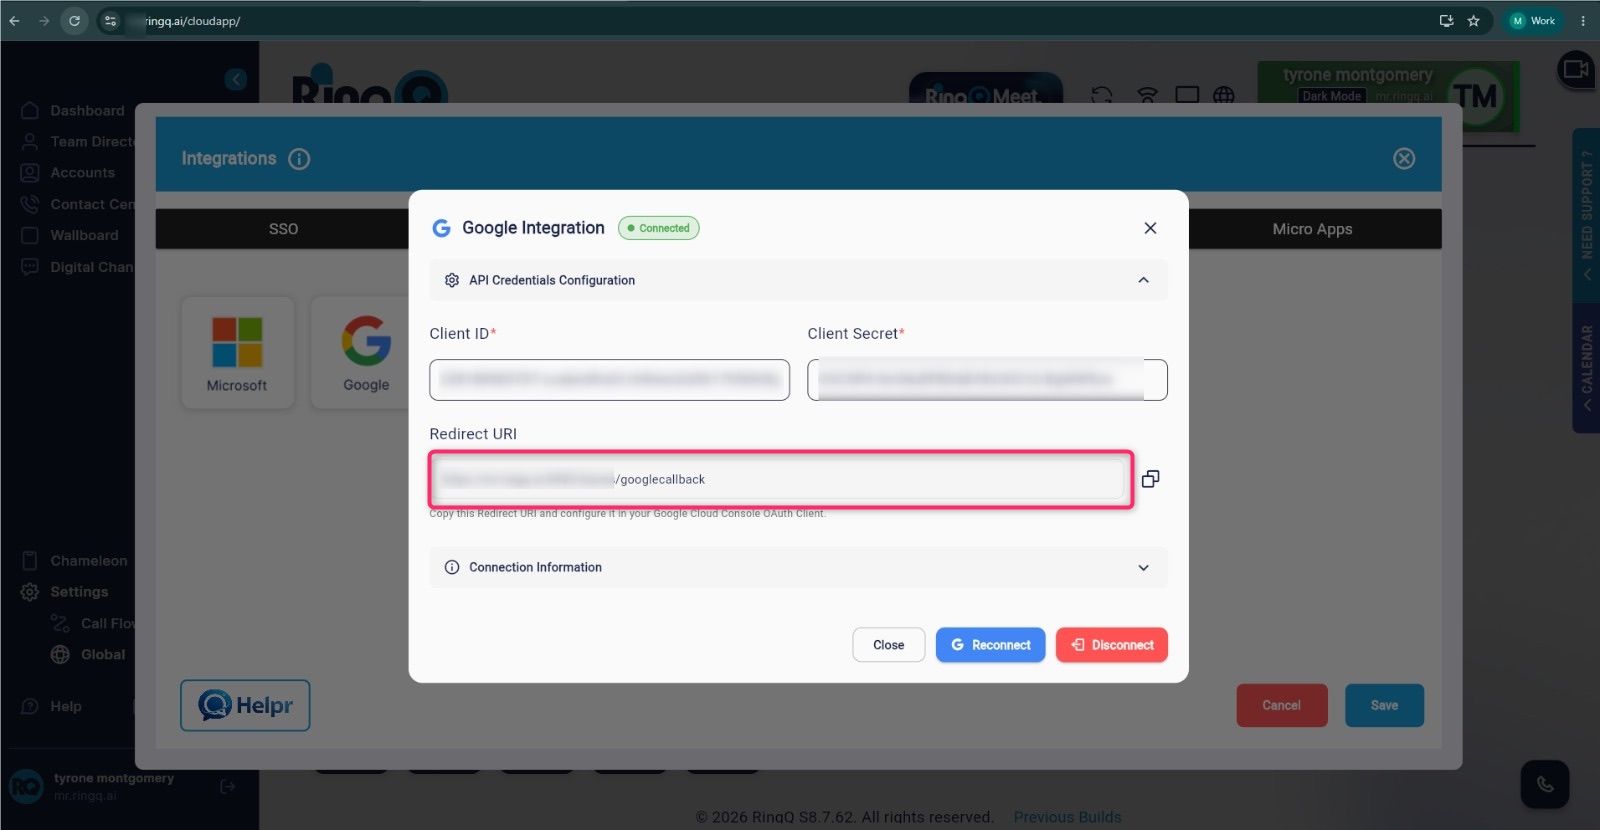
Log in to your RingQ application and navigate to Settings → Global Settings → Integrations → Google Cloud. Open the Google Integration window and copy the Redirect URI. This URL will be used while configuring the OAuth client in Google Cloud Console.
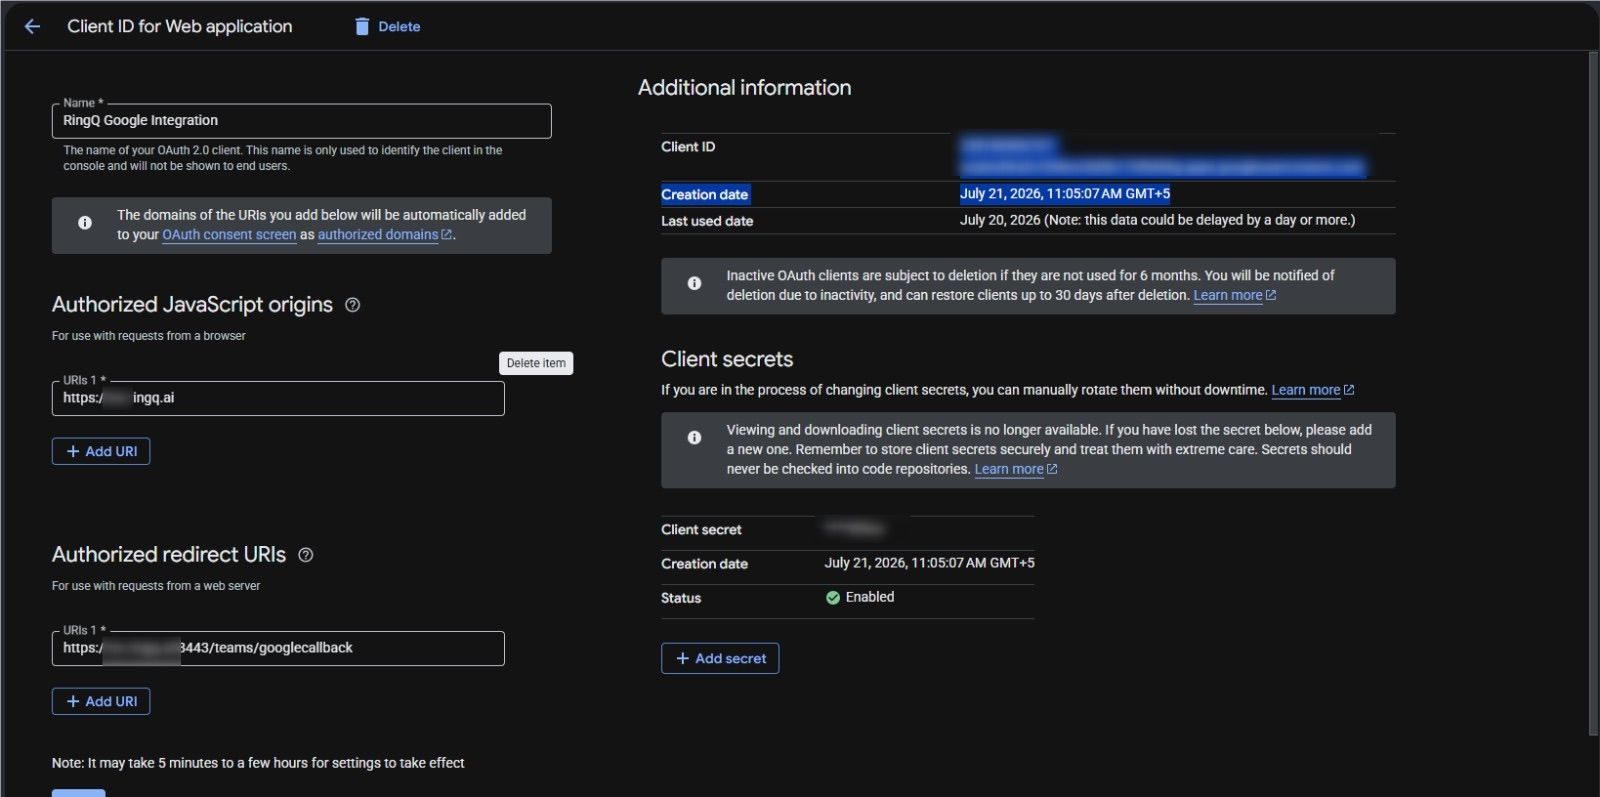
Paste the Redirect URI copied from the RingQ application into the Authorized redirect URIs section in Google Cloud Console. After saving the configuration, the Client ID and Client Secret will be generated. Copy both values and paste them into the Client ID and Client Secret fields in the RingQ Google Integration page, then save the configuration.
x
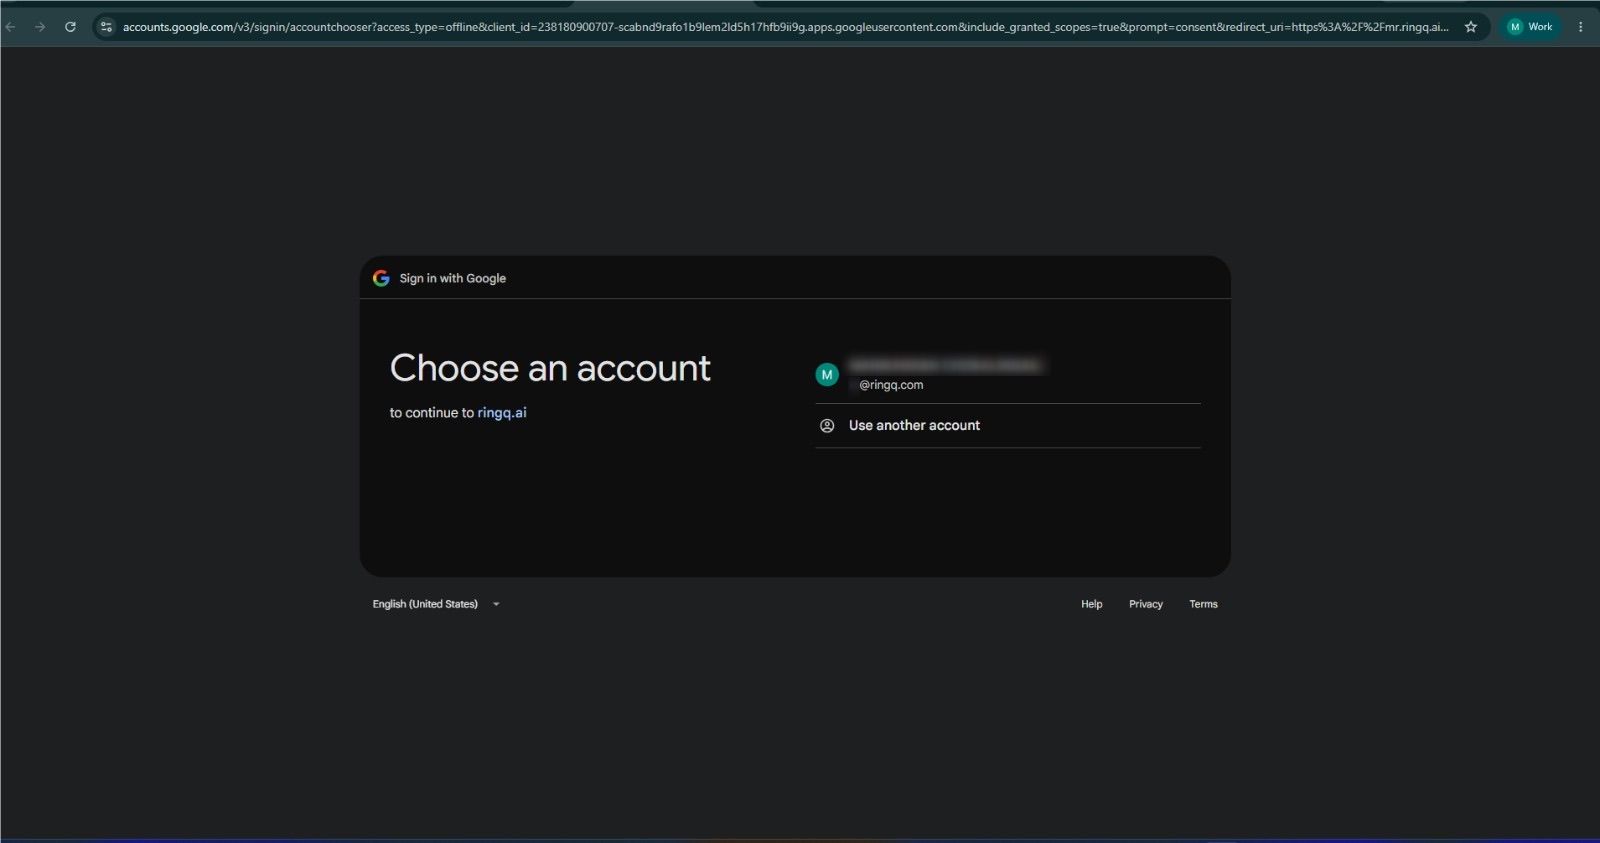
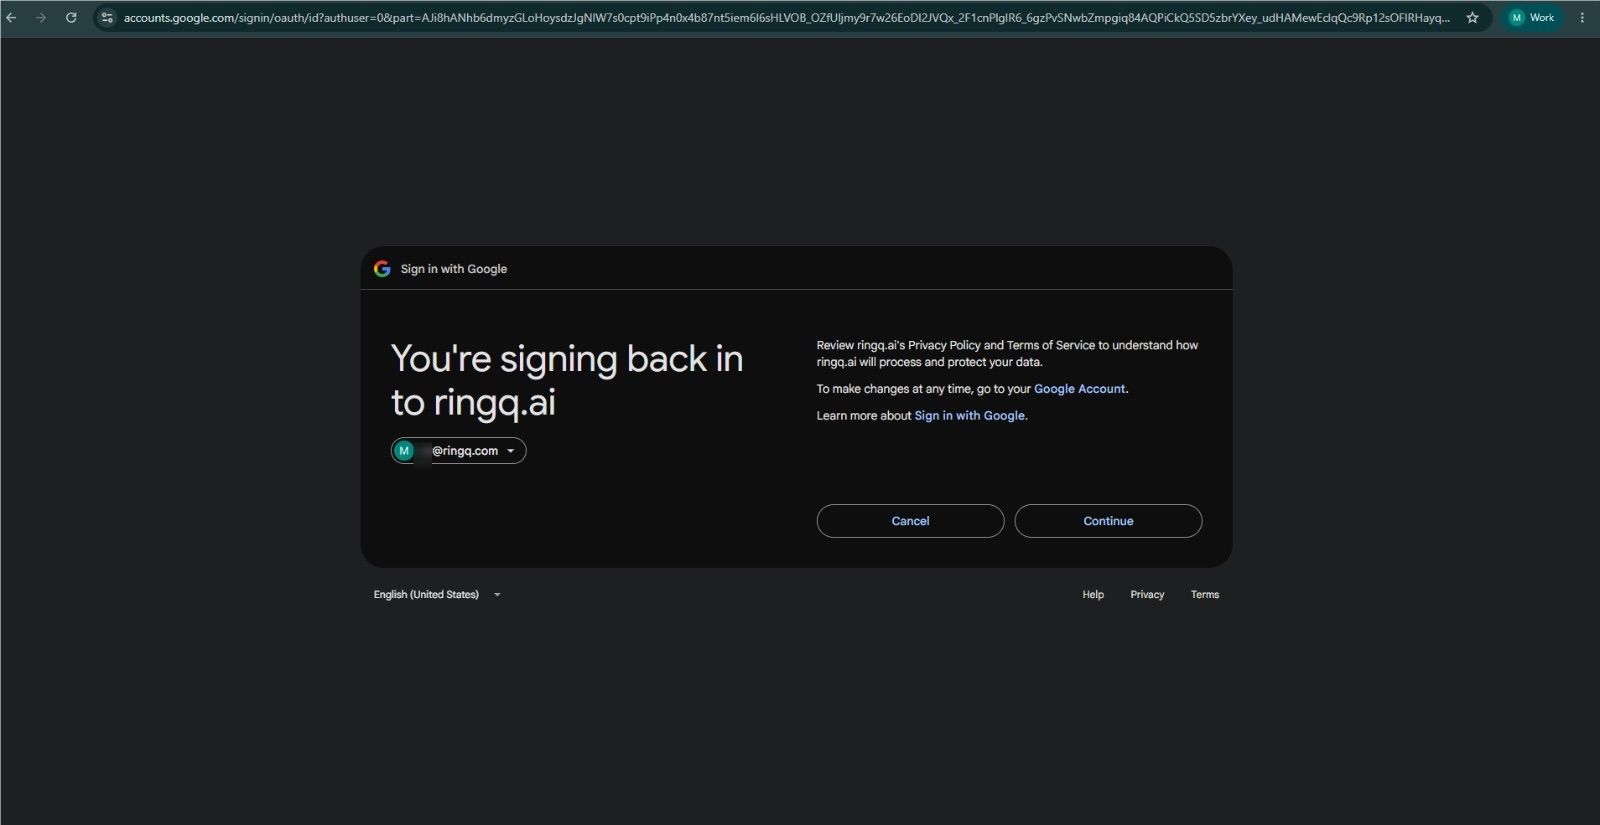
After saving the OAuth client configuration, a new browser tab will open. Select the Google account that you want to use for the integration and complete the verification process.
If prompted with a confirmation screen to sign in again, click Continue to proceed with the authentication.
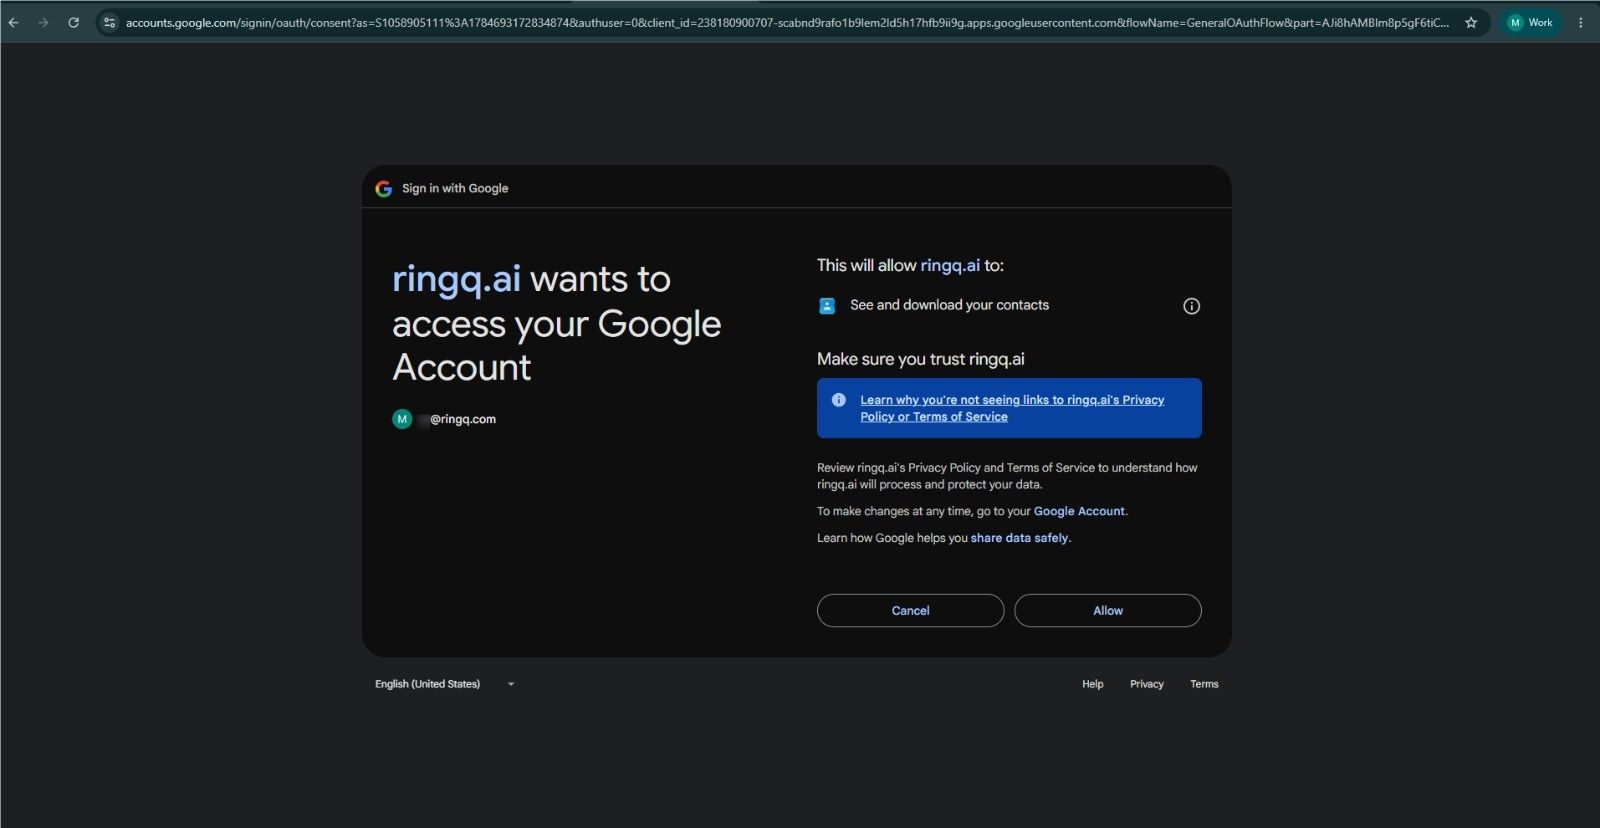
When prompted with "RingQ wants to access your Google Account", review the requested permissions and click Allow to grant access. This authorizes RingQ to communicate with your Google Workspace account.
After the authorization is completed, you will be redirected back to RingQ. Ensure that the integration result displays:
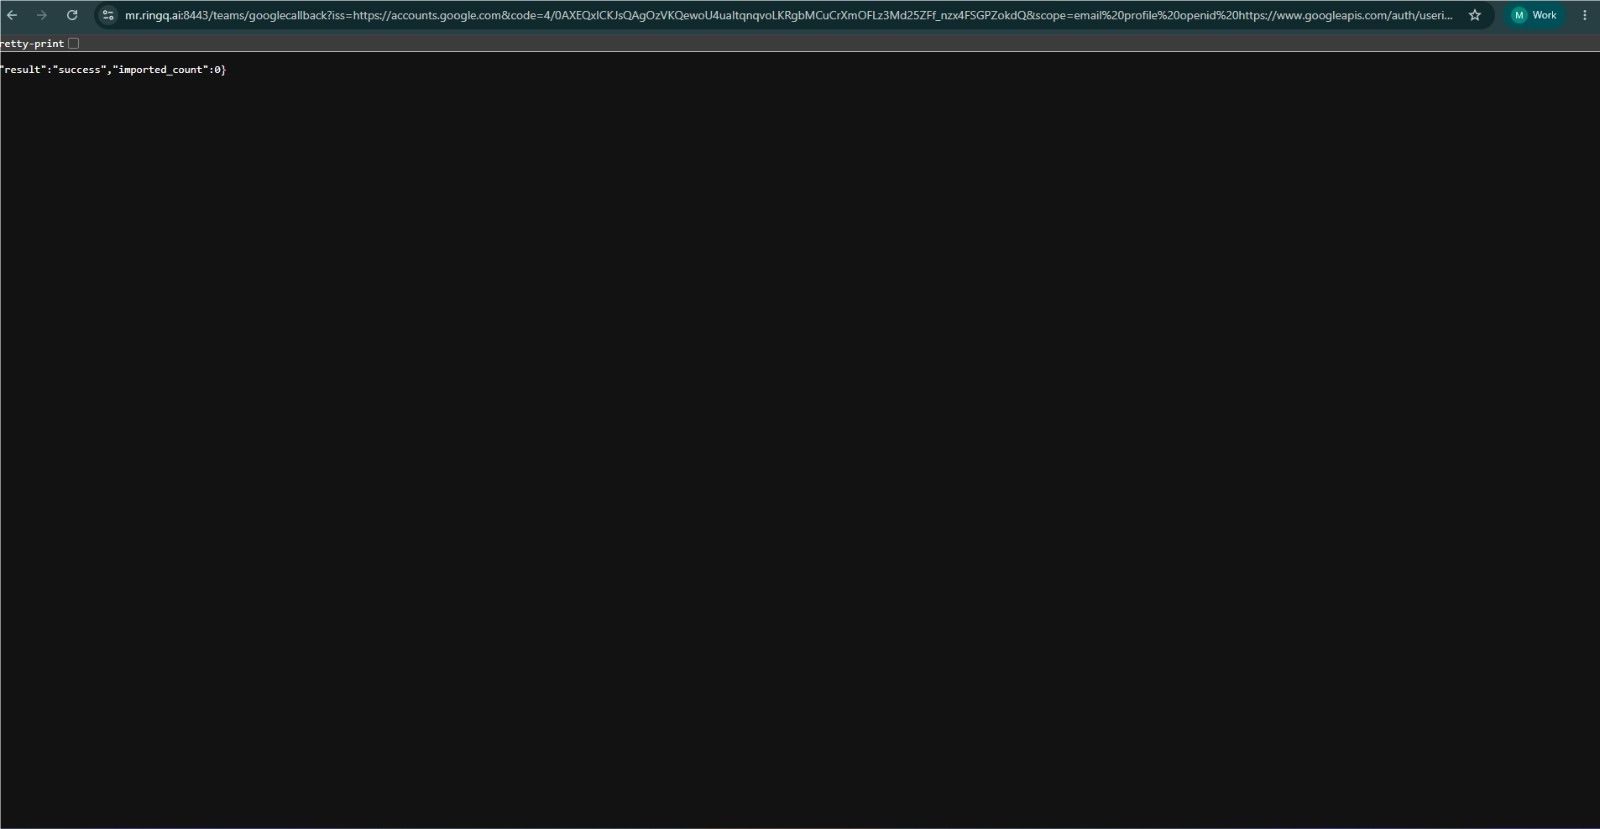
This confirms that the Google Cloud integration has been completed successfully.
After completing the authorization process, return to the Google Integration page in RingQ. Verify that the Connection Status is displayed as Connected. This confirms that the Google Cloud integration has been completed successfully and the RingQ application is connected to your Google Workspace account.