A paging group lets you broadcast a one-way announcement to every agent in the group. This guide walks you through creating the group under Accounts > Extensions > Groups, enabling paging and assigning agents.
Step 1. Log in to your RingQ instance and go to Accounts in the left-hand menu. Open the Extensions page, then click Groups at the top to switch to the Groups tab.
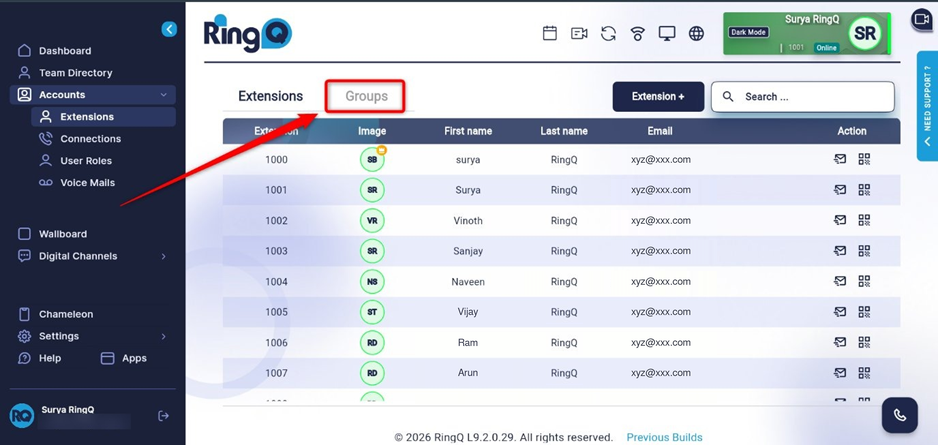
Figure 1: Accounts > Extensions > Groups tab
Step 2. On the Groups tab, click the Group + button in the upper right corner to open the group creation window.
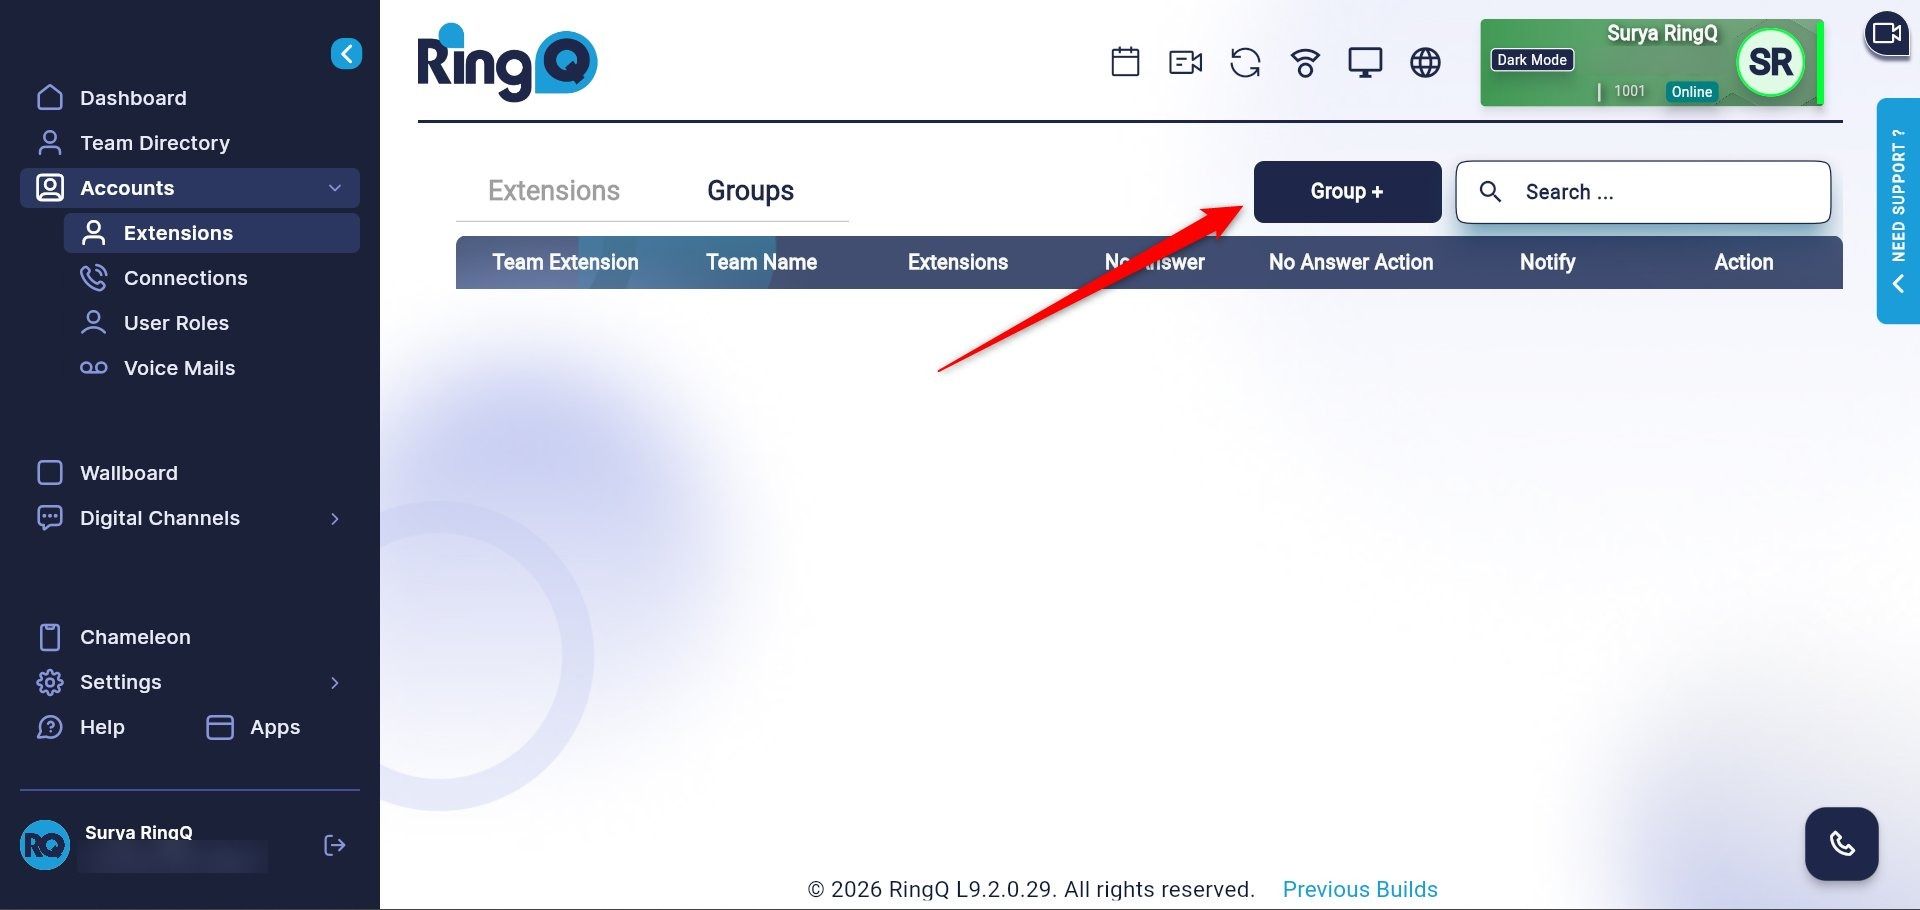
Figure 2: Group + button
In the Summary tab, enter a Group Extension and a Group Name. Turn on the Enable Paging toggle to broadcast a one-way announcement to every agent in this group.
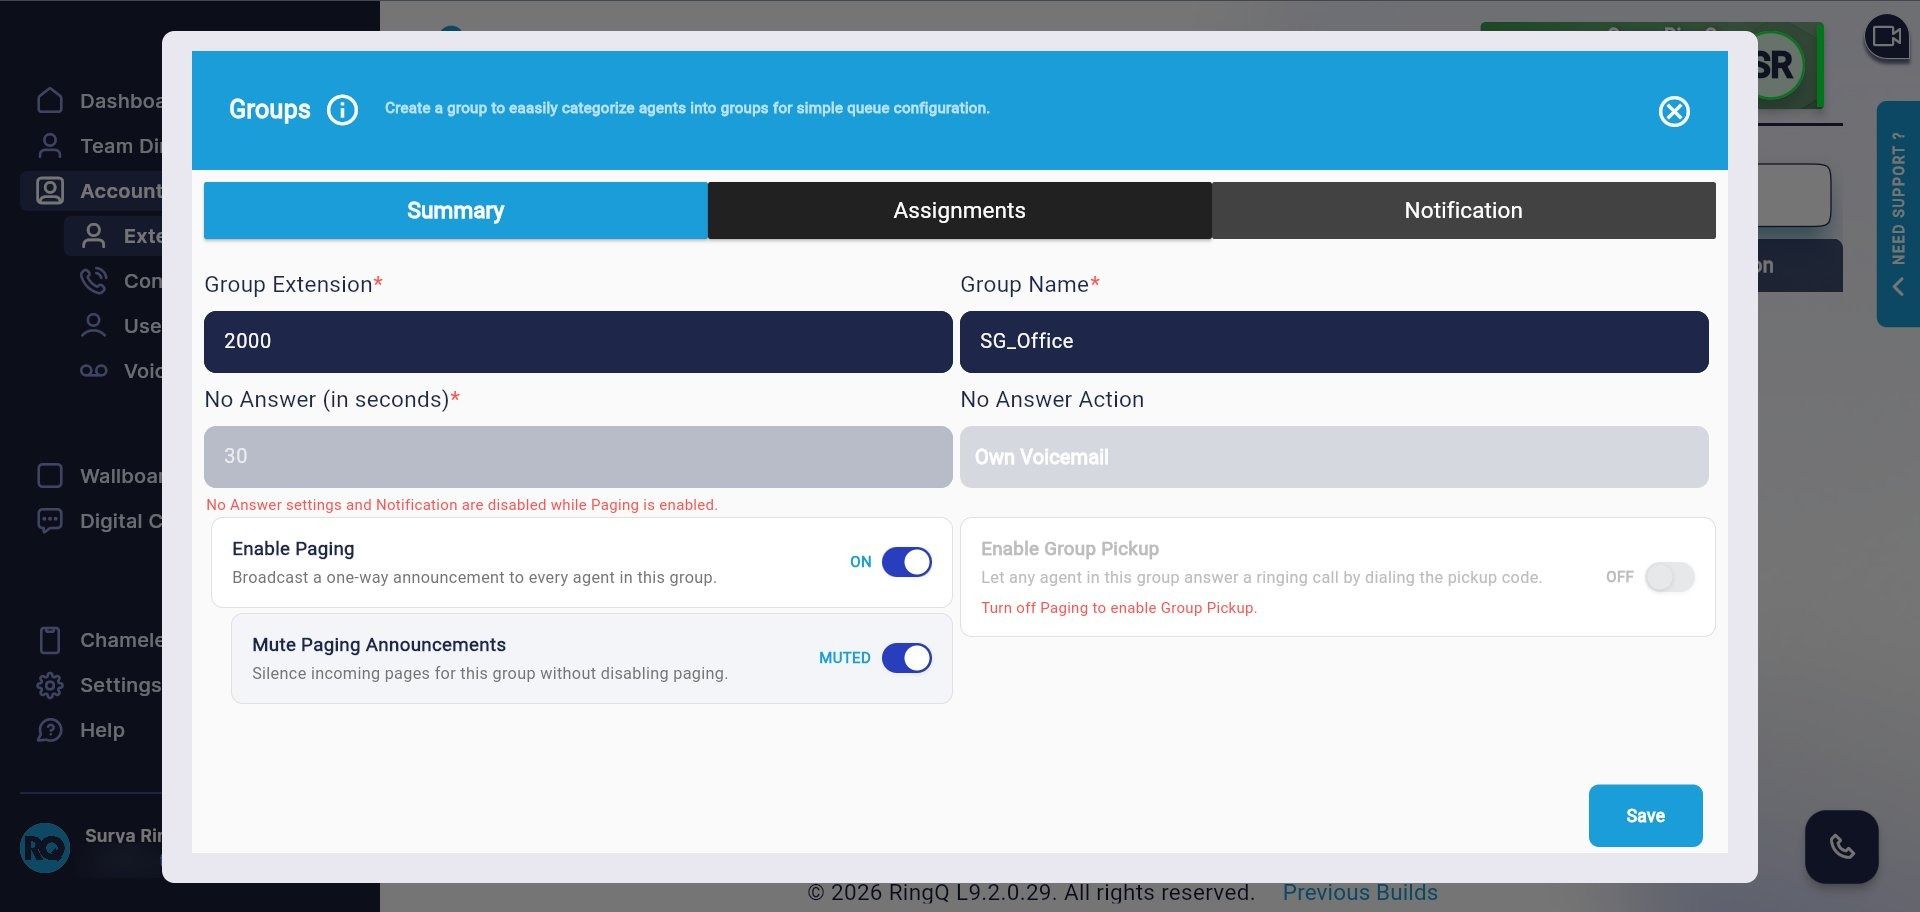
Figure 3: Summary tab with Enable Paging turned on
Note: Enabling Paging automatically disables the No Answer and Notification settings for this group. Paging and Group Pickup cannot be on at the same time.
Tip: To silence incoming pages without turning paging off, use the Mute Paging Announcements toggle.
Step 1. On the Assignments tab, drag agents from the Available Agents list on the left into the Group Agents list on the right. You can also use the search box to find a specific agent.
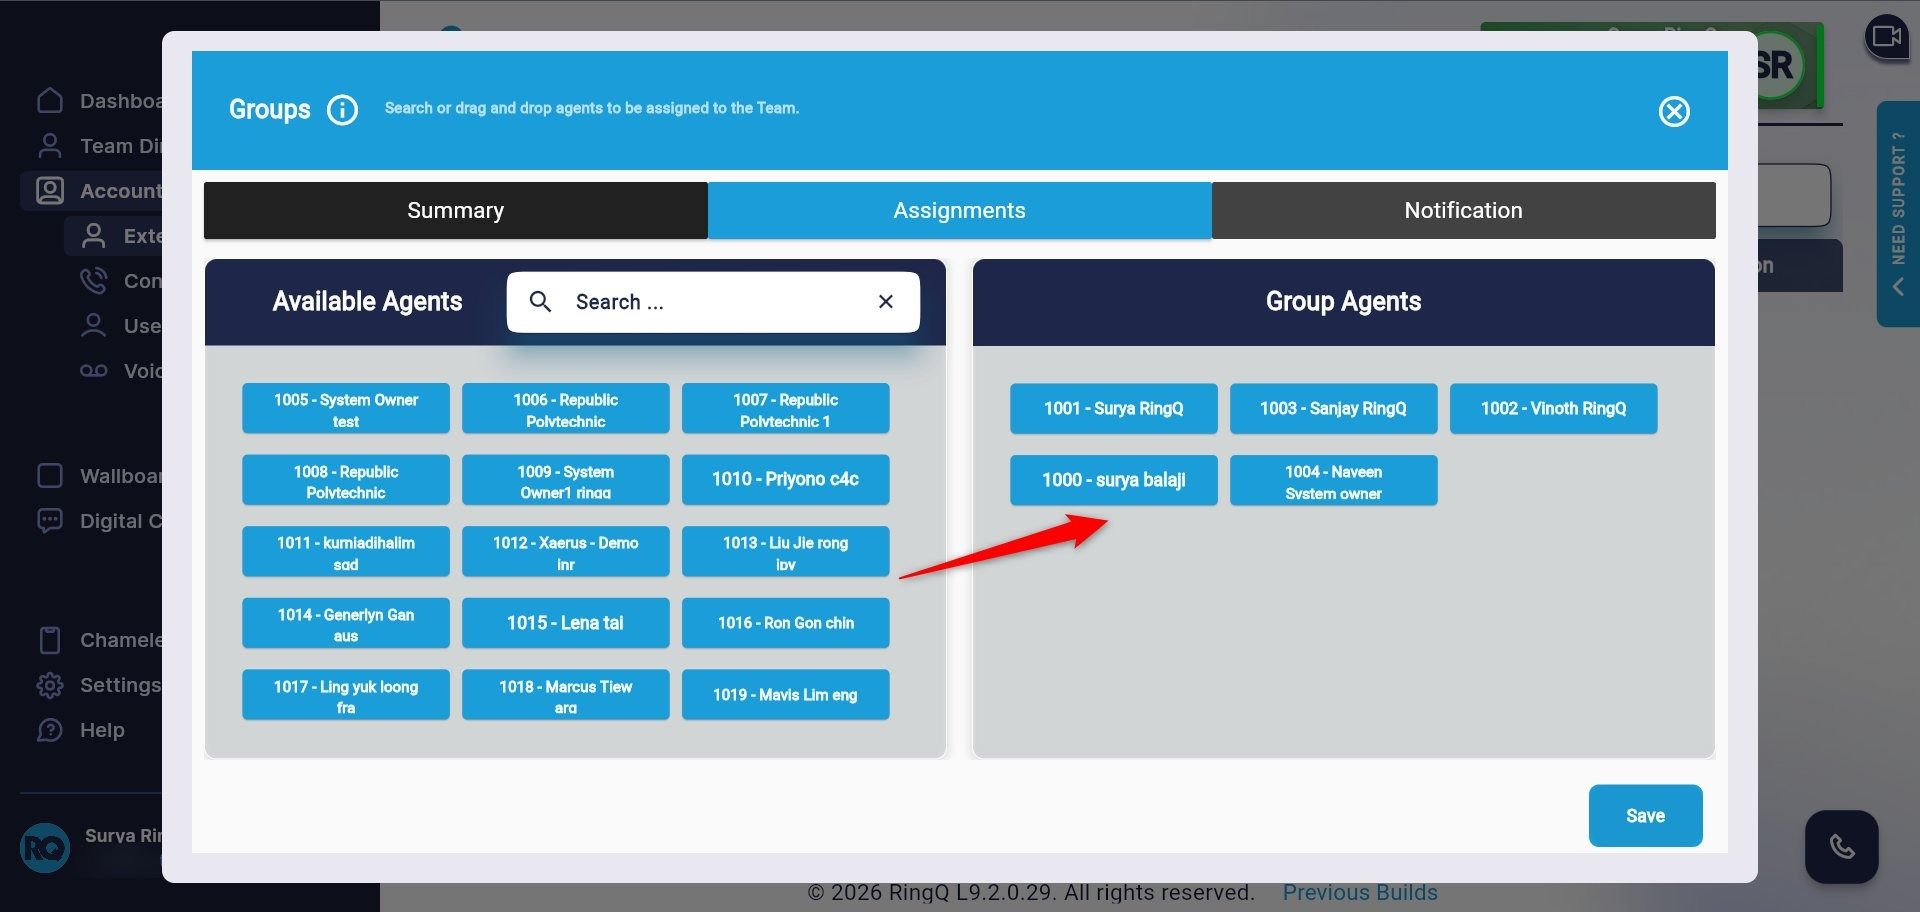
Figure 4: Assigning agents to the group
Step 2. Once all the agents you need are added, click Save to create the group.
Tip: You can return to the Groups tab at any time to edit membership, rename a group, or adjust its paging and notification settings.
| Setting | What it does |
|---|---|
| Group Extension / Group Name | Identifies the paging group |
| Enable Paging | Broadcasts a one-way announcement to all agents in the group |
| Mute Paging Announcements | Silences incoming pages without disabling paging |
| Assignments | Agents who receive the page |
