A DID (Direct Inward Dial) number can be routed straight to a paging group. When someone calls that number, RingQ answers automatically and announces the page to every agent in the group. You set this up in Settings > Call Flow.
This guide covers:
Go to Settings > Call Flow. Under Available DID Numbers, click and drag the DID number you want to assign, then drop it onto the Others panel on the right.
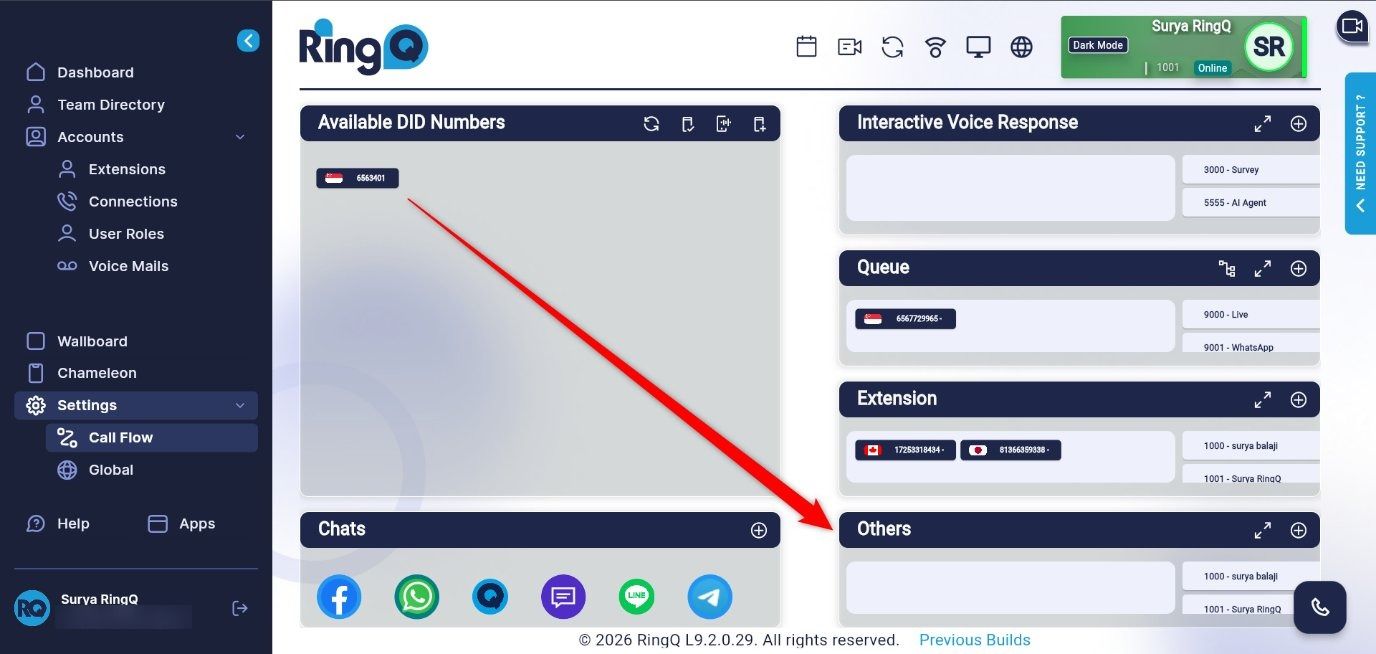
Figure 1: Drag the DID number onto the Others panel
Note: Drop the number on the Others panel, not on the Interactive Voice Response, Queue or Extension panels.
Step 1. A pop-up window opens asking where calls to this DID should be routed. In the tab bar at the top of the window, select Group.
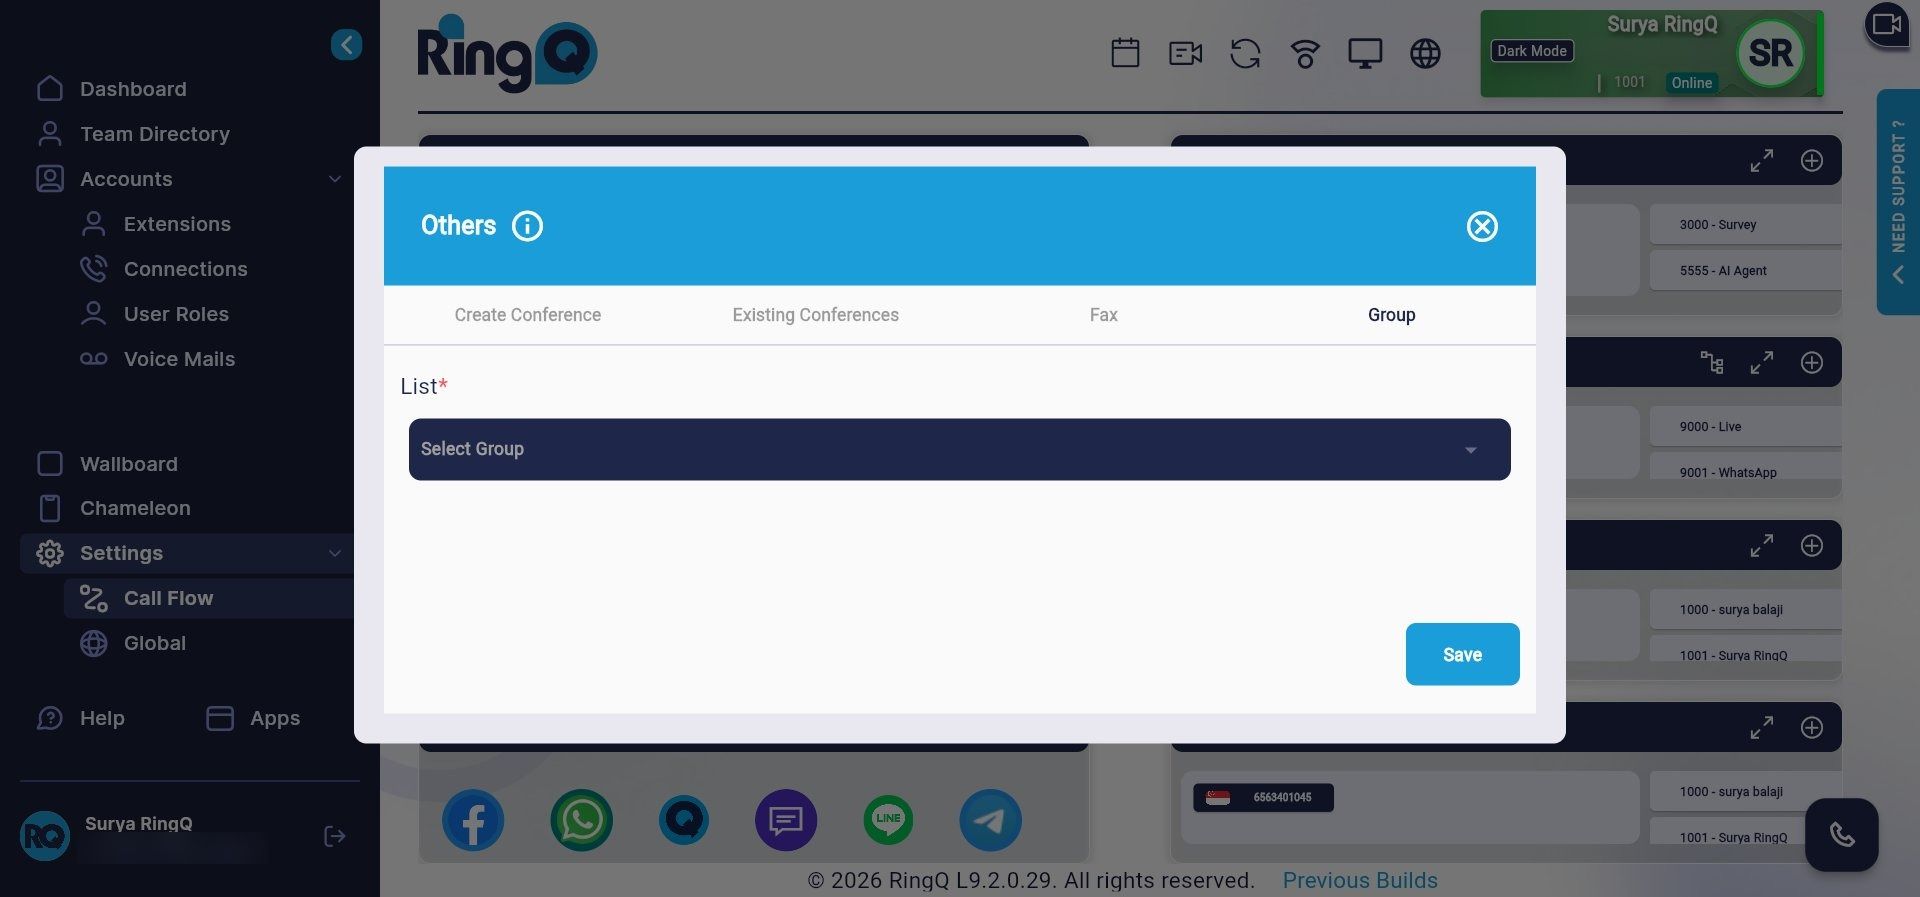
Figure 2: Select the Group tab
Step 2. Click the List drop-down and select the paging group the calls should go to, then click Save.
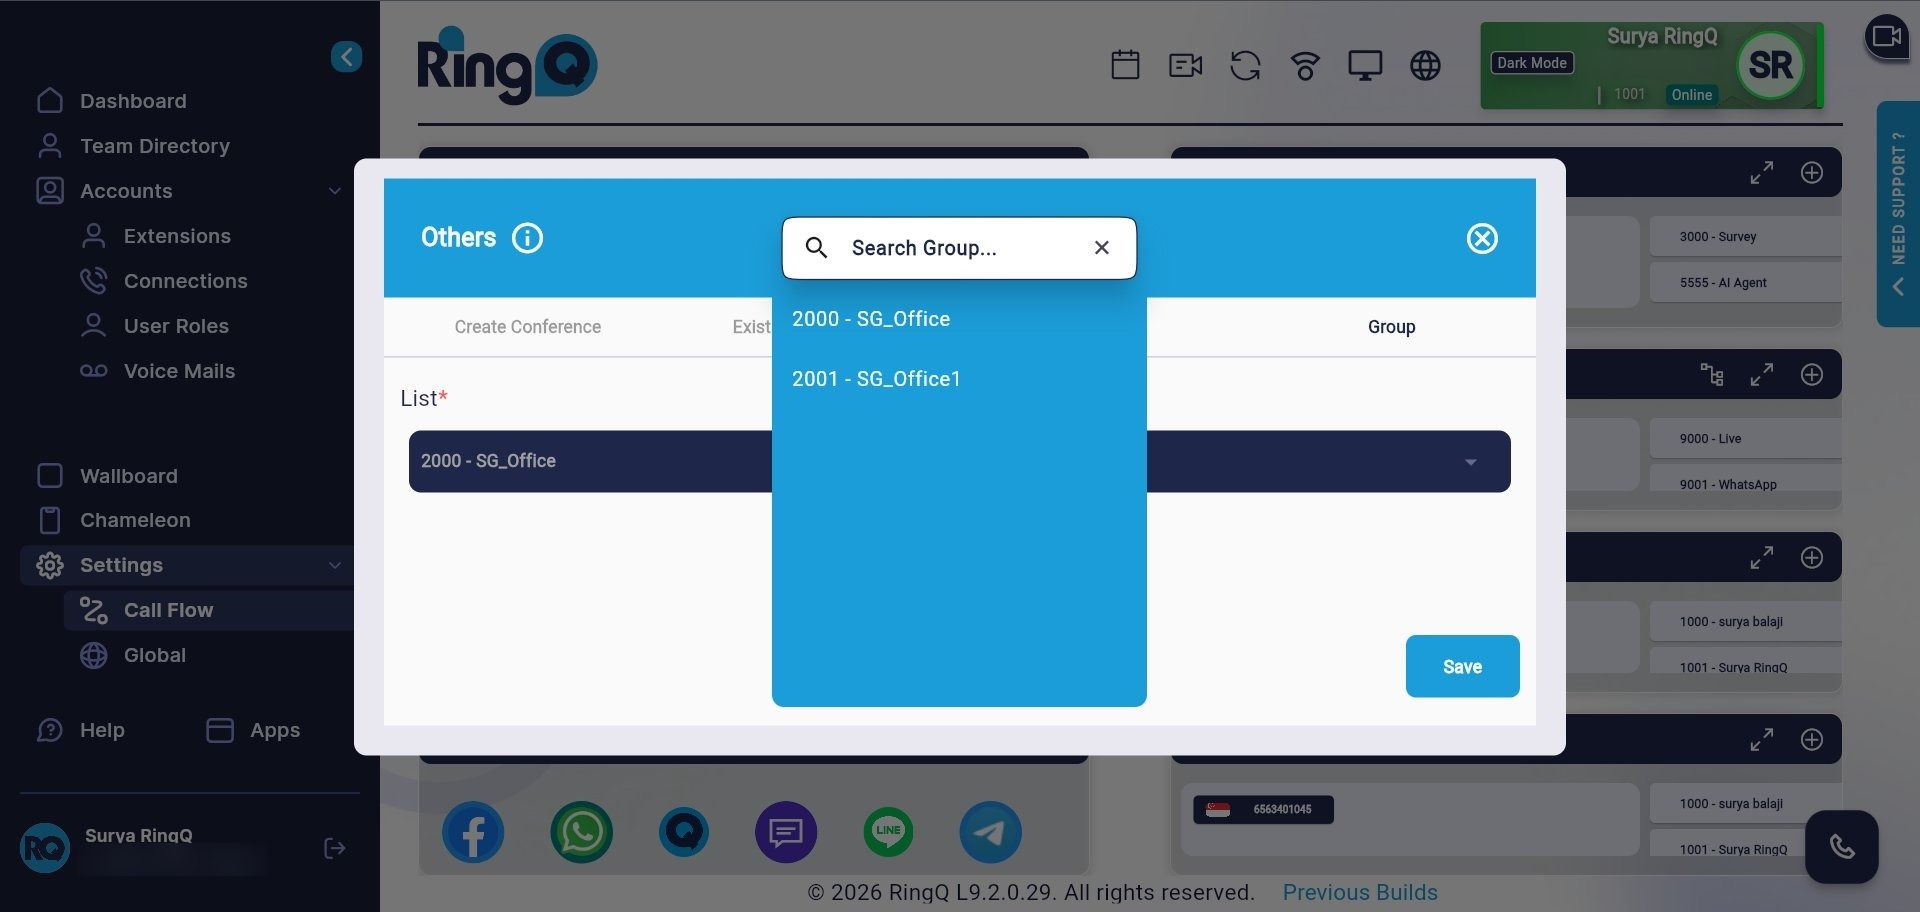
Figure 3: Choose the paging group and save
Tip: Only groups that already exist appear in the List drop-down. If your paging group is missing, create it first.
Once the DID is assigned:
Note: If Mute Paging Announcements is turned on for the group, incoming pages are silenced for that group even though paging stays enabled.
| Item | Where / What |
|---|---|
| Menu | Settings > Call Flow |
| DID source | Available DID Numbers panel |
| Drop target | Others panel |
| Routing tab | Group |
| Selection | Paging group from the List drop-down, then Save |
| Result | Calls to the DID are answered automatically and announced to the group |
