This guide walks you through the steps to configure a Twilio SIP Trunk (Peer Connection) for use with RingQ. It covers the required settings on both the Twilio and RingQ sides to ensure secure, reliable call routing for inbound and outbound calls.
Log in to your Twilio account.
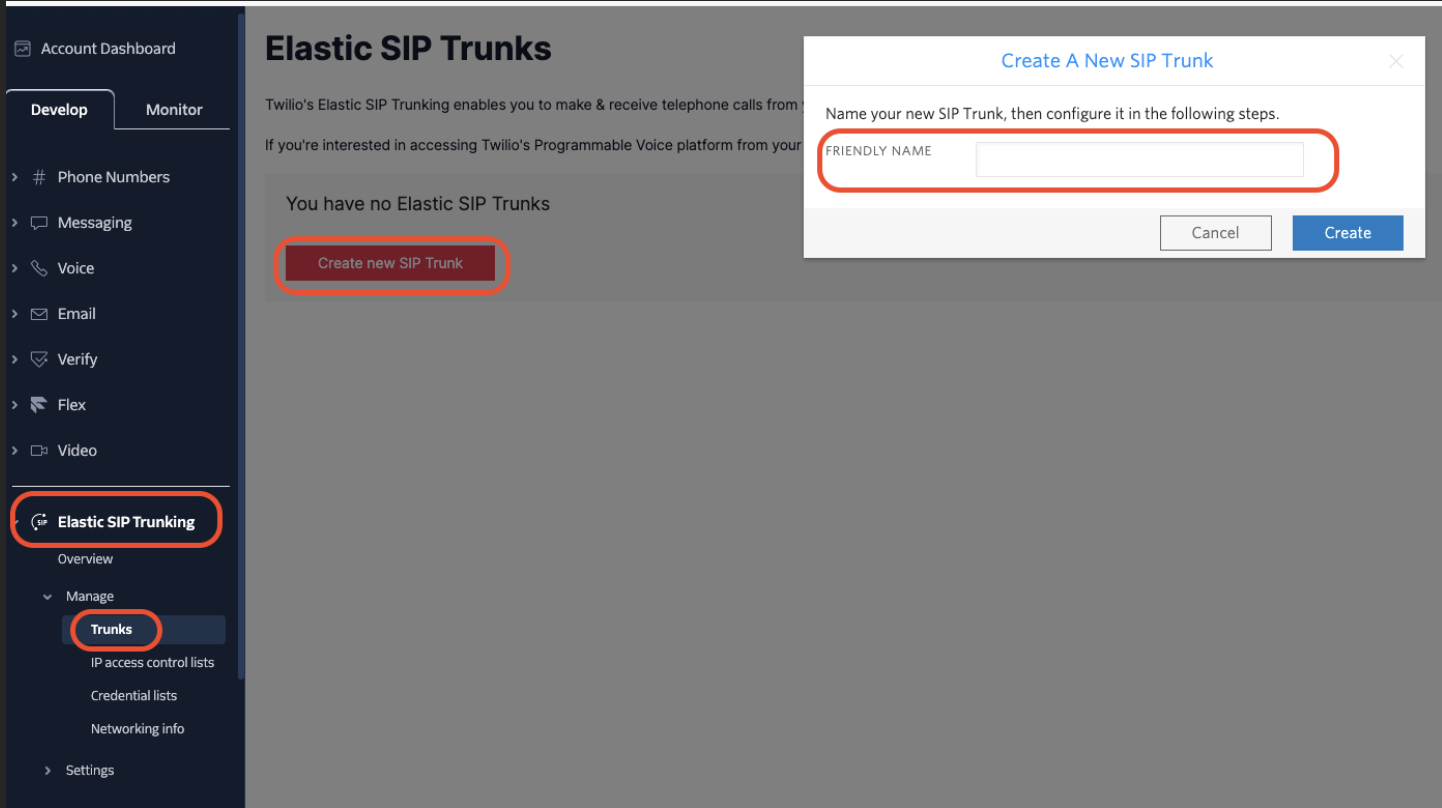
Navigate to Elastic SIP Trunking > Trunks.
Click Create new SIP Trunk.
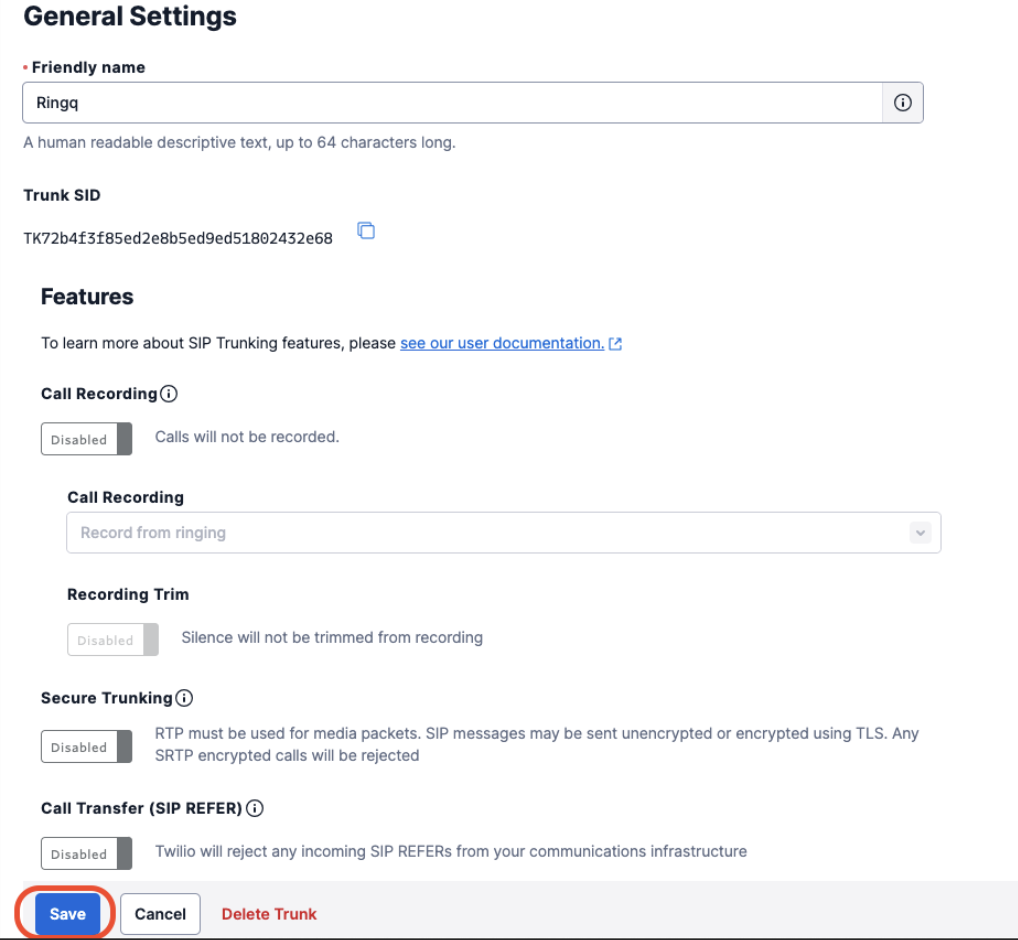
Enter your friendly name and click Create. Leave the default settings. If you need a specific feature such as recording, enable it here.
Save the trunk.
You will see a menu under the trunk name. Click Termination.
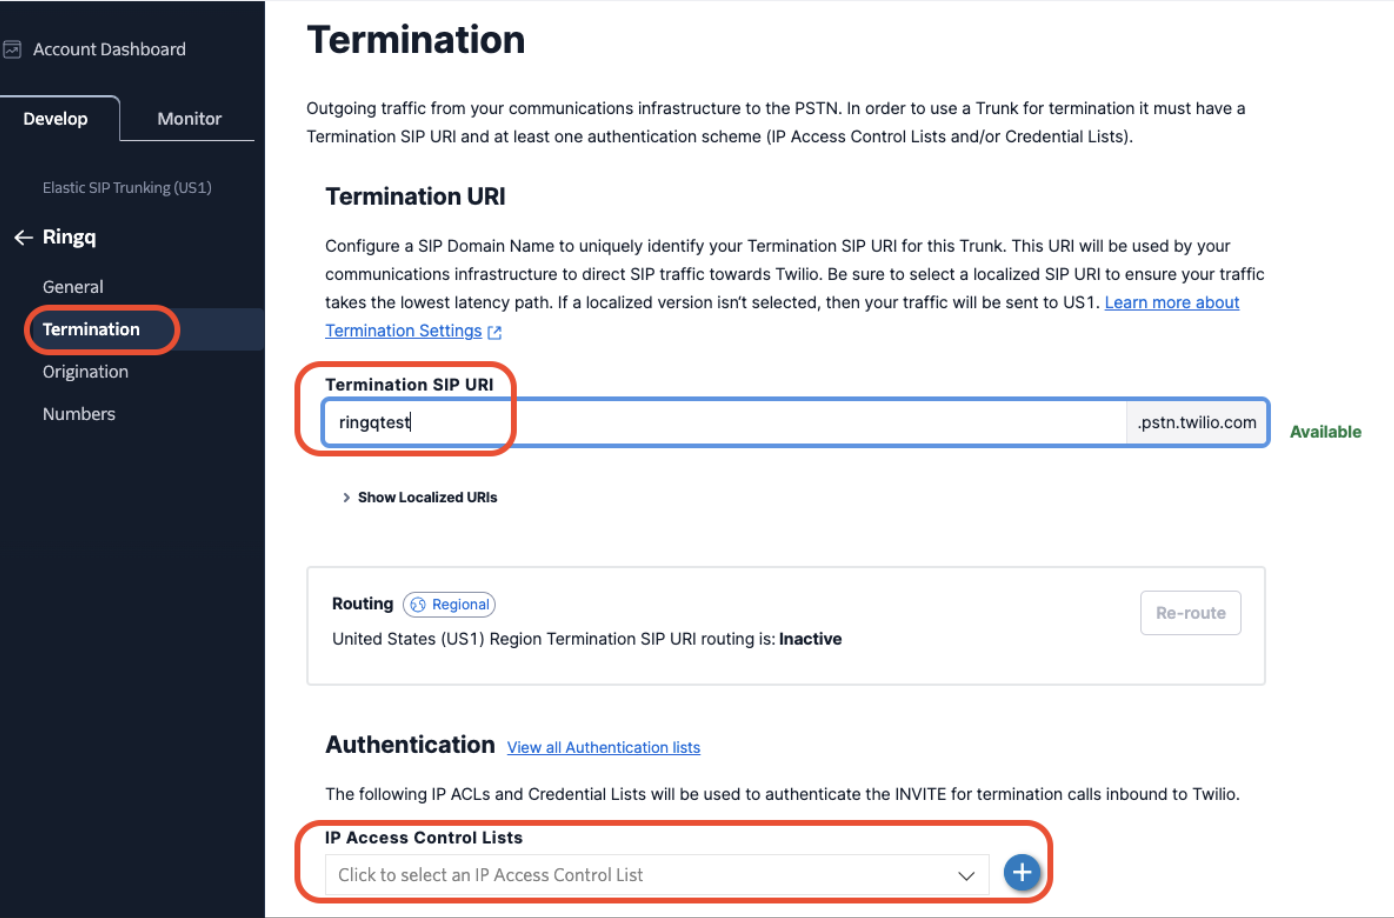
Select the Termination SIP URI and make sure the SIP URI is available.
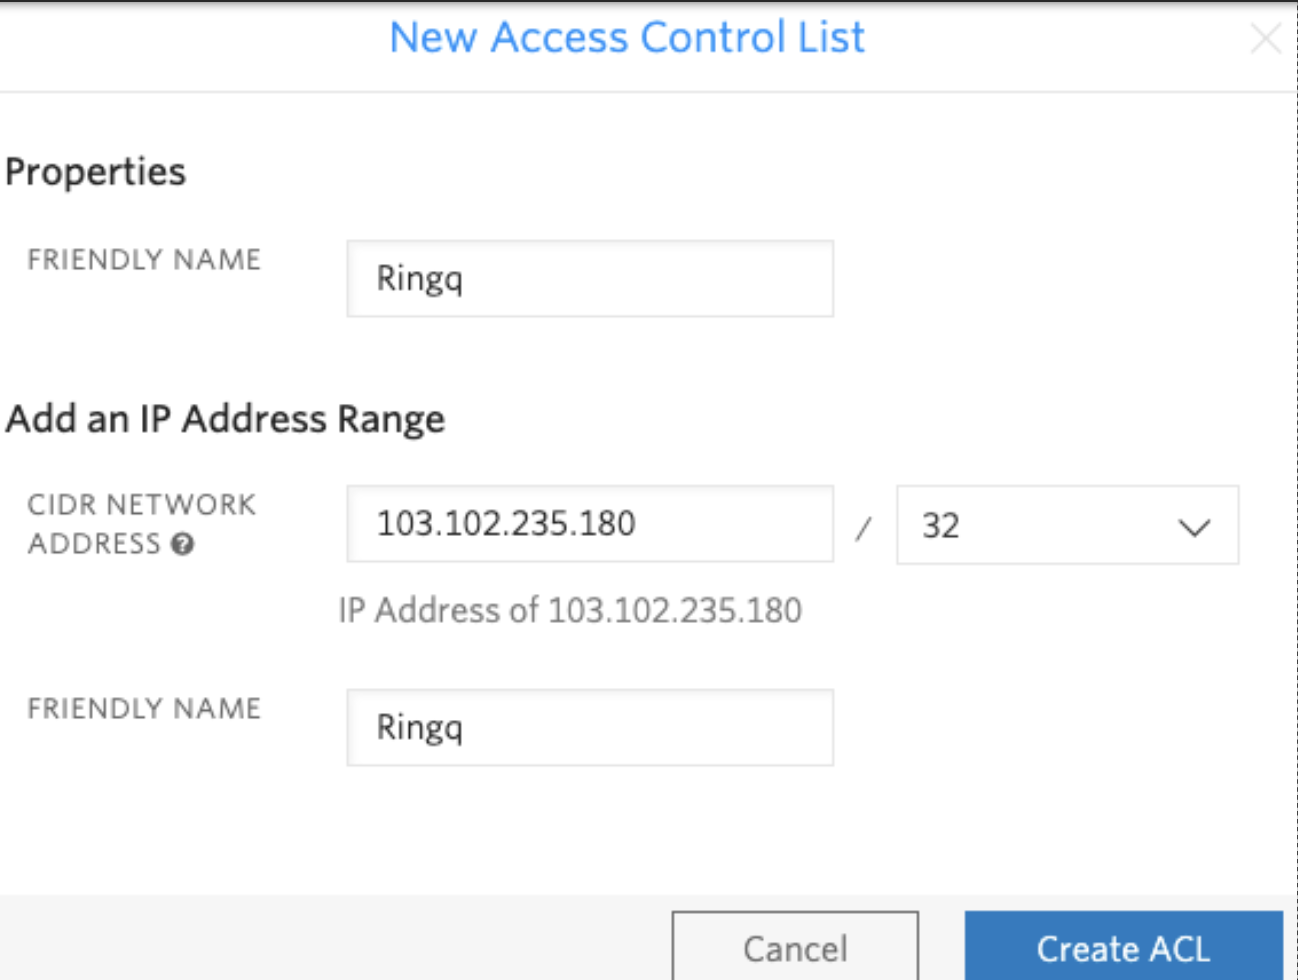
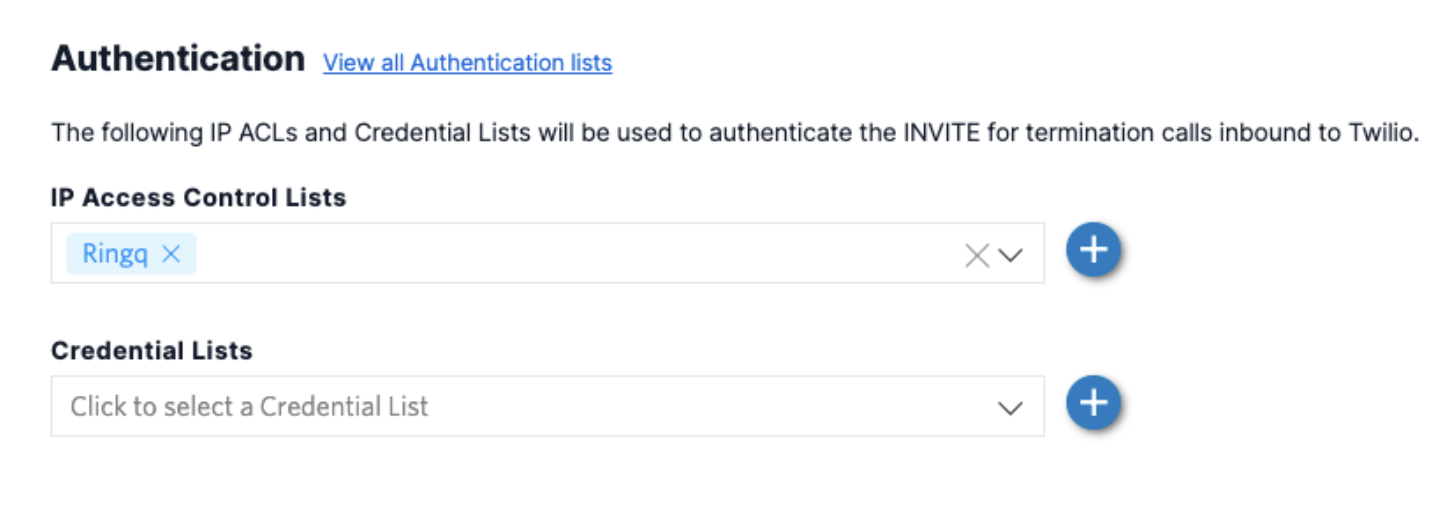
IP Access Control Lists: To select one of your already configured ACLs, open the IP Access Control Lists pull-down menu and choose the one you want to use. If you do not have any ACLs configured, or want to add a new one, click the + button to the right of the pull-down menu.
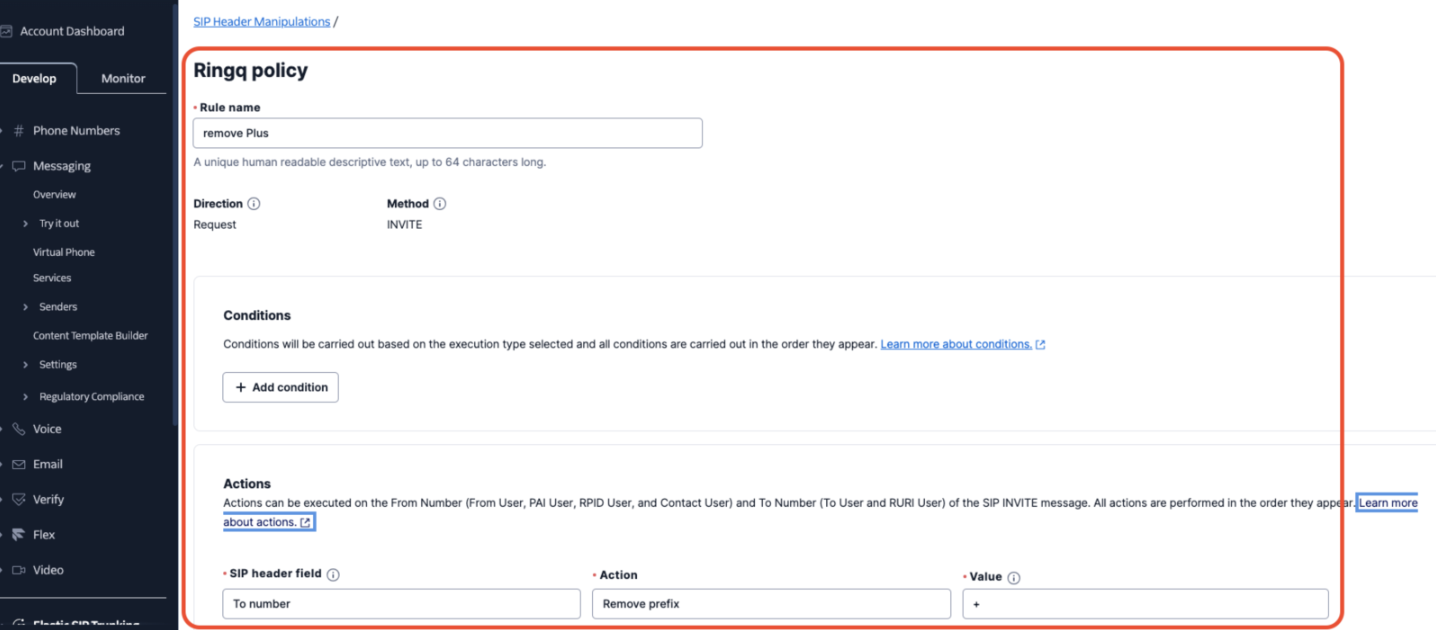
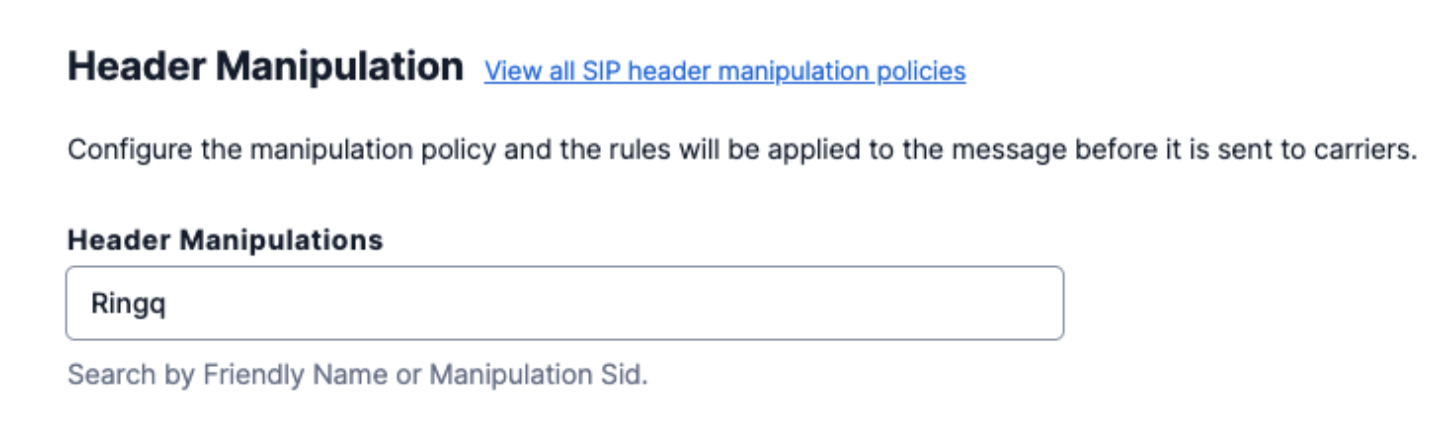
If you want to manipulate the header, use these options. For RingQ, to remove the plus sign on the DID number, use the header manipulation rule shown below.
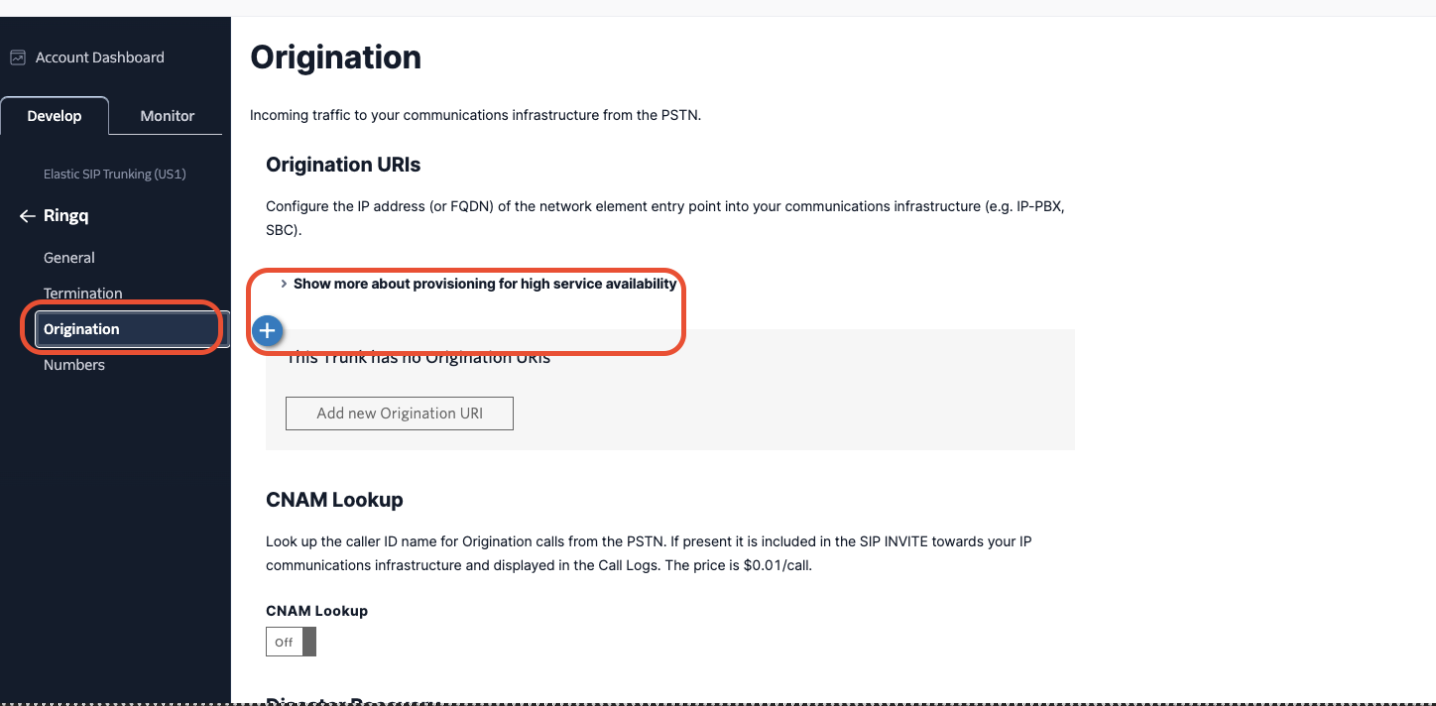
Under the trunk menu, select Origination URIs.
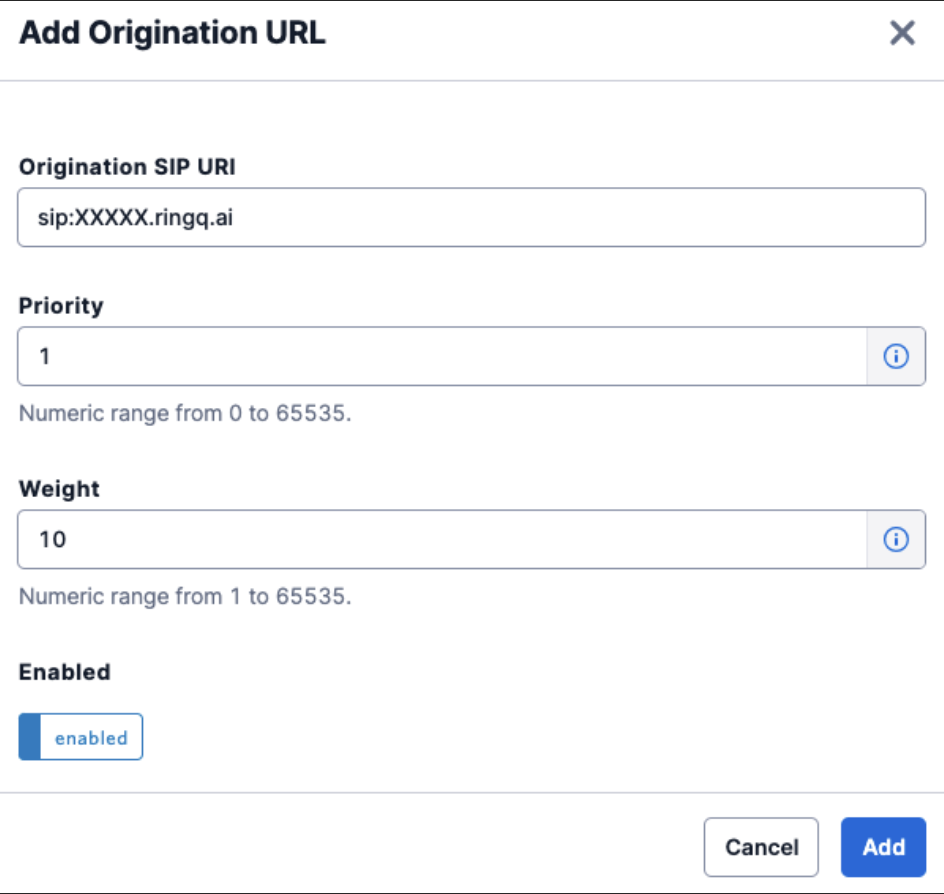
Click + and add your RingQ FQDN.
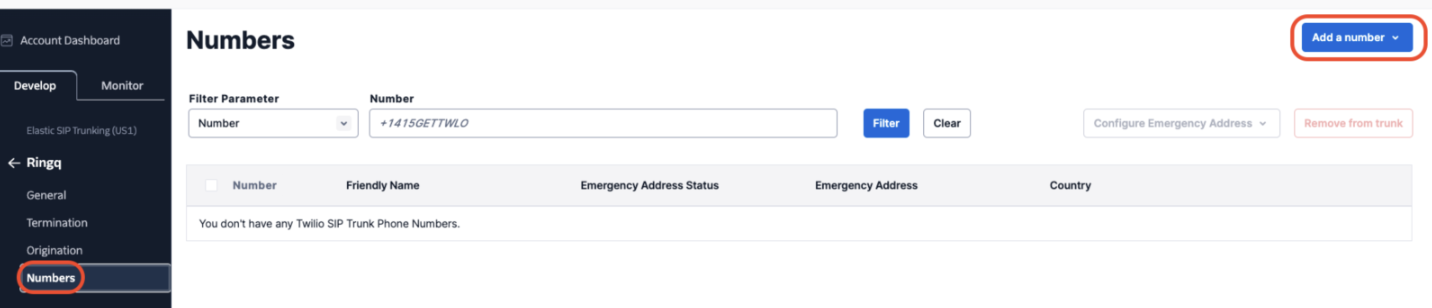
From the trunk menu, select a number to assign a DID to this trunk. Use the Add Number button to select options.
Log in to your RingQ instance.
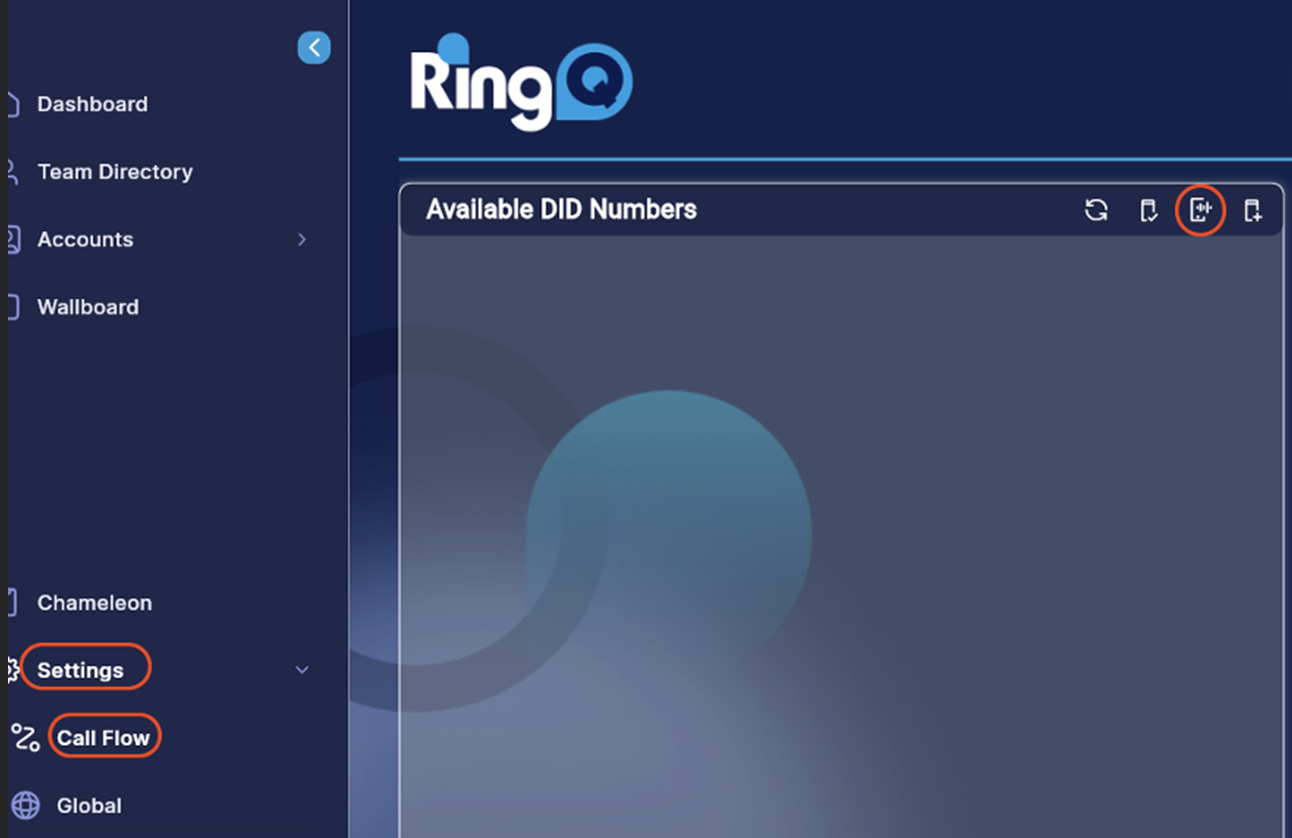
Go to Settings > Call Flow > SIP.
3. Click + in the top-right corner to add a Supported SIP Template.
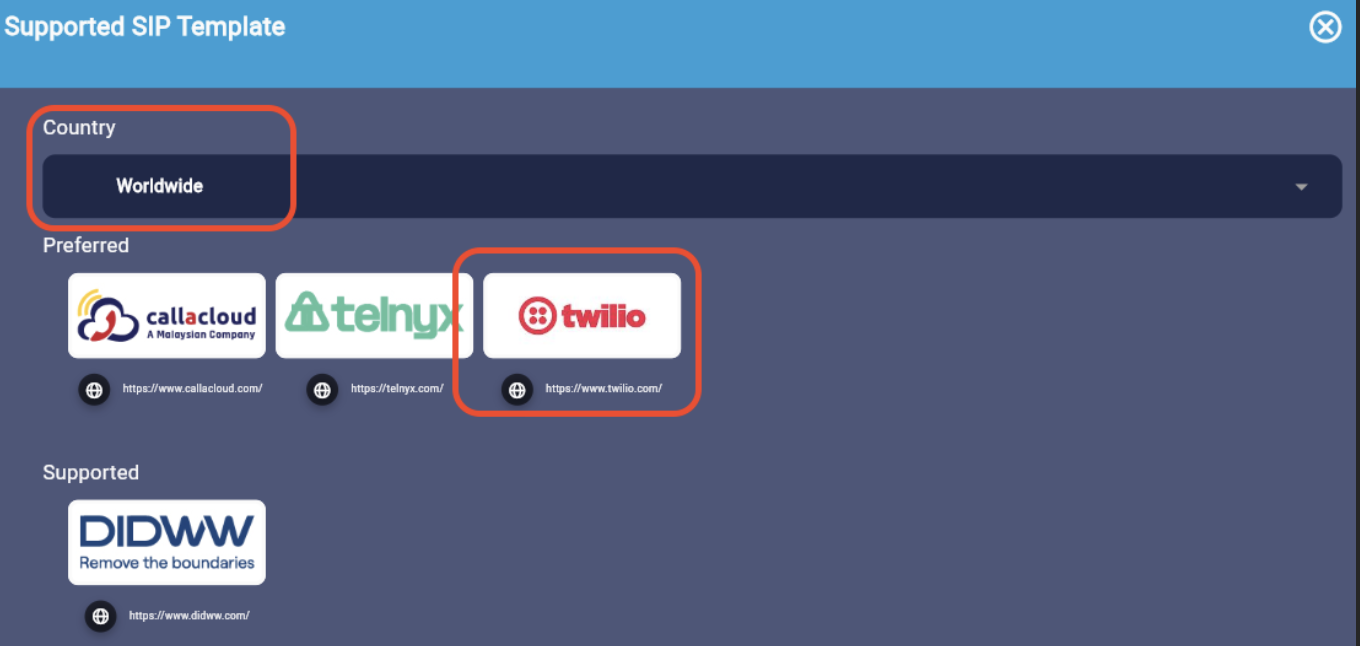
Select the country that you want to configure.
Select the provider logo.
Select the IP-Based template.
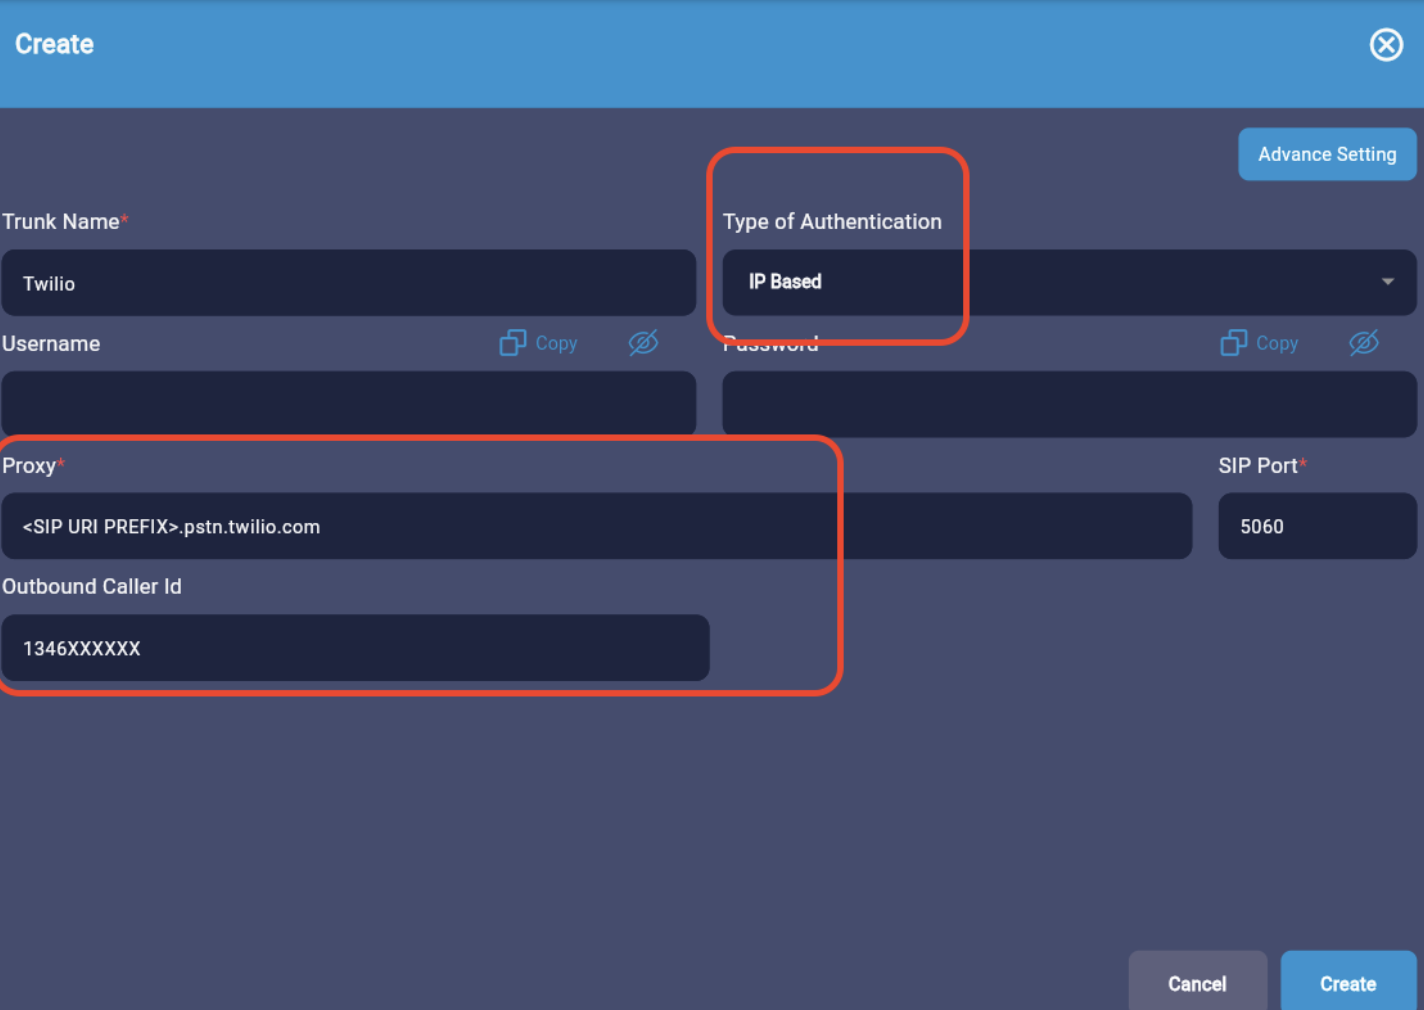
Enter the trunk name.
Leave the username and password fields empty.
Enter the outbound caller ID that you want to use as the main number.
Create the trunk.
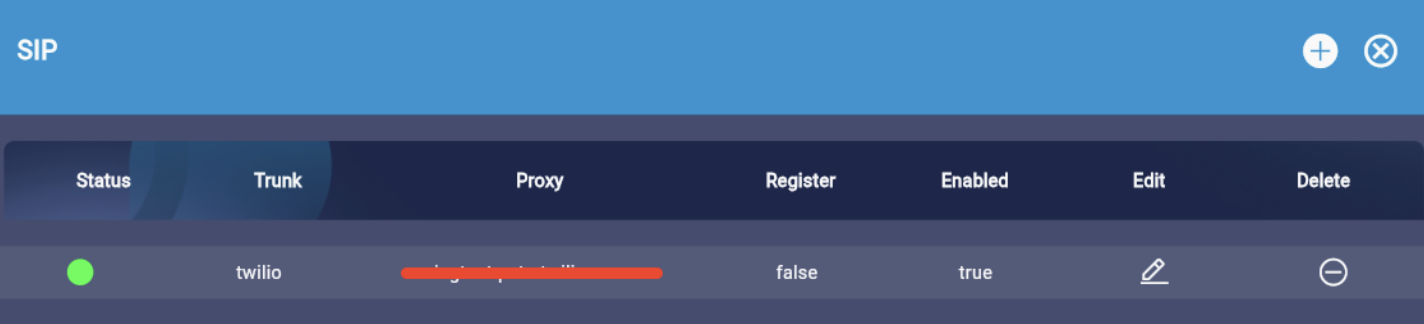
You will see a green status color if the trunk is successfully connected.
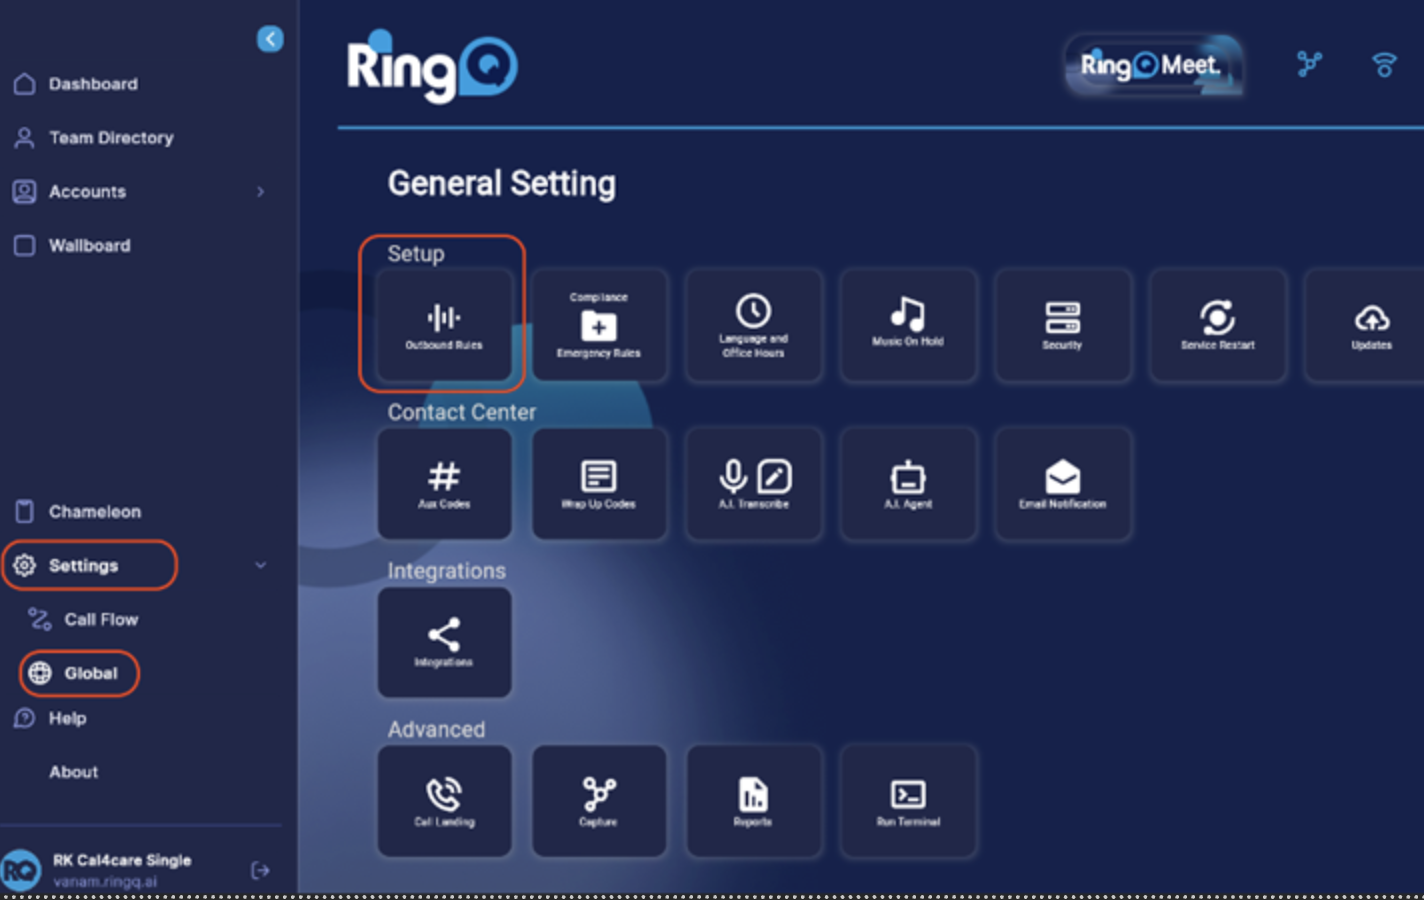
Go to Settings > Global > Outbound Rules.
Click Outbound Rule + to add a rule.
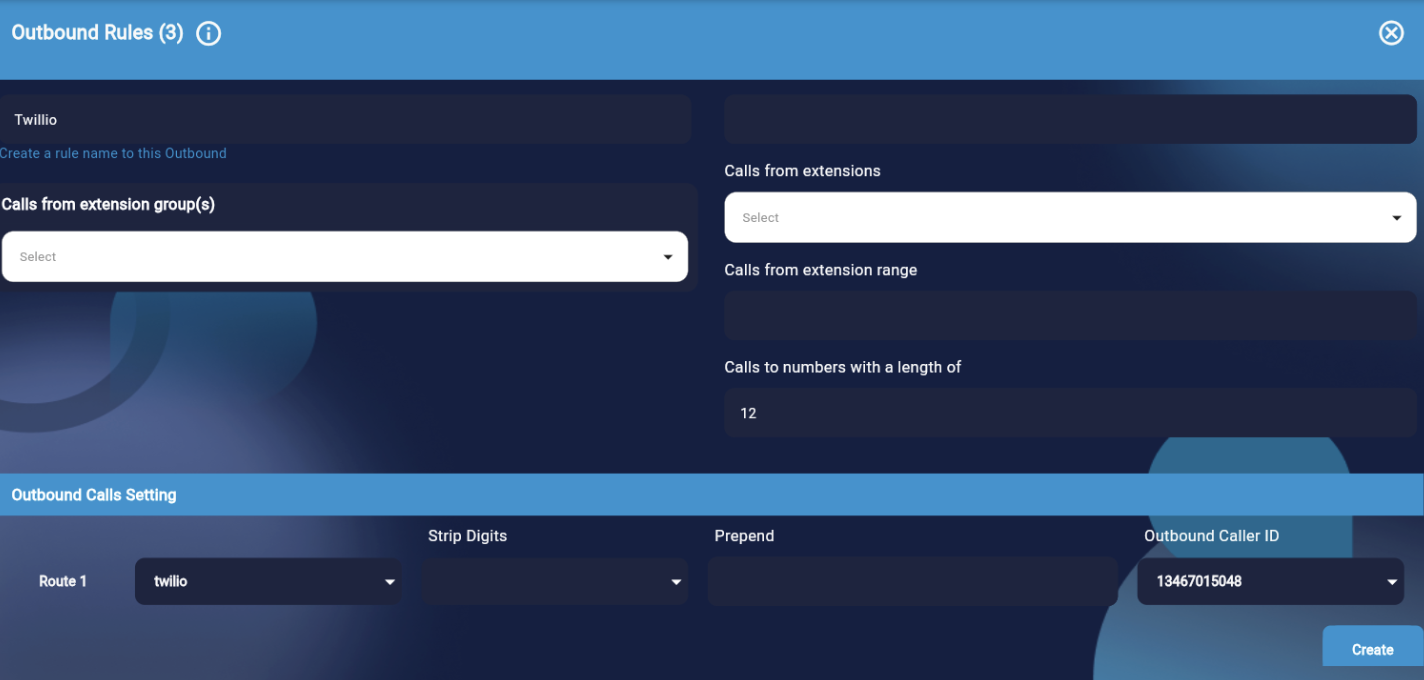
Enter the trunk name and prefix details for how to route the calls.
Select Route as Twilio SIP.
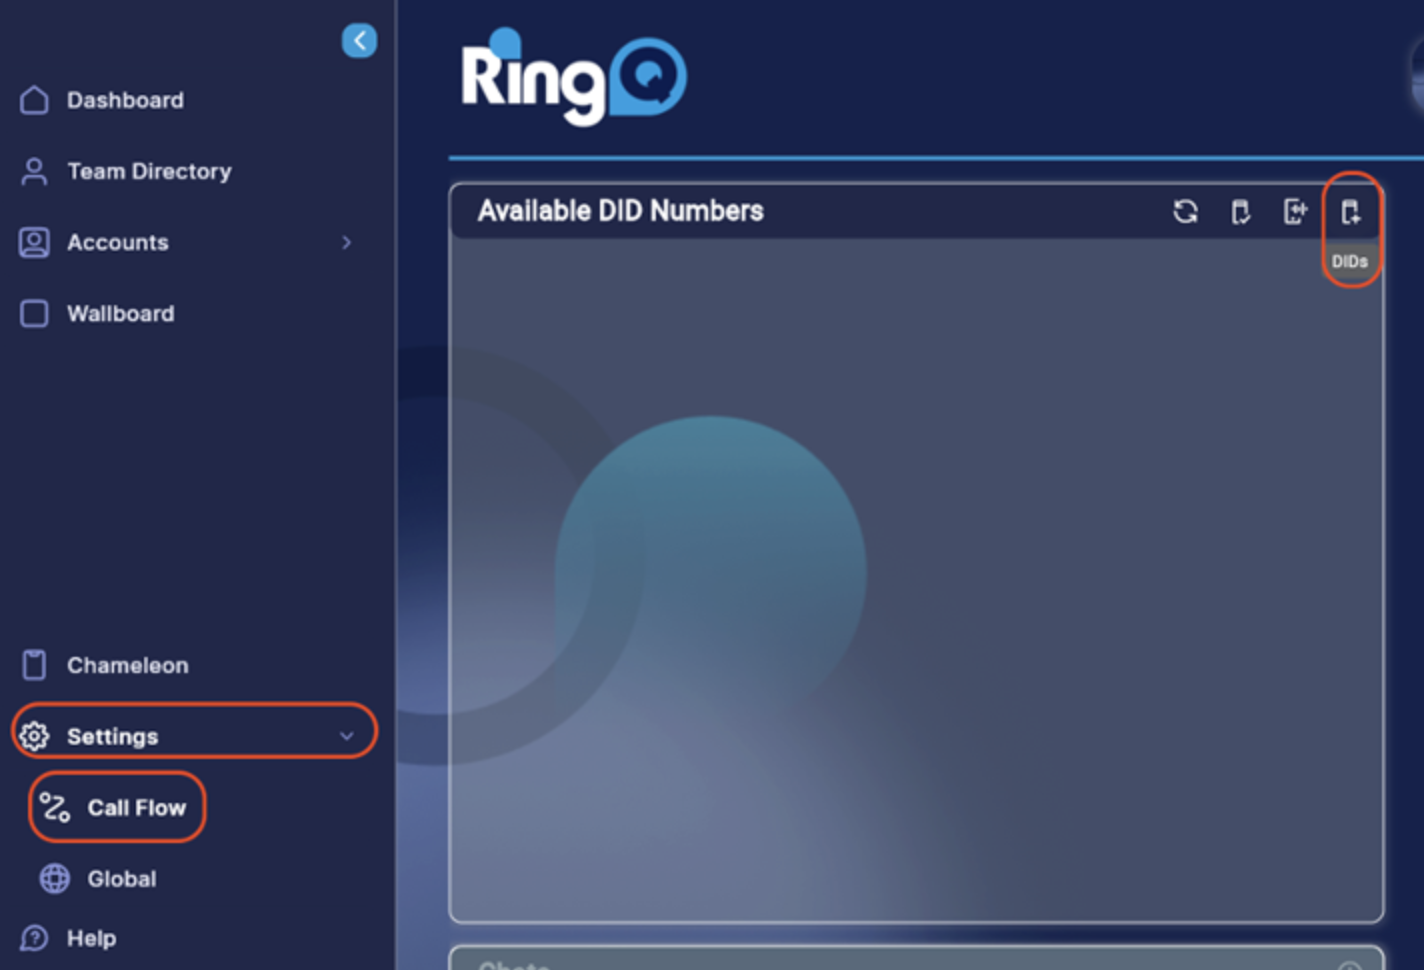
Go to Settings > Call Flow > Add DID.
Click Add DID + to add a DID.

Click Add DID as shown above.
Enter the DID number.
Select the trunk name.
Click the Create button.
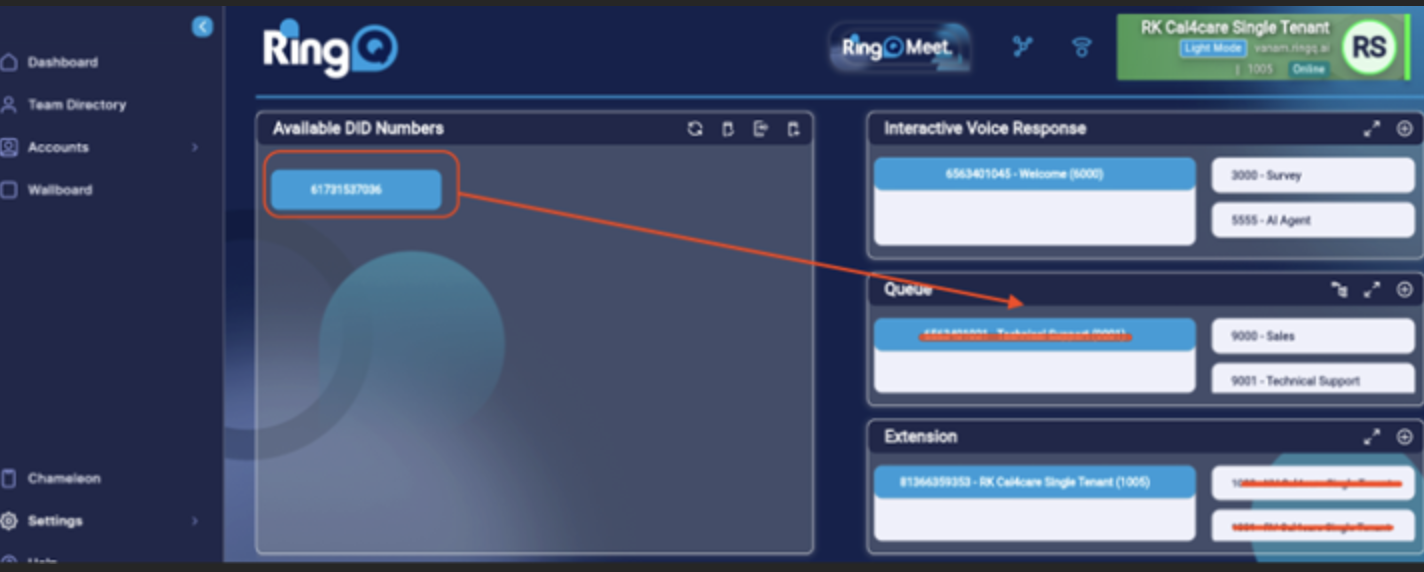
The DID will appear in the available list. Drag and drop the DID where you need it (queue, extension, or IVR).
When you drag the DID, you will get the option to create an extension, IVR, or queue, or to add it to an existing extension, IVR, or queue.
