This guide walks you through the step-by-step process of configuring a Telnyx SIP trunk with your RingQ account using the registered SIP trunk method. Whether you’re setting up RingQ for the first time or integrating Telnyx as your preferred SIP trunk provider, this guide will help you establish a reliable and secure connection for inbound and outbound calling.
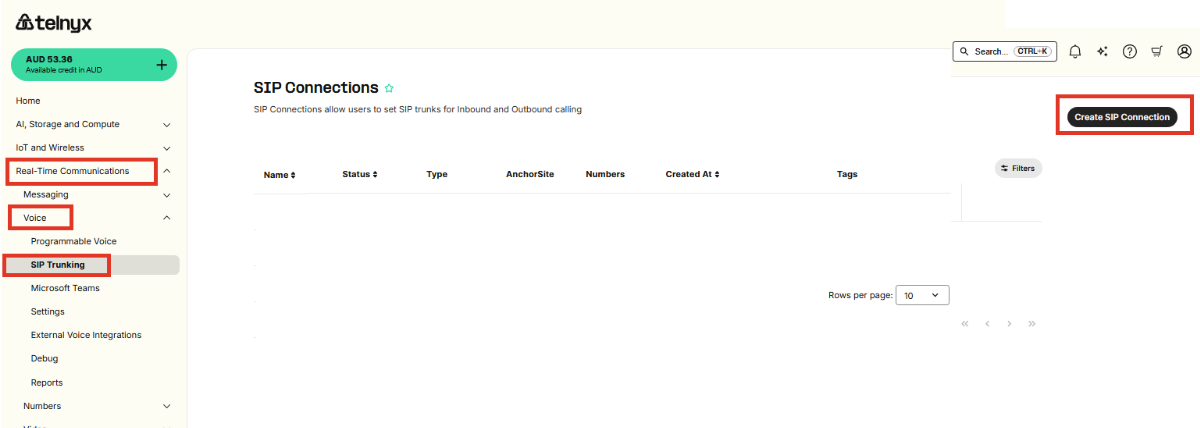
Navigate to Menus > Real-time Communication > Voice > SIP Trunking.
Click Create SIP Connections.
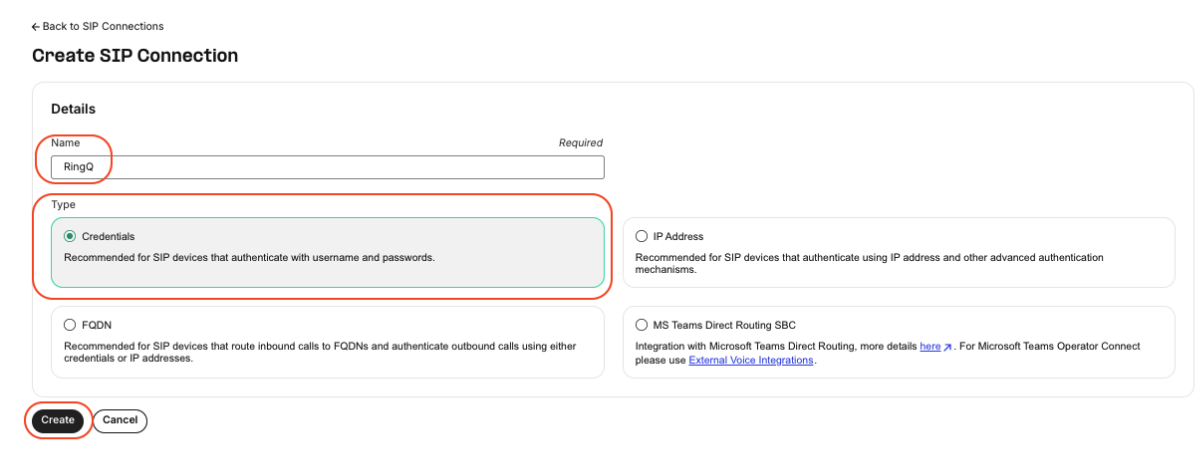
Enter the trunk name.
Select Type as Credentials. 5. Click the Create button.
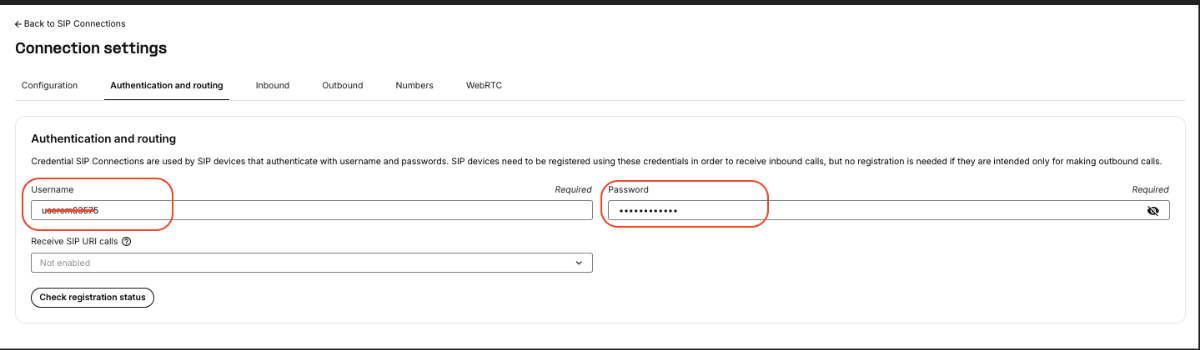
In the Authentication and Routing tab, copy the username and password to configure on the RingQ instance.
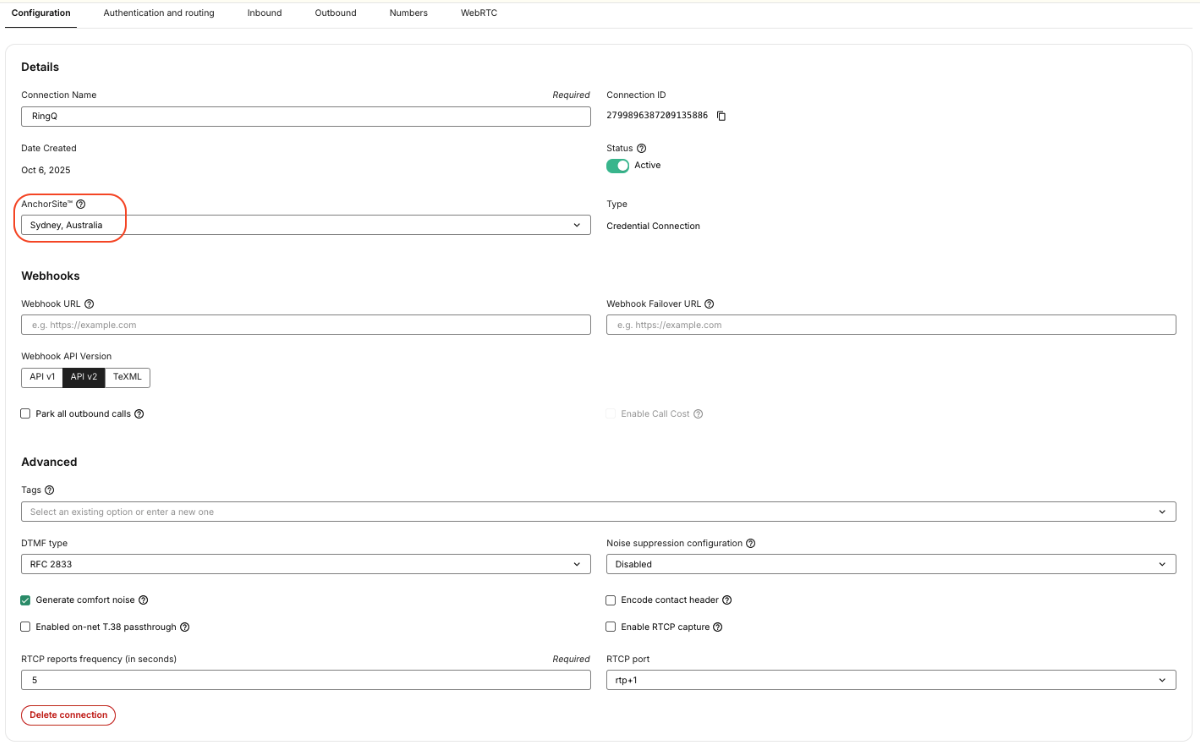
From the Configuration tab:
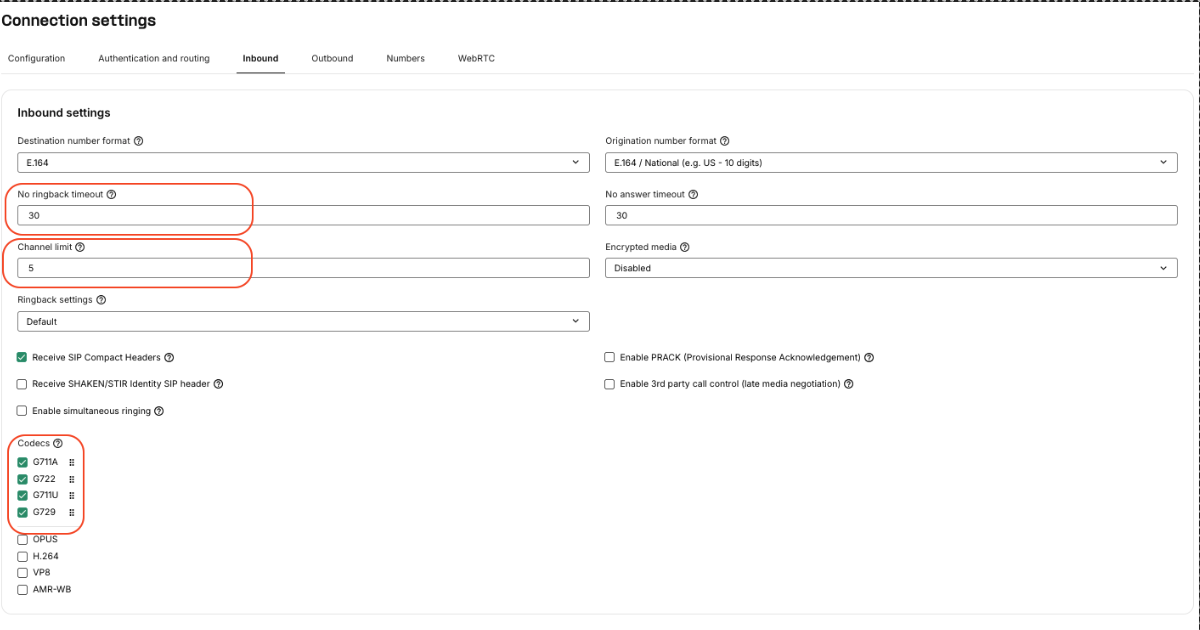
From the Inbound Settings tab:
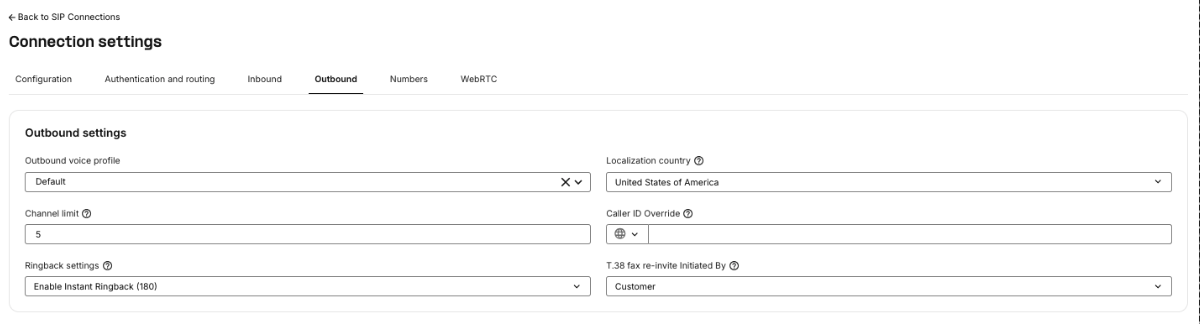
From the Outbound tab:
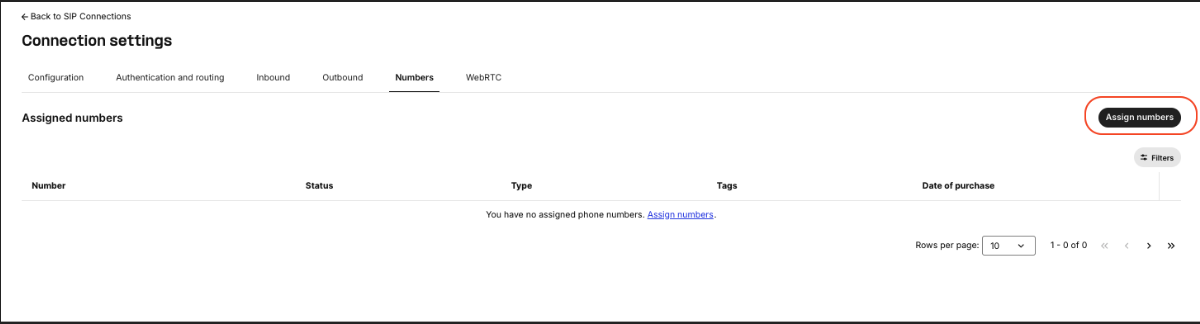
From the Numbers tab:

Assign a number to RingQ.
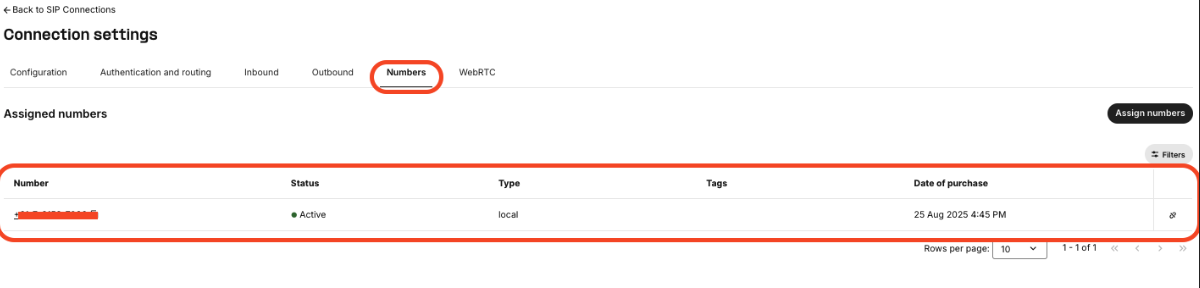
Click Completed.
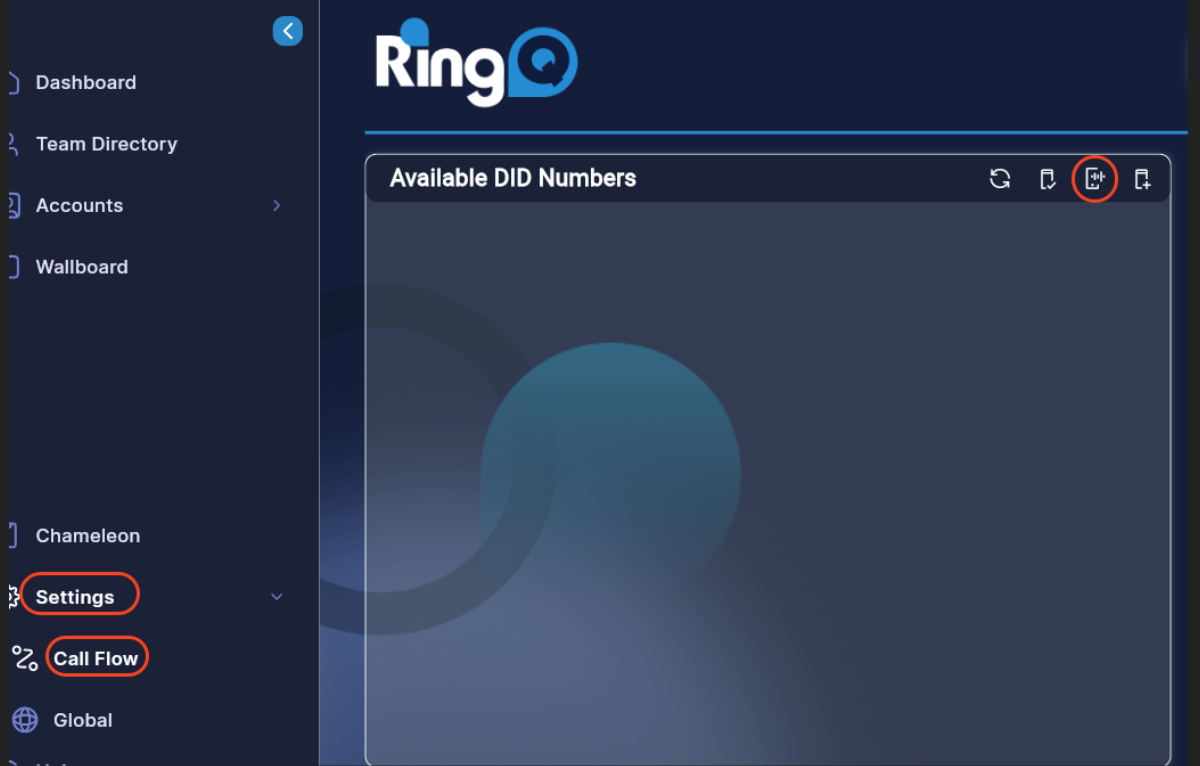
Log in to your RingQ instance.
Go to Settings > Call Flow > SIP.
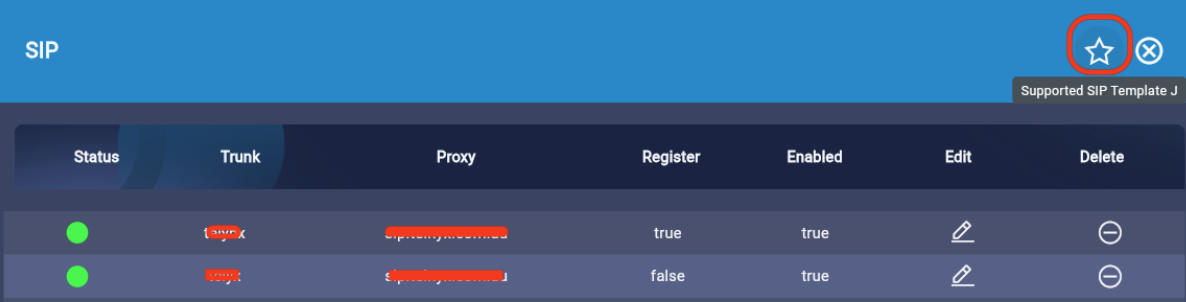
Click Supported SIP templates.
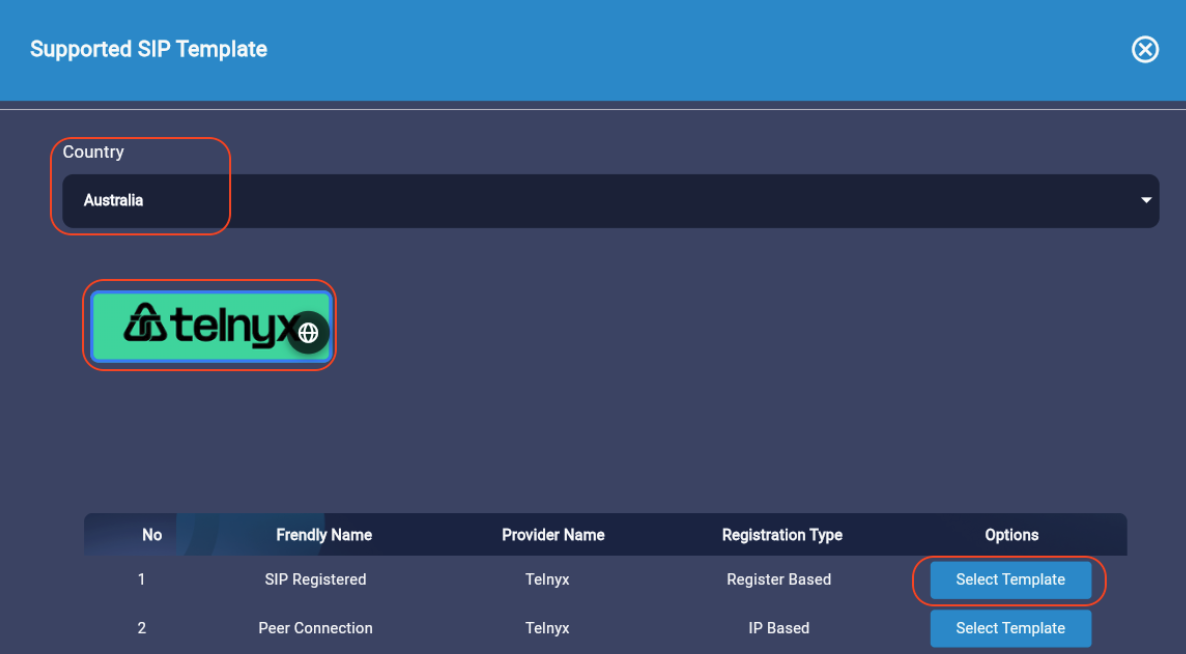
Select the country.
Select the provider logo.
Select the registered-based template.
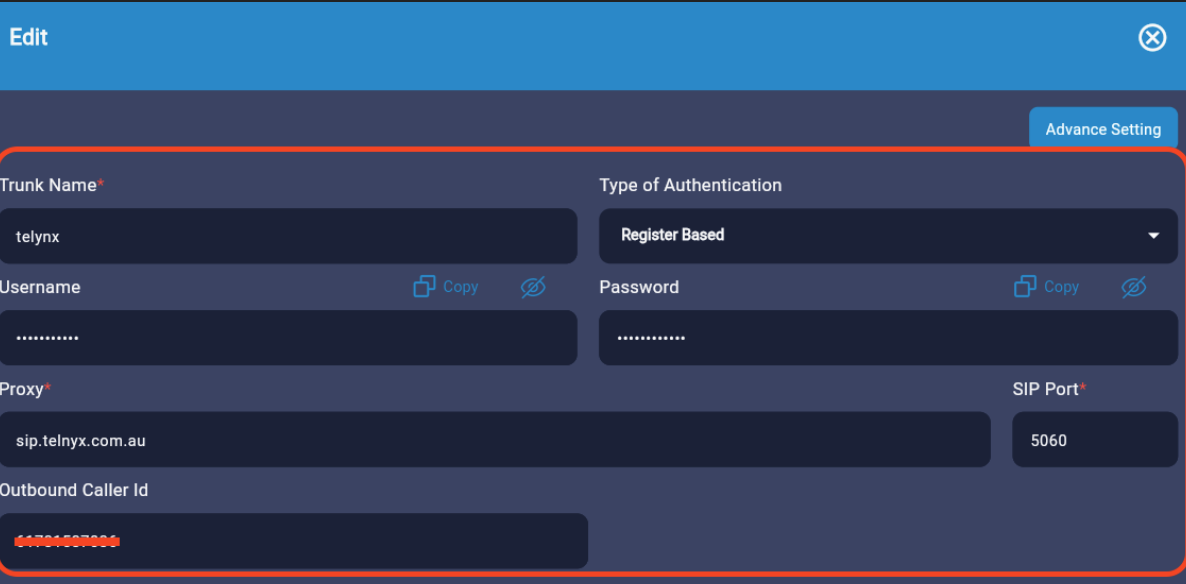
Configure the trunk.
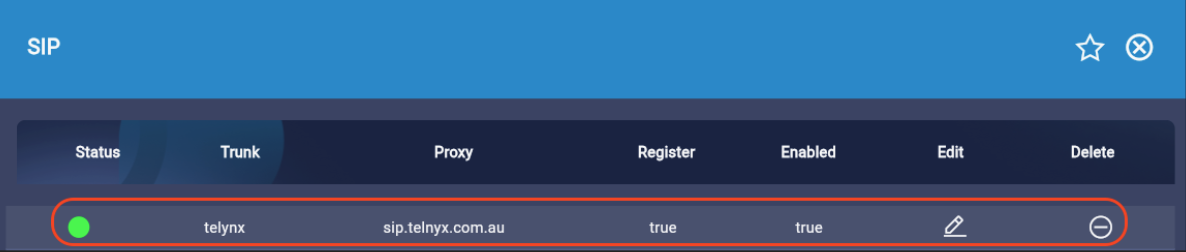
Once the configuration is complete, the trunk should be registered and the status will be green.
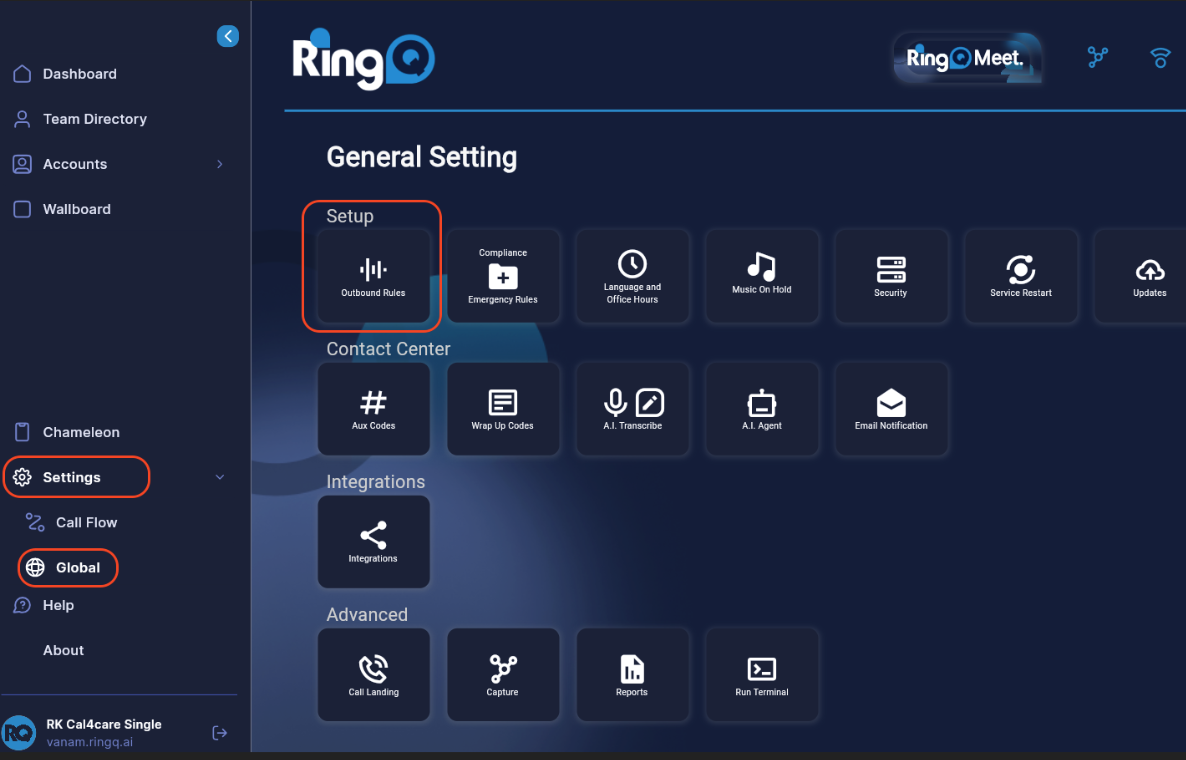
In your RingQ web app, go to Settings > Global Settings > Outbound rules.

Click Outbound rule +.
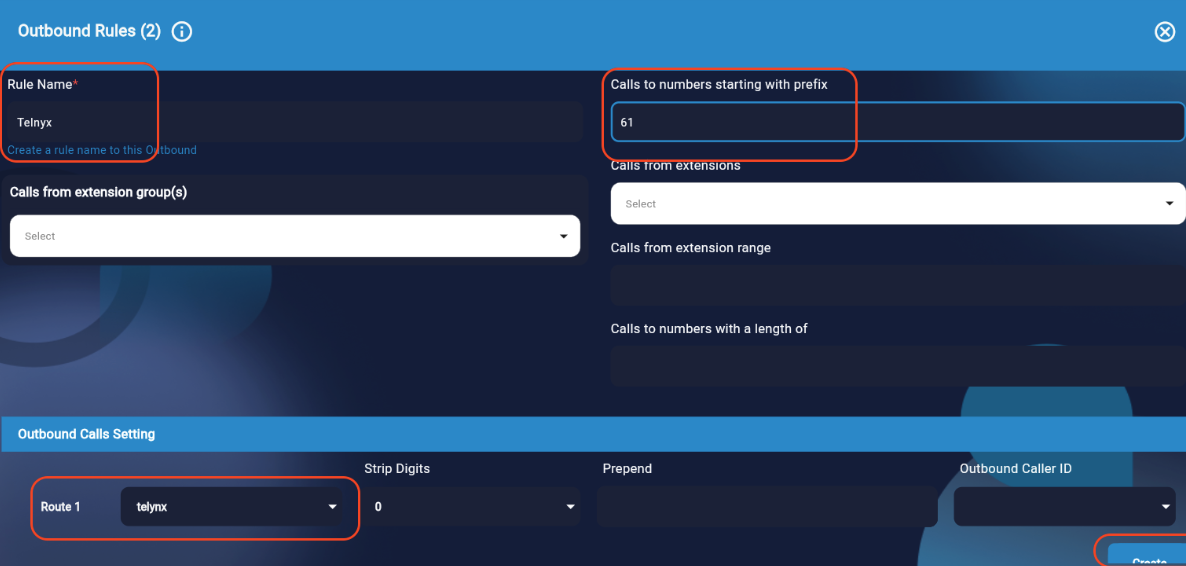
Enter the rule name and prefix details for how you need to route the calls.
Select the route as Telnyx SIP.
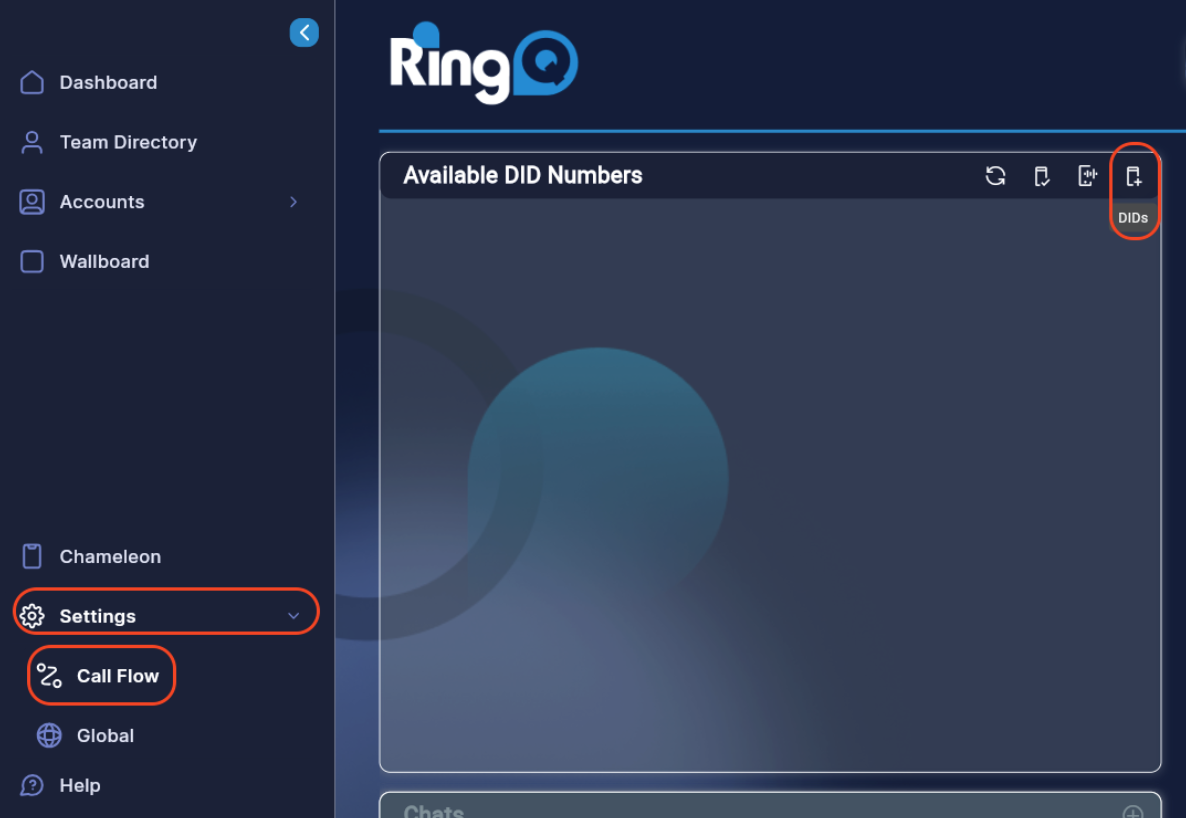
From your RingQ web app, go to Settings > Call Flow > Add DID.

Click the Add DID number button (shown above).
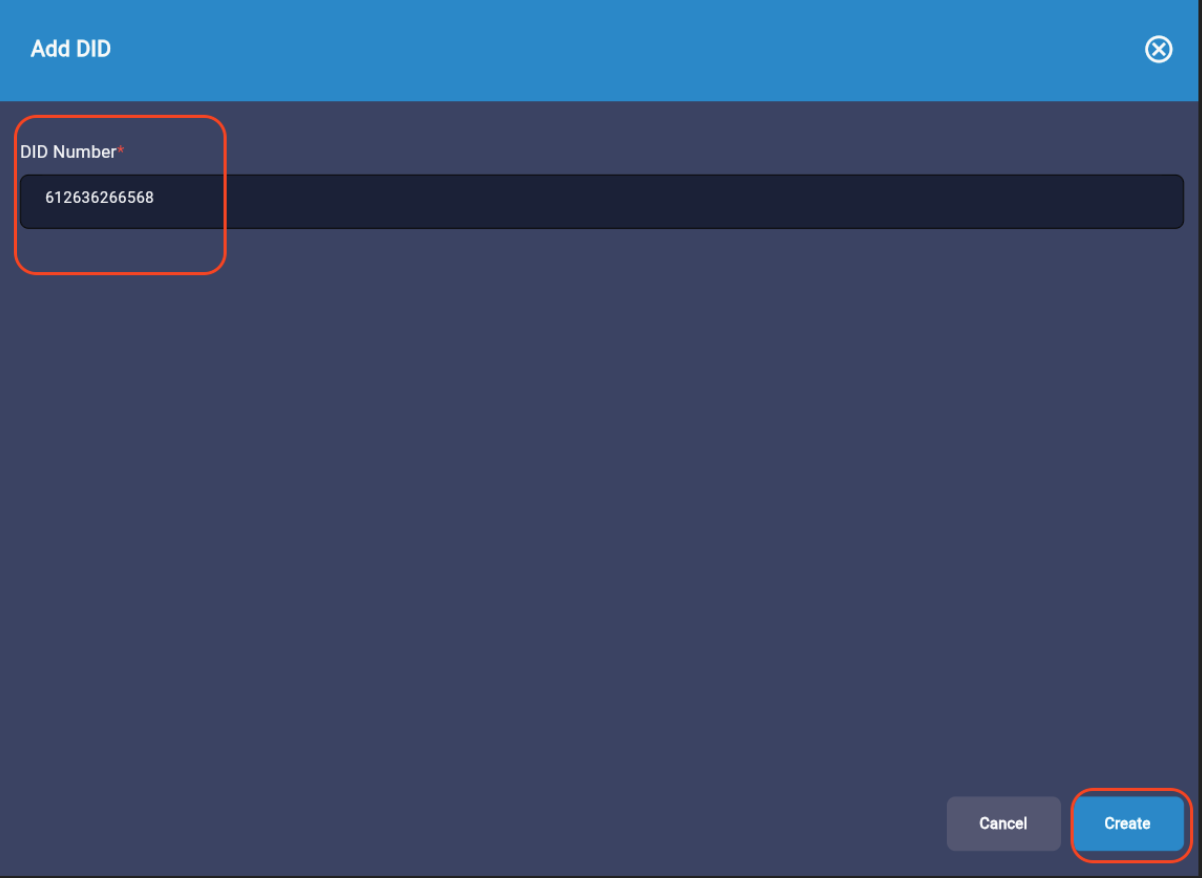
Enter the DID number.
Click the Create button.
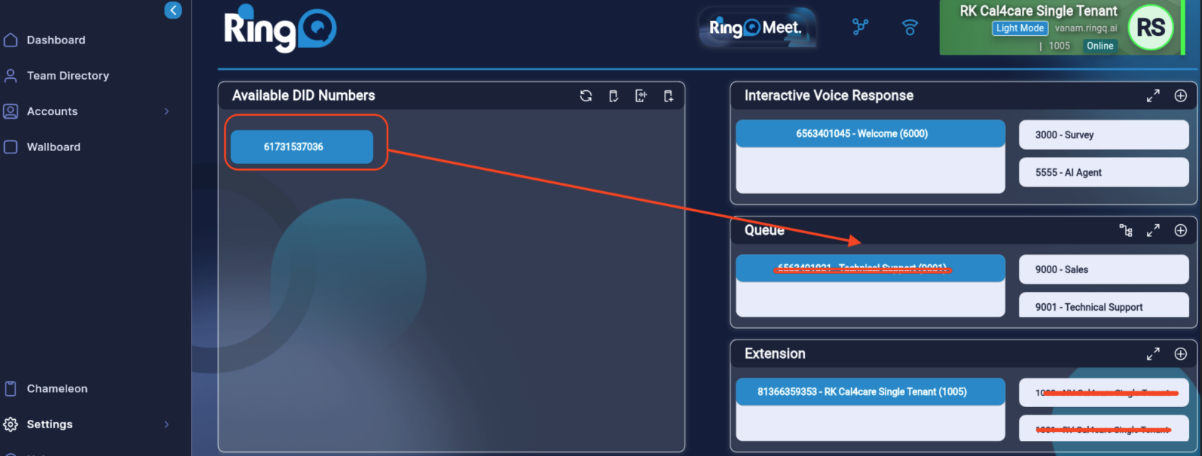
The DID is now in the Available DID Numbers list. Click the DID number and drag it to where you need it.
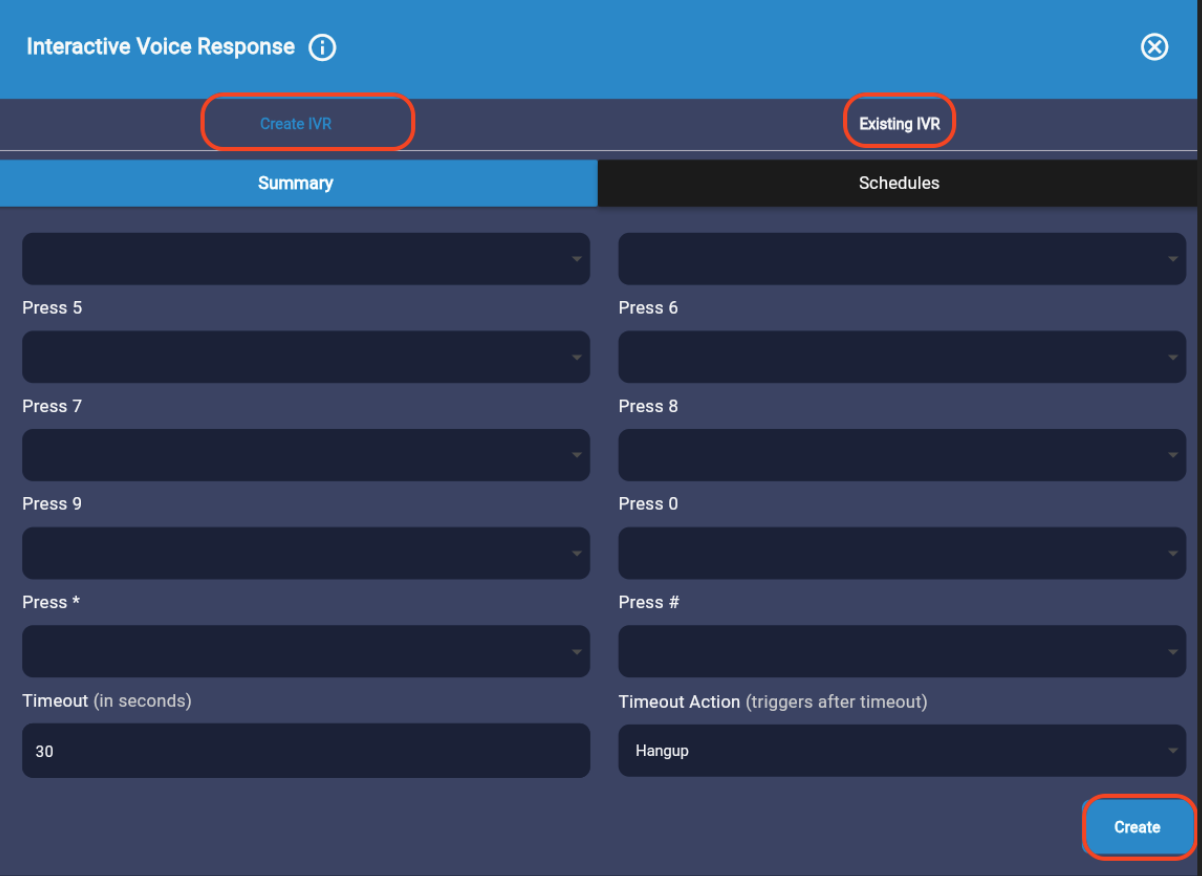
When you drag and drop the DID, you will be given the option to create an extension/IVR/queue or select an existing extension/IVR/queue.
