This guide provides step-by-step instructions for manually configuring your Snom IP phone to connect with RingQ. Manual configuration is useful when automatic provisioning is not available, or when advanced users prefer to input settings directly.
Follow this guide to configure your Snom phone to make and receive calls through the RingQ platform.
Before accessing the web interface, you need the local IP address assigned to your Snom phone.
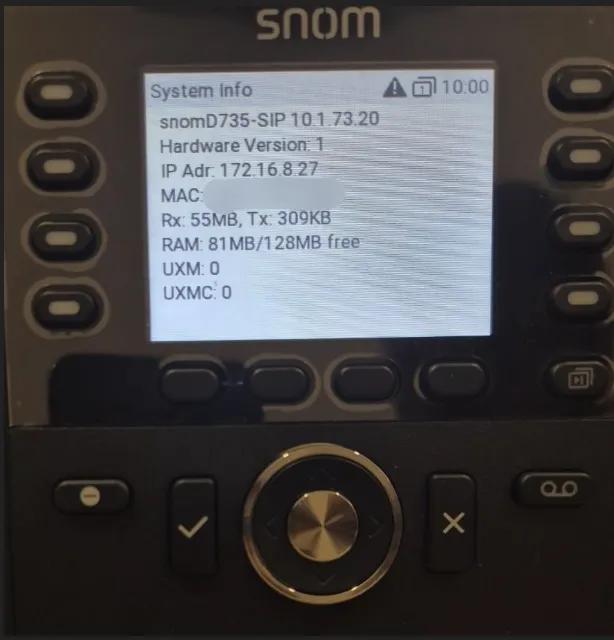
Fig. 1 — Snom phone System Info screen showing the assigned IP address.
1. Press the Menu (or OK) button.
2. Go to Status / Info / System Info → Network (or IP info).
3. Read the IP address shown (e.g., 192.168.1.45).
Use a scanner on your PC (e.g., nmap -sP 192.168.1.0/24 or a GUI app like Angry IP Scanner) and locate the phone by MAC vendor or hostname.
The Snom web interface allows full configuration of SIP accounts, network, and audio settings from a browser on the same network.
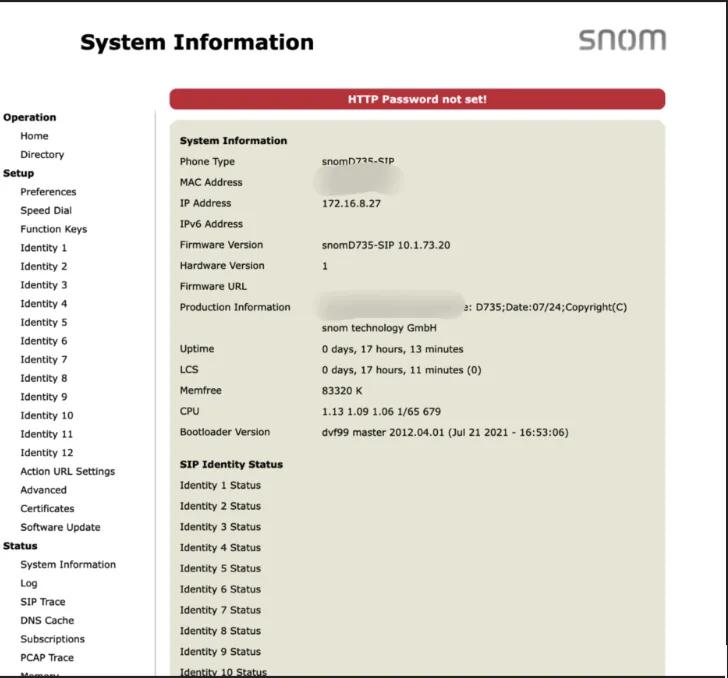
Fig. 2 — Snom web interface showing the System Information page.
1. Open a web browser on your computer.
2. Enter the IP address of your Snom phone in the address bar (e.g., http://192.168.1.45).
3. Log in using your admin credentials. Default credentials may vary depending on the model.
⚠ NOTE
If no HTTP password has been set, the interface will display "HTTP Password not set!" in red. It is strongly recommended to set an admin password before deploying the phone. Go to Setup → Preferences → HTTP Password to set one.
SIP account settings are configured per identity (line). Each identity corresponds to one SIP account/extension. Configure Identity 1 for your primary RingQ extension.
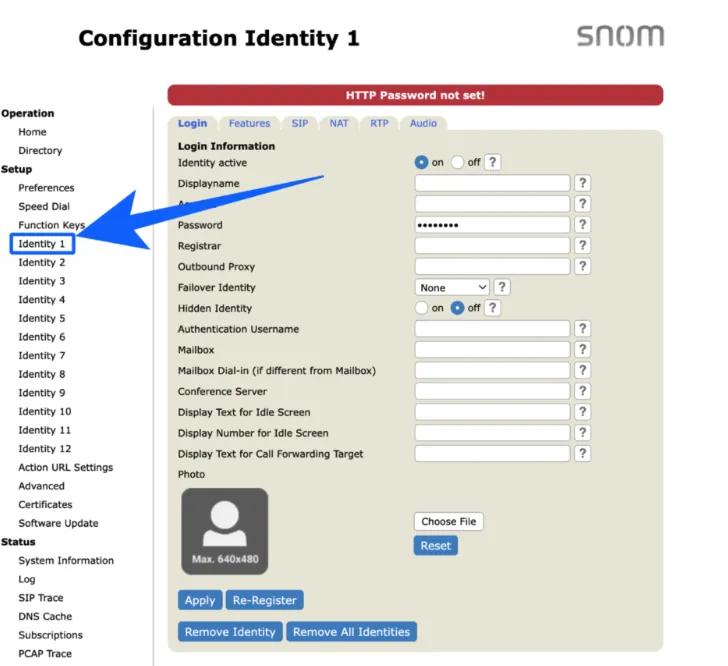
Fig. 3 — Identity 1 configuration page showing the Login tab with SIP account fields.
1. On the left-hand menu, select Identity 1 (or Identity 2, if configuring a second account).
2. Fill in the following details provided by RingQ:
| Setting | Description |
|---|---|
| Identity Active | Set to Enabled (on). |
| Display Name | Enter your preferred display name (e.g., your name or extension label). |
| Account | Enter your assigned SIP username or extension number. |
| Password | Enter your SIP password. |
| Registrar | Enter the RingQ SIP server address (e.g., pbx.ringq.com). |
| Outbound Proxy | (Optional) Enter only if provided by RingQ. |
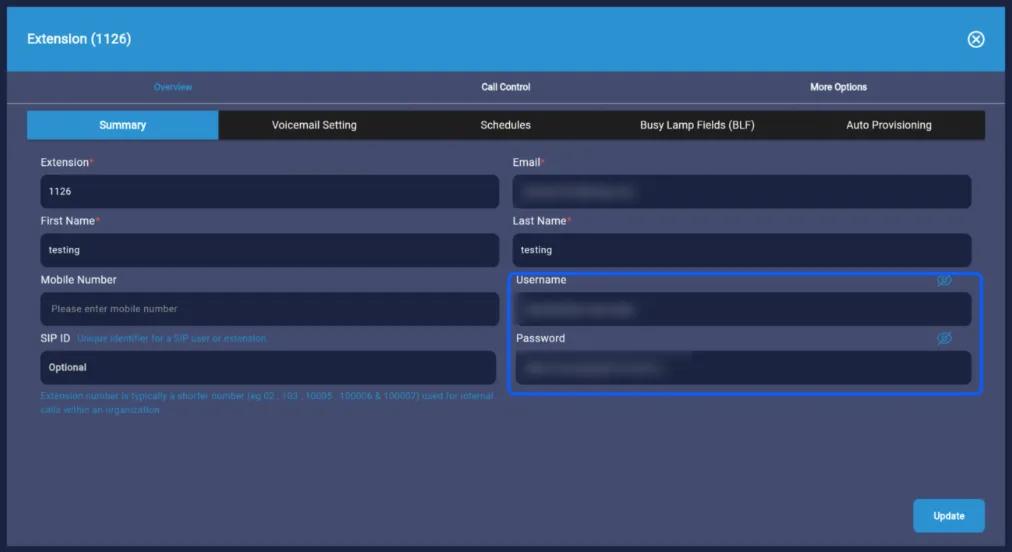
Fig. 4 — RingQ extension credentials (extension number, username, and password) from the RingQ portal.
3. After completing all fields, click Apply or Save at the bottom of the page.
RingQ does not use SRTP (Secure Real-time Transport Protocol) for media encryption by default. If SRTP is enabled on the Snom phone, calls may connect but audio will be one-way or silent. This setting must be disabled to ensure calls work correctly.
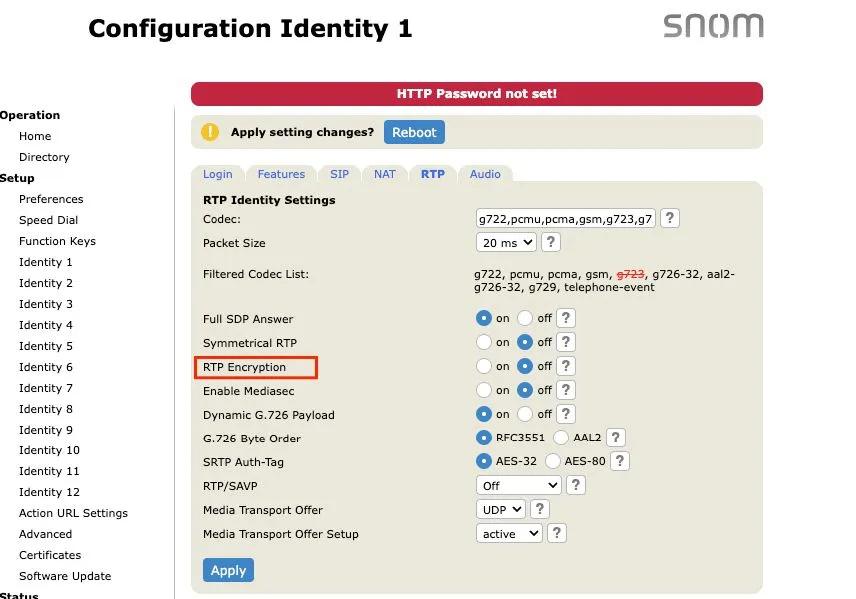
1. In the Snom web interface, go to Identity 1 (or the identity you just configured).
2. Click the RTP tab at the top of the Identity configuration page (next to Login, Features, SIP, NAT, Audio).
3. Locate the RTP Encryption (SRTP) setting.
4. Set the value to Off.
5. Click Apply or Save to confirm the change.
⚠ NOTE
If calls connect but there is no audio (one-way or silent), SRTP mismatch is the most common cause. Always ensure the SRTP setting on the phone matches the RingQ server configuration. For standard RingQ deployments, SRTP should be set to Off.
After saving the SIP settings, the phone will attempt to register with RingQ. Verify the registration was successful before making a test call.
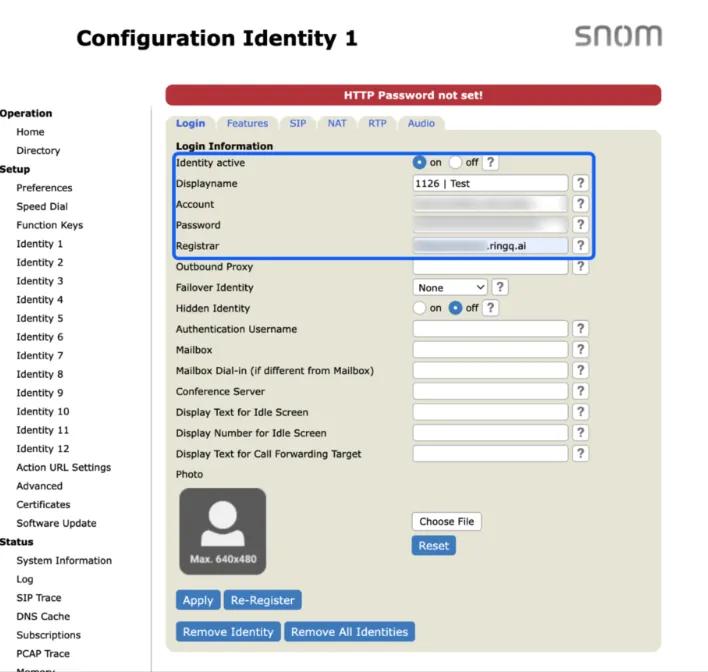
Fig. 5 — Identity 1 configuration page showing the Registrar field set to the RingQ server.
1. Navigate to System Information from the main menu.
2. In the center of the page, locate the section labeled Identity 1 (or Identity 2).
3. Check the Status field:
a. If registration is successful, it will display "OK".
b. If it shows an error (e.g., "Failed" or "Unregistered"), recheck your SIP credentials and server address.
If the phone does not register or calls are not working, use the table below to identify and resolve common issues.
| Symptom | Likely Cause / Fix |
|---|---|
| Status shows "Failed" or "Unregistered" | Check SIP username, password, and Registrar address. Ensure the RingQ server is reachable from the phone's network. |
| Calls connect but no audio (one-way or silent) | Disable RTP Encryption (SRTP) on the Identity RTP tab. Set SRTP to Off and click Apply. |
| Cannot access the web interface | Confirm the phone's IP address via the phone screen menu. Ensure your PC is on the same network subnet. |
| Phone keeps re-registering | Check for duplicate SIP credentials. Each extension should only be registered on one device at a time. |
| "HTTP Password not set!" warning | Set an HTTP admin password under Setup → Preferences → HTTP Password to secure the web interface. |
For support, contact support@ringq.com | ringq.com
