Windows Client Installation Guide
Server (RingQ PBX portal) setup and Windows client (branch/site) installation walkthrough
The RingQ Secure Tunnel lets a remote site run its entire phone system over a single outbound connection. On Windows, this is delivered as two pieces: the RingQ Tunnel Gateway application and the RingQ Proxy service it installs, which together tunnel the site’s IP phones back to the RingQ Cloud PBX without ever exposing a public SIP endpoint or requiring any inbound firewall ports.
| Requirement | Details |
|---|---|
| Access | Administrator rights on a Windows 10 or 11 (64-bit) machine |
| Network | Outbound access to the PBX domain on TCP 6010 (no inbound rules needed at the site) |
| PBX Domain | Your RingQ PBX hostname, e.g. yourcompany.ringq.ai |
| Auth Key | Generated from the RingQ portal (Tunnel Connections page) — see Section 2 |
Before installing anything on the Windows machine, create a tunnel entry in the RingQ portal. This generates the auth key that pairs the device with your PBX server.
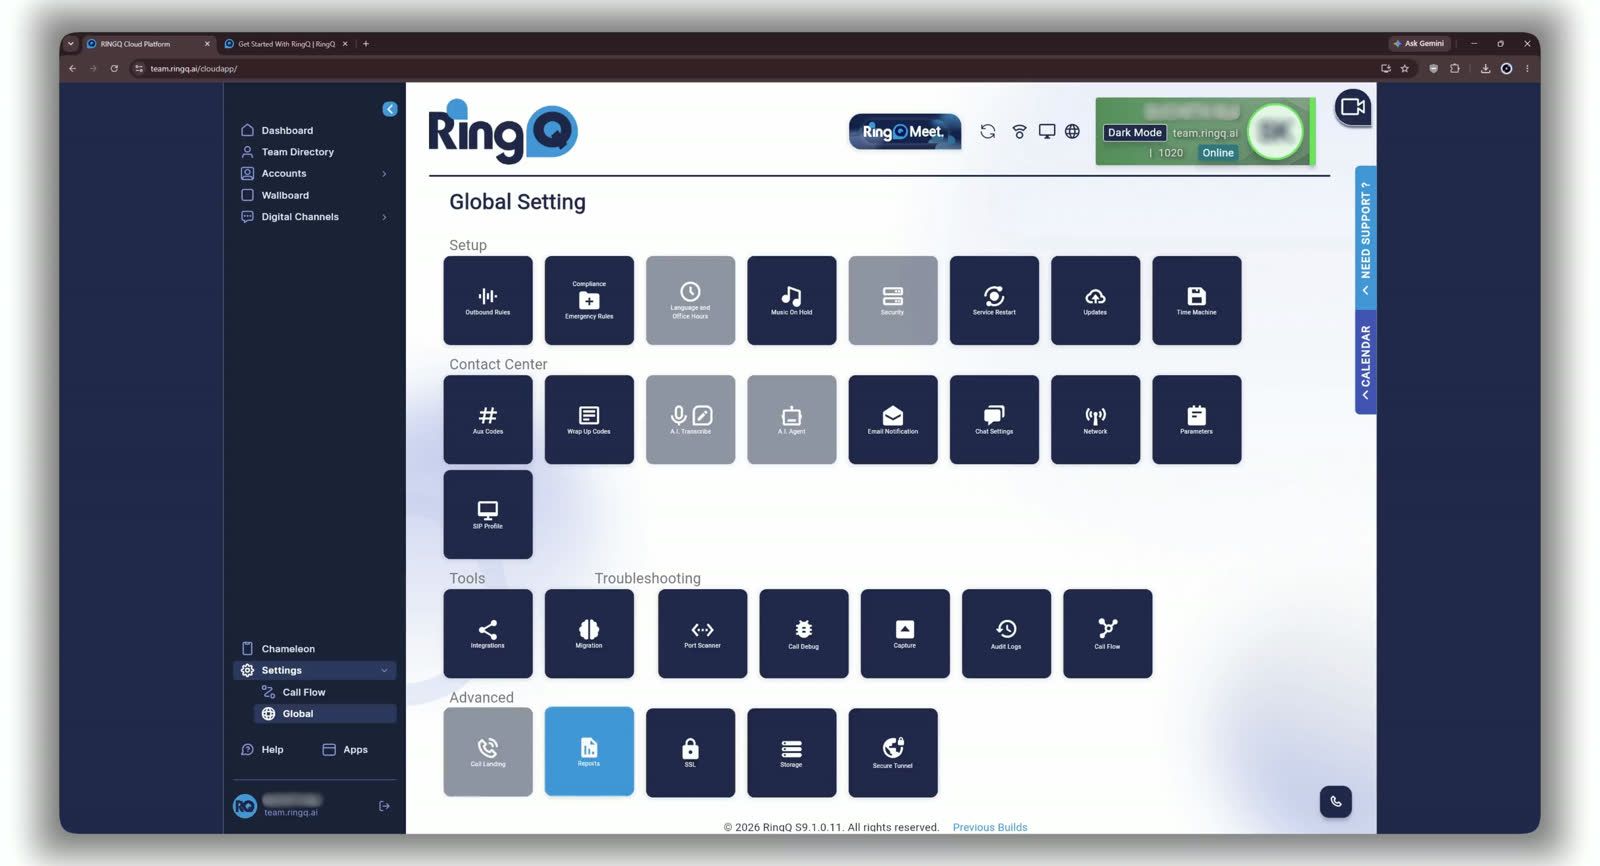
Global Settings — the Secure Tunnel tile under Advanced opens Tunnel Connections.
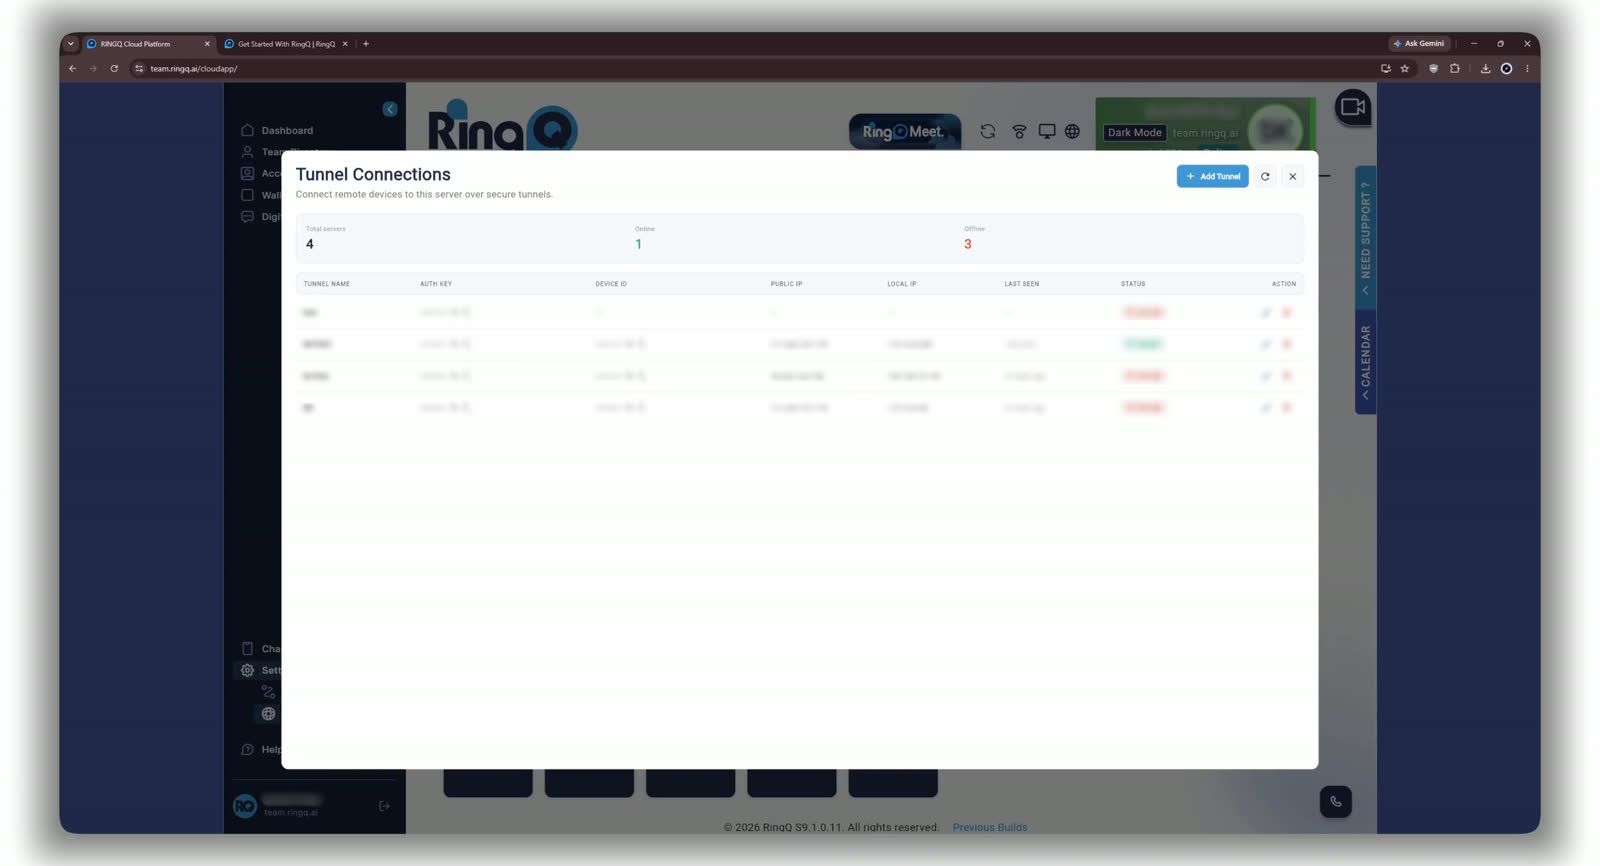
Tunnel Connections — existing servers and their online/offline status.
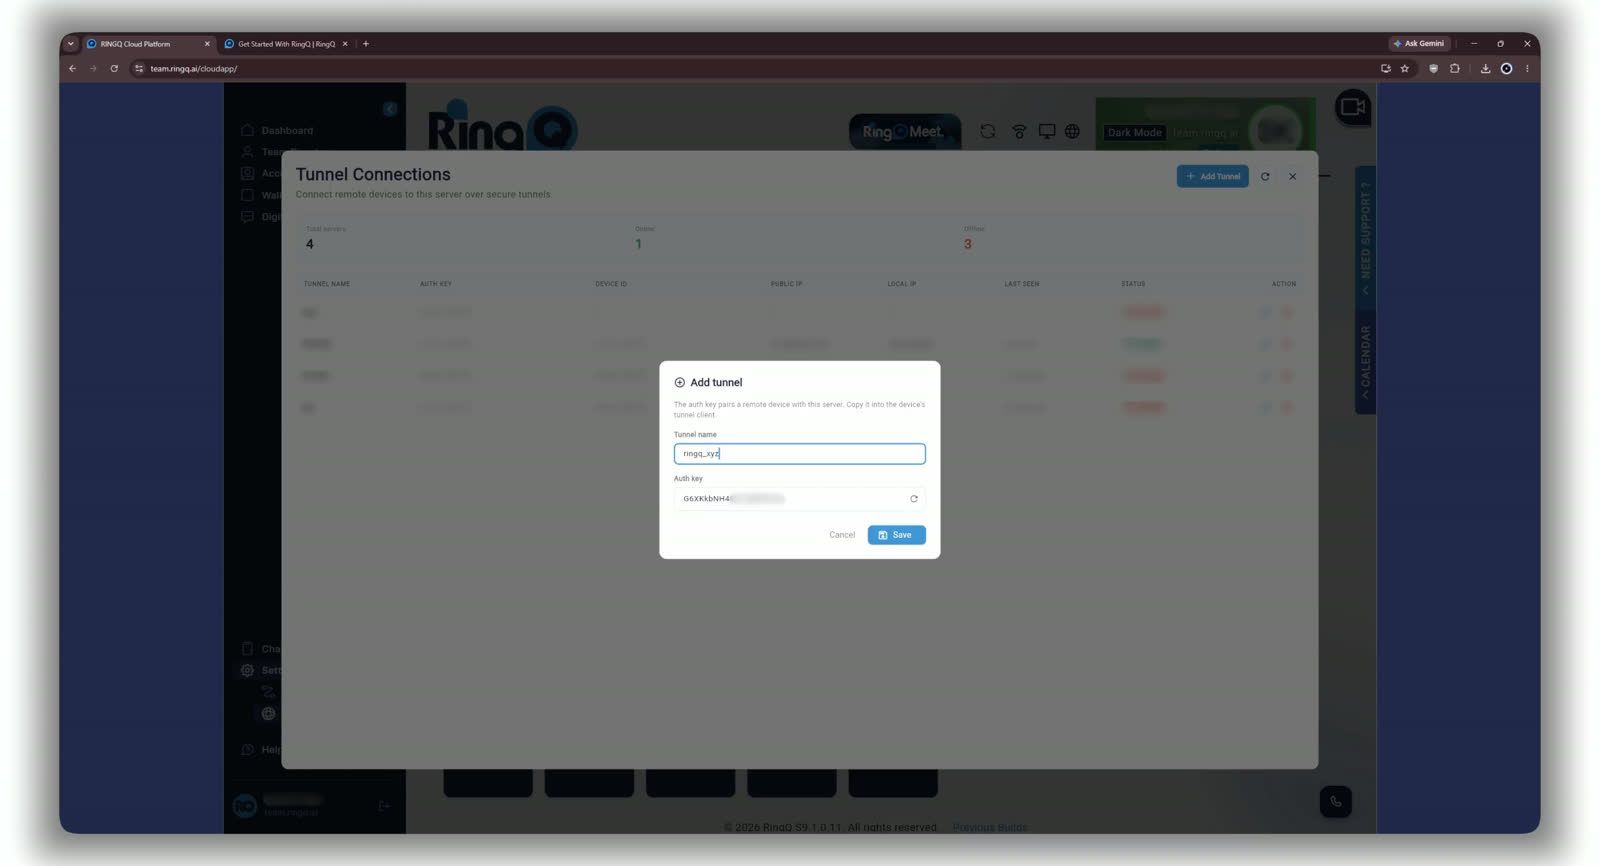
Add tunnel dialog — name the tunnel and the portal generates the auth key.
On ringq.com, go to Get Started → Download.

ringq.com — start from Get Started to reach the download page.
Under Secure Tunnel Client, click .EXE under Windows Tunnel to download the installer.
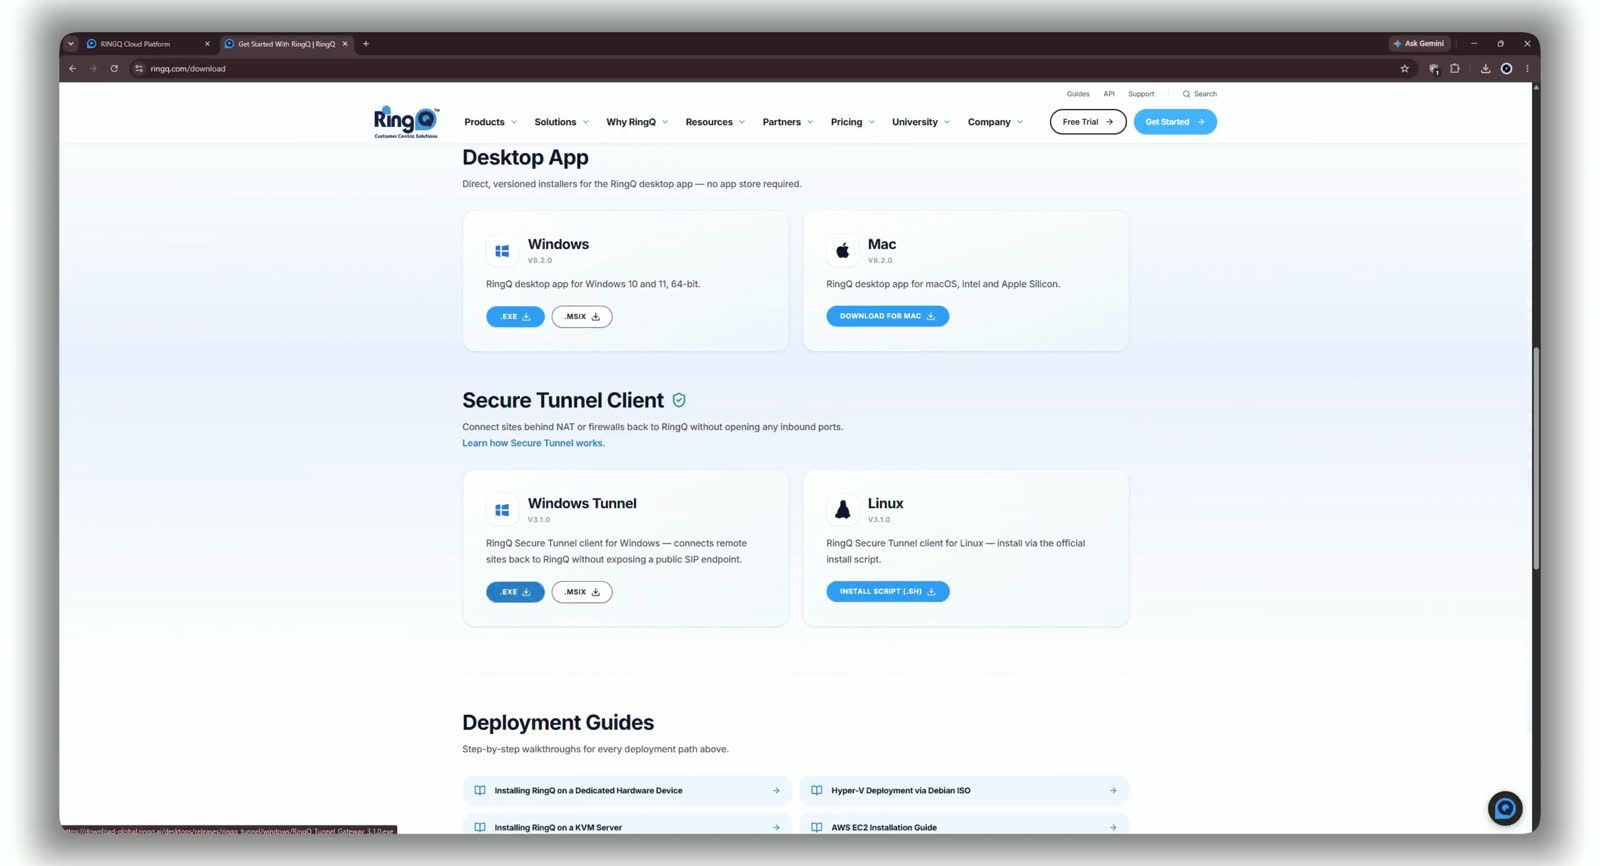
Download page — Secure Tunnel Client section, Windows Tunnel .EXE installer.
Run the downloaded installer.
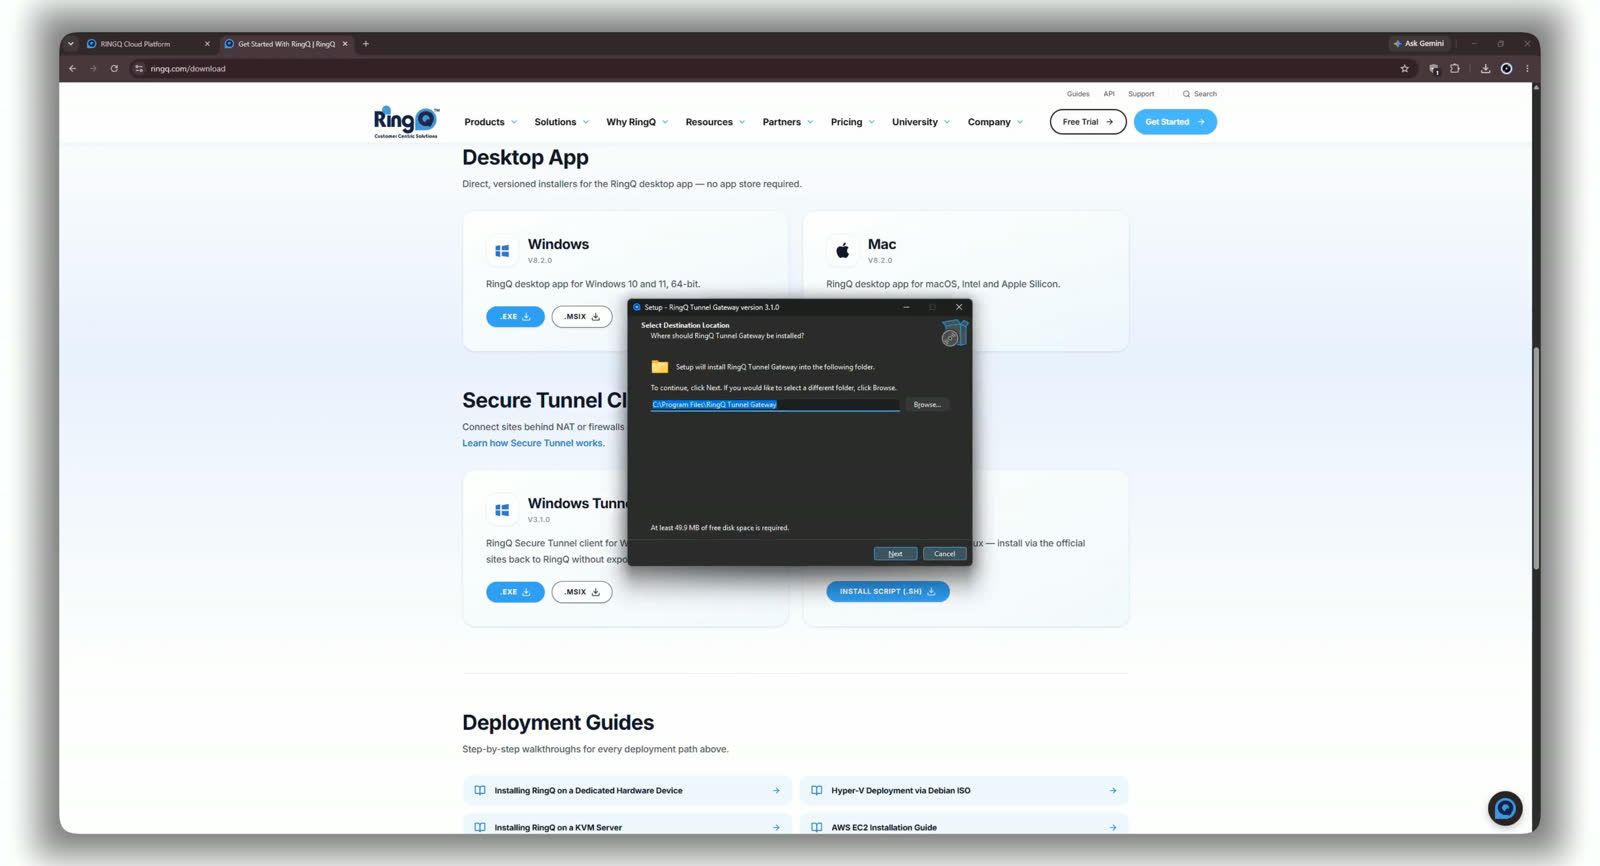
Select Destination Location — default install path.
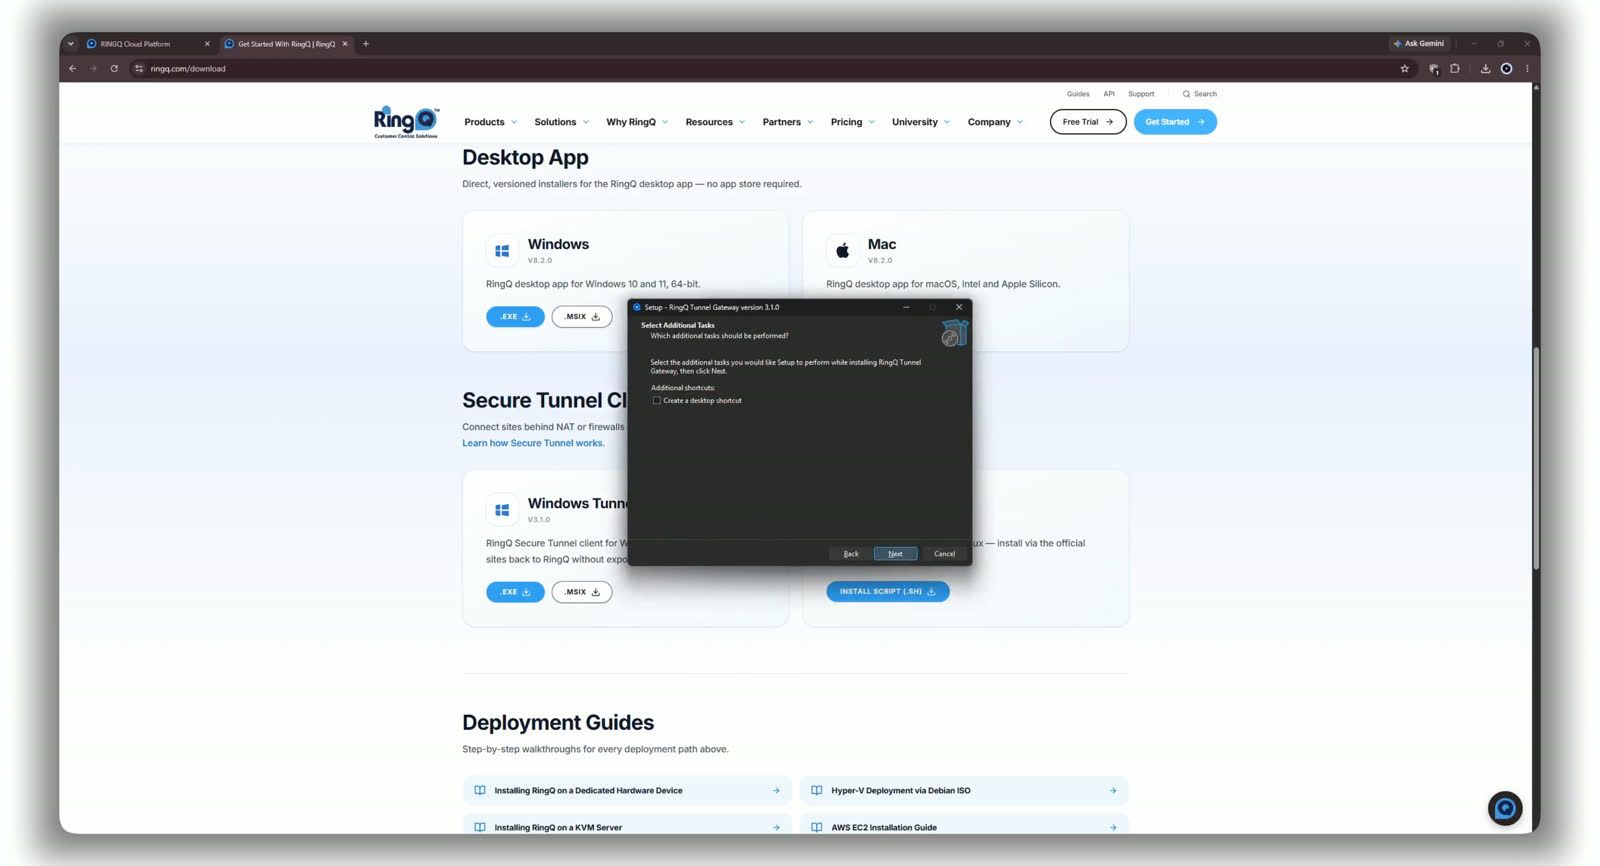
Select Additional Tasks — optional desktop shortcut.
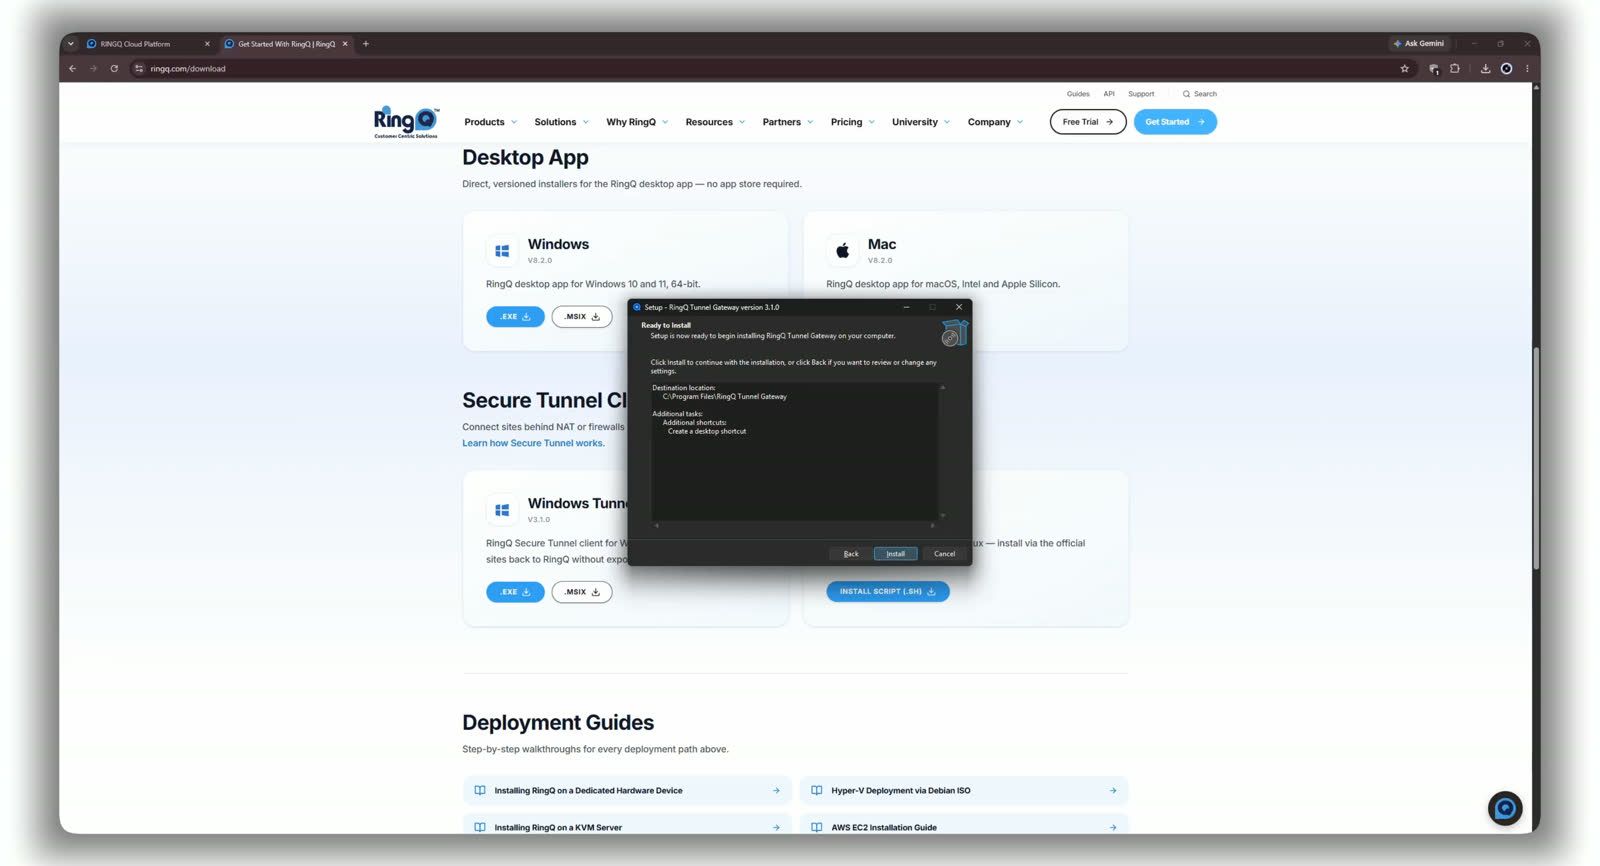
Ready to Install — review before installing.
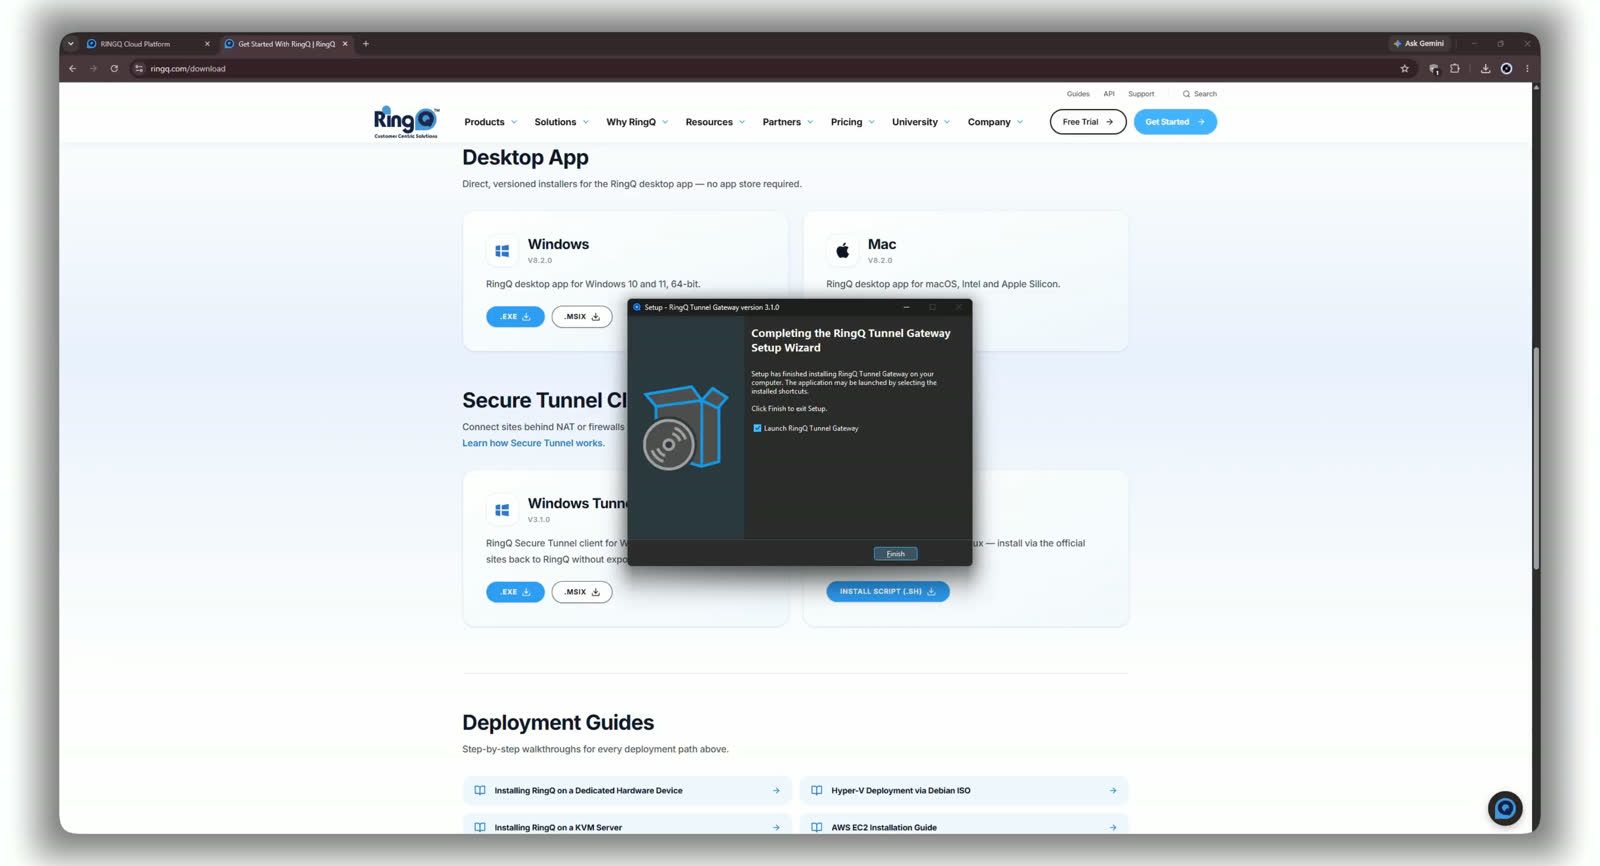
Completing the Setup Wizard — launches RingQ Tunnel Gateway on Finish.
Finishing the Tunnel Gateway installer automatically launches the RingQ Proxy setup wizard, which installs the service that tunnels the office’s IP phones to the RingQ Cloud PBX.
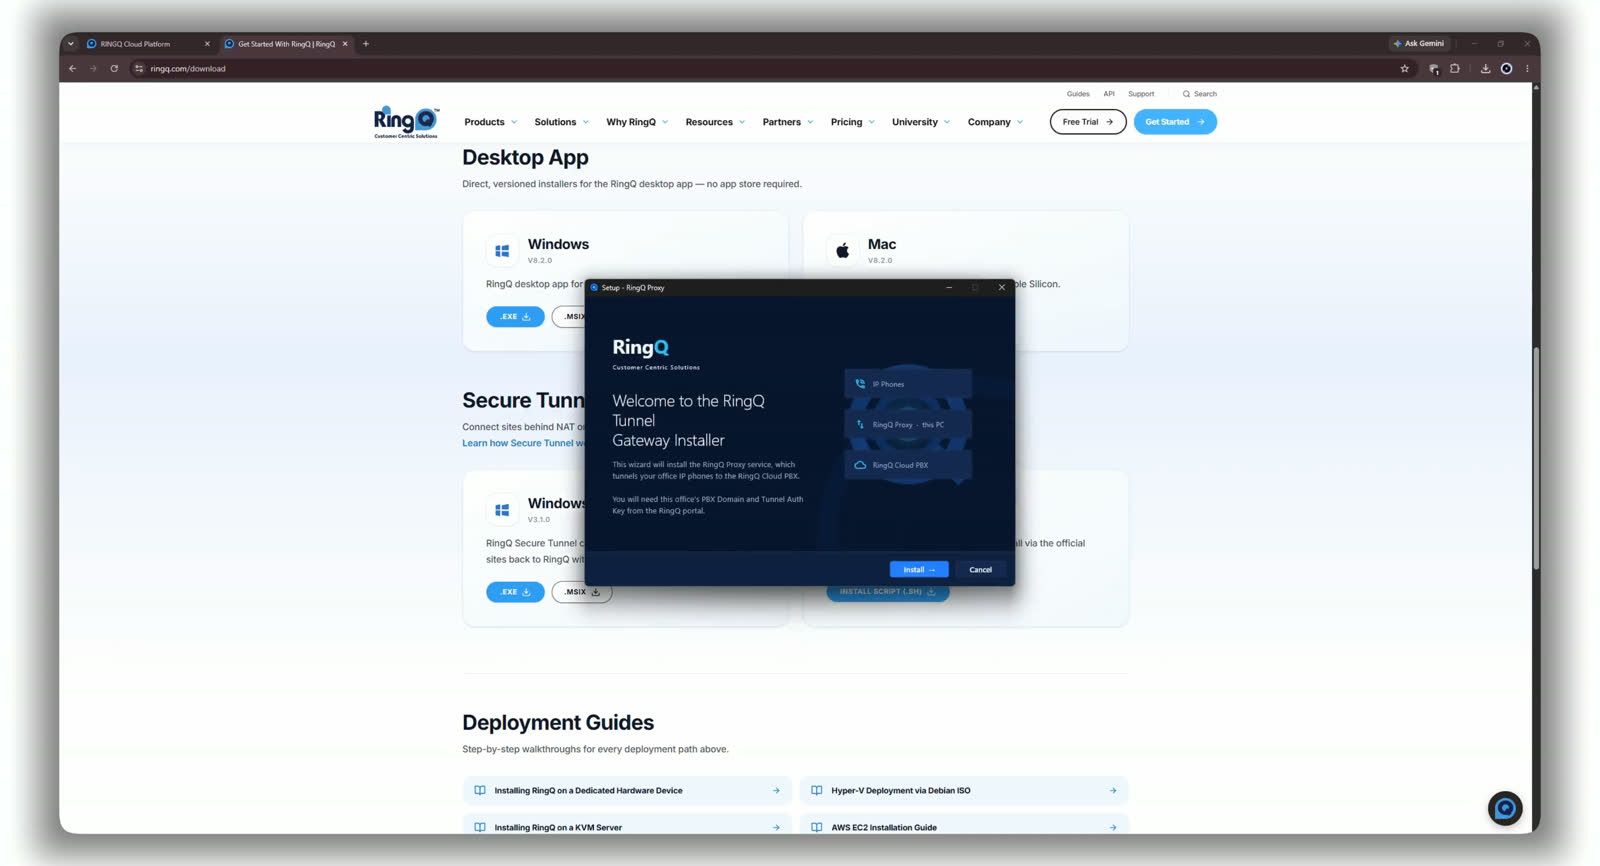
Welcome to the RingQ Tunnel Gateway Installer — click Install to continue.
On the PBX Connection Details screen, enter:
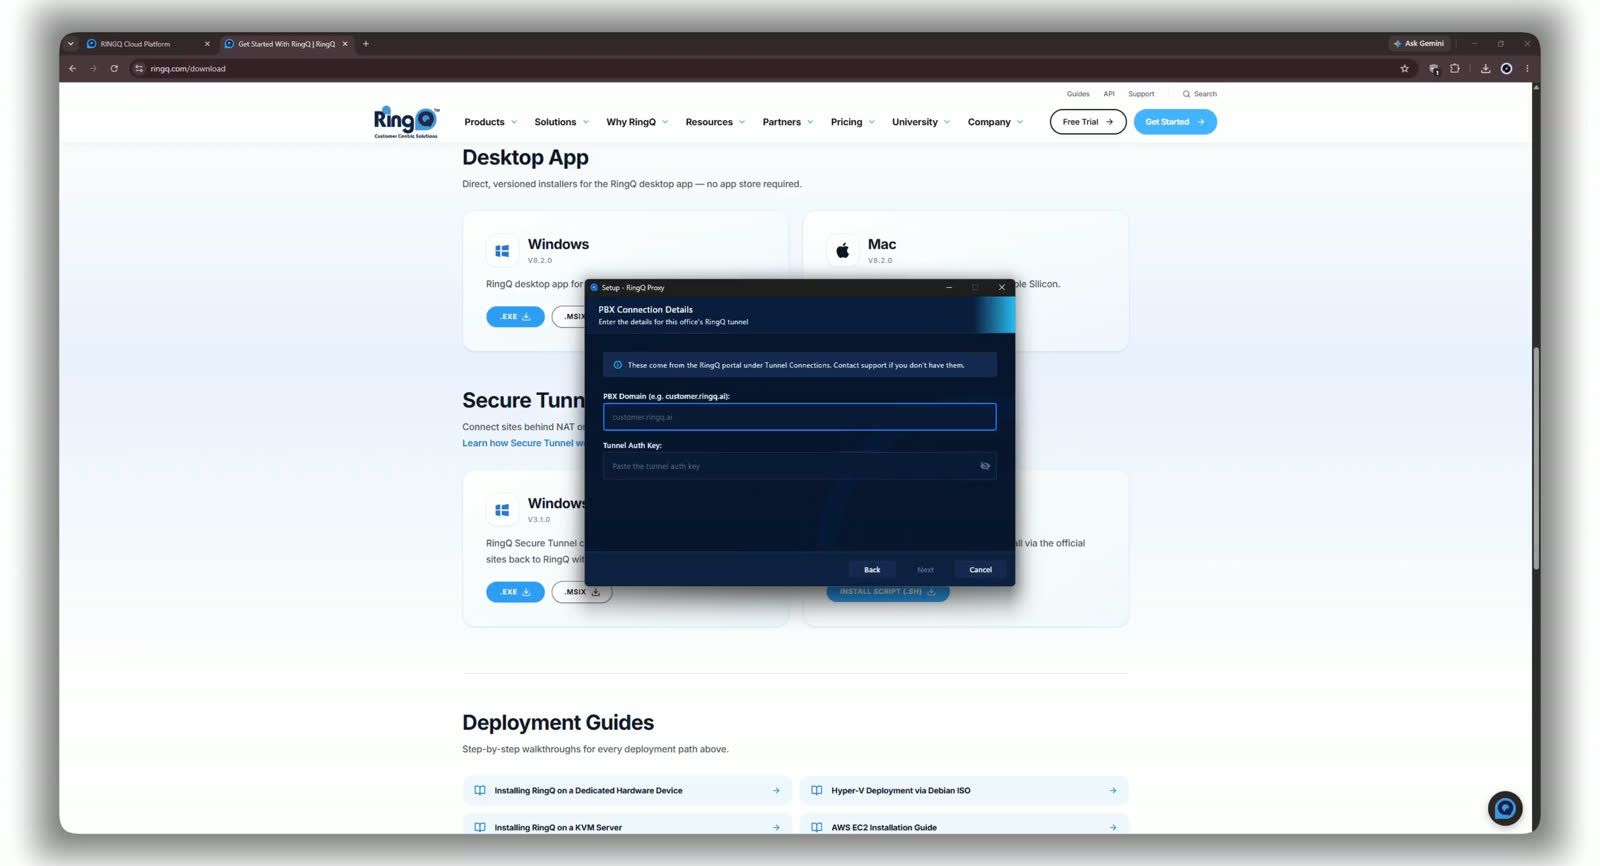
PBX Connection Details — empty fields ready for the domain and auth key.
Tip: The PBX Domain and Auth Key entered here must exactly match the tunnel created in Section 2 — that’s what pairs this Windows machine with your PBX.
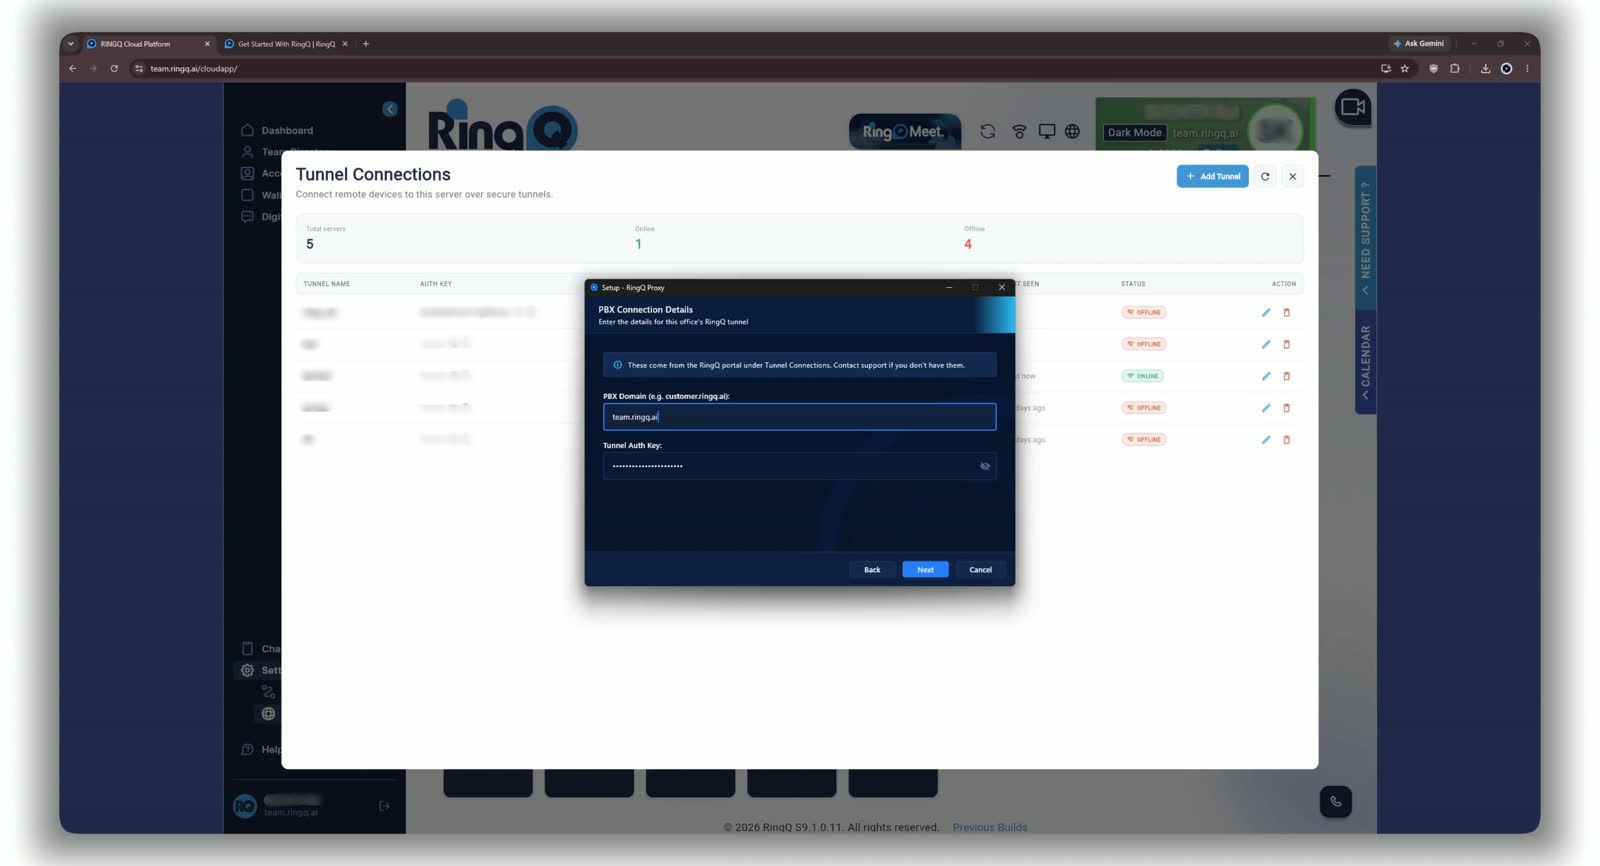
PBX Connection Details filled in — domain and auth key entered, ready to continue.
Click Next.
The wizard registers the RingQProxy Windows service and opens the required firewall ports automatically — no manual firewall configuration is needed.
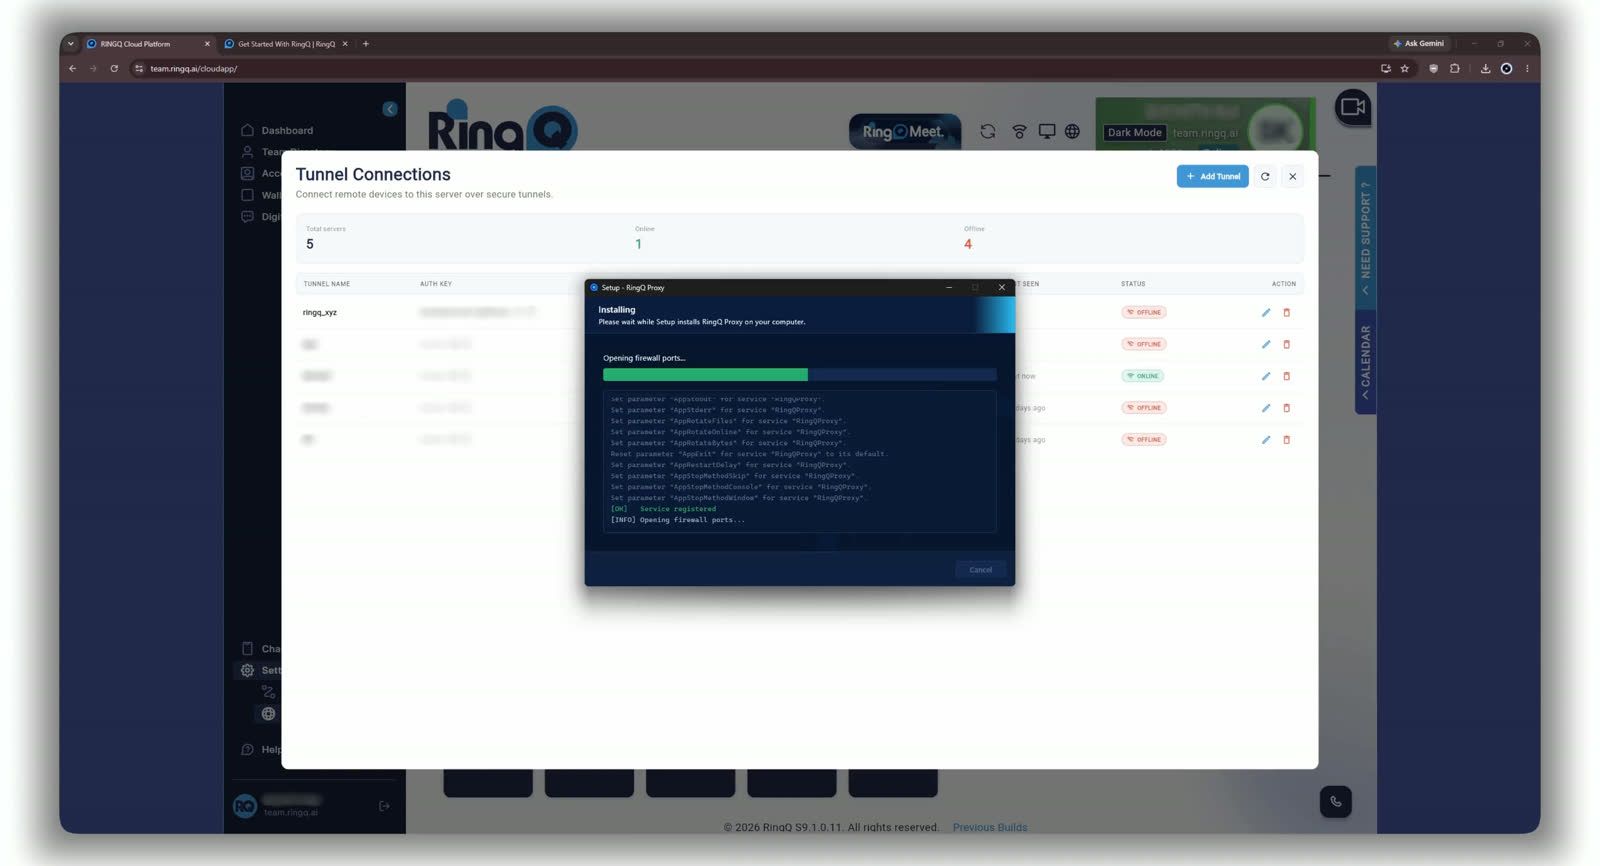
Installing — registering the RingQProxy service and opening firewall ports.
Completing the RingQ Proxy Setup Wizard confirms the tunnel service is running and will start automatically with Windows. Click Finish.
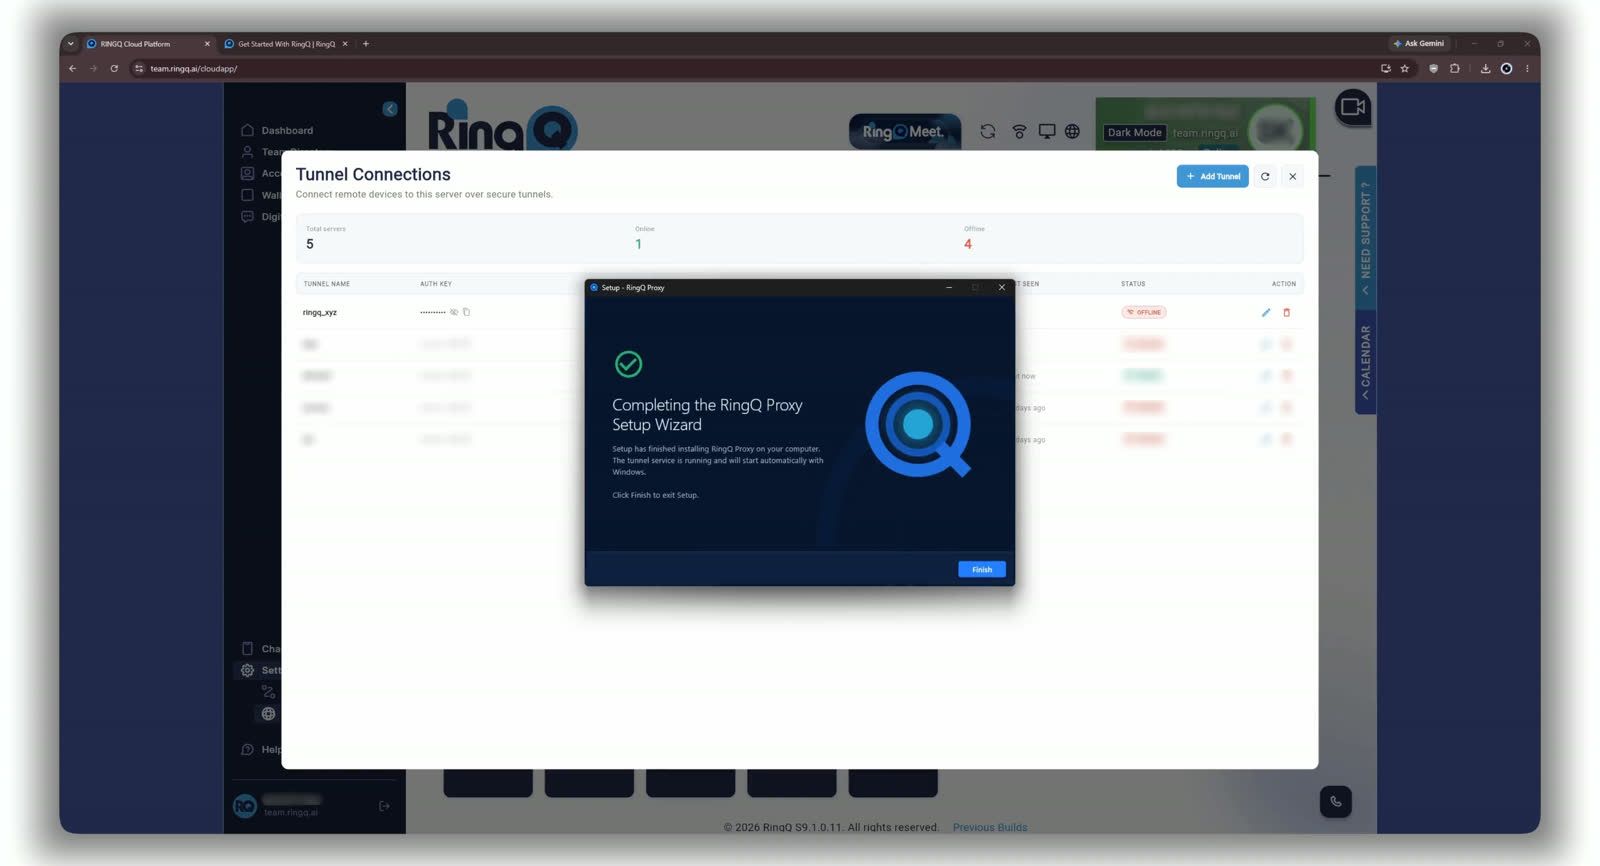
Setup complete — the tunnel service is running and set to auto-start with Windows.
Back in the RingQ portal’s Tunnel Connections list, the tunnel should now show a populated Device ID, Public IP, Local IP, “Last seen: Just now,” and status Online.
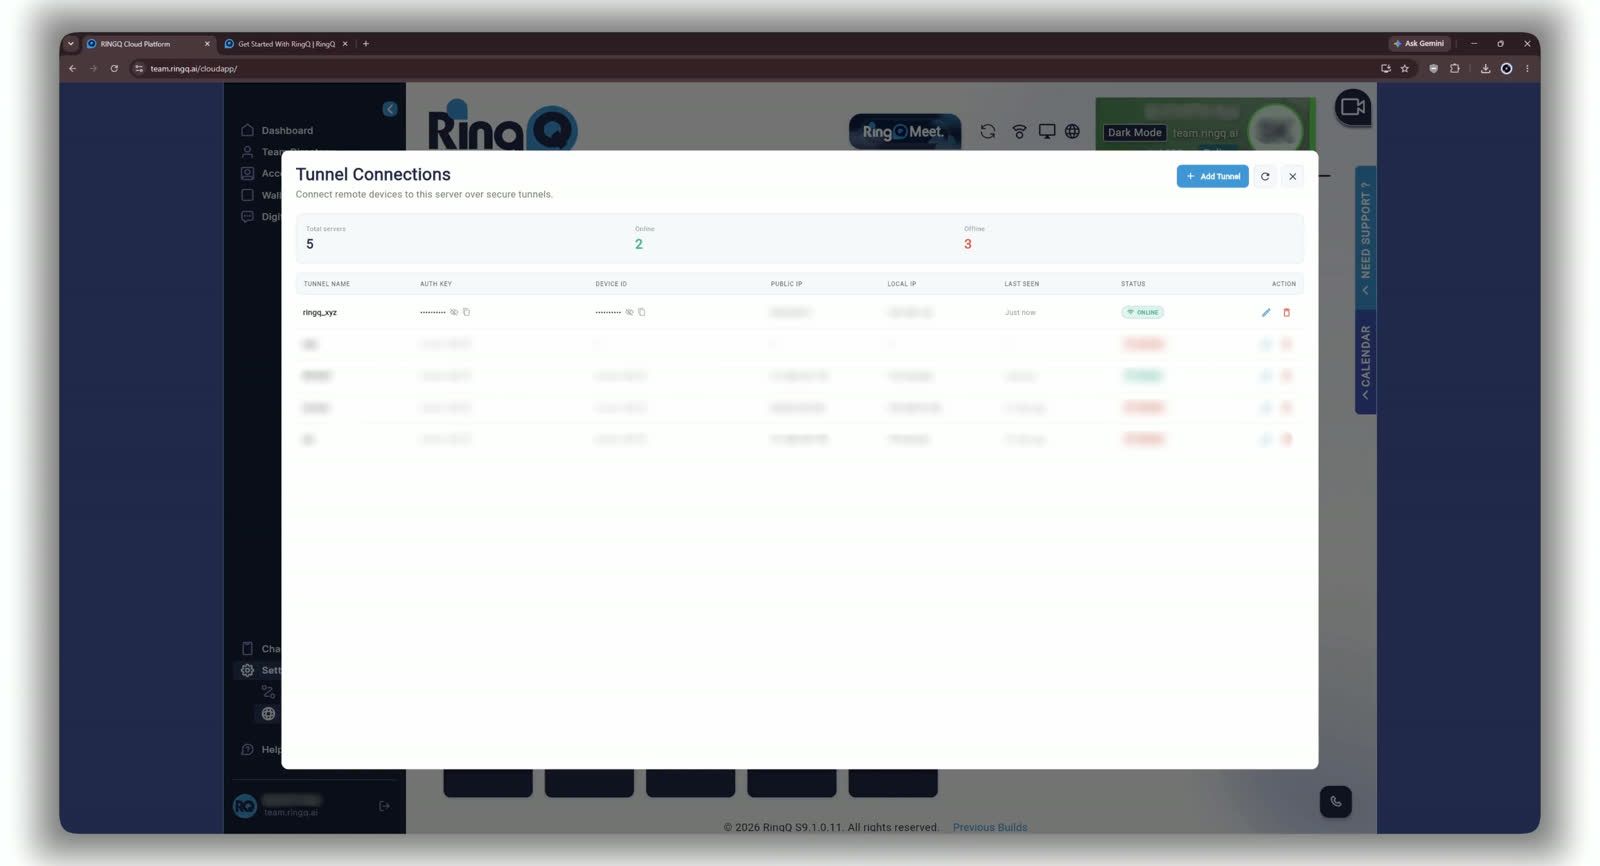
Tunnel Connections — the tunnel now shows Status: Online with populated Device ID and IPs.
Bottom line: A tunnel that flips from Offline to Online immediately after Finish confirms the Windows machine paired successfully with your PBX.
