Configuration Guide
Server (RingQ PBX portal) setup and client (branch/site) installation walkthrough
The RingQ Secure Tunnel lets a remote site run its entire phone system over a single outbound connection. Instead of opening separate ports for signalling, management, and audio, RingQ encapsulates all three inside one persistent connection on TCP port 6010.
The connection is always initiated outbound, from the Tunnel Client at the remote site to the RingQ cloud PBX. On the PBX side, the only requirement is one inbound allowance for TCP 6010 — no other ports (8443, 7443, etc.) need to be opened for the tunnel to function.
Note: Because the token is validated before the tunnel is trusted, an unauthenticated connection attempt on TCP 6010 gets nowhere — the port being open does not by itself grant access.
Bottom line: Open only TCP 6010 outbound from the client / inbound on the PBX side. All media streams are encapsulated inside this one connection — no other ports, no added complexity.
Whatever is registered behind the Tunnel Client — physical desk phones or software clients — reaches the cloud PBX through the same authenticated TCP 6010 connection. Each branch or remote site runs its own Tunnel Client, so multiple sites can connect to the same cloud PBX, each over its own single-port tunnel.
| Requirement | Details |
|---|---|
| Access | Root / sudo access on the client machine (Linux, e.g. Debian 12) |
| Network | Outbound access to the PBX domain on TCP 6010 (no inbound rules needed at the branch) |
| PBX Domain | Your RingQ PBX hostname, e.g. yourcompany.ringq.ai |
| Auth Key | Generated from the RingQ portal (Tunnel Connections page) — see Section 3 |
Before installing anything on the client, create a tunnel entry in the RingQ portal. This generates the auth key that pairs the remote device with your PBX server.
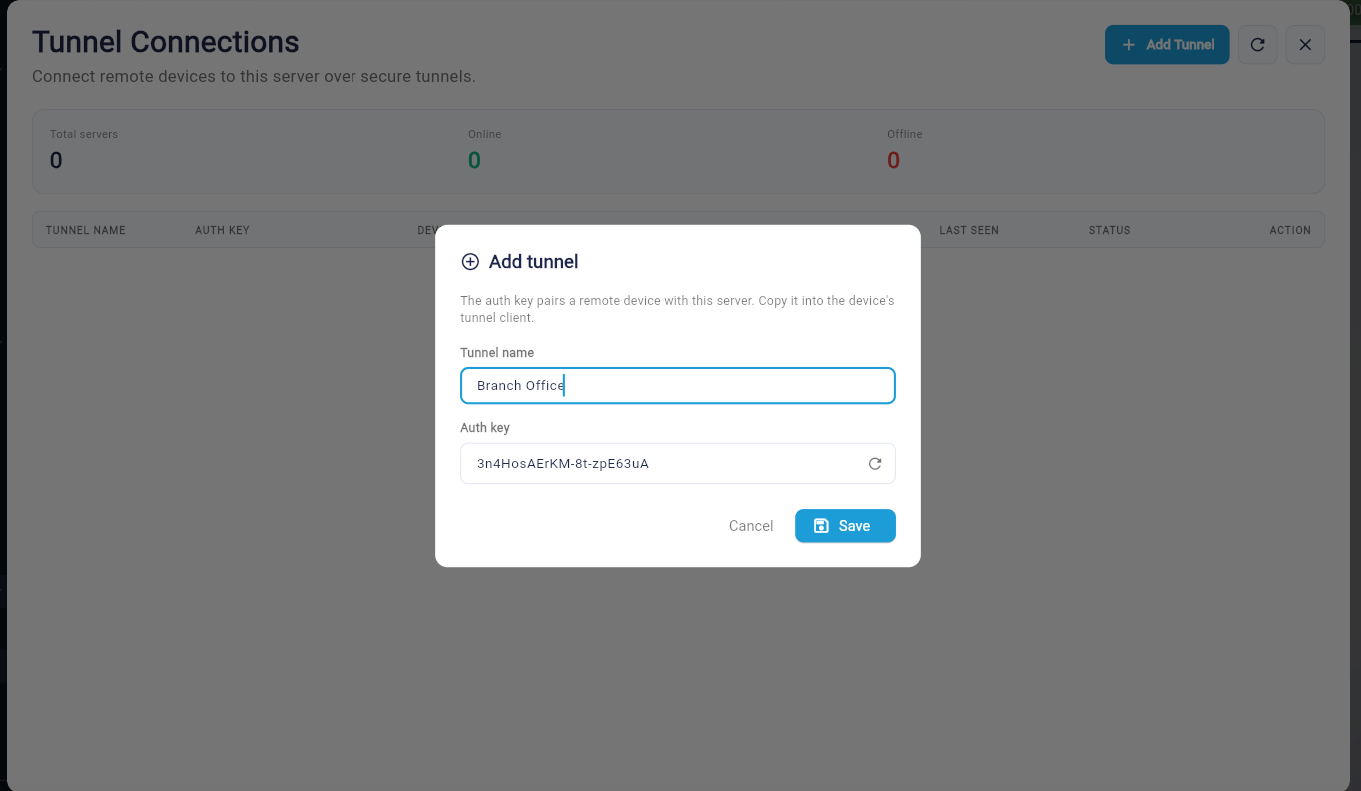
Add Tunnel dialog — name the tunnel and the portal generates the auth key.
Each row on the Tunnel Connections page represents one paired device, showing its auth key, device details, last-seen time, and online/offline status. Total, online, and offline counts appear at the top of the page.
On the remote machine that will host the Tunnel Client, run the installer with root privileges.
curl -fsSL https://raw.githubusercontent.com/Cal4Care-Developers/proxytunnel/master/install.sh -o /tmp/install.sh
chmod +x /tmp/install.sh
sudo /tmp/install.sh
The installer runs a system check (OS, architecture, device ID, LAN IP, and public IP are auto-detected), then prompts for two values — everything else is filled in automatically:
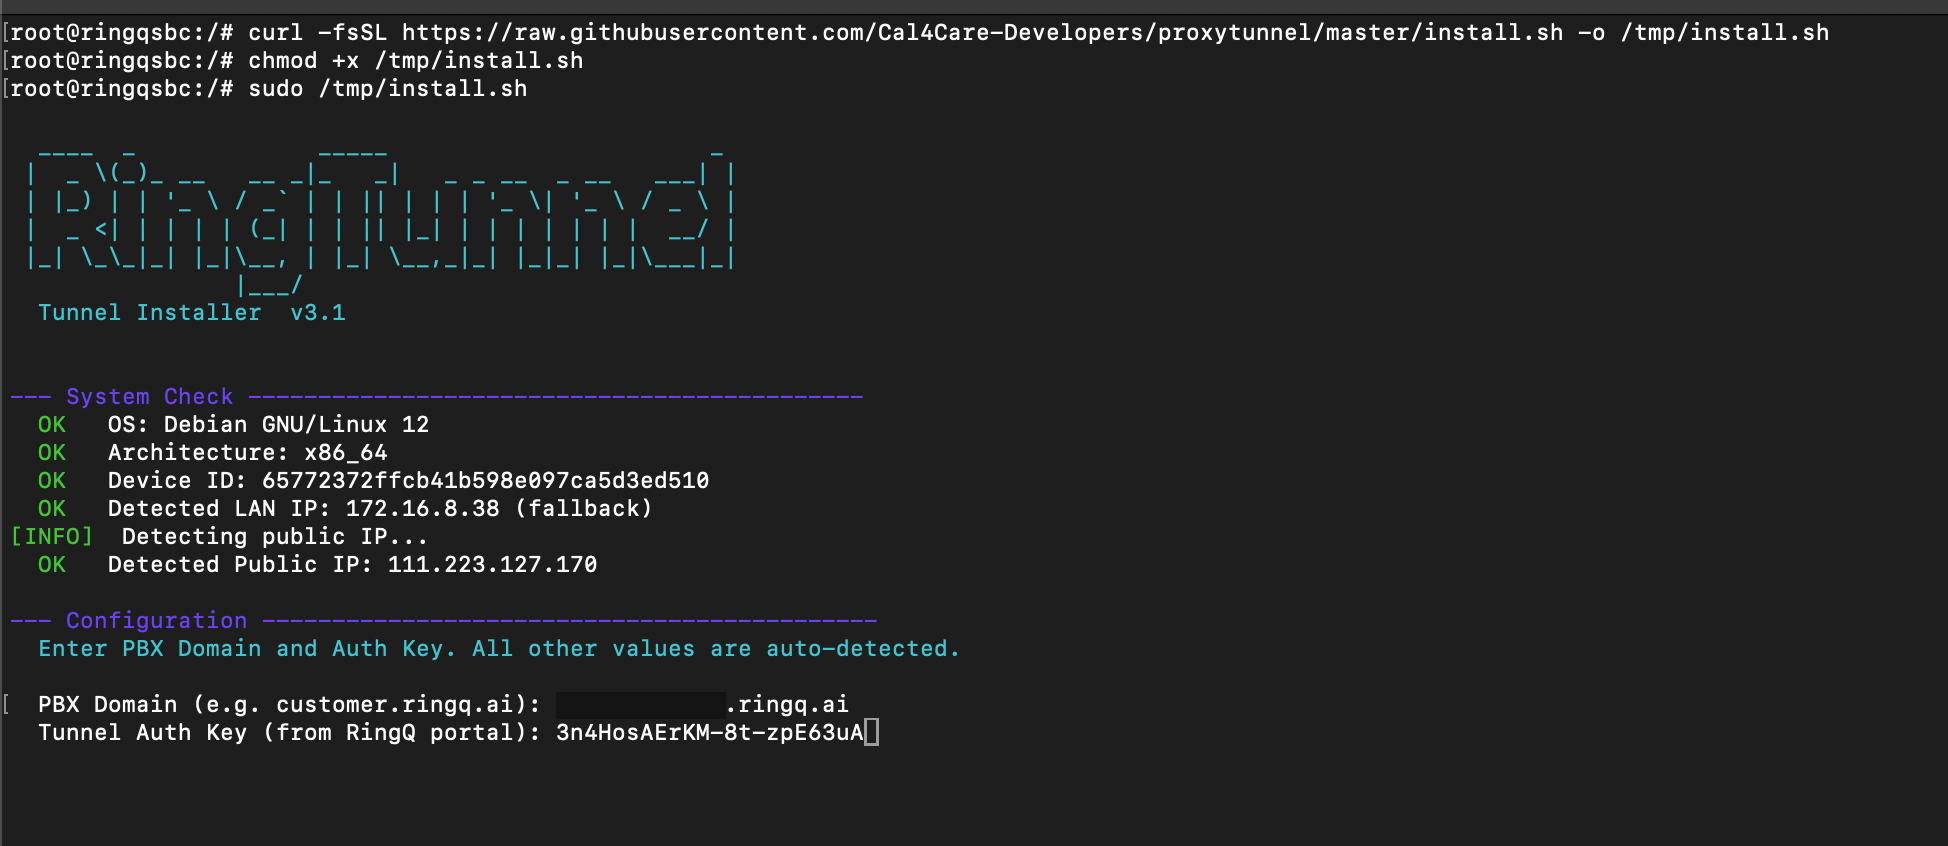
Tunnel installer — system check followed by the PBX Domain and Auth Key prompts.
Tip: The Auth Key entered here must exactly match the one generated for this tunnel in the portal (Section 3) — that's what pairs this device with your PBX.
After the PBX Domain and Auth Key are entered, the installer echoes back the full configuration it derived — API URL, tunnel endpoint, LAN/public IP, and the phone signaling ports — before it changes anything on the system.
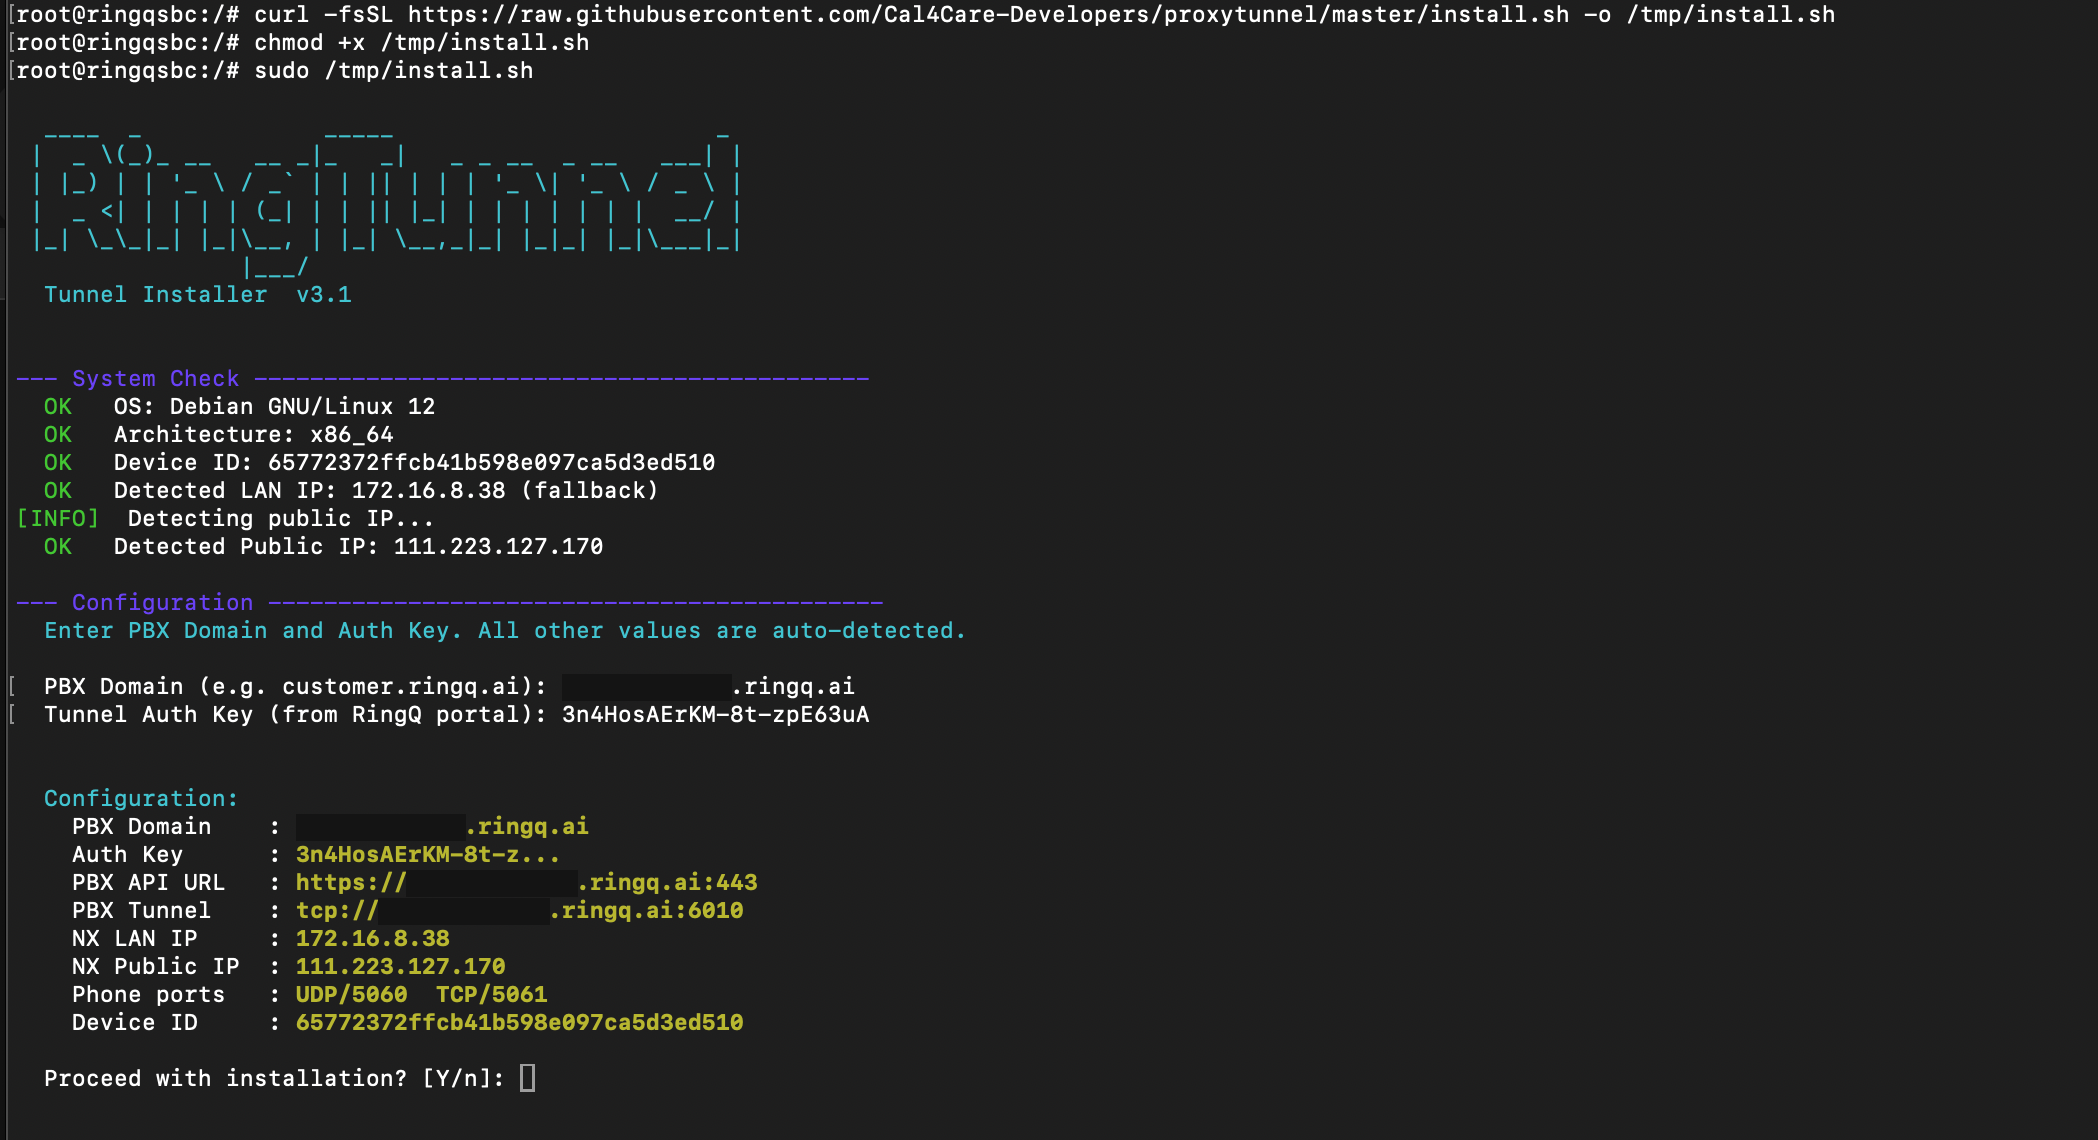
Configuration summary — review the derived values, then confirm to proceed.
Once confirmed, the installer finishes and prints a summary with the service name, config file location, and the commands used to manage the tunnel going forward.
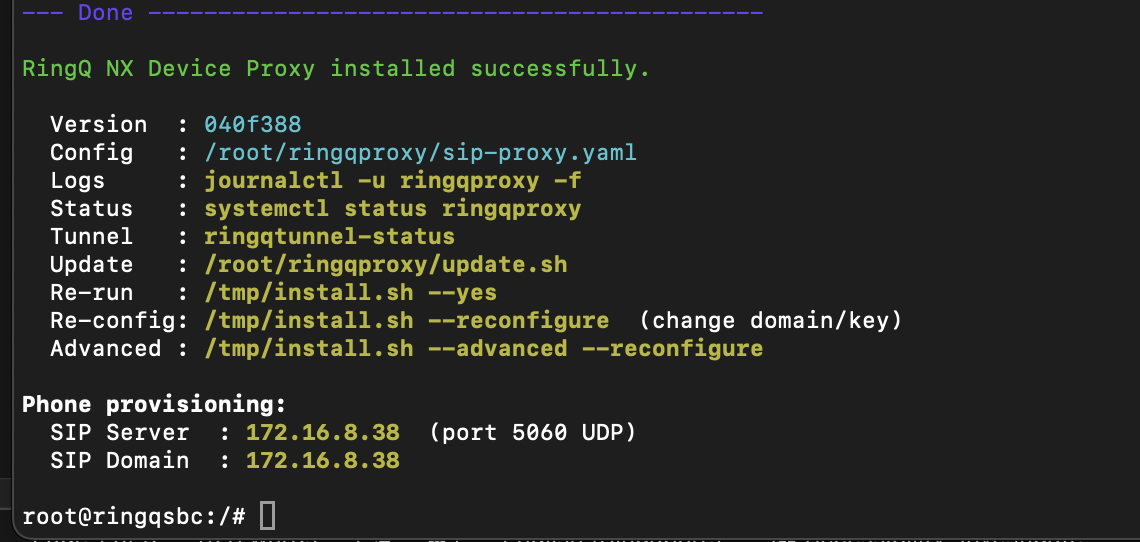
RingQ NX Device Proxy installed successfully — service, logs, and status commands.
Key paths and commands from this summary:
| Item | Value / Command |
|---|---|
| Config file | /root/ringqproxy/sip-proxy.yaml |
| Logs | journalctl -u ringqproxy -f |
| Service status | systemctl status ringqproxy |
| Tunnel status | ringqtunnel-status |
| Update | /root/ringqproxy/update.sh |
The same install script supports re-running for maintenance, without needing to repeat the full setup each time.
| Command | Purpose |
|---|---|
| sudo /tmp/install.sh | Initial install |
| sudo /tmp/install.sh --yes | Re-run after a partial failure — uses existing config, skips unchanged steps |
| sudo /tmp/install.sh --reconfigure | Change PBX domain or auth key — re-prompts everything |
| sudo /tmp/install.sh --reinstall | Force re-download of Go and re-clone the repo (e.g. for a Go version upgrade) |
Once installed, use the ringqtunnel-status command on the client to confirm the tunnel is connected.
ringqtunnel-status # one-shot status (service, auth, IPs, last active)
ringqtunnel-status --watch # live refresh every 5s
ringqtunnel-status --json # JSON output, for portal/monitoring integration
You can cross-check the same connection from the portal side: on the Tunnel Connections page, the tunnel's row should show Status: Online and a recent Last Seen time.
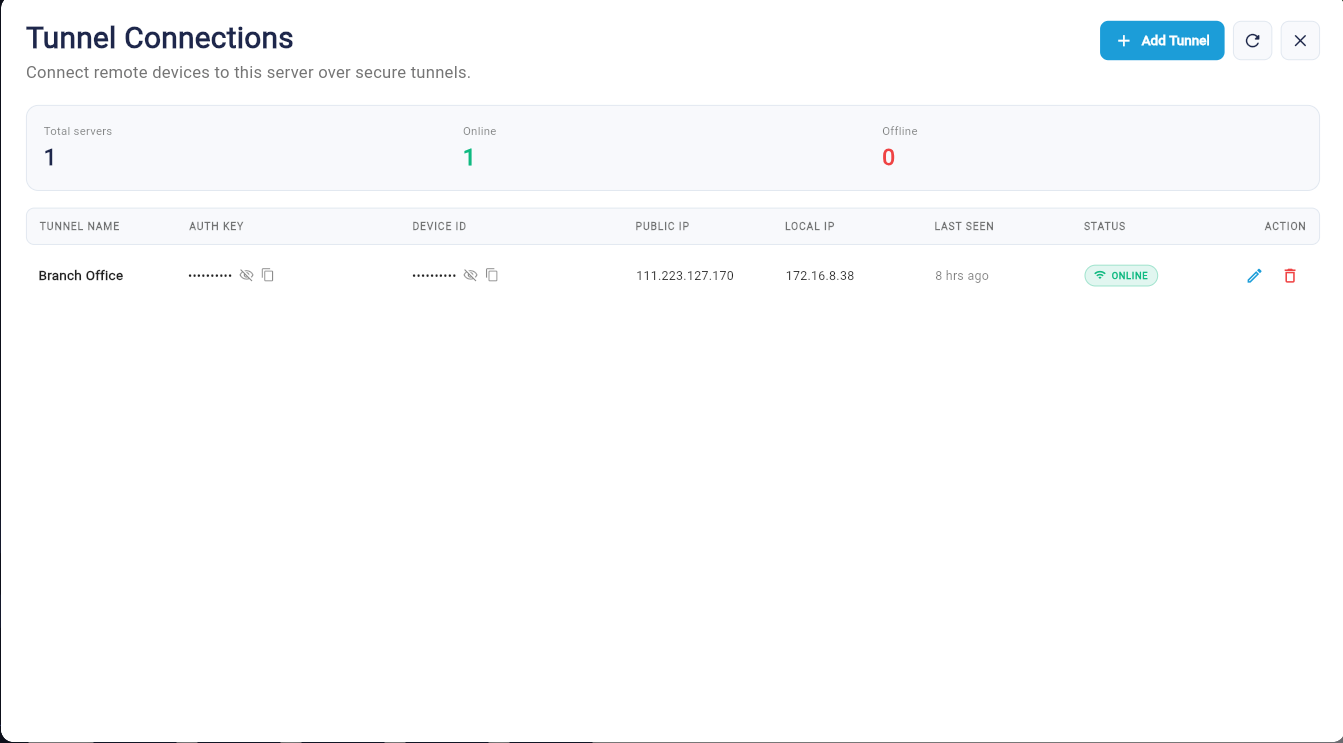
Tunnel Connections page — “Branch Office” now shows Status: Online, with its Device ID, Public IP, and Local IP populated.
Bottom line: Matching Public IP / Local IP values between this page and the client's system-check output (Section 4) confirm the correct device paired successfully.
To remove the Tunnel Client from a device:
curl -fsSL https://raw.githubusercontent.com/Cal4Care-Developers/proxytunnel/master/uninstall.sh -o /tmp/uninstall.sh
chmod +x /tmp/uninstall.sh
sudo /tmp/uninstall.sh
