This document describes the configuration of Dell SonicWall firewall devices for use with RingQ. The guide applies to SonicWall firewalls configured using Many-to-One NAT. Please note that we cannot help with the configuration of your firewall.
Create Service Objects
To configure the SonicWall, you need to create the service objects for each Port or Port range that needs to be forwarded. Then place these service objects in a service group after which you must apply the policies.
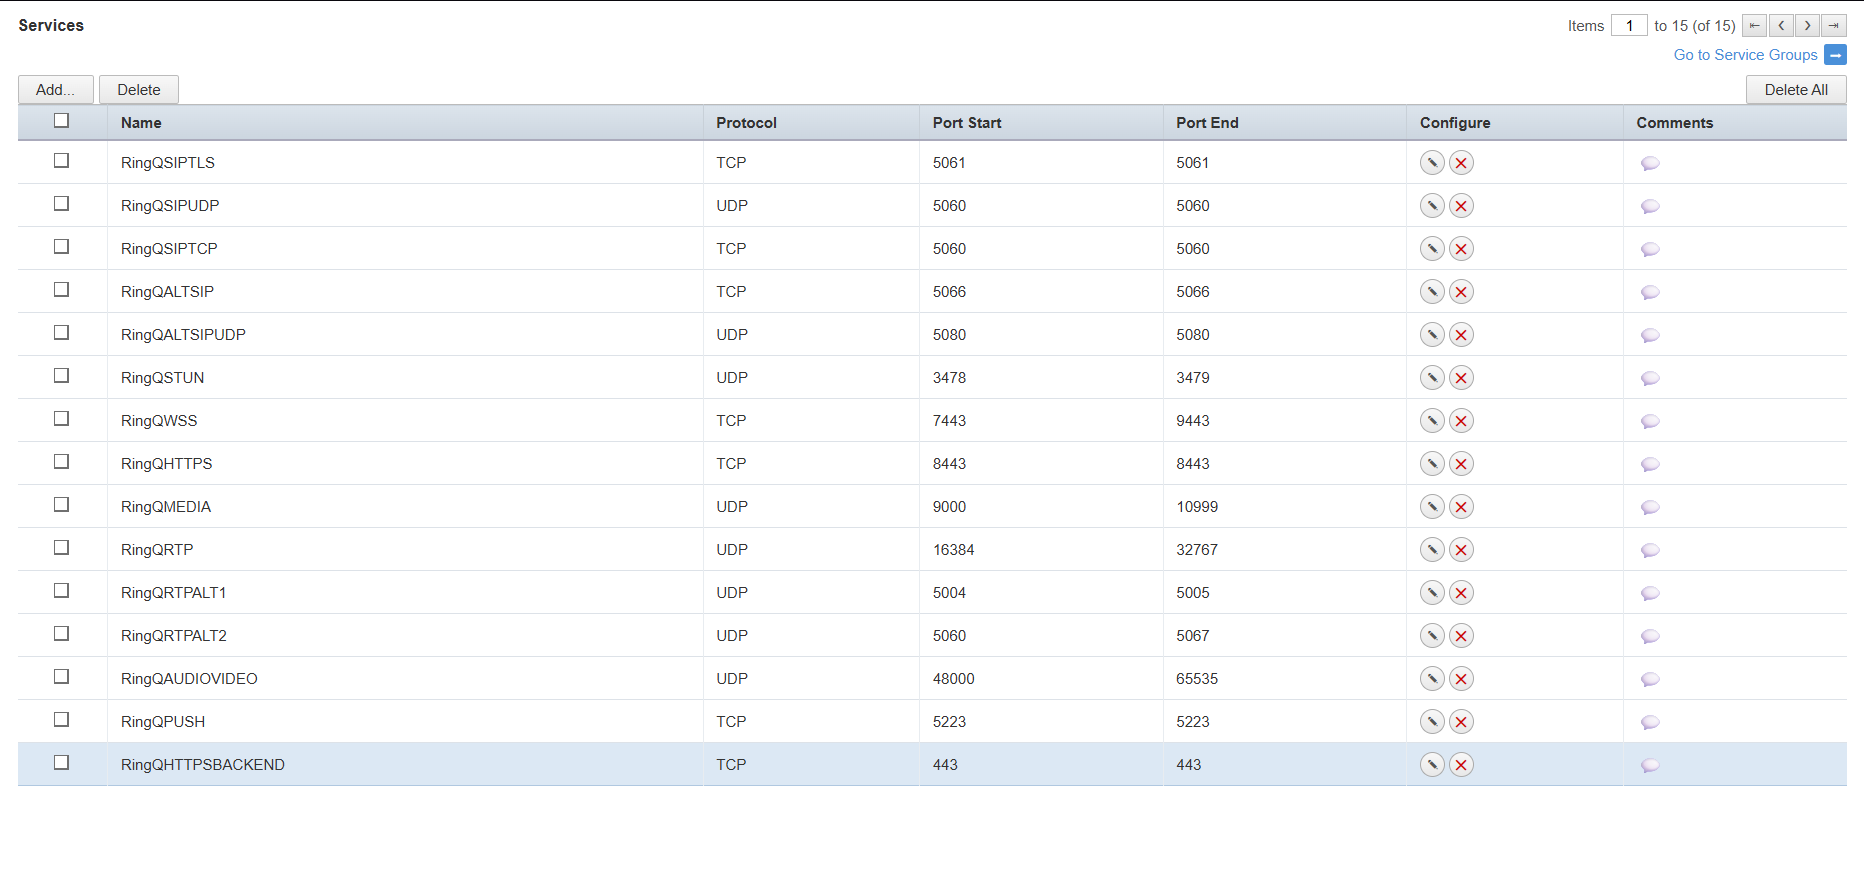
Open the Web Management Console of the DELL SonicWall Firewall Gateway and go to Network → Services.
In section “Services” add one service object for each port that RingQ requires forwarding for.
In section “Service Groups” add a new service group named “RingQ Services” and add all of the above Service Objects as members.
Now go to Network → Address Object and locate section “Address Objects”.
Here add a new Address Object and set:
Name: RingQ PBX
Zone Assignment: LAN
Type: Host
IP Address: The LAN IP address of your RingQ Server
Create NAT Policy
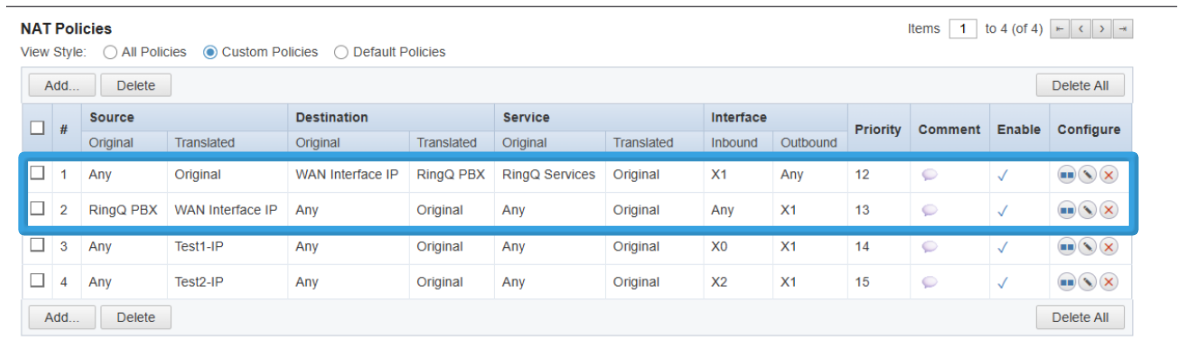
Go to “Network → NAT Policies” and press “Add”.
Create your Inbound NAT policy by filling in the following fields:
“General” tab:
Original Source: Any
Translated Source: Original
Original Destination: WAN Interface IP
Translated Destination: RingQ PBX (this is the Address Object created in Step 1)
Original Service: RingQ Services (this is the Service Group created in Step 1)
Translated Service: Original
Inbound Interface: Select the WAN interface your RingQ Will be using
Outbound Interface: Any
Comment: RingQ Inbound Connections
Enable NAT Policy: Checked/Enabled
Press “Add” again to create your Outbound NAT policy by filling in the following fields:
“General” tab:
Original Source: RingQ PBX (this is the Address Object created in Step 1)
Translated Source: WAN Interface IP
Original Destination: Any
Translated Destination: Original
Original Service: Any
Translated Service: Original
Inbound Interface: Any
Outbound Interface: Select the WAN interface your RingQ Will be using
Comment: RingQ Outbound Connections
Enable NAT Policy: Checked/Enabled
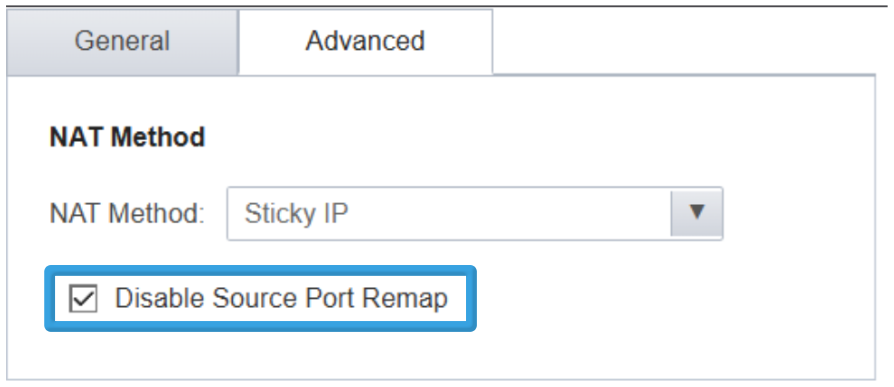
“Advanced” tab:
Disable Source Port Remap: Checked/Enabled
Creating Firewall Access Rules
Go to “Firewall → Access Rules”, select the “WAN to LAN” option and press “Add”.
Create a new Access Rule with the following fields:
“General” tab:
Action: Allow
From Zone: WAN
To Zone: LAN
Service: RingQ Services (this is the Service Group created in Step 1)
Source: Any
Destination: Select the Address Object of the “WAN/Public IP” you have configured RingQ to use
Users Allowed: All
Schedule: Always on
Comment: RingQ Inbound Access
Allow Fragmented Packets: Checked/Enabled
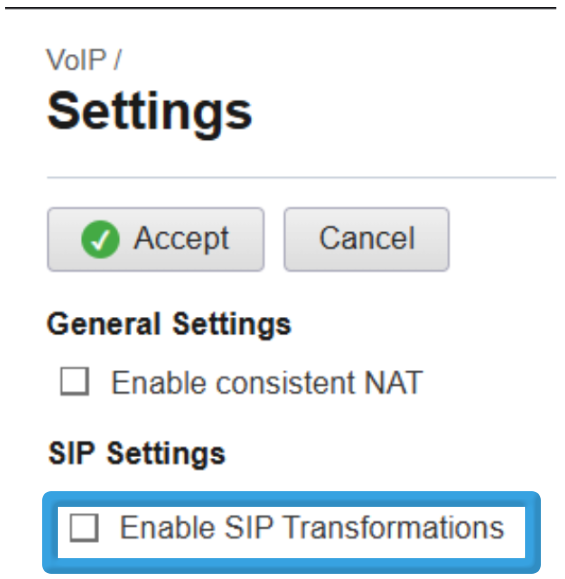
Disable SIP Transformations
Go to” VoIP → Settings”
In the “SIP Settings” section disable option: Enable SIP Transformations