This guide shows you how to enable or disable notifications from your RingQ app on Windows 10 or newer. You can choose to receive notifications for specific actions—or turn them off completely—and also learn how to configure your system’s Focus Assist settings.
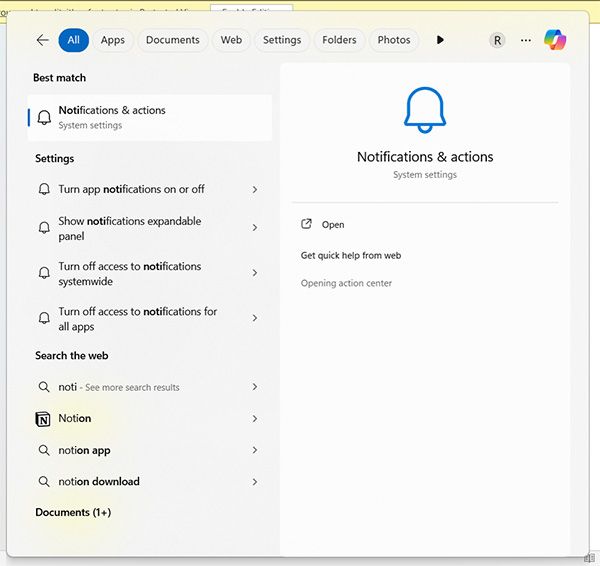
Click the Start button or press the Windows key.
Select Settings (gear icon).
Click System.
Select Notifications & actions (Windows 10/10 Pro) or Notifications (Windows 11).
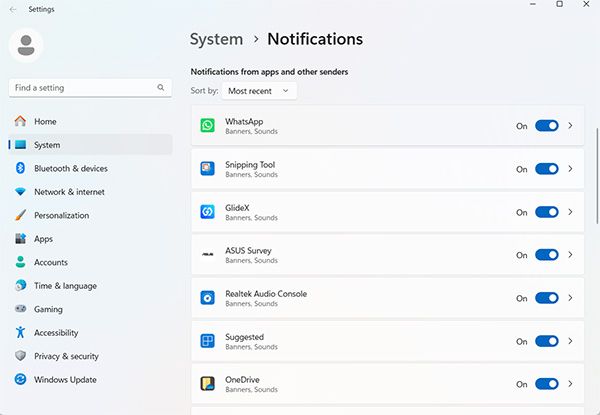
In the Notifications settings page:
Toggle Get notifications from apps and other senders to On to enable system-wide notifications.
Choose which system notifications to receive by toggling options like:
Scroll down to the Get notifications from these senders section.
Toggle the switch for each app to On or Off.
Click an app name to customize its specific notification settings.
Go to Settings > System > Notifications & actions.
Under Show notifications for, adjust how long notifications appear on screen (default is 5 seconds).
Go to Settings > System > Notifications.
Click Notification timing.
Adjust how long notifications appear on screen.
In Notification settings, you can configure:
Choose whether to show notifications in chronological order or grouped by app.
Set the number of visible notifications per app.
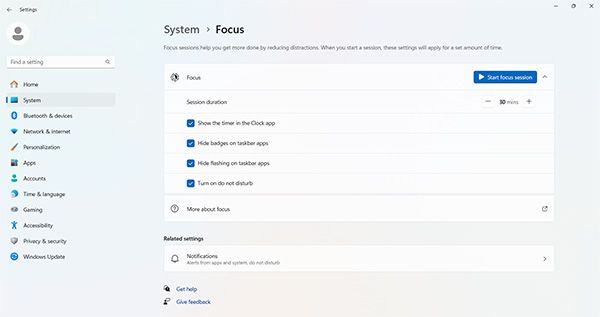
Focus Assist (formerly Quiet Hours) helps you control when notifications appear:
Go to Settings > System > Focus assist.
Choose from three modes:
You can set Focus Assist to activate automatically:
During specific hours
When duplicating your display
When playing games
When using an app in full-screen mode
Ensure notifications are enabled system-wide.
Verify the specific app has notifications enabled.
Check if Focus Assist is turned on (look for the moon icon in the taskbar).
Open the problematic app’s settings.
Look for in-app notification settings that might override Windows settings.
Try reinstalling the app if notifications still don’t work.
Restart your computer.
Ensure Windows is up to date:
Run the Windows Troubleshooter:
