This guide walks administrators through the process of changing a Fully Qualified Domain Name (FQDN) assigned to a RingQ license in the Customer Access Portal (CAP). This procedure is typically required when migrating to a new server, rebranding, or reorganizing your deployment under a different subdomain.
💡 TIP
Before you begin, ensure you have: (1) Administrator access to cap.ringq.com, (2) the new desired subdomain name ready, and (3) a new server IP address available — the new FQDN must be activated from a fresh server, as the old server will be decommissioned after the change.
⚠ IMPORTANT
Changing the FQDN is irreversible on the current server. Once completed, the old server URL will no longer be accessible. All tenant data is retained and re-provisioned under the new domain, but plan for a short activation window of 2–3 minutes.
Navigate to cap.ringq.com and sign in with your administrator credentials. Once logged in, click on Licenses in the left-hand sidebar to open the License Management page.
💡 TIP
Use the same credentials you were given when your RingQ account was provisioned. If you have forgotten your password, use the "Forgot Password" option on the login page.
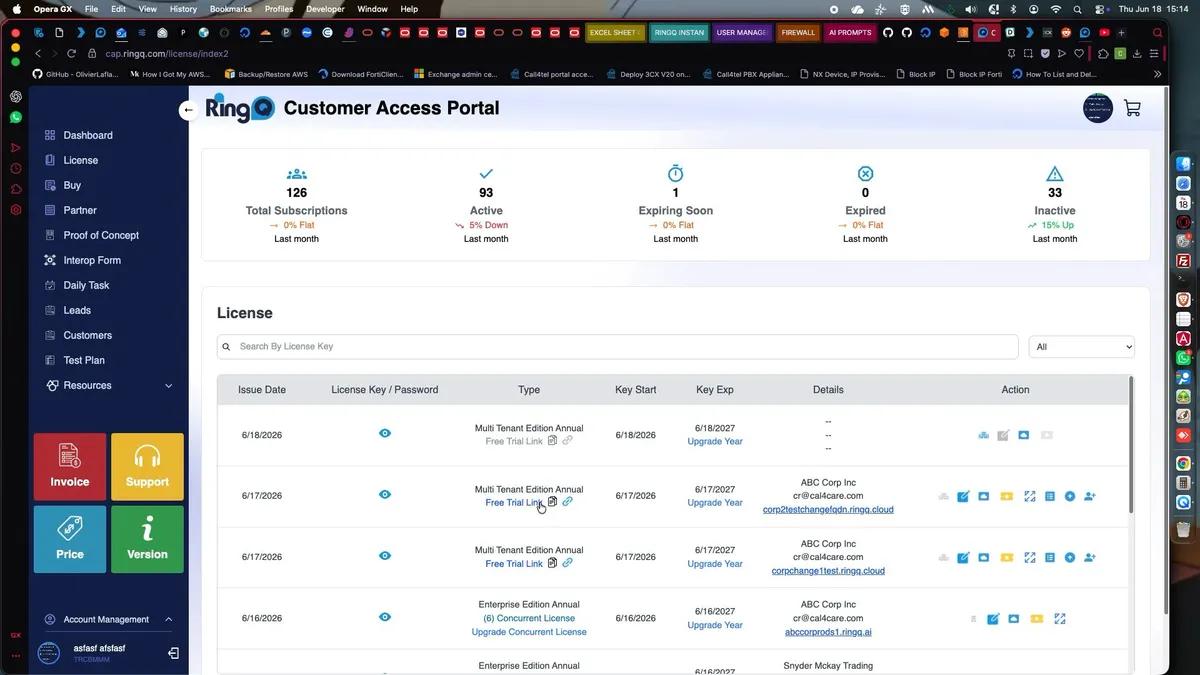
In the browser address bar, manually change the URL from cap.ringq.com/license to cap.ringq.com/license/index2 and press Enter.
📝 NOTE
The /license/index2 path provides access to advanced license management actions including FQDN changes, license reshuffling, and FQDN release — options that are not exposed through the standard license list view.
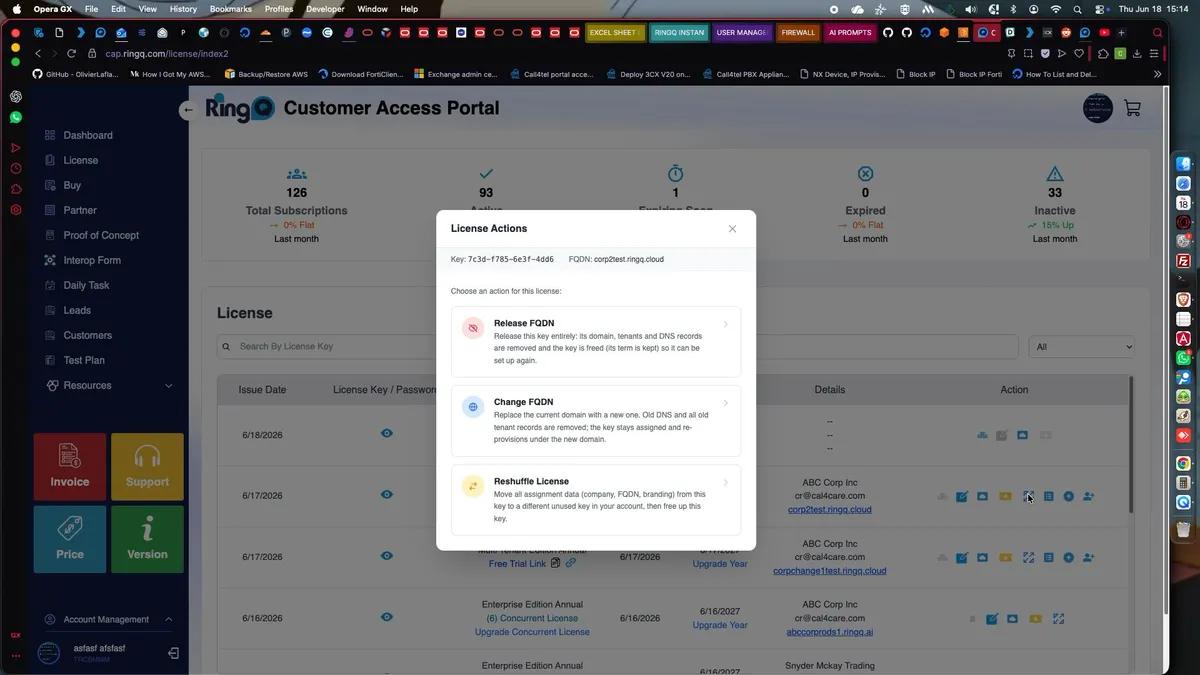
Find the license entry associated with the FQDN you want to change. Click the Reshuffle License icon (⟳) on the right side of that license row. A License Actions dialog will appear showing three available actions.
The License Actions dialog presents the following options:
💡 TIP
If the Reshuffle License icon is not visible, ensure you are on the /license/index2 URL — it is not available from the standard /license view.
Select Change FQDN from the License Actions dialog. A Change FQDN form will appear showing your current FQDN. In the New FQDN field, type only the subdomain label — the base domain (.ringq.cloud) is added automatically.
Once the system confirms the FQDN is available (it will display "Looks good"), type CONFIRM in the confirmation field and click Update FQDN.
⚠ IMPORTANT
Choose your new FQDN carefully. This value becomes the permanent URL for your RingQ instance. Use lowercase letters, numbers, and hyphens only. Avoid using existing or reserved subdomain names.
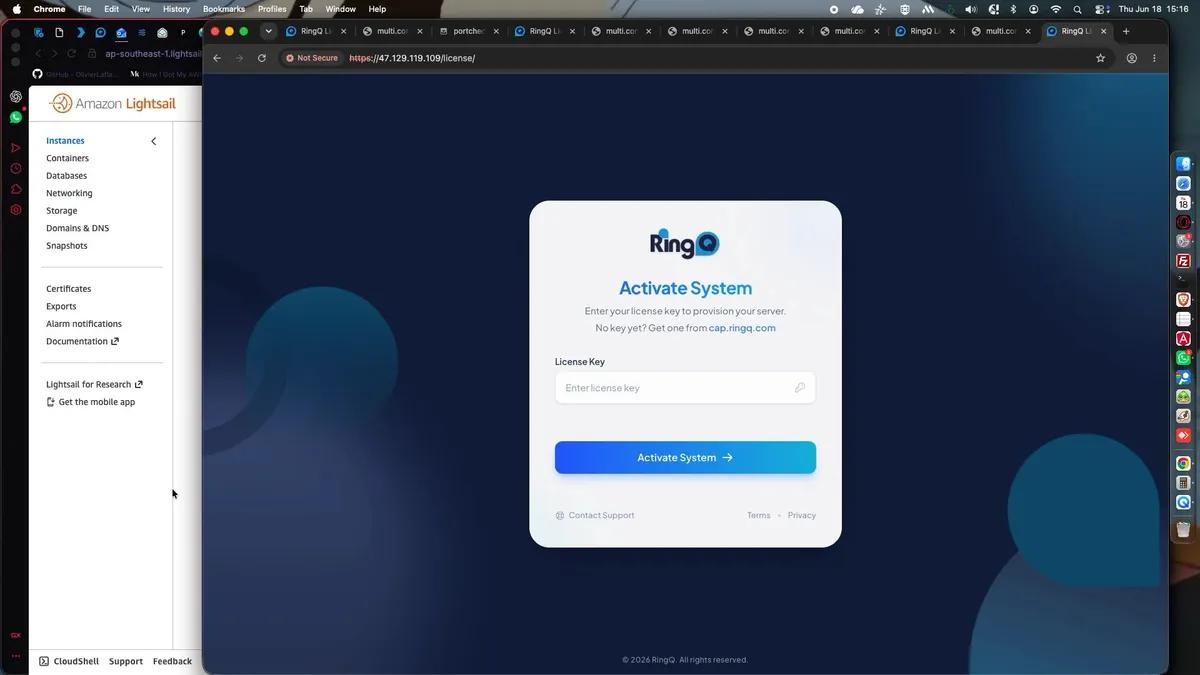
Open a browser and go to http://<new-server-ip>/license, replacing <new-server-ip> with the IP address of your new server. You will see the Activate System page.
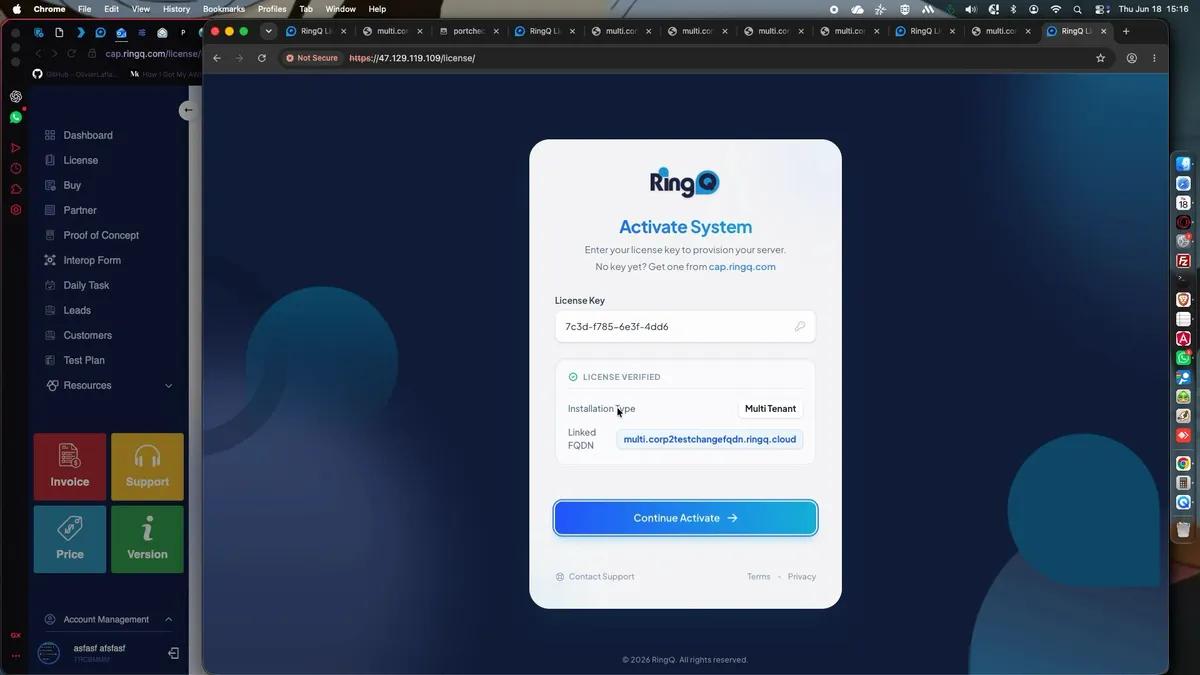
Enter the license key associated with your newly changed FQDN into the License Key field. The system will validate the key and display the linked FQDN. Click Activate System.
📝 NOTE
The old server associated with the former FQDN will no longer be accessible after this step. All existing tenant data is retained and will be re-provisioned under the new FQDN. To use the new FQDN, a fresh server IP is required.
💡 TIP
Retrieve your license key from cap.ringq.com under the Licenses section. Copy it exactly — the key is case-sensitive.
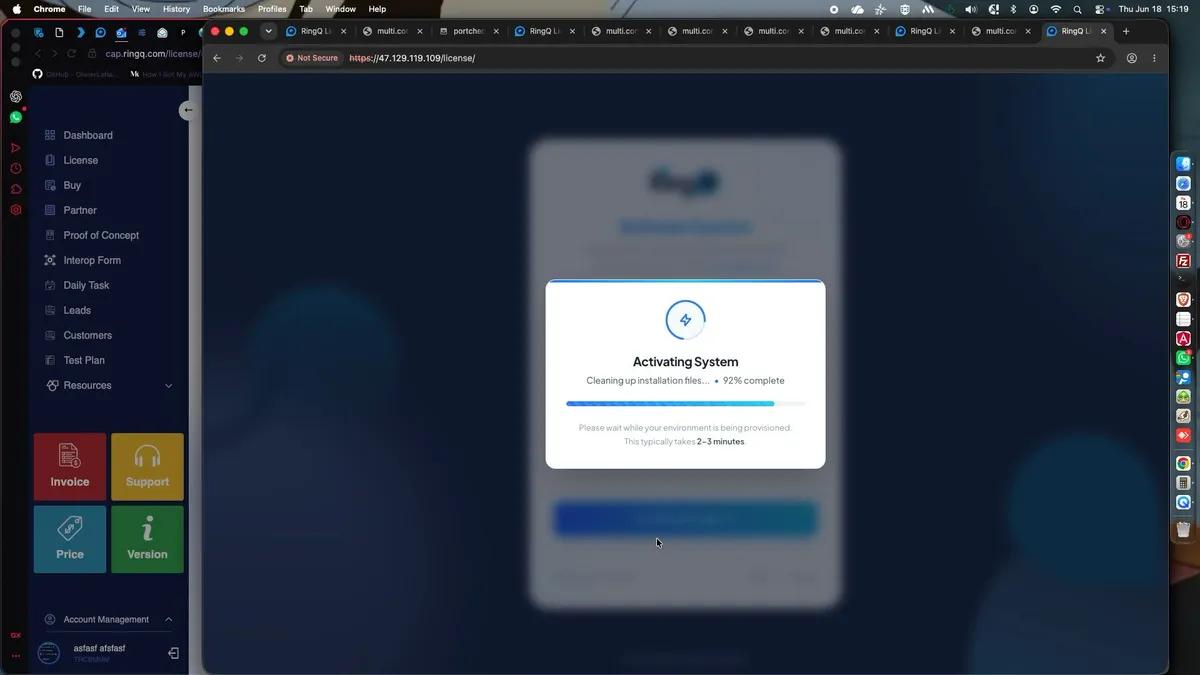
After the license is verified, click Continue Activate. The system will begin provisioning your new environment. A progress screen will appear showing the activation status.
💡 TIP
Do not close the browser or navigate away during activation. The process typically takes 2–3 minutes. Closing the window prematurely may require you to re-enter the license key.
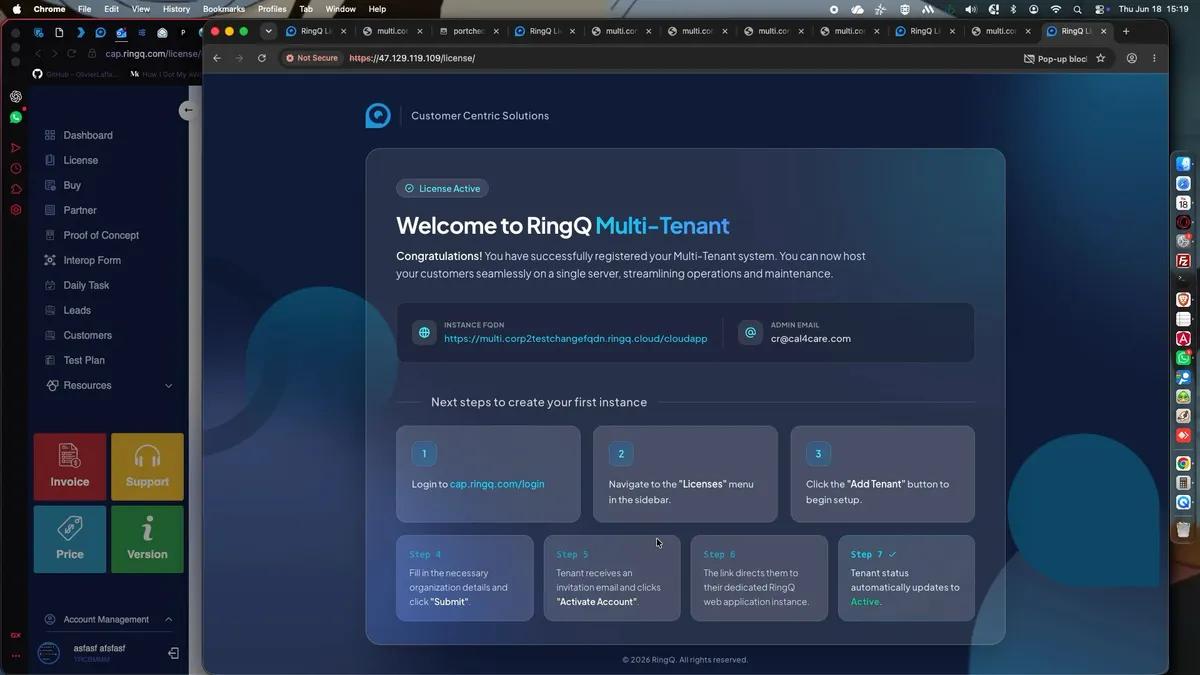
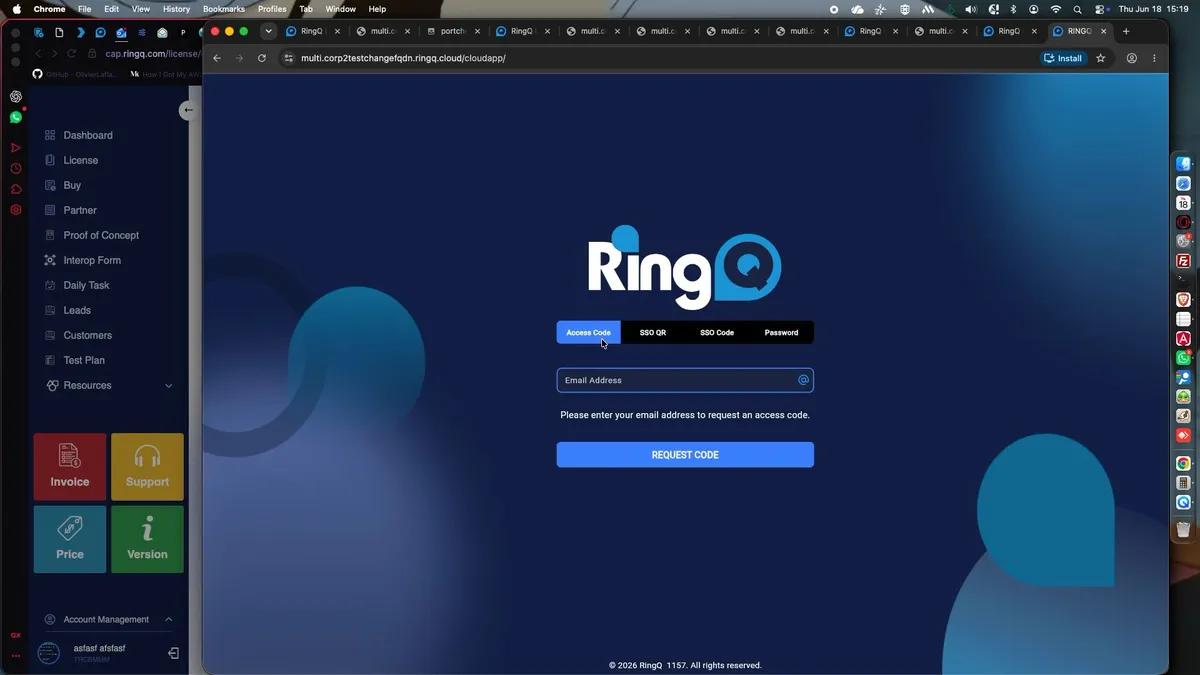
Once provisioning is complete, the system will redirect to the RingQ Multi-Tenant welcome screen confirming your new instance FQDN. Open a new browser tab and navigate to your new FQDN URL to confirm the RingQ login page loads correctly.
📝 NOTE
DNS propagation for the new FQDN may take a few minutes. If the URL does not load immediately, wait 1–2 minutes and try again. If the issue persists after 10 minutes, contact support at support@ringq.com.
The following table summarises all steps in this procedure:
| # | Action | What to Expect |
|---|---|---|
| 1 | Log In to CAP | Sign in at cap.ringq.com and go to the License page. |
| 2 | Open index2 URL | Append /index2 to the license URL to access advanced actions. |
| 3 | Open License Actions | Click the Reshuffle icon → Choose "Change FQDN". |
| 4 | Enter New FQDN | Type the new subdomain, confirm availability, type CONFIRM, click Update. |
| 5 | Activate on New Server | Go to http://<new-server-ip>/license, enter license key, click Activate System. |
| 6 | Continue Activation | Click Continue Activate and wait 2–3 minutes for provisioning. |
| 7 | Verify New FQDN | Navigate to the new FQDN URL and confirm login page loads. |
