RingQ eFax lets you send and receive faxes on your RingQ numbers. This guide walks through the full setup: creating a SIP trunk from a supported template, adding the DID, routing it to a fax extension, then sending an eFax and tracking its status.
Step 1. Log in to your RingQ instance and go to Settings > Call Flow. In the Available DID Numbers panel, click the Create Trunk icon.
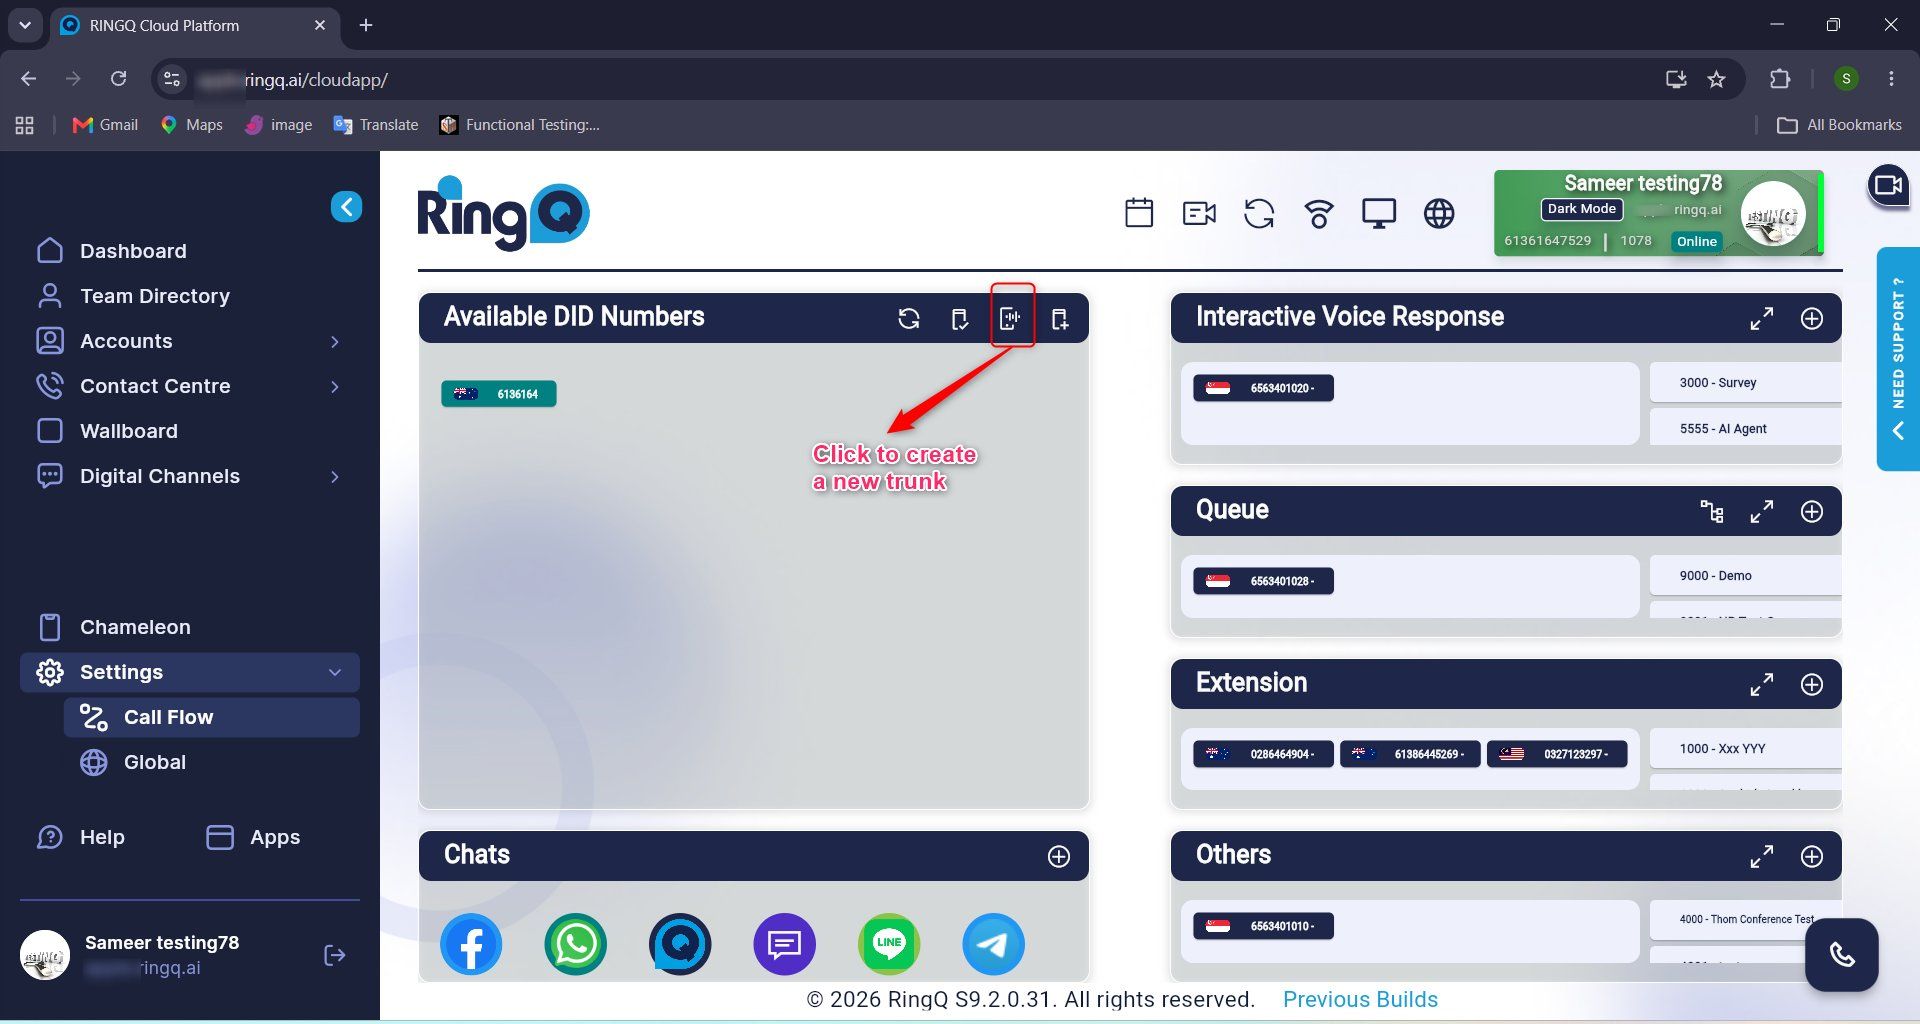
Figure 1: Create Trunk icon in Available DID Numbers
Step 2. The SIP Trunk window opens with the list of existing trunks. Click the + icon in the top right corner to add a new SIP trunk.
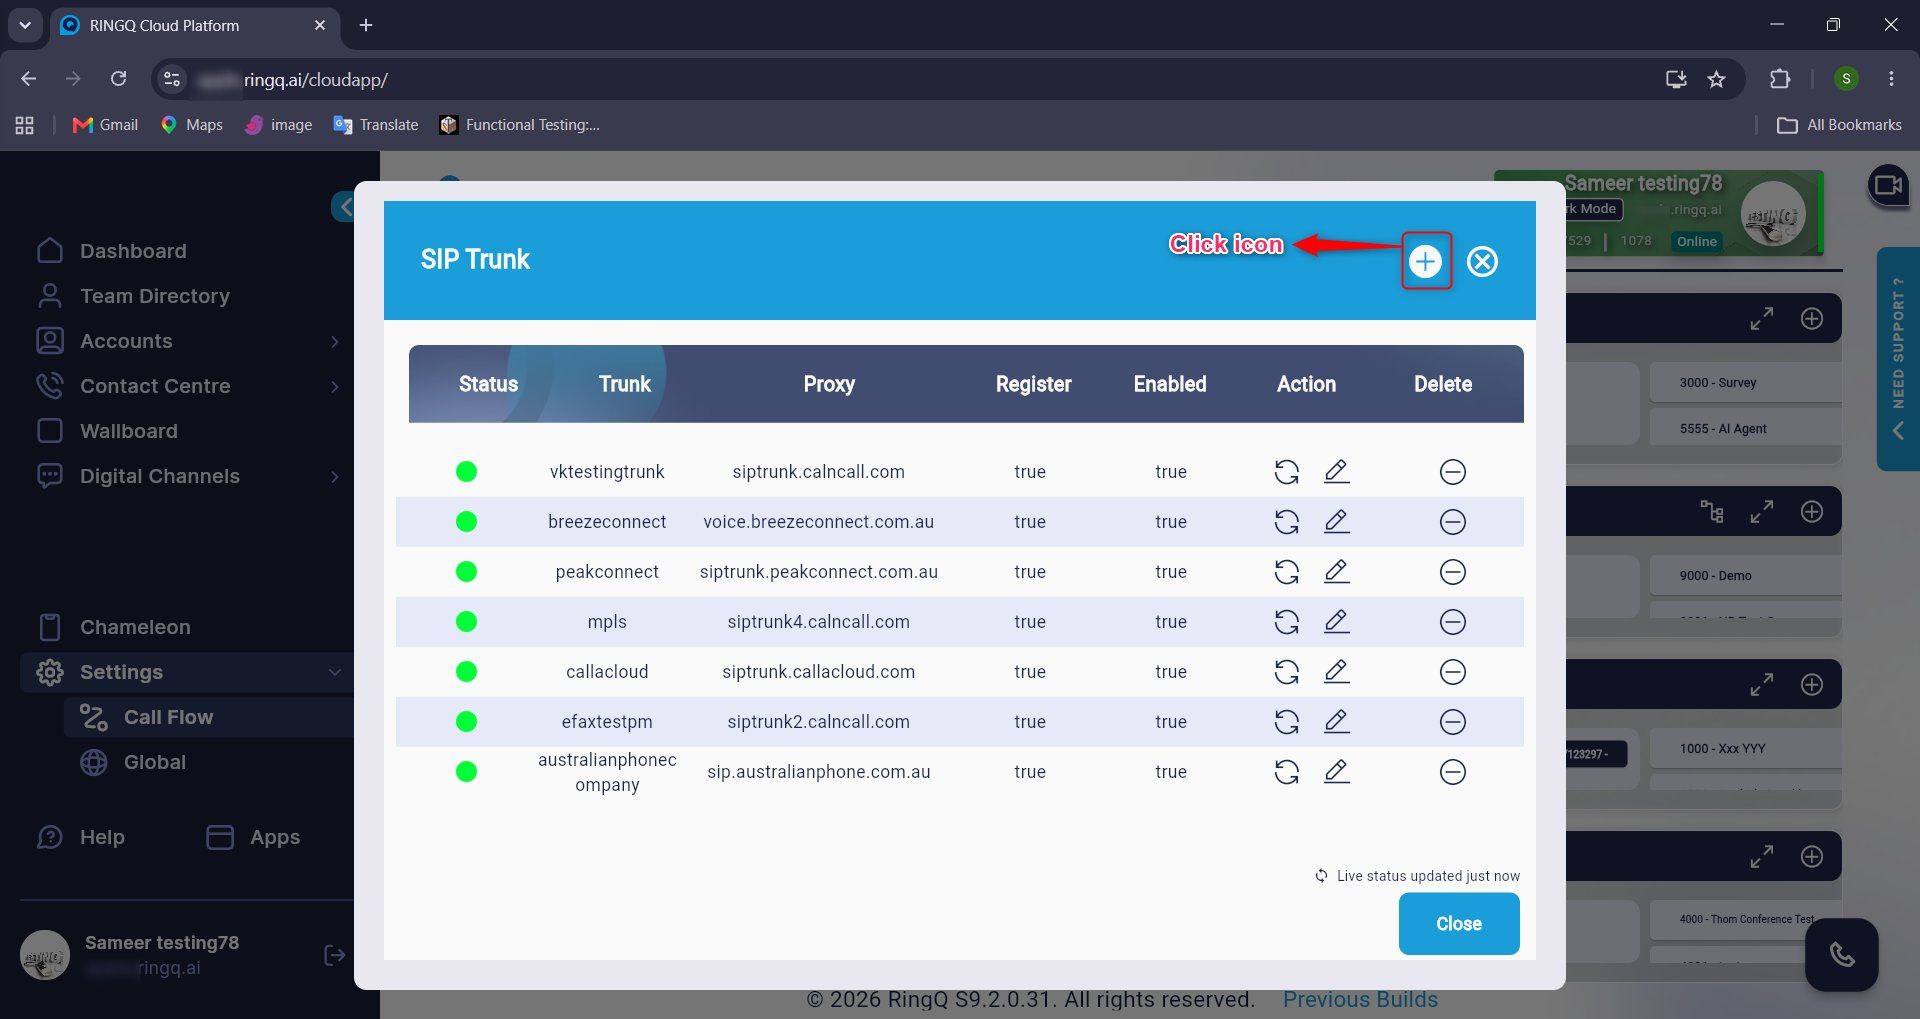
Figure 2: SIP Trunk list and + icon
Step 3. In Supported SIP Trunk Template, click Country and search for the required country (for example, Singapore). Under Preferred, select the provider (Calncall), then click Select Template next to the trunk you want.
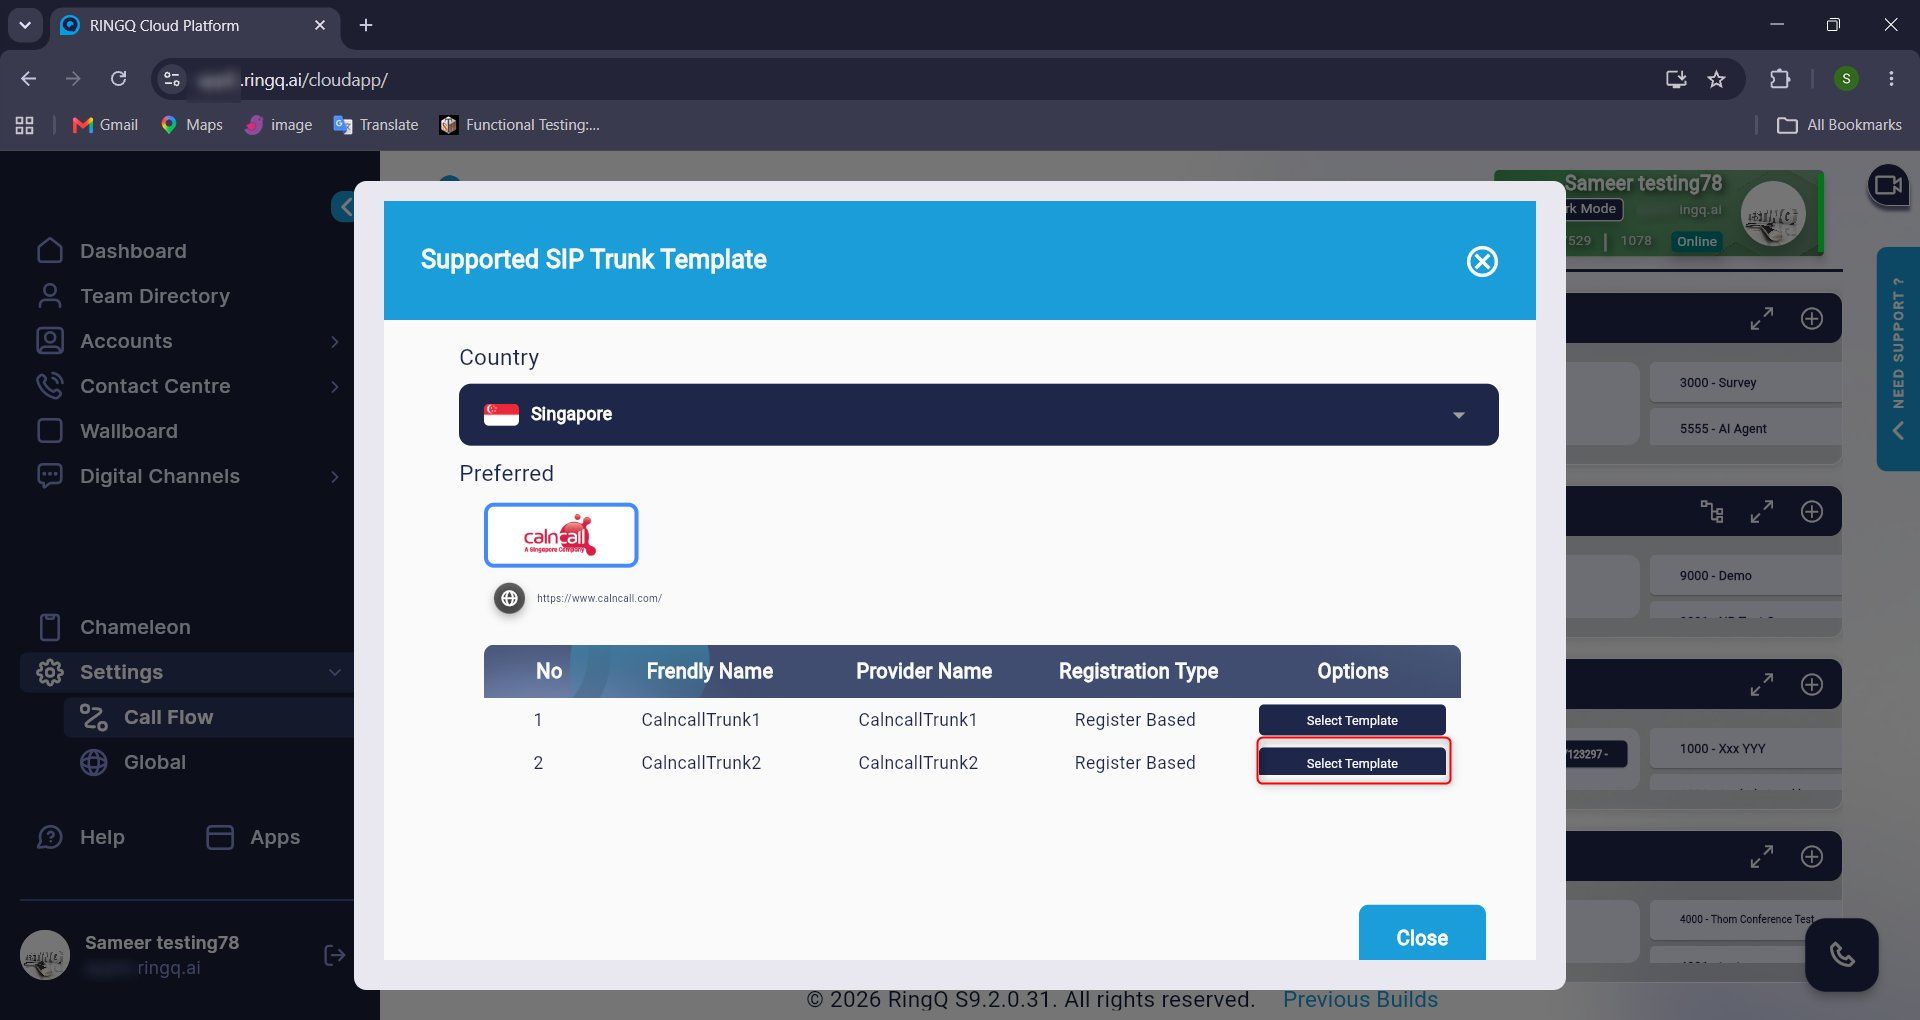
Figure 3: Selecting the country, provider and template
Step 4. The Add SIP Trunk page opens with the Trunk Name, Type of Authentication, Proxy and SIP Port pre-filled from the template. Enter the Username, Password, Auth Username and Outbound Caller ID, review the details, then click Create.
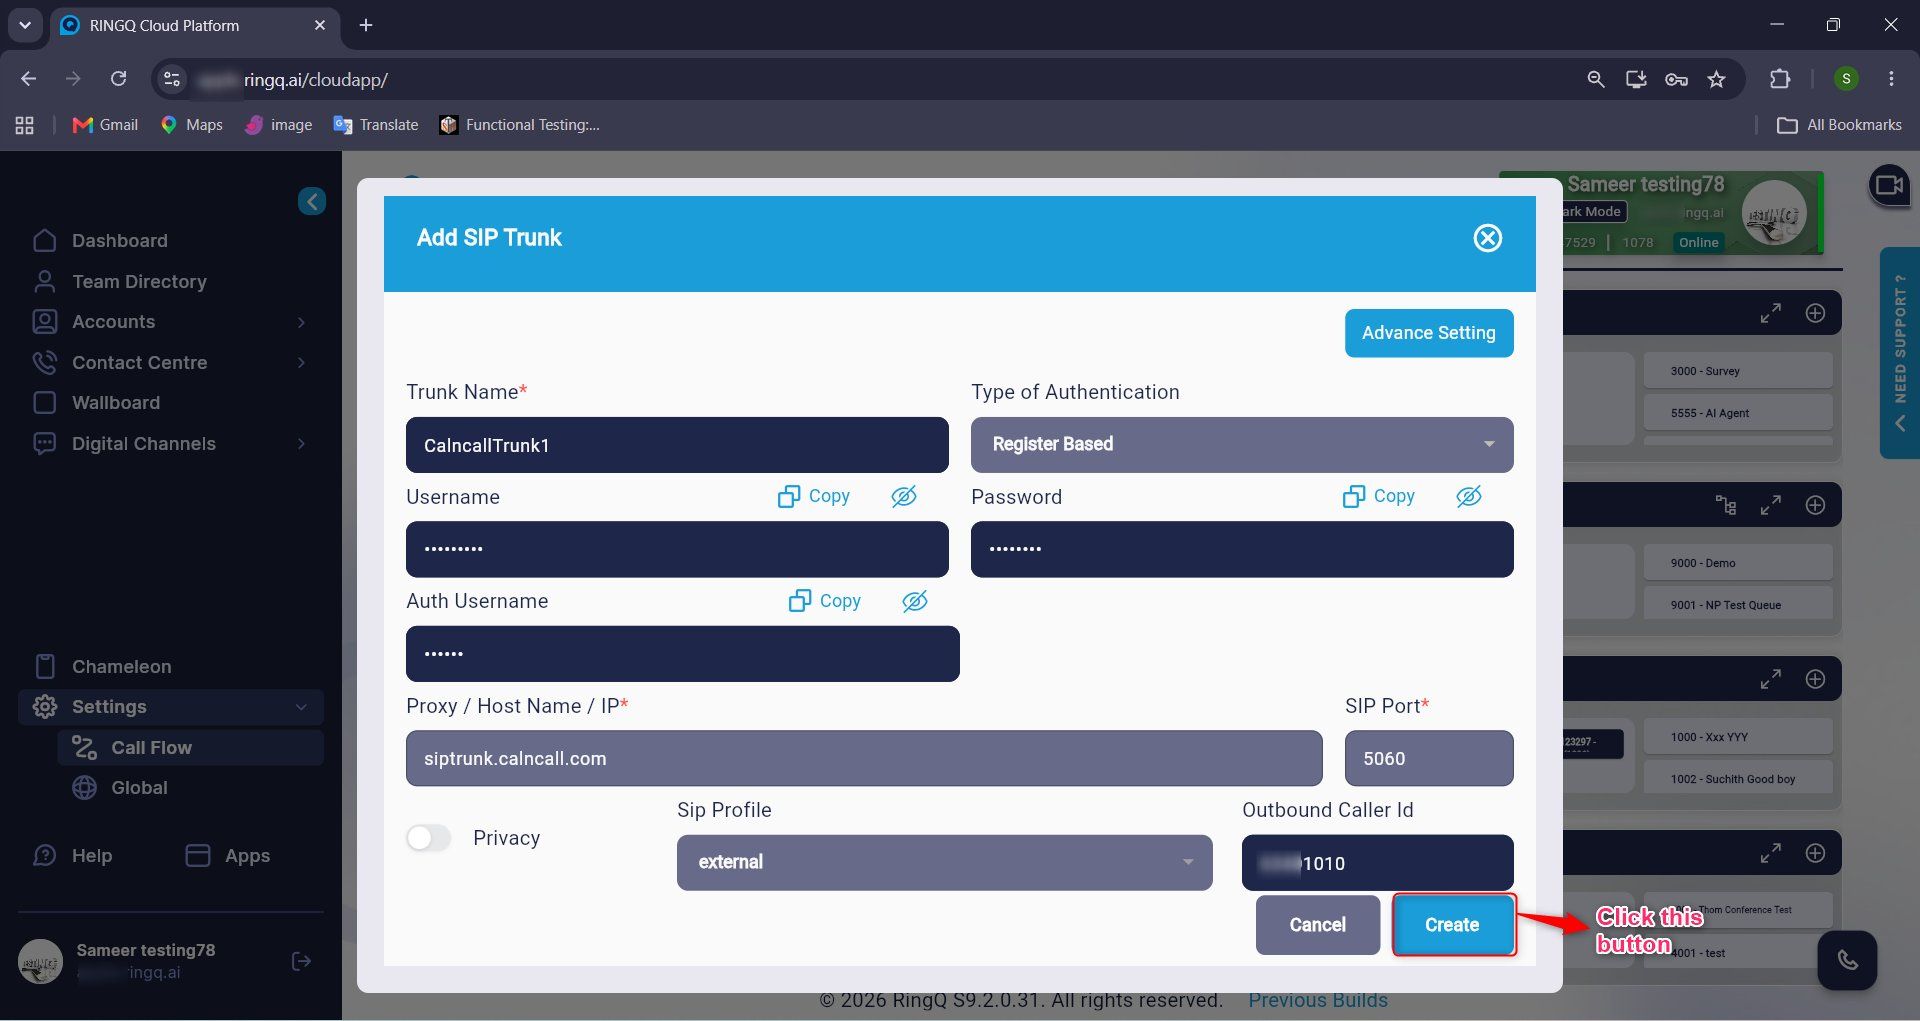
Figure 4: Add SIP Trunk form
Note: After you click Create, a loading status is shown. Once complete, the new trunk appears in the SIP Trunk list. A green status shows the trunk is registered.
Open the DIDs window and click the Add DID’s (+) icon. Check that the newly registered SIP trunk is in the list with its DID number.
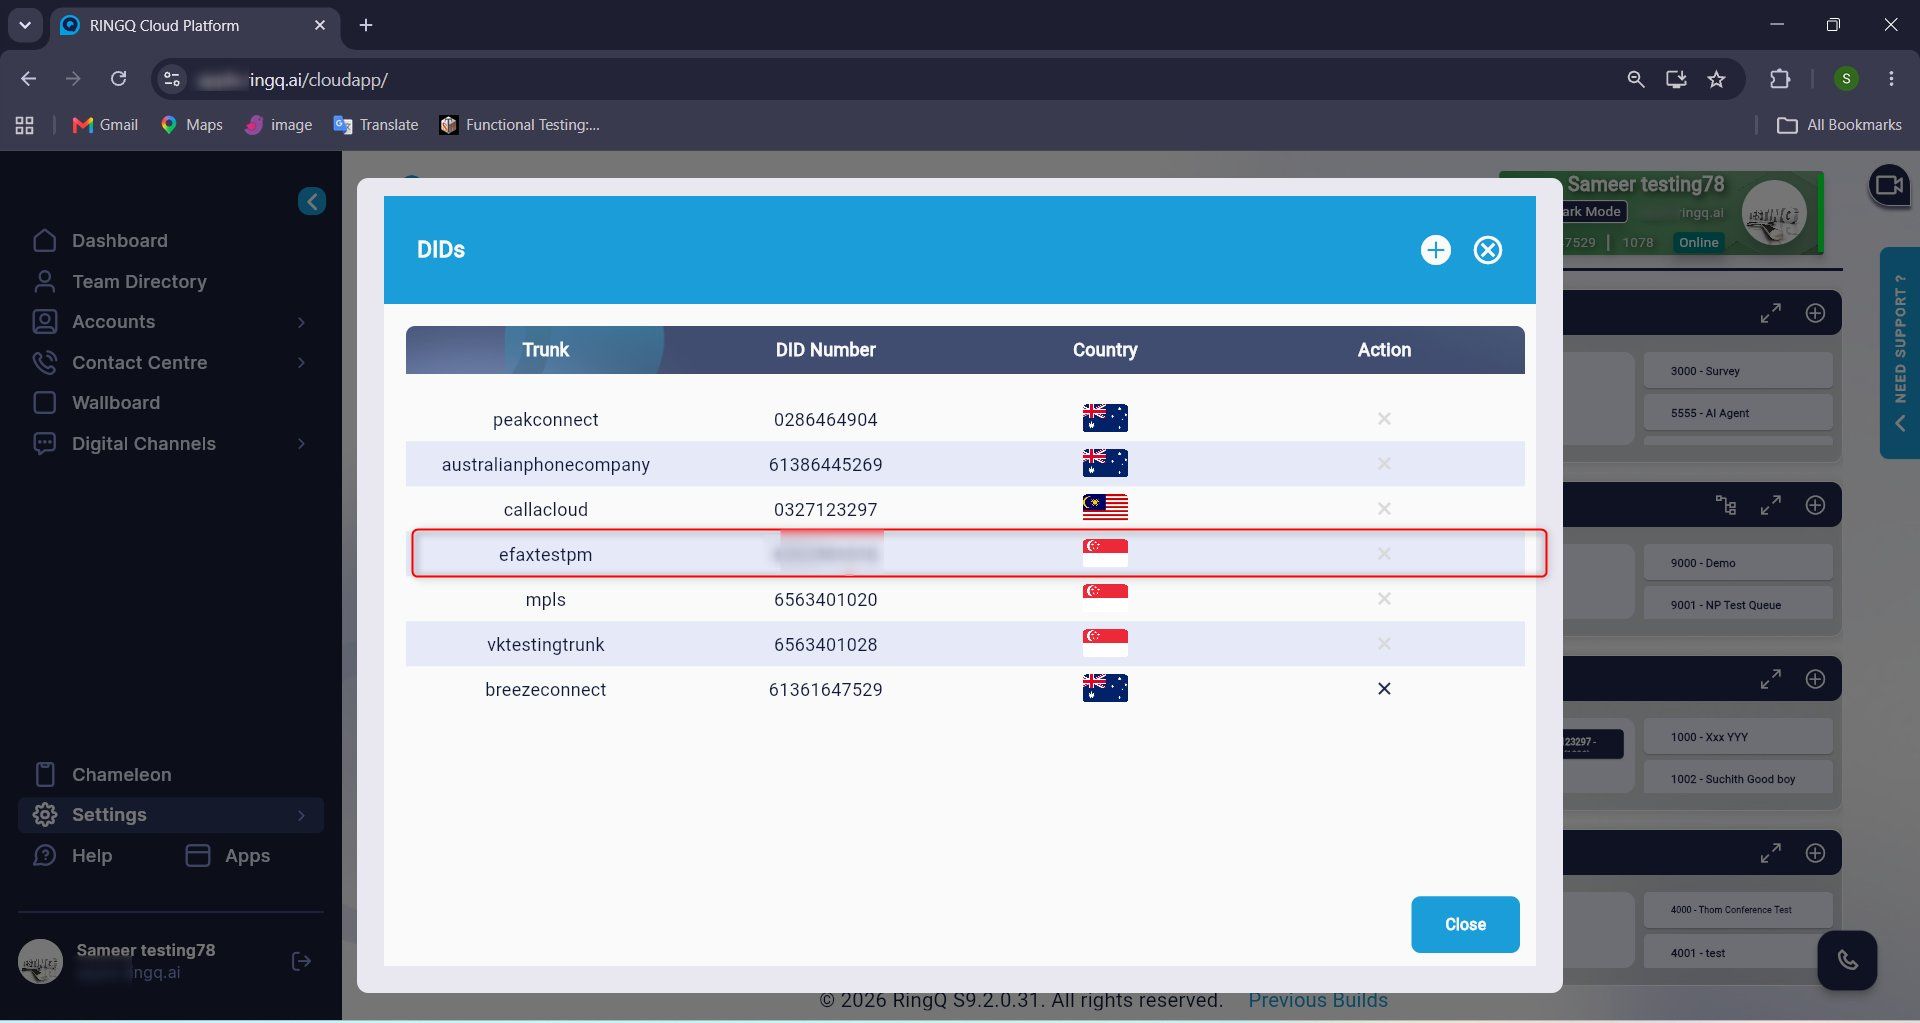
Figure 5: DIDs list showing the new trunk
Step 1. The new DID now appears under Available DID Numbers. Drag it and drop it onto the Others panel, then check that it has moved there.
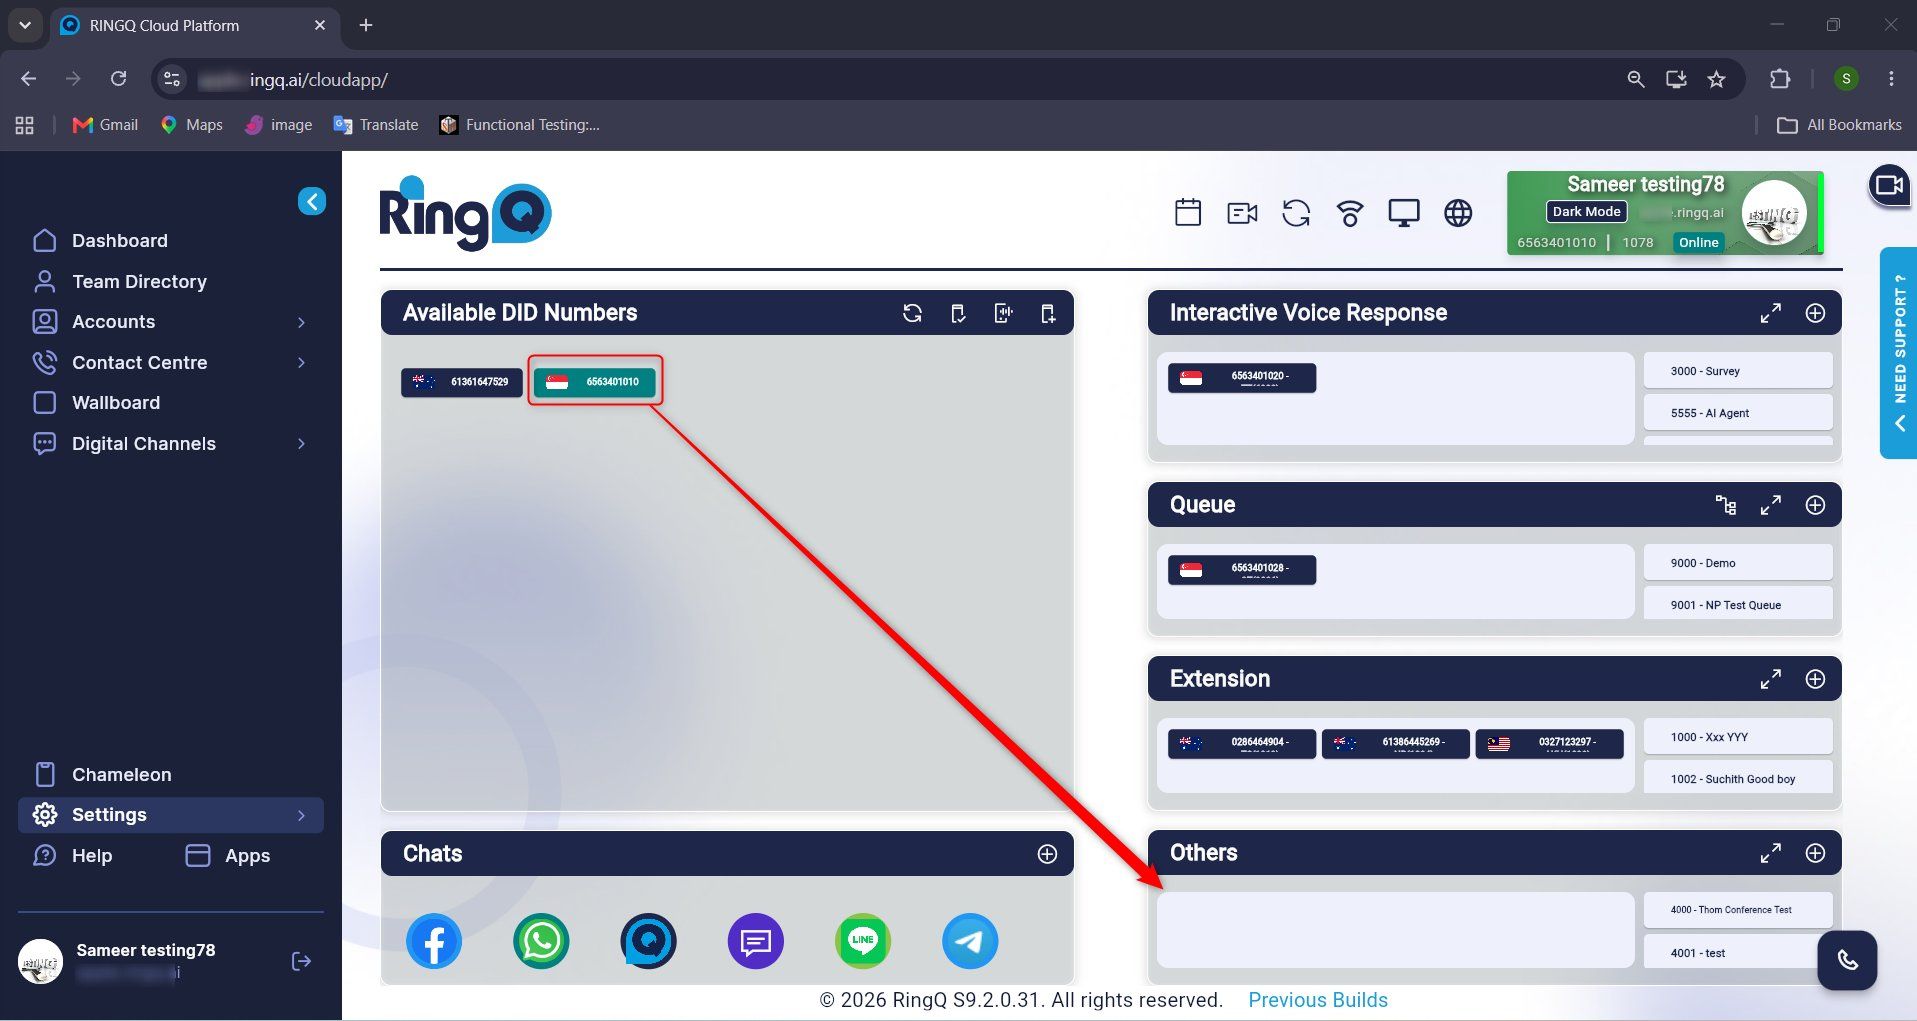
Figure 6: Drag the DID onto the Others panel
Step 2. In the Others window, open the Fax option and click the List drop-down to see the fax extensions. Select the extension that should receive faxes, then click Save.
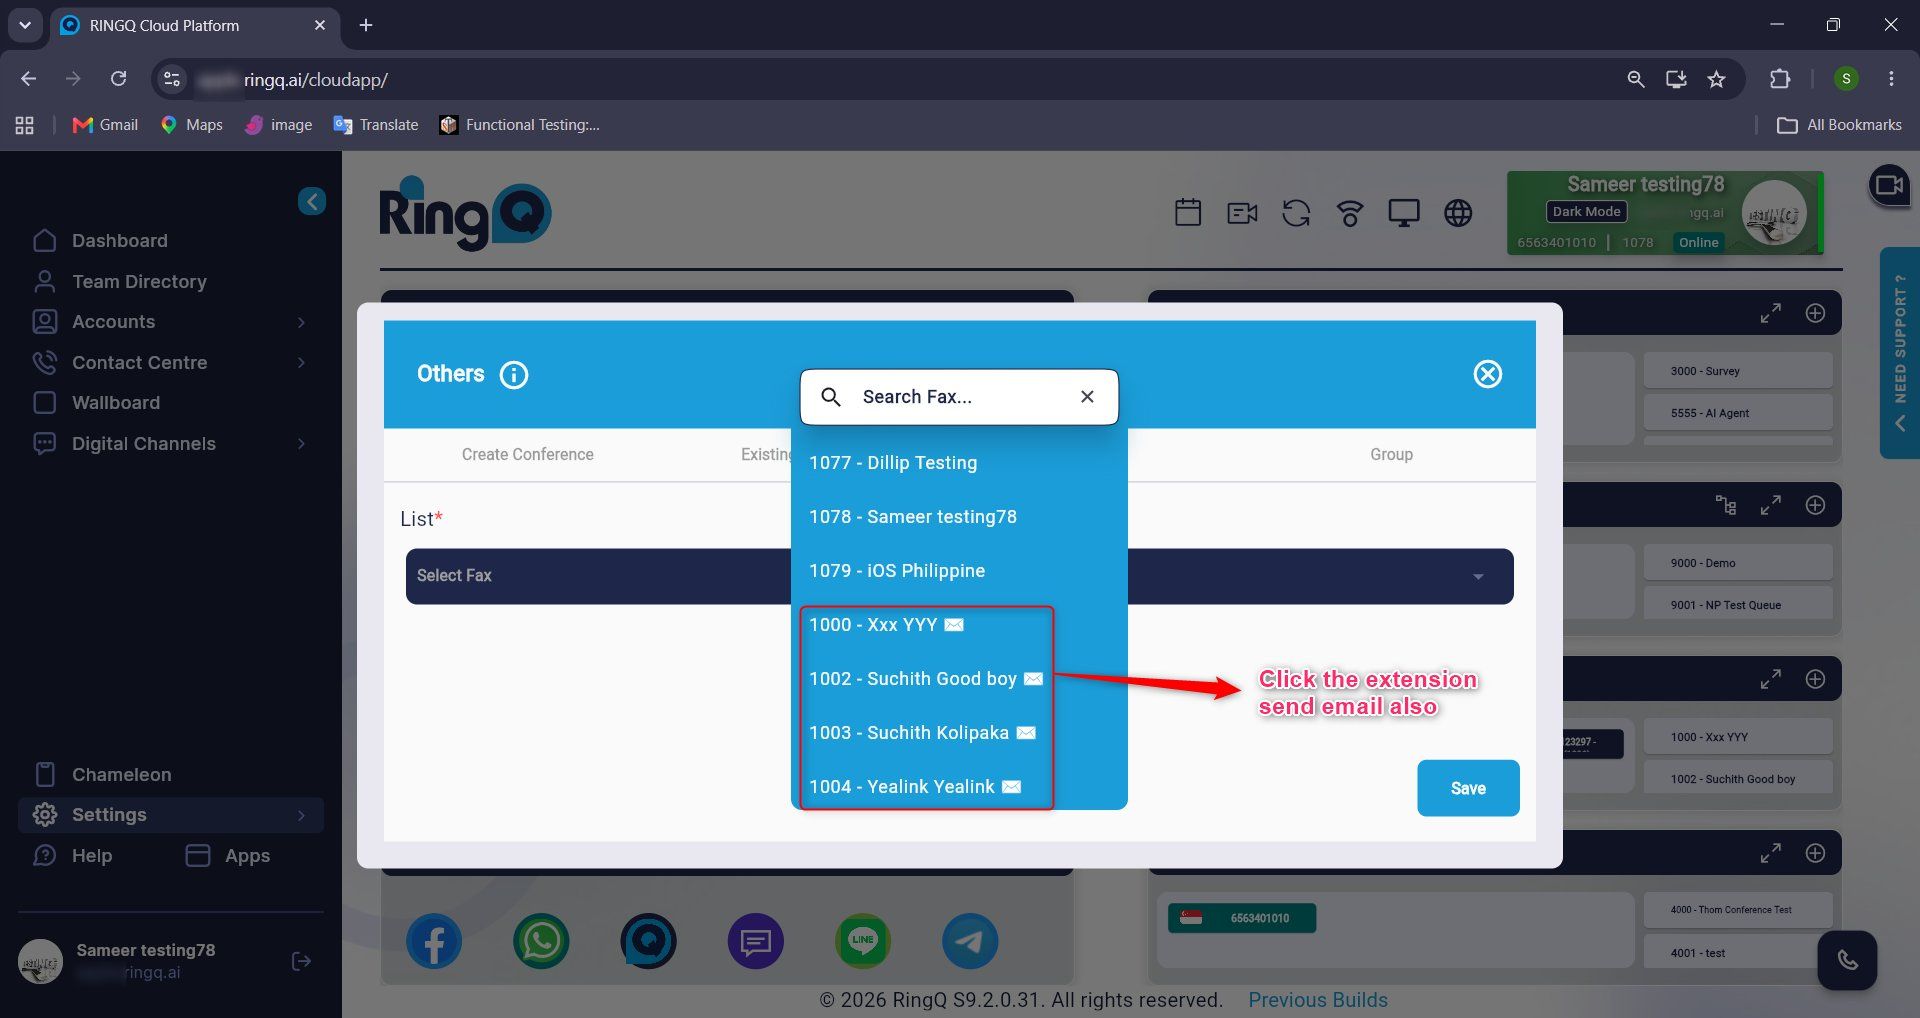
Figure 7: Selecting the fax extension
Tip: Extensions with an email icon can also receive faxes by email. Select one of these and each fax is delivered to the eFax inbox and emailed to the extension’s address; otherwise only the eFax is delivered.
Step 1. Go to Digital Channels > eFax and open the Send eFax tab. Enter the recipient’s number in To eFax number, choose the configured DID in From, add an optional cover note, and upload the document (PDF only). Click Continue sending eFax.
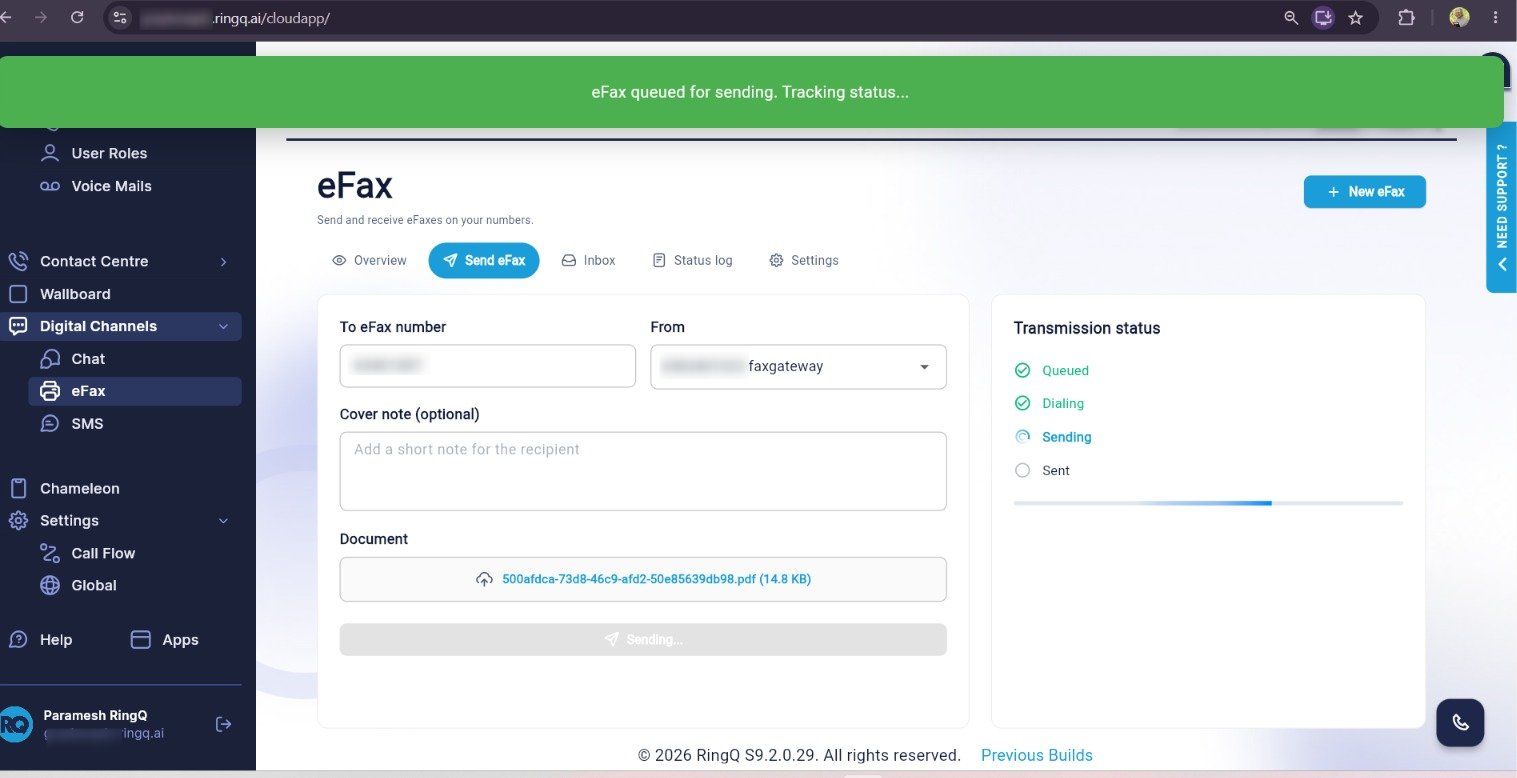
Figure 8: Send eFax form while sending
Step 2. Watch the Transmission status panel. The status moves through Queued > Dialing > Sending > Sent. When it finishes, the message eFax has been sent successfully! is shown.
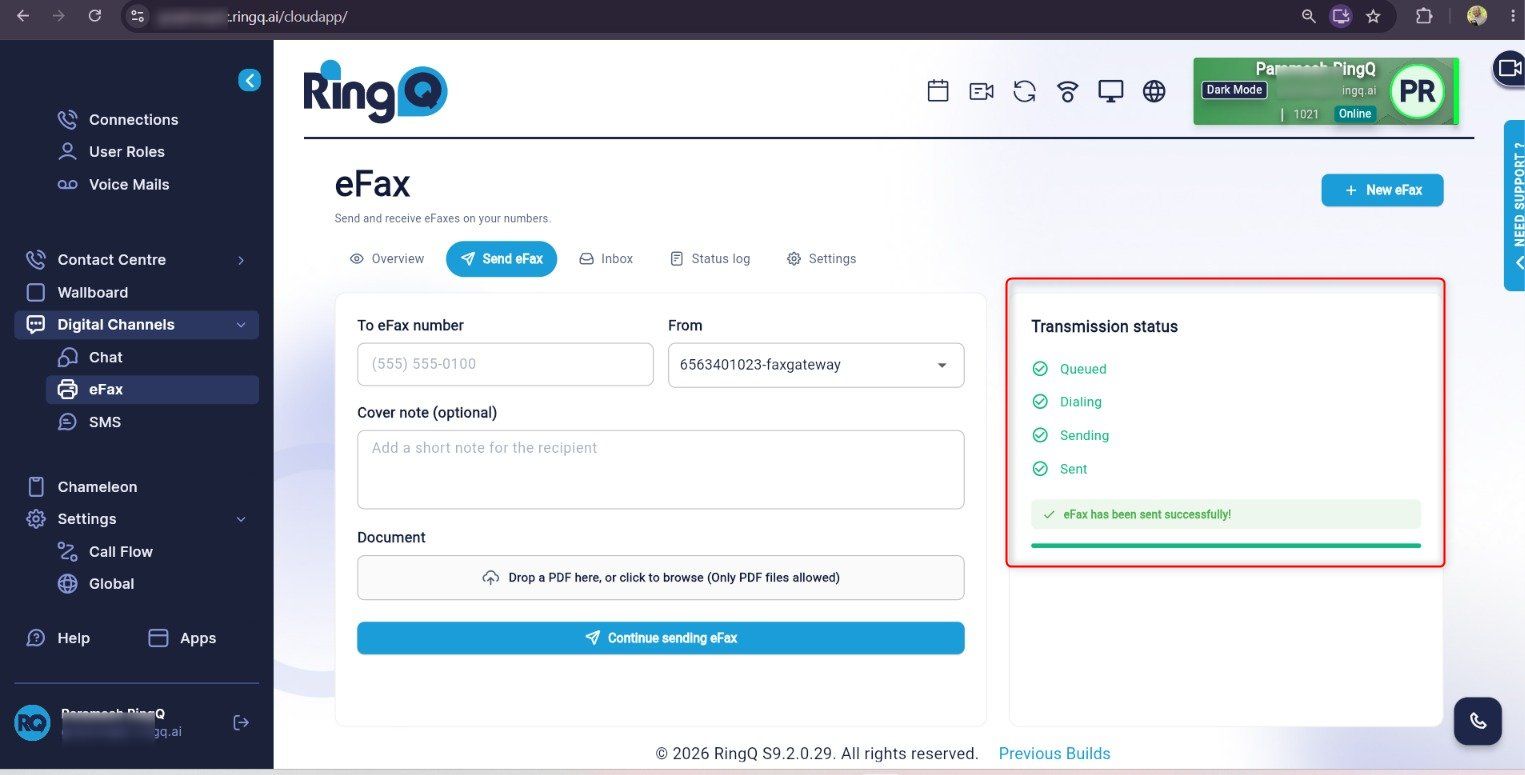
Figure 9: Transmission status showing Sent
Tip: If the status does not reach Sent, check the Status log tab for the full history of the job.
Open the Overview tab to see totals (Total eFaxes, Success Rate, In Progress, Failed) and Recent activity, which lists each job’s Direction, From, To, Pages, Status and Updated time.
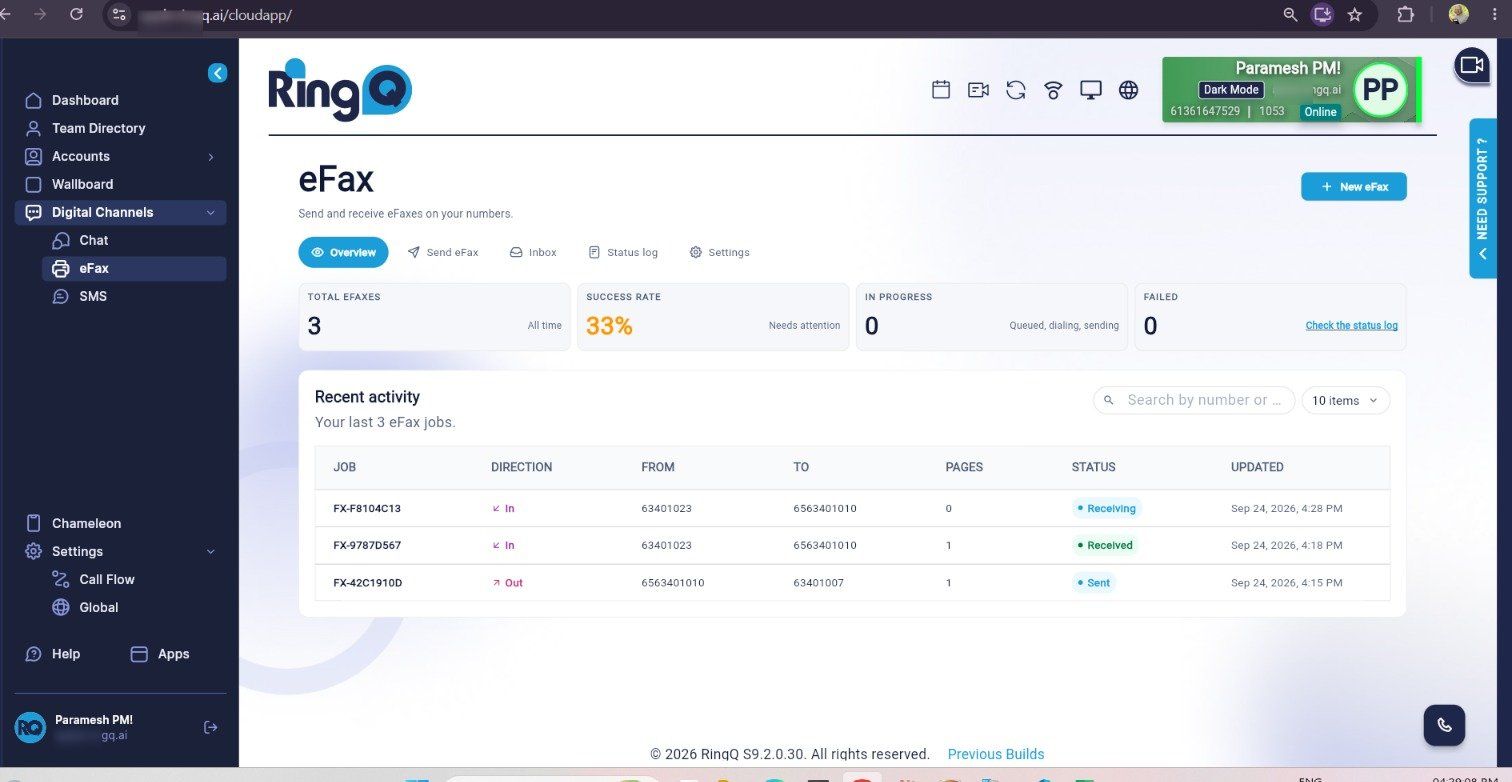
Figure 10: eFax Overview and recent activity
Use the Inbox tab to check received faxes and the Status log tab to review the complete status history of each eFax.
Open the Settings tab on the eFax page. Enter the eFax ident and eFax header to show at the top of every fax you send, then click Save changes.
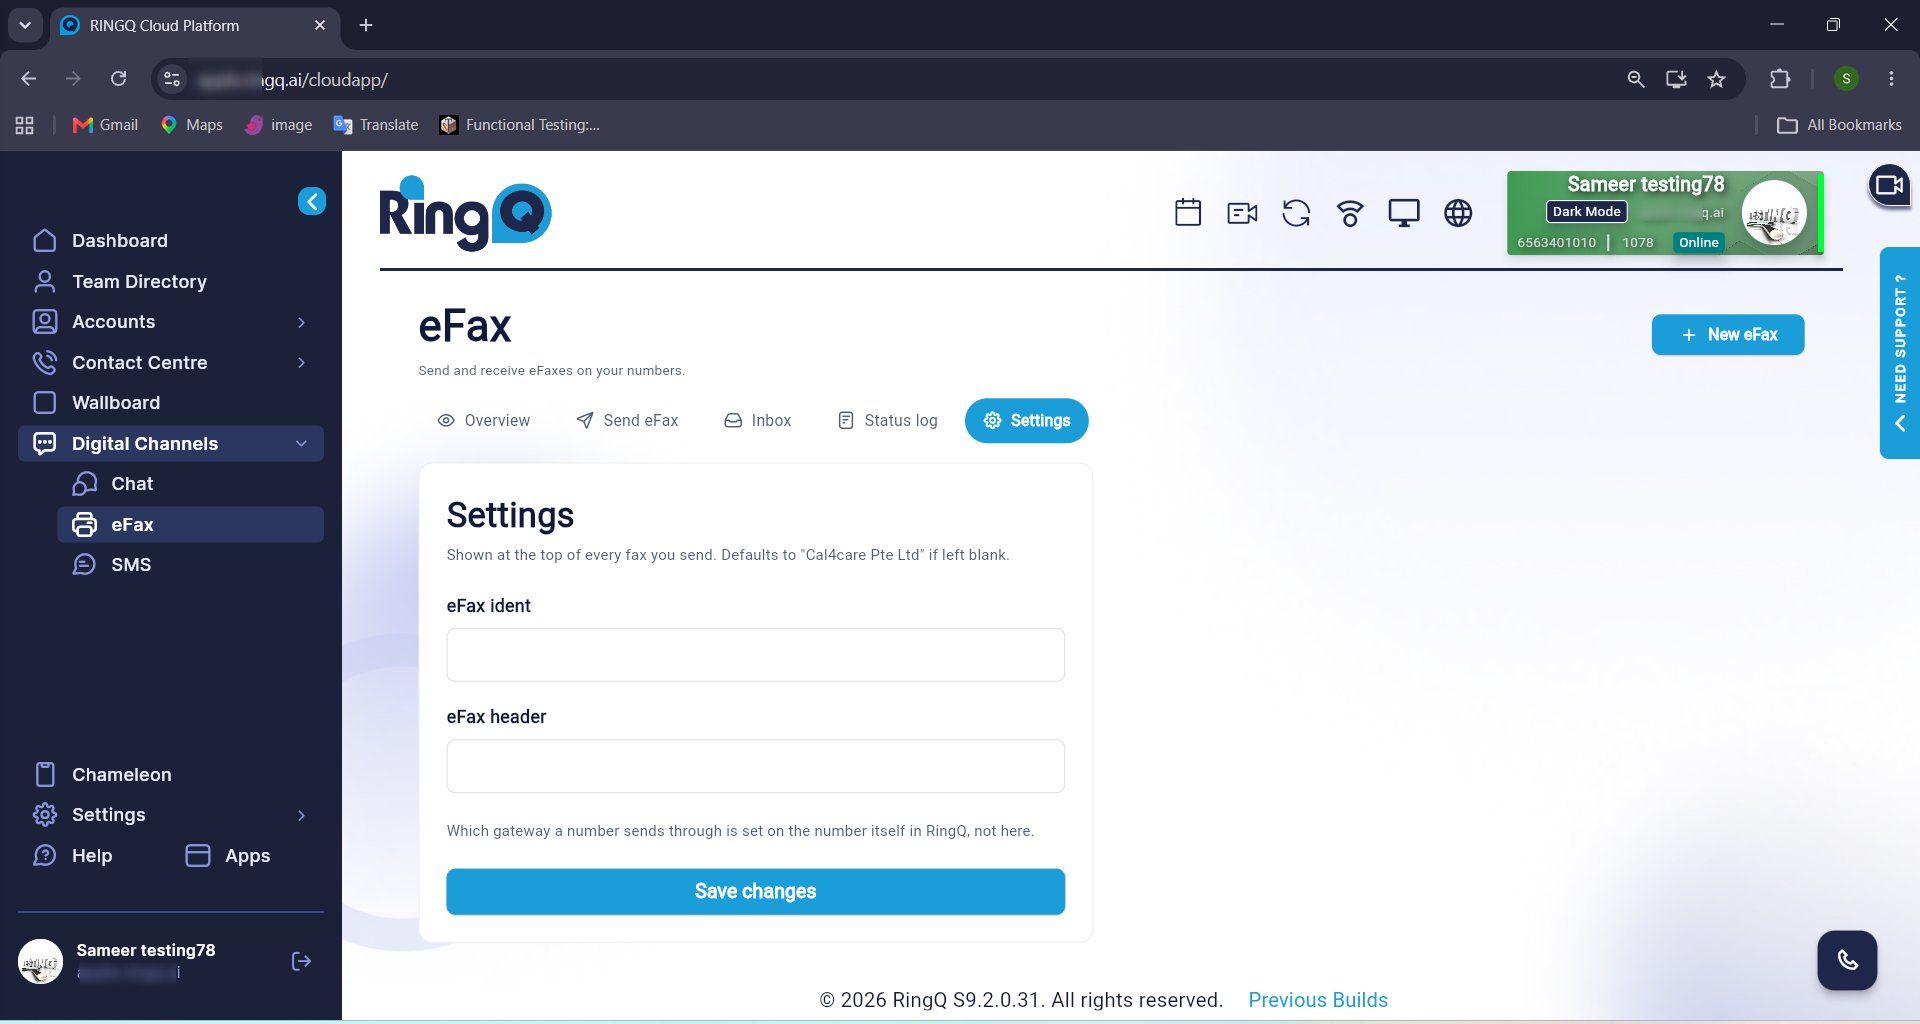
Figure 11: eFax Settings: ident and header
Note: If left blank, the header defaults to the company name shown on the page. The gateway a number sends through is set on the number itself in RingQ, not here.
| Task | Where |
|---|---|
| Create SIP trunk | Settings > Call Flow > Available DID Numbers > Create Trunk |
| Verify DID | DIDs window > Add DID’s |
| Route DID to fax | Drag DID to Others > Fax > select extension > Save |
| Send eFax | Digital Channels > eFax > Send eFax |
| Track status | Transmission status, Overview, Status log |
| Fax header | Digital Channels > eFax > Settings |
