This guide walks you through the steps to configure WhatsApp Chat in the RingQ Web App. By following the instructions below, you’ll be able to connect your WhatsApp channel, manage conversations from a single interface, and ensure your team can respond to messages efficiently and consistently.
Sign in to your RingQ Web App with your admin credentials.
Navigate to the Chat Channel Settings.
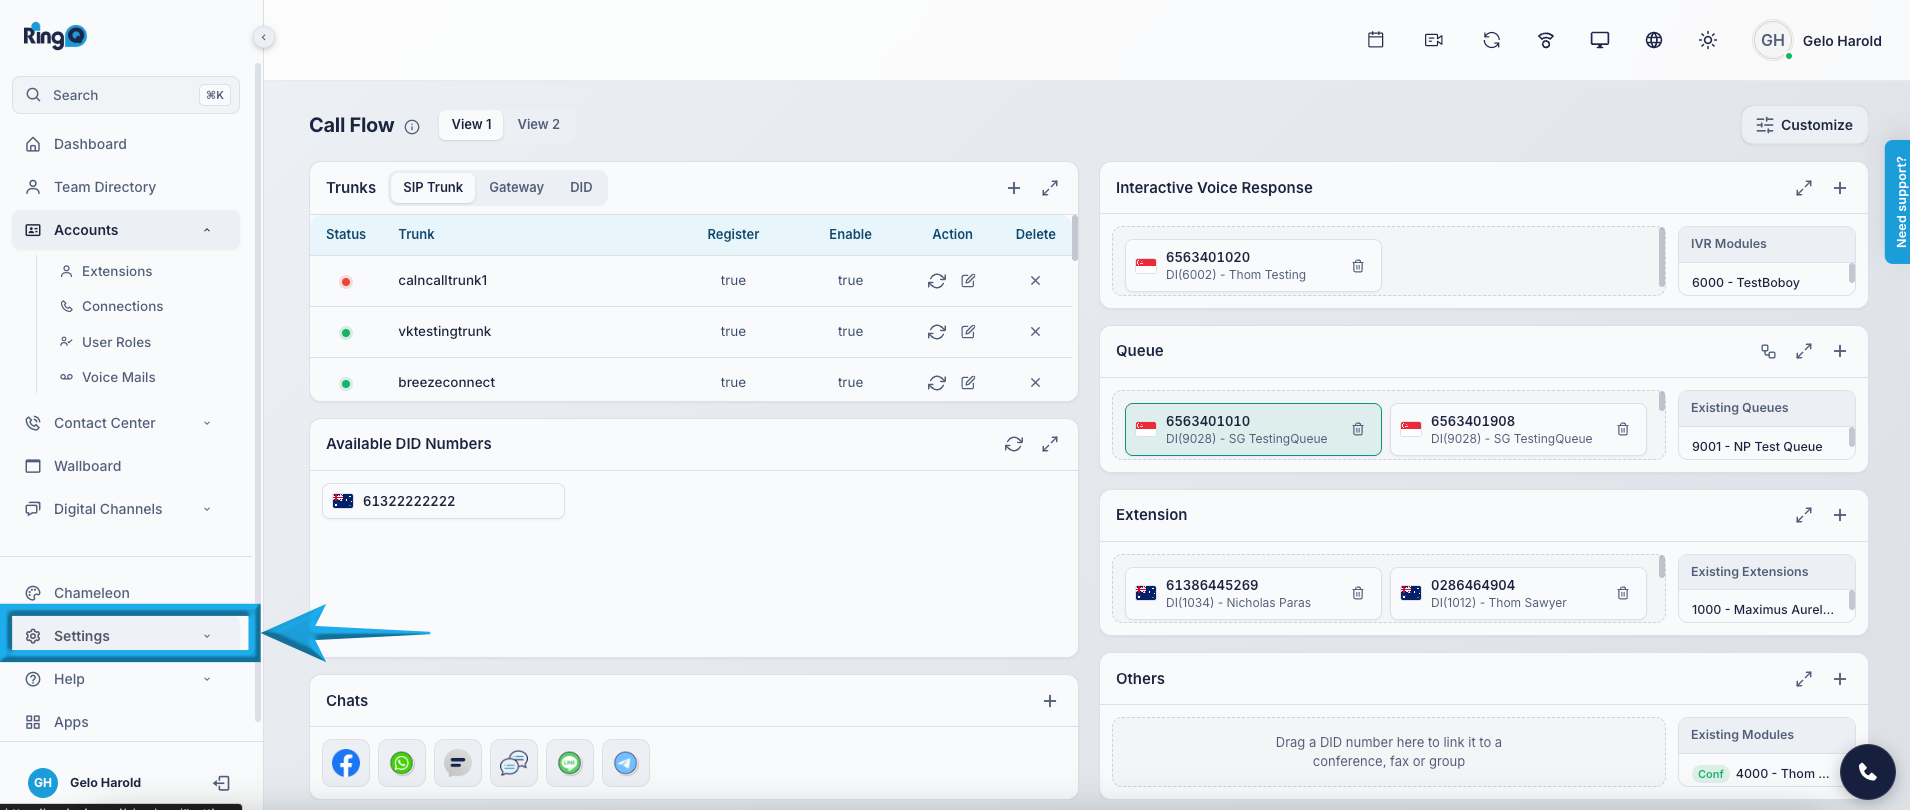
From the main menu, go to Settings.
Select Global Settings.
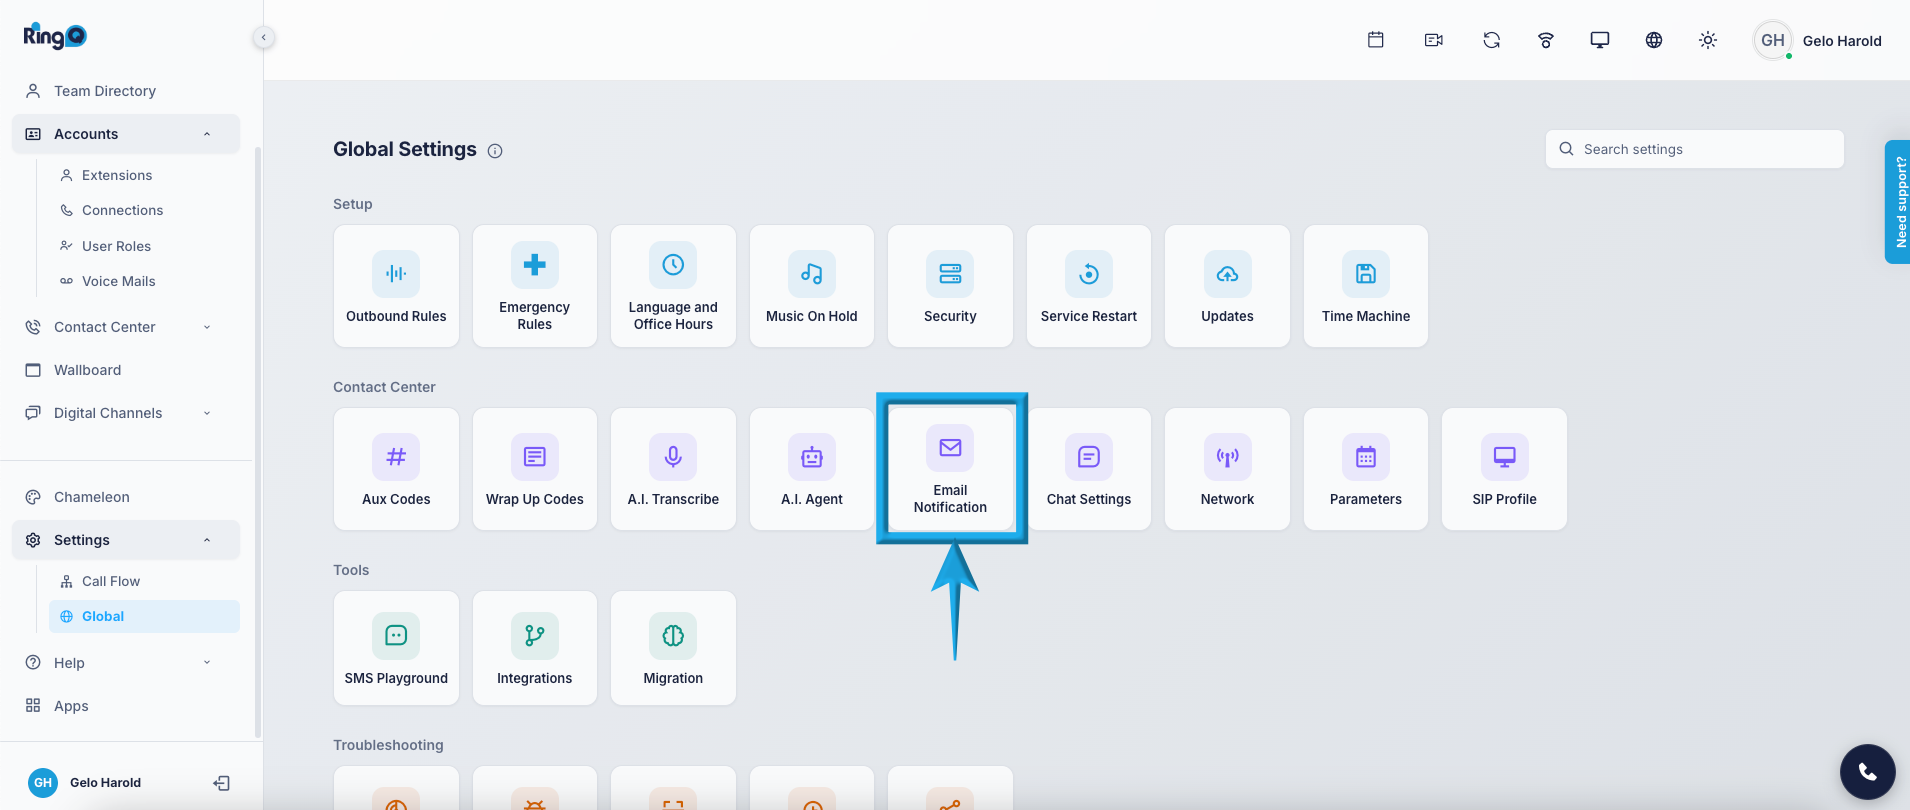
Click Chat Settings.
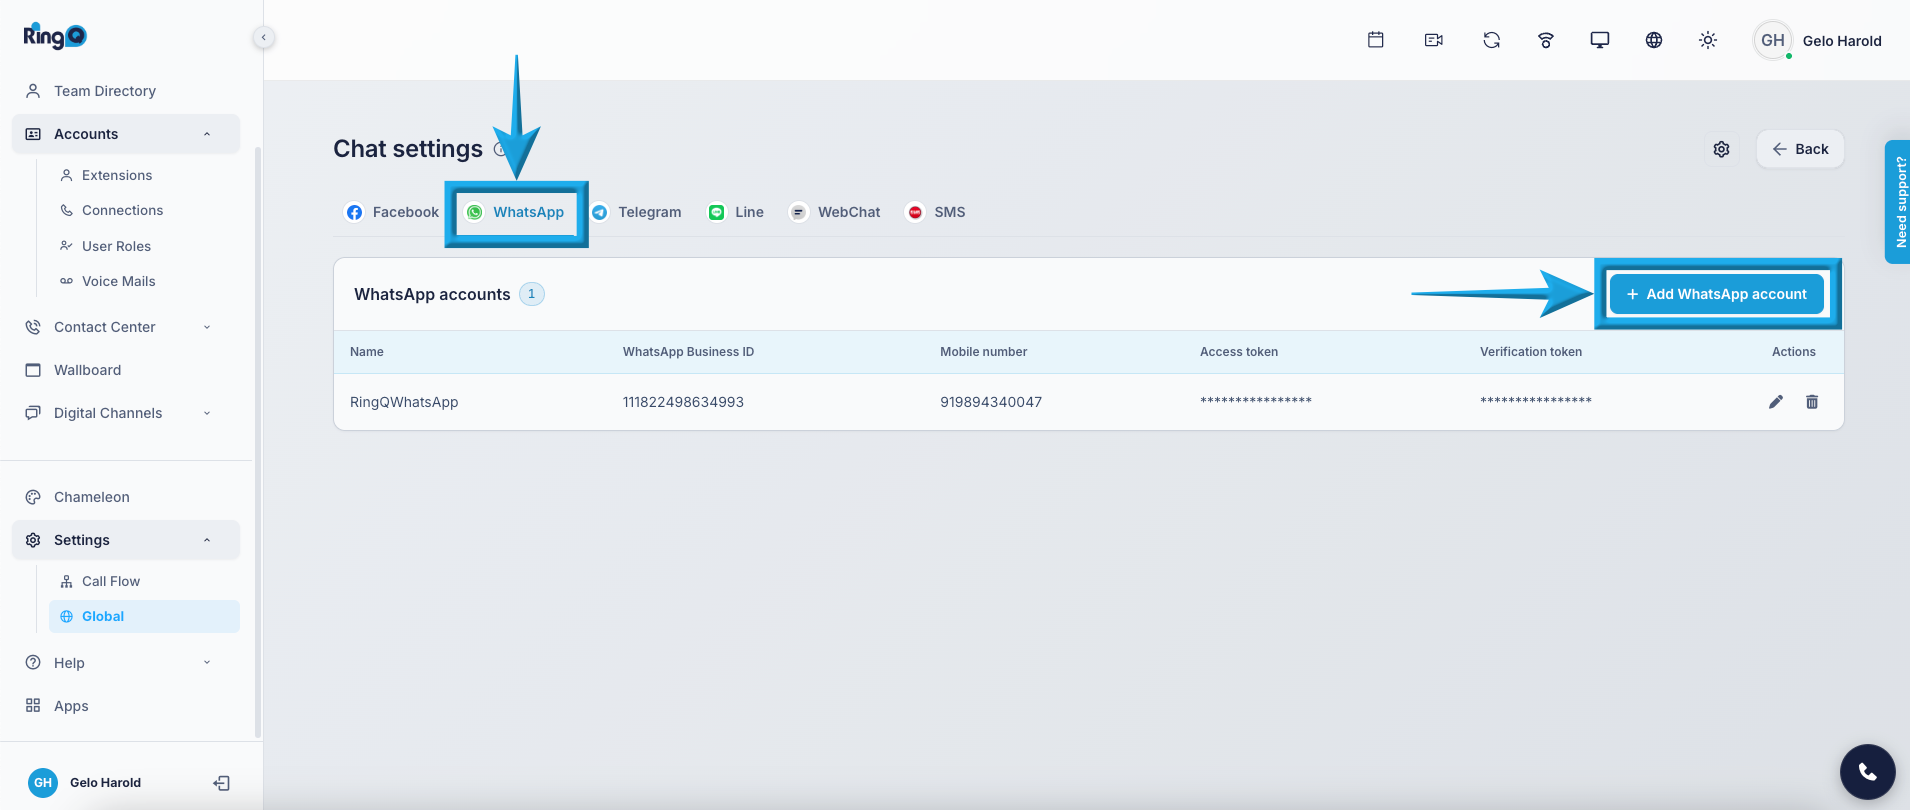
On the Chat Settings page, locate the list of available chat channels. Select WhatsApp to begin the configuration process.
To make the configuration easier, we suggest you gather all required details beforehand and note them down.
Recommended list to prepare in your notes:
Follow the Meta for Developers Login guide on how to obtain the above information from your account.
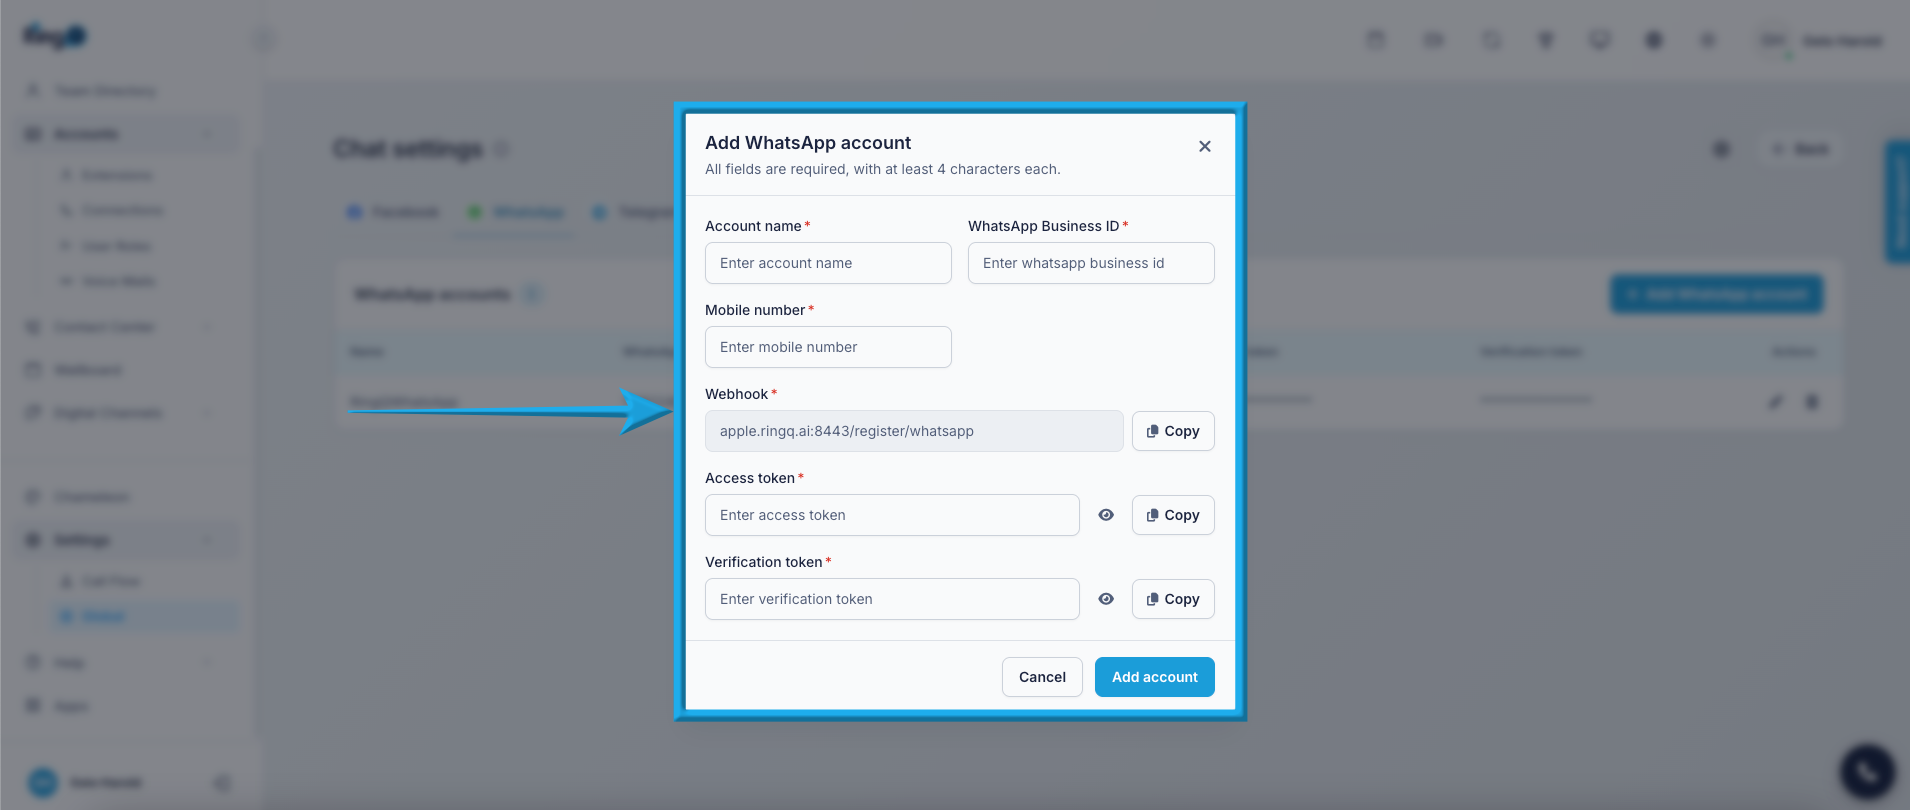
After collecting all required information, copy and paste each value into its corresponding field in RingQ.
Click Add Account.
Once saved, WhatsApp Chat will be successfully configured in RingQ, establishing a secure connection that enables real-time messaging between your WhatsApp Business number and the RingQ Web App.
