Configuring LINE Chat in the RingQ Web App
This guide explains how to configure LINE Chat in the RingQ Web App. By following these steps, you can integrate LINE messaging with RingQ and enable the platform to send and receive chat messages.
Sign in to your RingQ Admin dashboard.
From the main menu, go to Settings.
Select Global Settings.
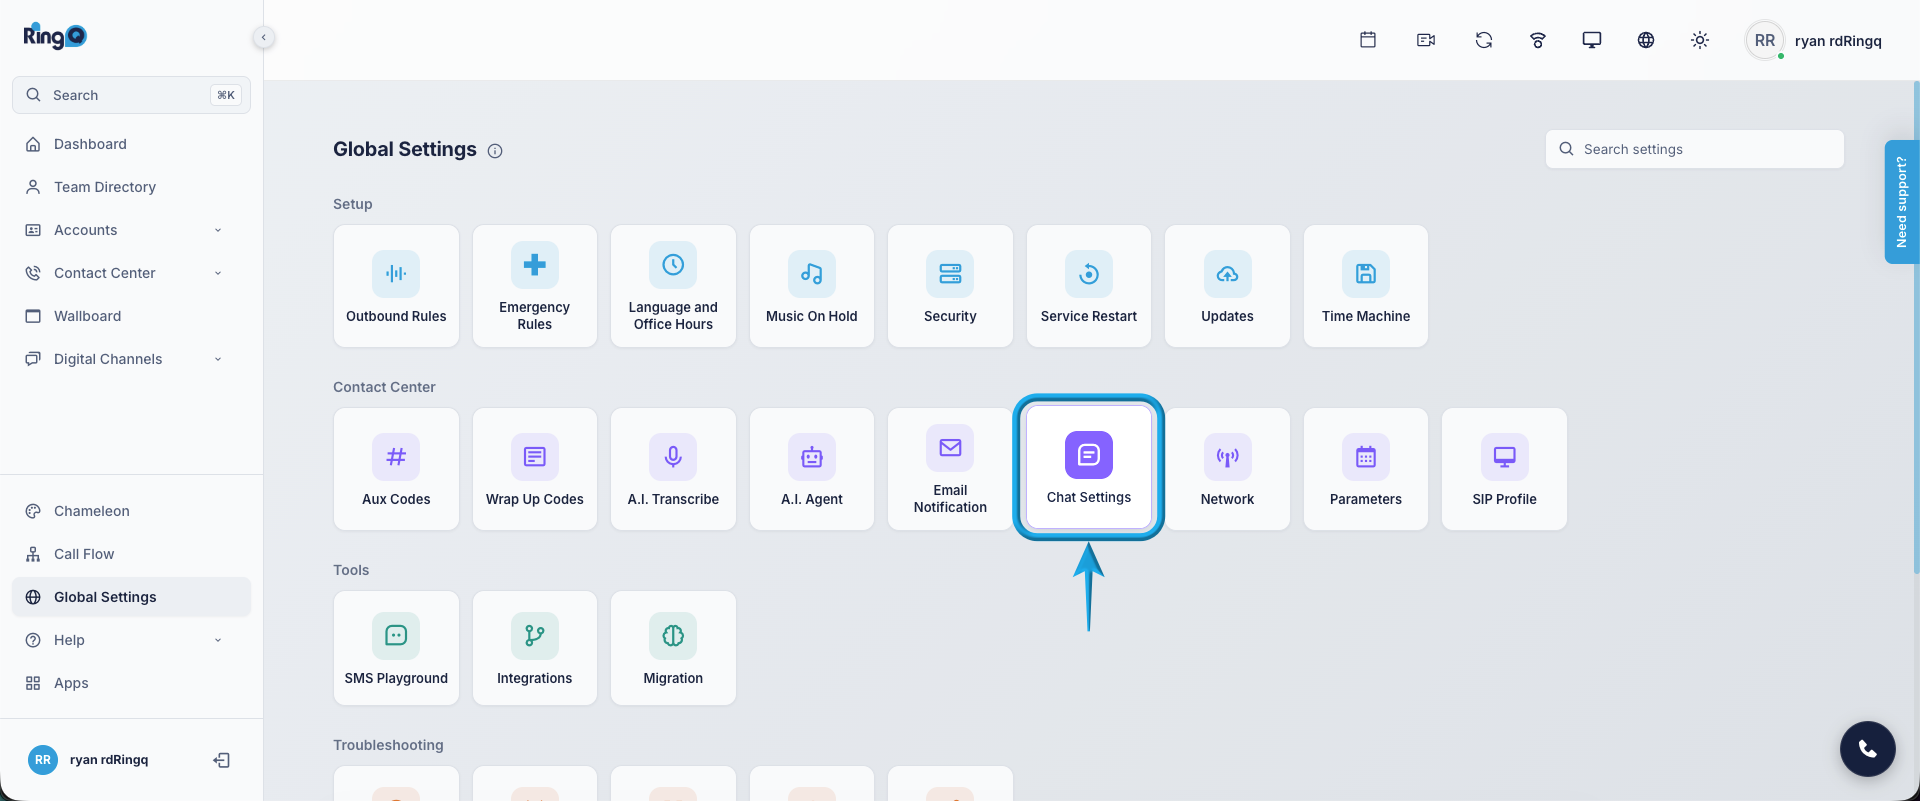
Click Chat Settings.
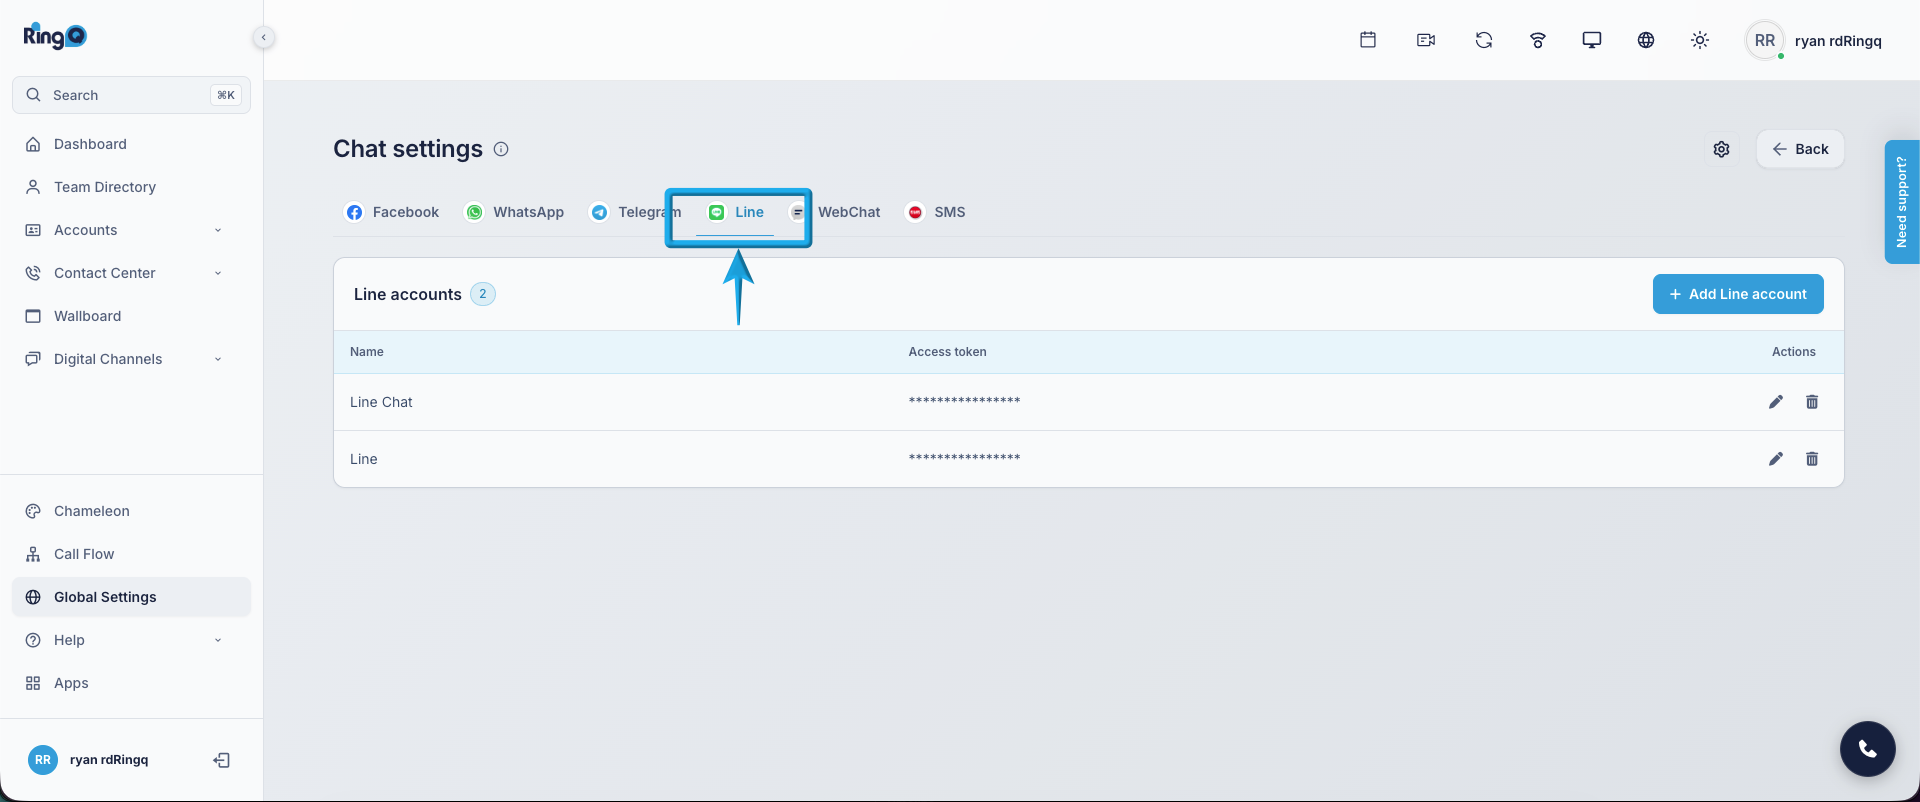
On the Chat Settings page, locate the list of available chat channels. Select Line to begin the configuration process.
Before starting the configuration, collect all required values from your LINE Developers Console. Using a note-taking app or any text editor, list and save all configuration details. This will allow you to quickly copy and paste the values during setup without switching between multiple screens. Proceed by following the LINE Developers setup guide to ensure that all credentials are properly generated and configured.
Once all required information has been collected, carefully copy and paste each value into its corresponding field in the RingQ Web App.
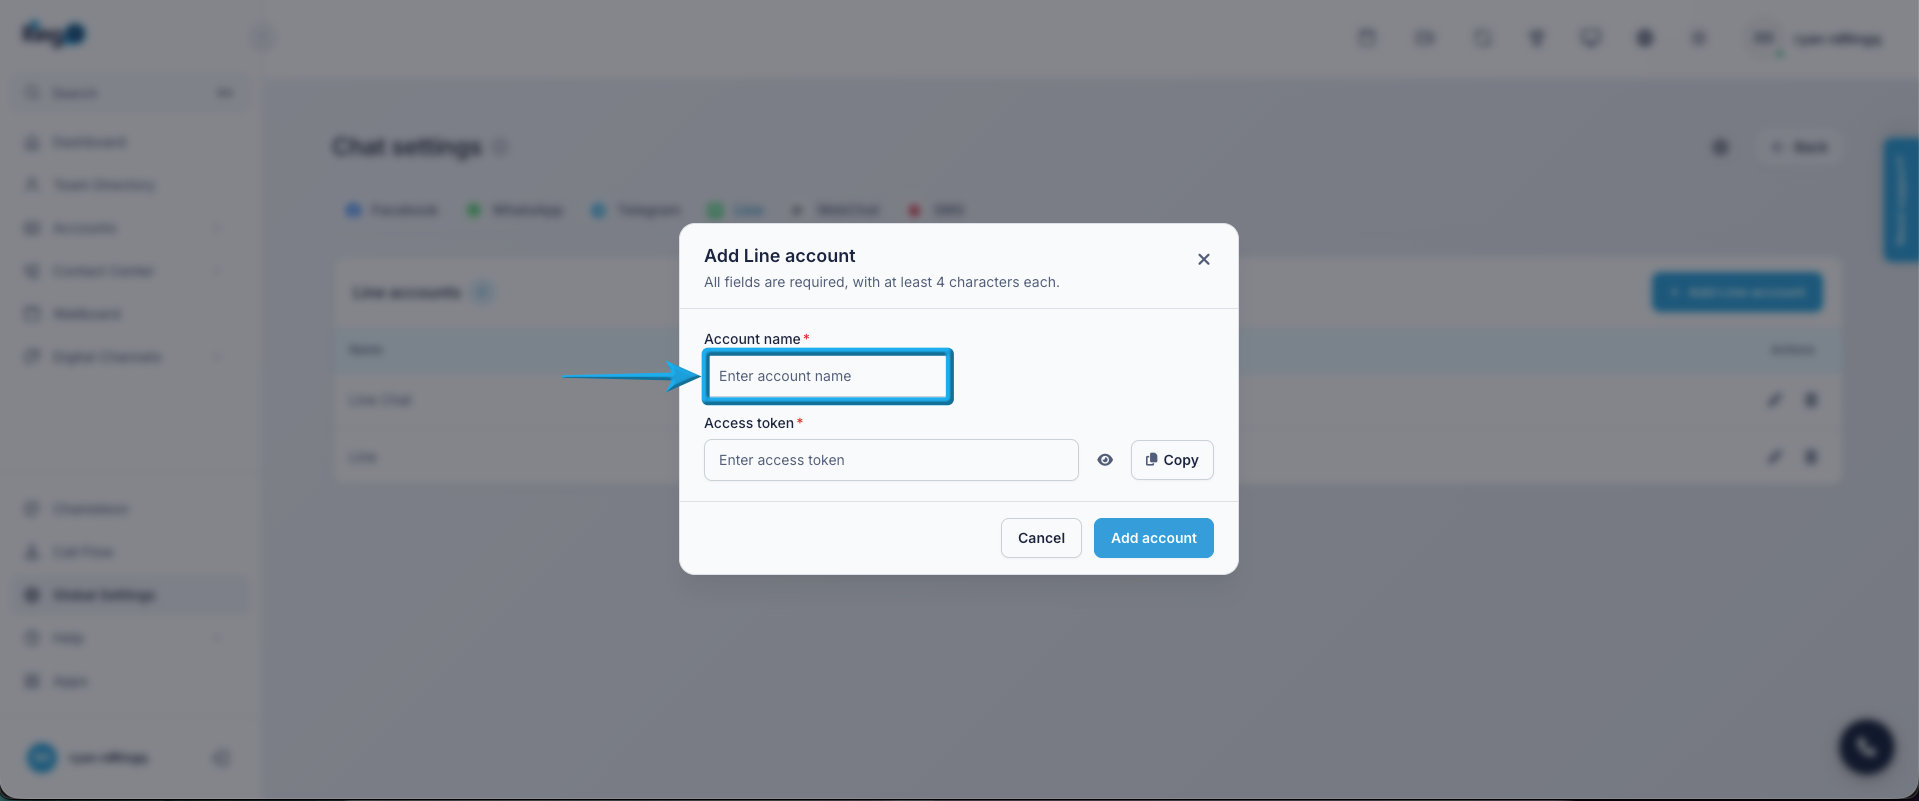
Enter a descriptive name for the integration.
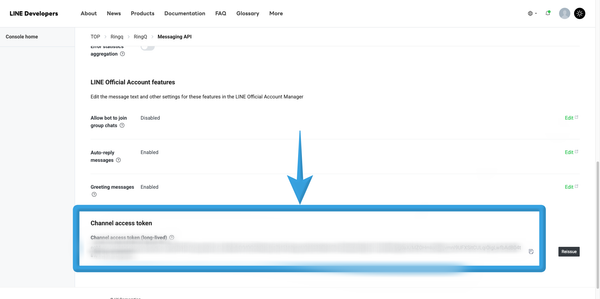
Copy the Channel Access Token from your LINE configuration details.
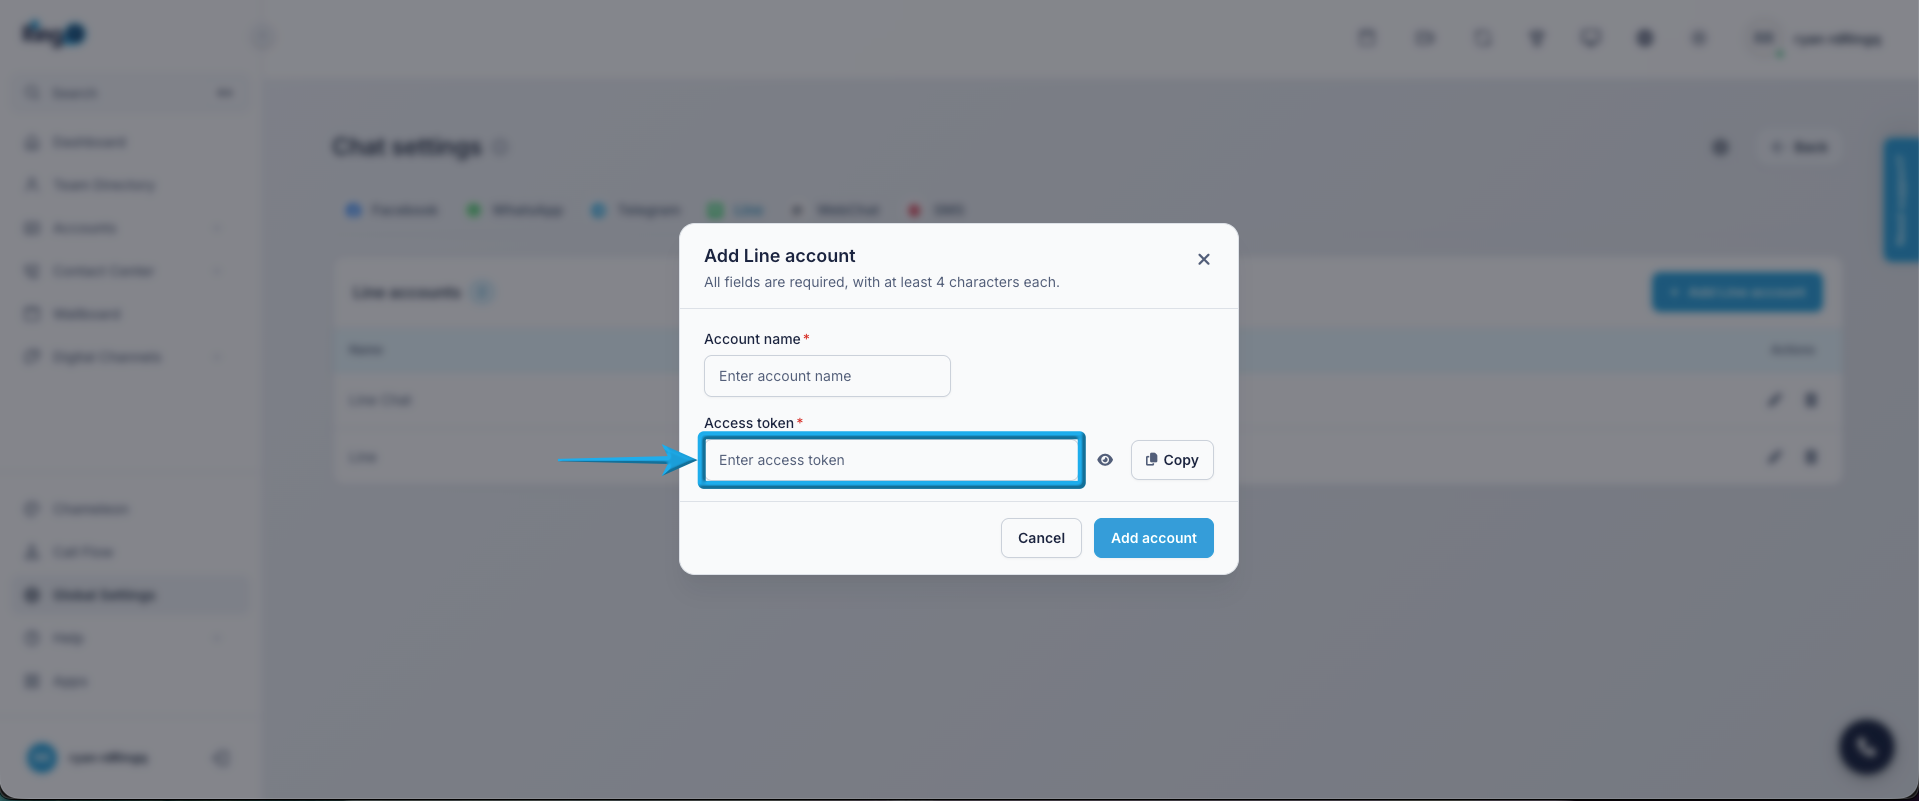
Paste it into the Access Token field in the RingQ Web App. The Channel Access Token is used to authenticate and securely connect RingQ to your LINE Official Account, enabling message sending and receiving. 4. Click Create. Important Notes
