Downloading the ISO, running the Debian-based installer, and activating your RingQ license
Version: RingQ ISO v9.1 | Debian 13
The RingQ ISO installation allows you to set up a fresh instance of RingQ on your own hardware or virtual environment. This method is ideal for users who want to have full control over their deployment, whether for on-premises installations or custom virtual machines.
This guide will walk you through downloading the ISO, preparing your system, and completing the installation process step by step.
This guide walks through the complete process of setting up RingQ on your own server, from downloading the installation ISO on the RingQ website through to activating your license in the browser. The installation is split into three parts:
Note: This installation deploys RingQ on your own server (On-Premise option), giving you full control over your data and instance. Ensure your server meets RingQ's minimum hardware requirements before you begin.
Purely automatic progress screens that need no input from you — such as component loading bars, base-system installation, and package downloads — have been left out of this guide to keep it focused on the steps that actually require action.
Navigate to the RingQ website and locate the “Get Started” button in the top-right corner of the page. This takes you to the download options for all supported deployment methods.
On the “Get Started with RingQ Today” page, find the On-Premise card and click DOWNLOAD ISO. This downloads the Debian-based ISO (version 9.1 at the time of writing) that will be used to install RingQ on your own server.
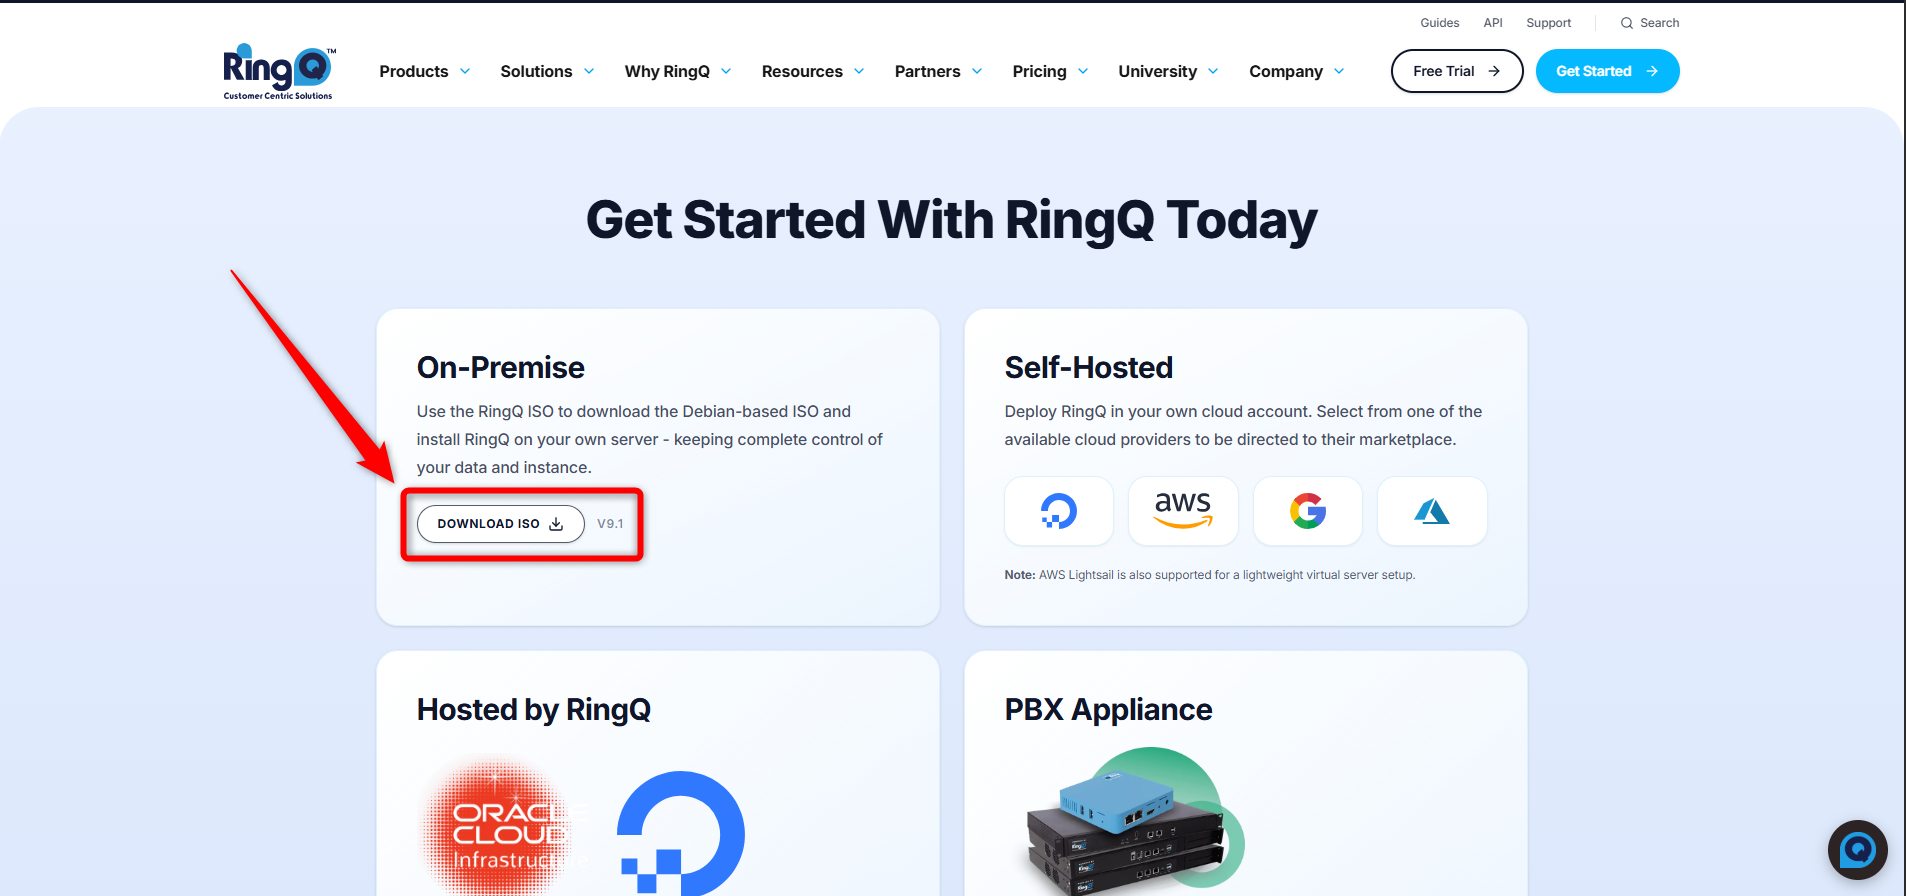
Figure 1 — Get Started page: On-Premise card with the Download ISO button highlighted
Once the ISO has downloaded, write it to a bootable USB drive (or mount it as virtual media) and boot your server from it. The RingQ Debian installer then walks you through a guided setup.
At the boot menu, the installer defaults to “Install RingQ” and will automatically boot after a short countdown if no key is pressed.
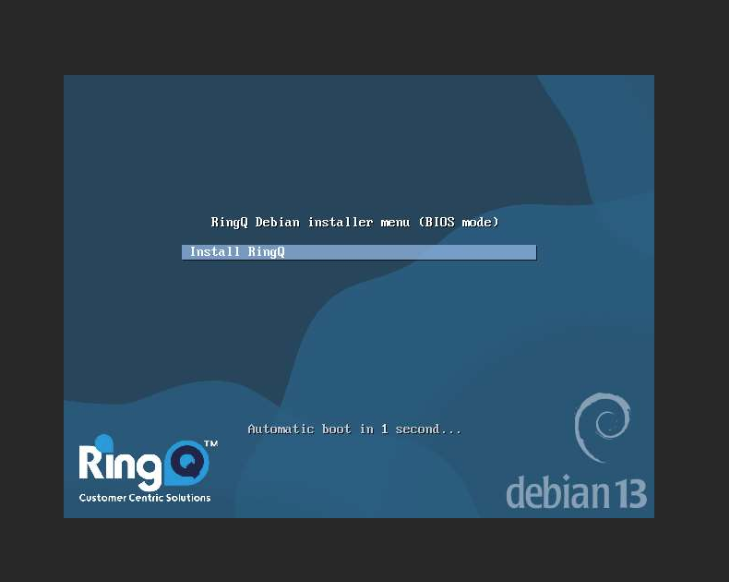
Figure 2 — RingQ Debian installer boot menu
The installer asks for the network settings needed to bring the server online. Enter each value and click Continue to move to the next field:
If your server obtains its address via DHCP, the installer will detect this automatically and configure the network for you, skipping these manual entry screens. If you're unsure of any of these values for a static/manual setup, check with your network administrator.
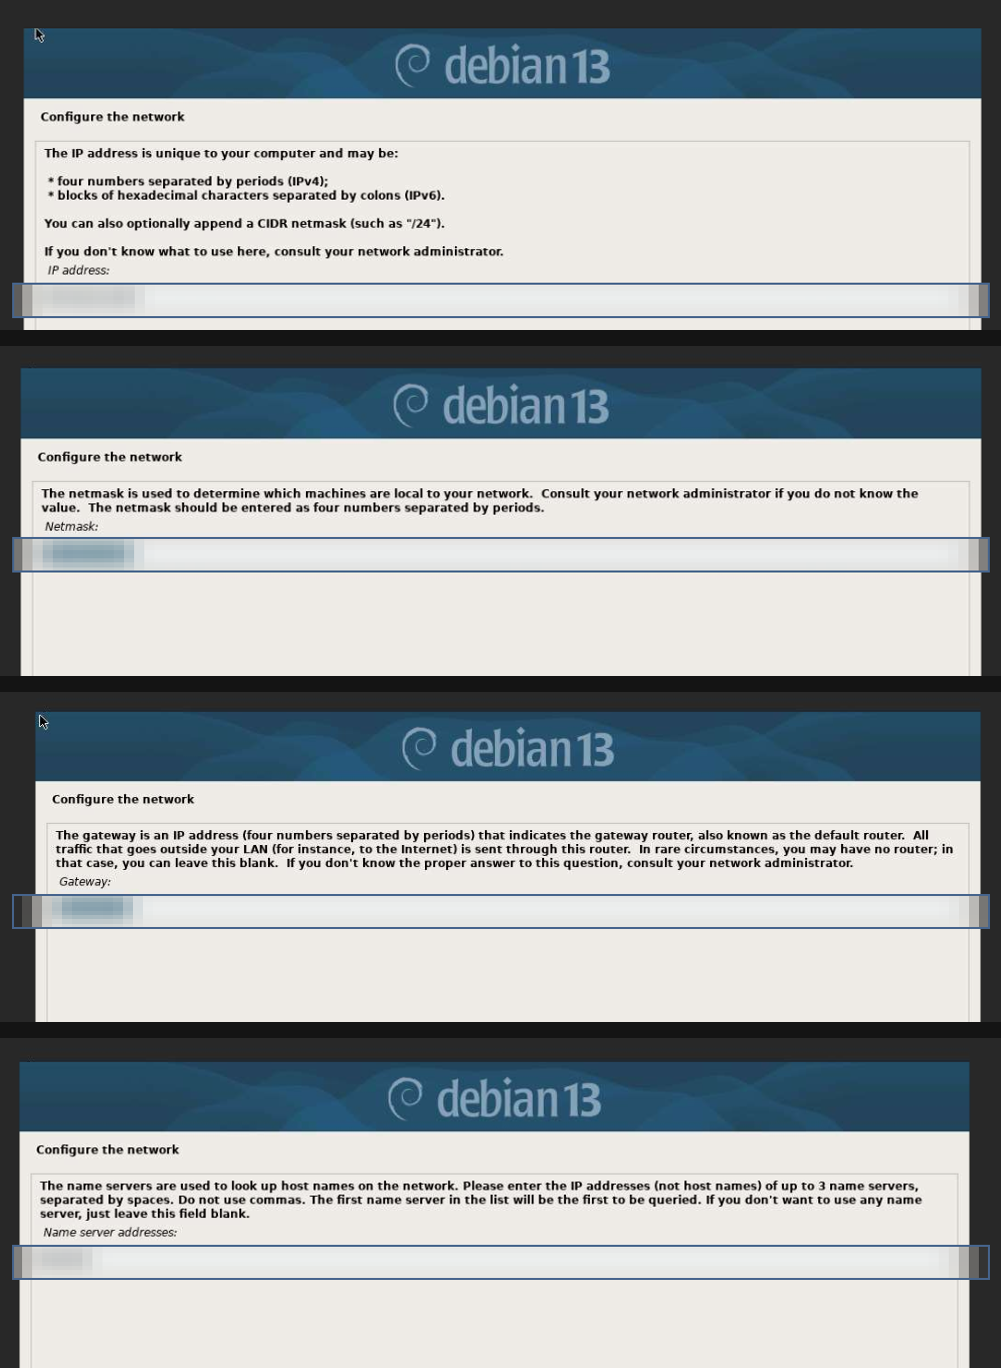
Figure 3 — Configuring the network: IP address, netmask, gateway, and DNS
Enter a strong root password, then re-enter it to verify it was typed correctly. This account has full administrative privileges on the server, so choose a password that cannot be guessed. Tick “Show Password in Clear” at either field if you'd like to verify what you're typing before clicking Continue.
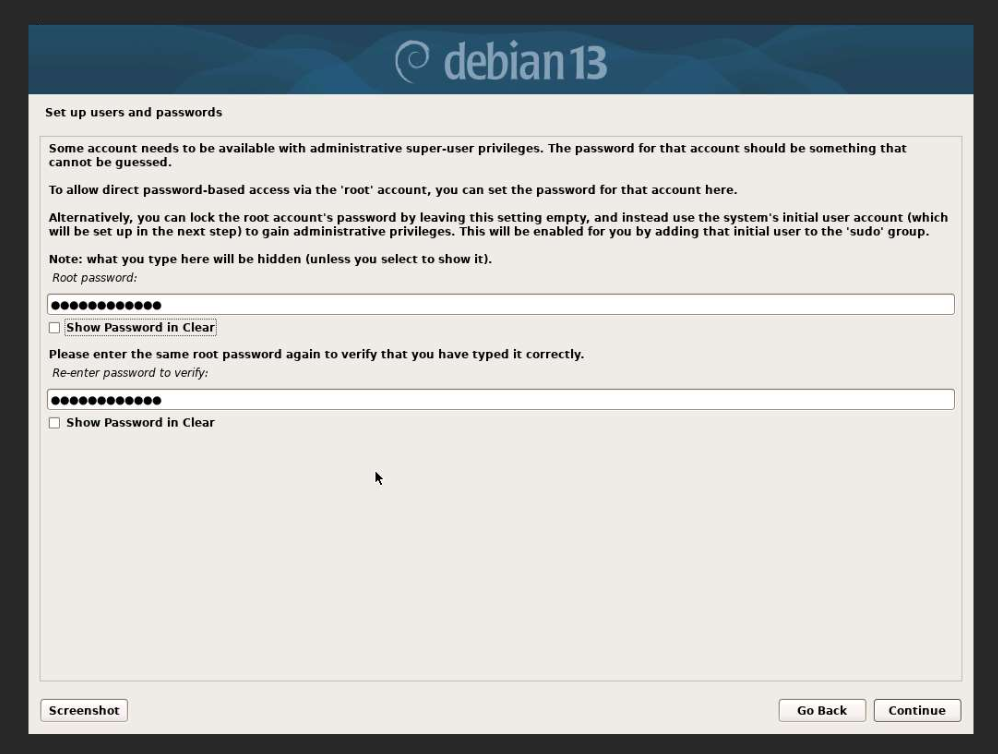
Figure 4 — Re-entering the root password to confirm
Select “Guided - use entire disk” (the default and recommended option for a standard RingQ server) and click Continue.
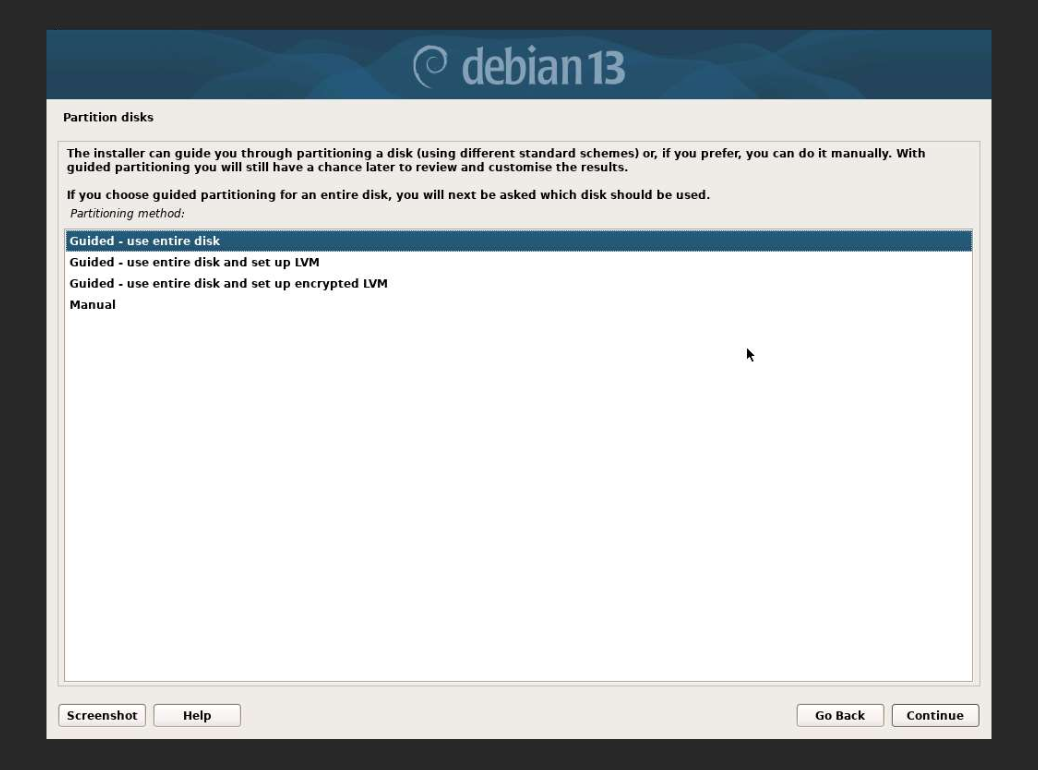
Figure 5 — Selecting the guided partitioning method
Choose the virtual/physical disk that RingQ will be installed on. All data on this disk will be erased, so double-check you've selected the correct device.
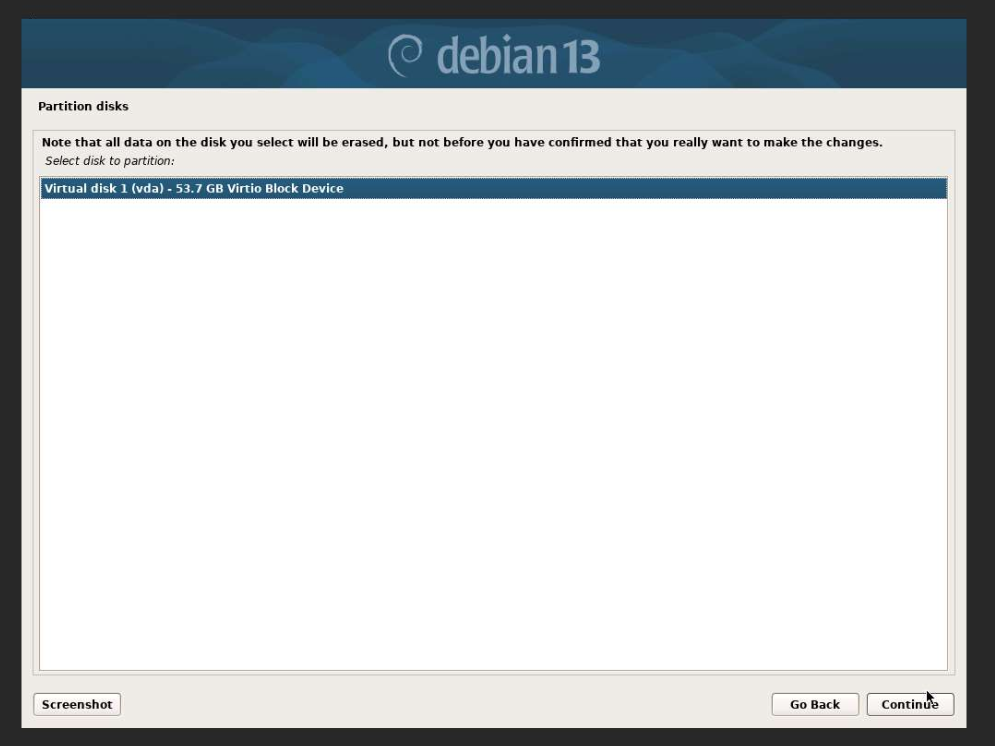
Figure 6 — Selecting the disk to partition
The installer creates a primary ext4 partition for the root filesystem and a logical swap partition. Review the layout, then select “Finish partitioning and write changes to disk.”
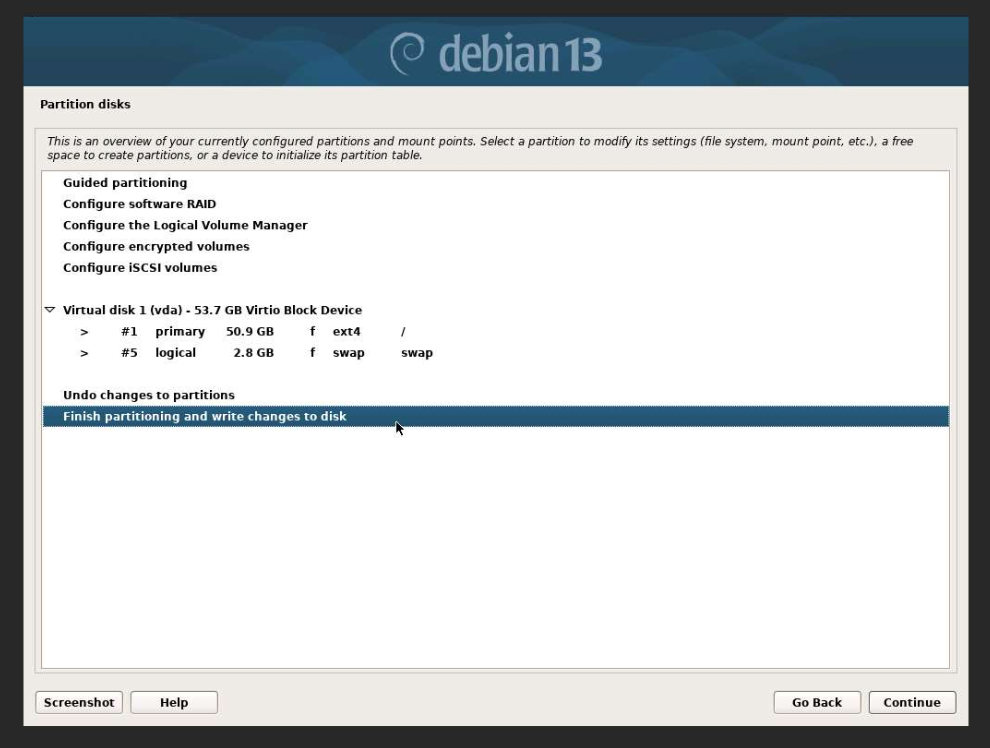
Figure 7 — Partition overview: ext4 root partition and swap partition
Select Yes to confirm, and the chosen partitions will be formatted. The installer then installs the base system, configures APT, and installs the remaining required software automatically.
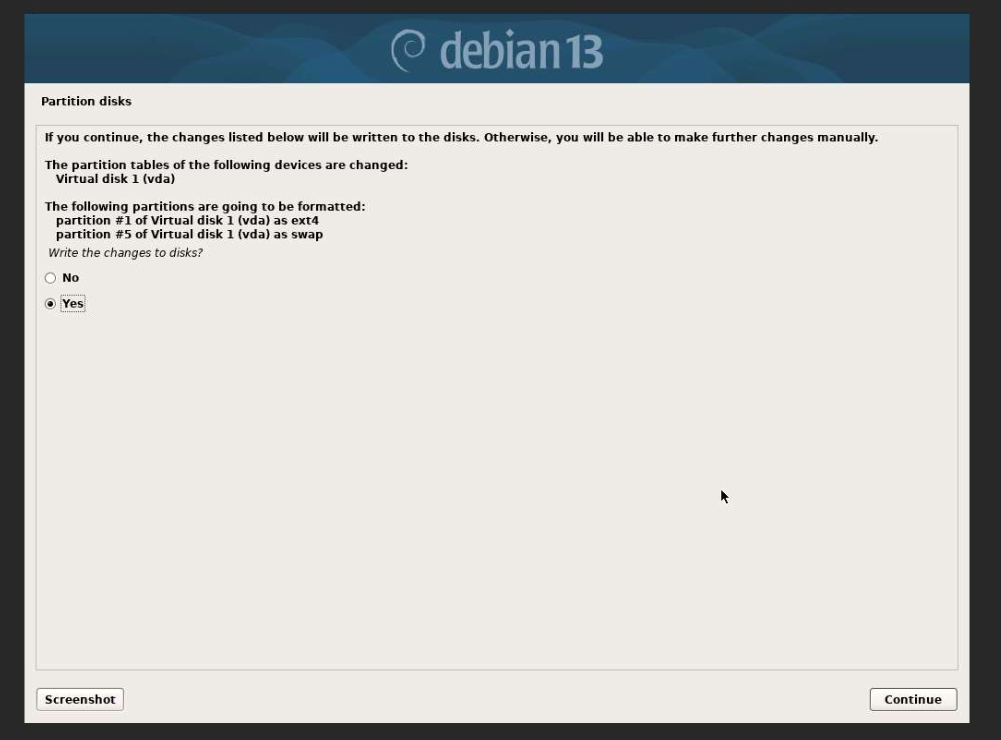
Figure 8 — Confirming changes before they're written to disk
Once the base system and software are installed, confirm the device GRUB should be installed to. This depends on how your server is hosted:
Check with your hosting provider or infrastructure team if you're unsure which applies to your setup. Click Continue, and the installer will finish up and prompt you to reboot into the newly installed system.
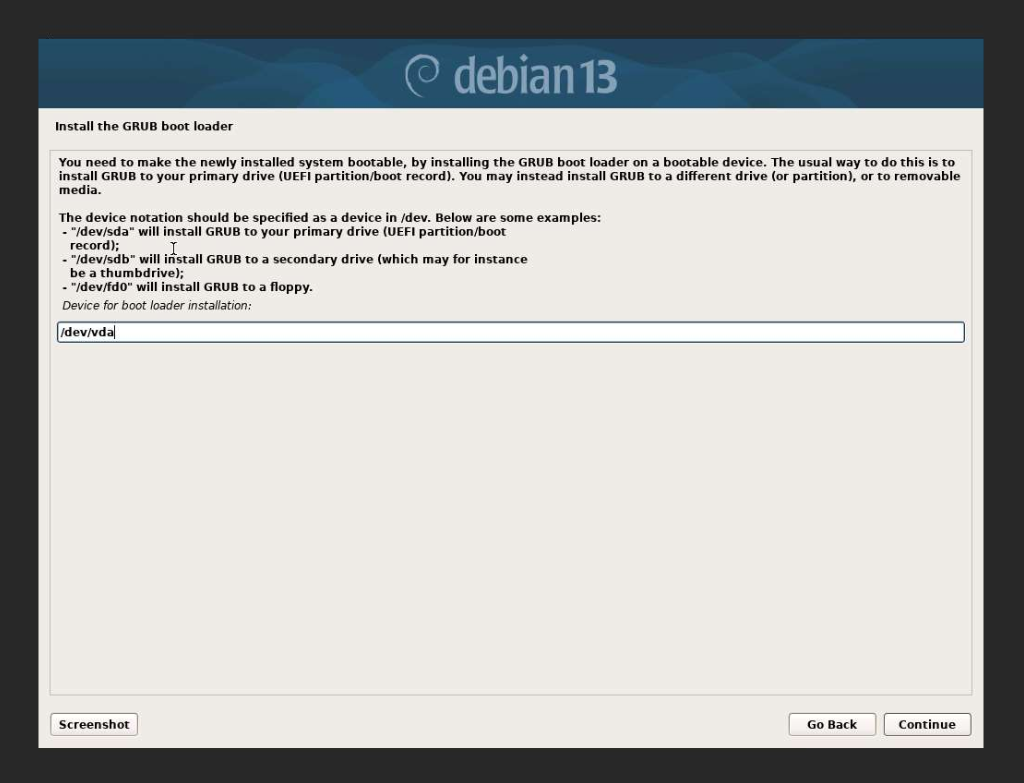
Figure 9 — Specifying the device for boot loader installation
On first boot, the RingQ CloudApp Installer runs automatically and prompts you to confirm that the required ports are open on your firewall / security groups before it proceeds:
The full port list is available at https://www.ringq.com/guides/port-forwarding. Once the required ports are open, type y to continue. The installer then updates packages, installs and its dependencies, pulls the RingQ image, and creates the automatically.
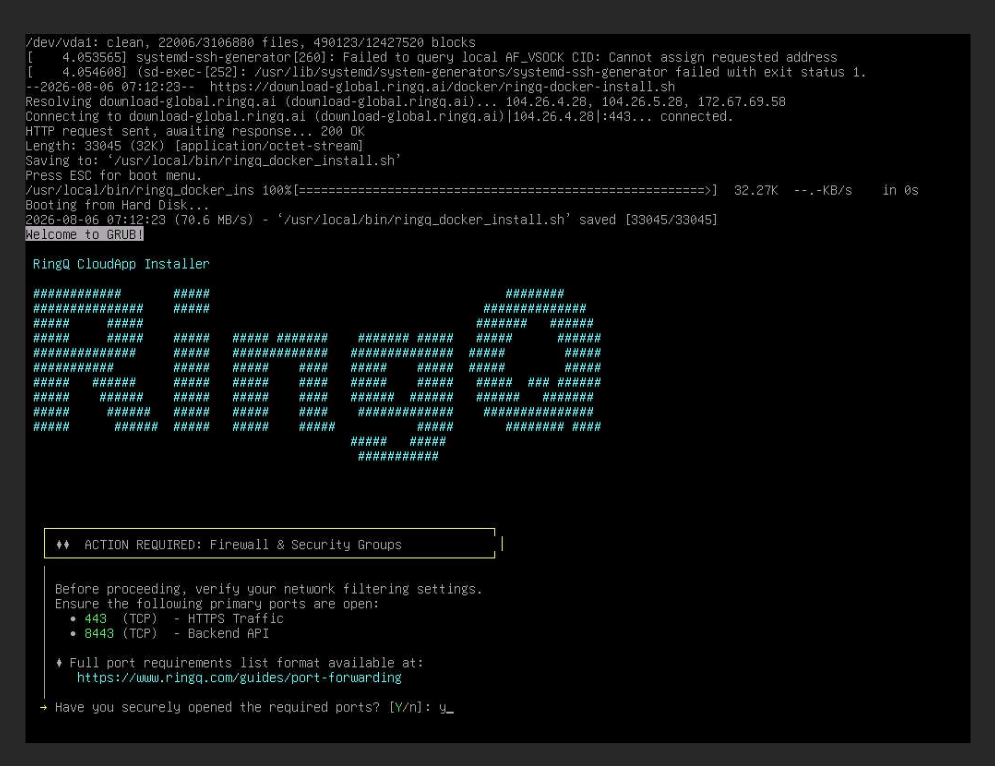
Figure 10 — RingQ CloudApp Installer: firewall and security group check
Once the installation is complete, the installer confirms that RingQ has been installed successfully and displays the URL that you will use to activate your license (for example: https://<your-server-ip>:8443/license).
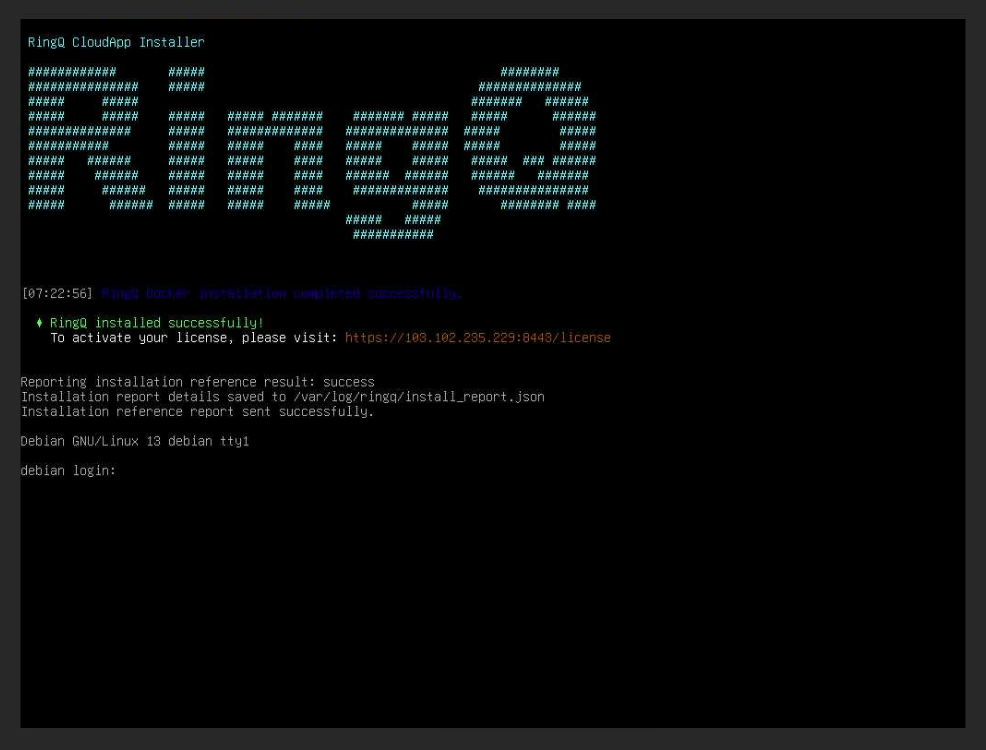
Figure 11 — Installation completed successfully
Open the activation URL from the previous step in a browser. Enter your license key — if you don't have one yet, you can obtain it from cap.ringq.com. Once the key is verified, the installation type and linked FQDN are displayed. Click “Continue Activate.”
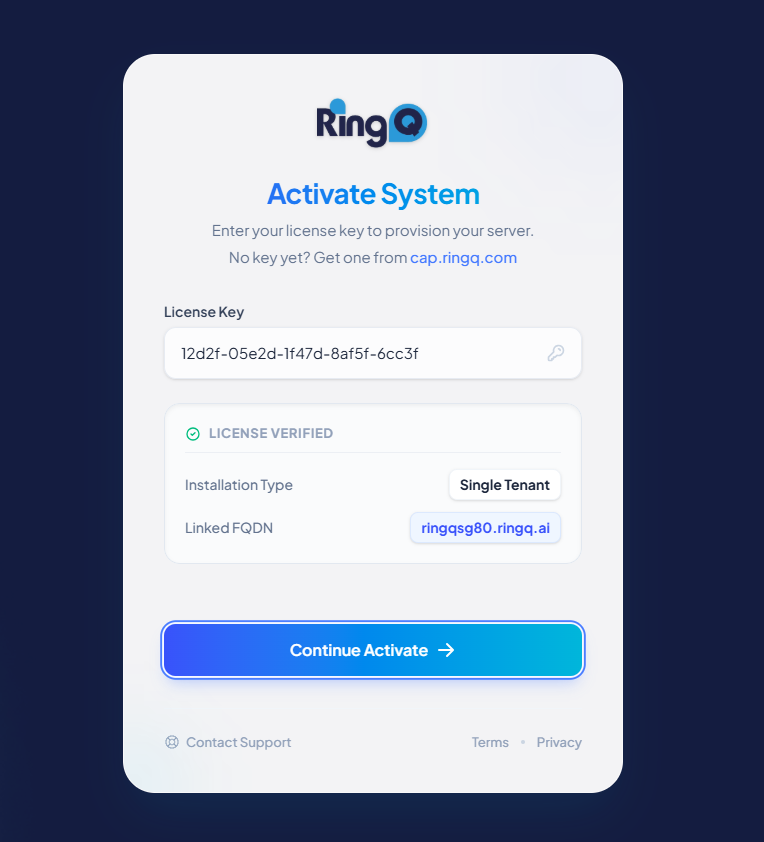
Figure 12 — Activate System: entering the license key
Once activation completes, RingQ confirms the system is provisioned and ready to use. This screen shows your instance access URL, registered email, and security key.
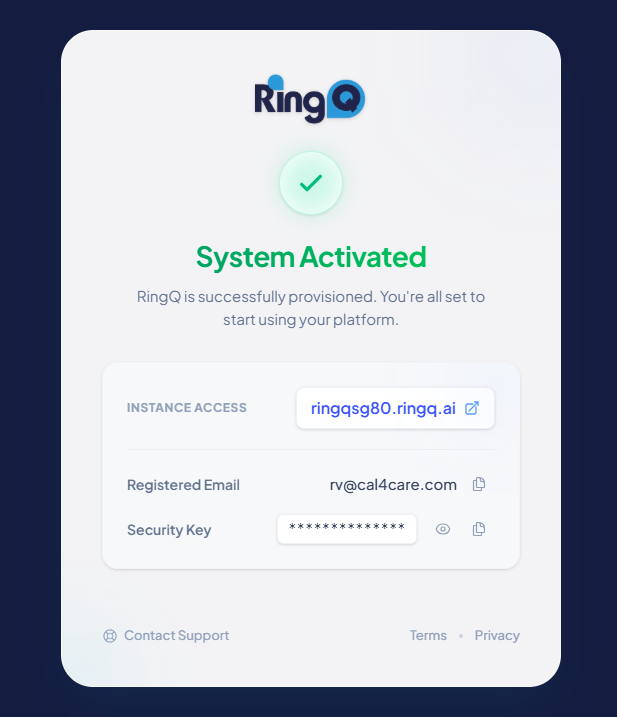
Figure 13 — System Activated: RingQ is provisioned and ready to use
Note: Keep your license key in a safe place — you'll need them if you ever have to reactivate or reconfigure your RingQ instance.
