The Email Notification Settings feature allows you to manage how the system sends alerts for important events such as resource usage and call limits. You can define recipients and set thresholds to ensure the right people are notified at the right time.
Access the Email Notification Feature
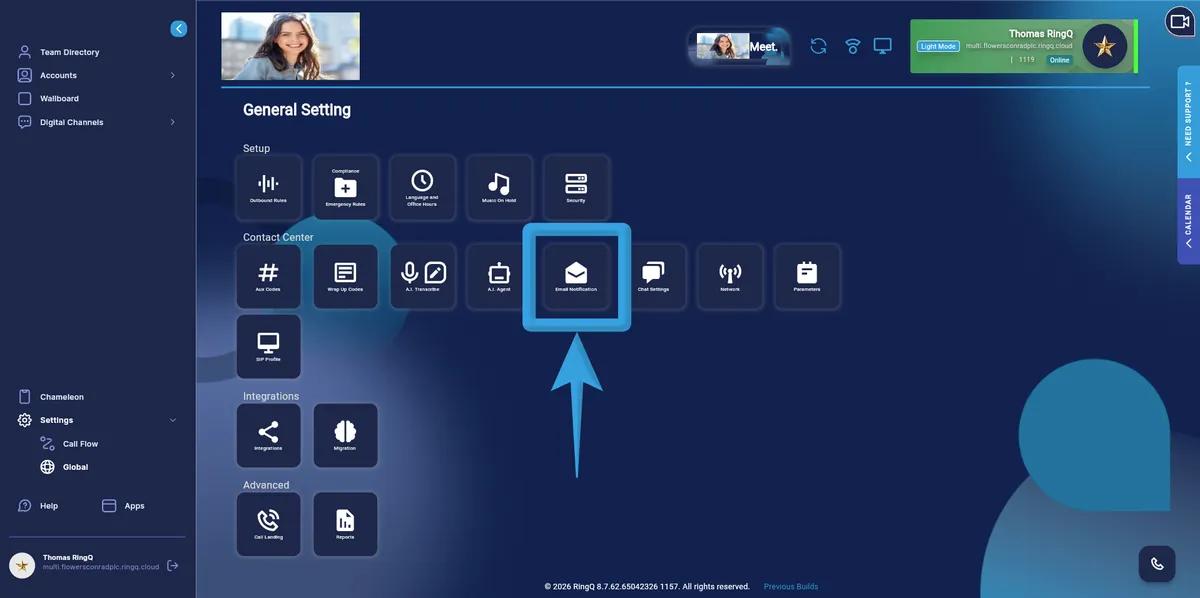
Log in to your RingQ Admin Dashboard.
Navigate to the side menu. Go to Settings > Global
Select Email Notification.
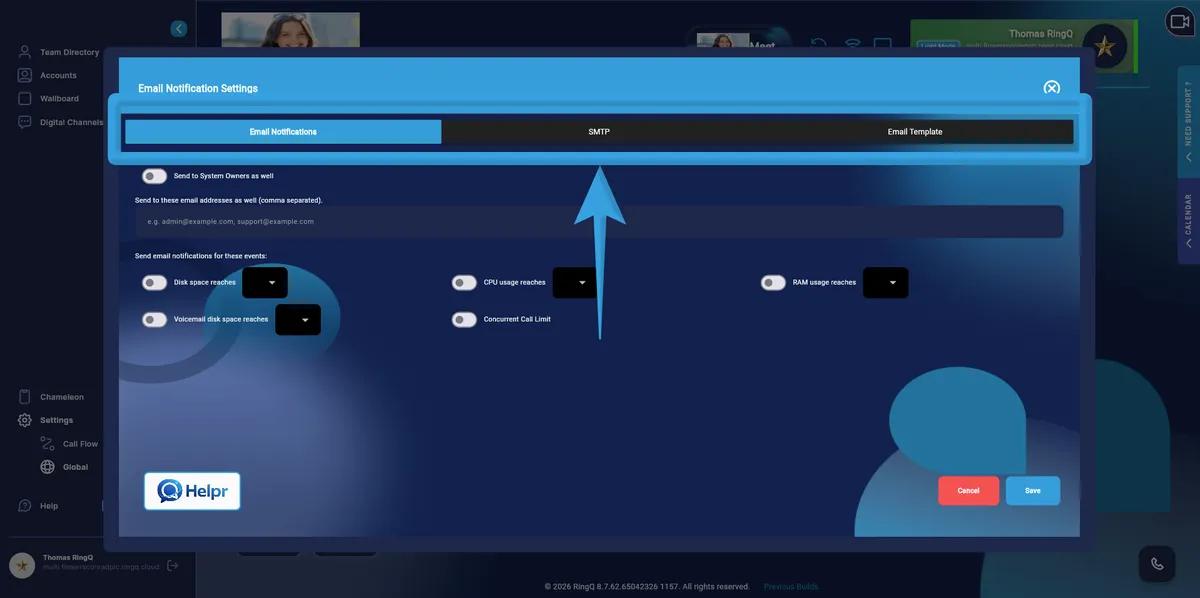
Navigation Tabs
Email Notifications – Configure recipients and trigger events
SMTP – Set up email server configuration
Email Template – Customize the email format/content
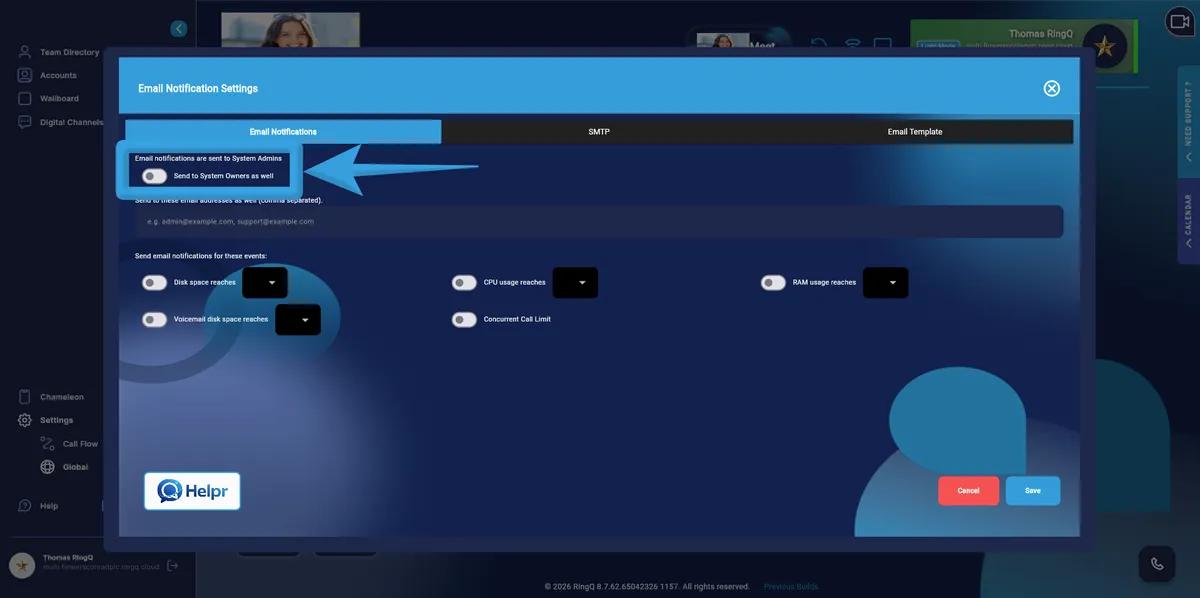
Configure Recipients
Send to System Owners as well - enabled by default (notifications go to system admins)
Send to these email addresses as well (comma-separated) - add any additional email addresses you want to send notifications to.
Configure Notification Triggers
Enable notifications by toggling the switch and selecting a threshold:
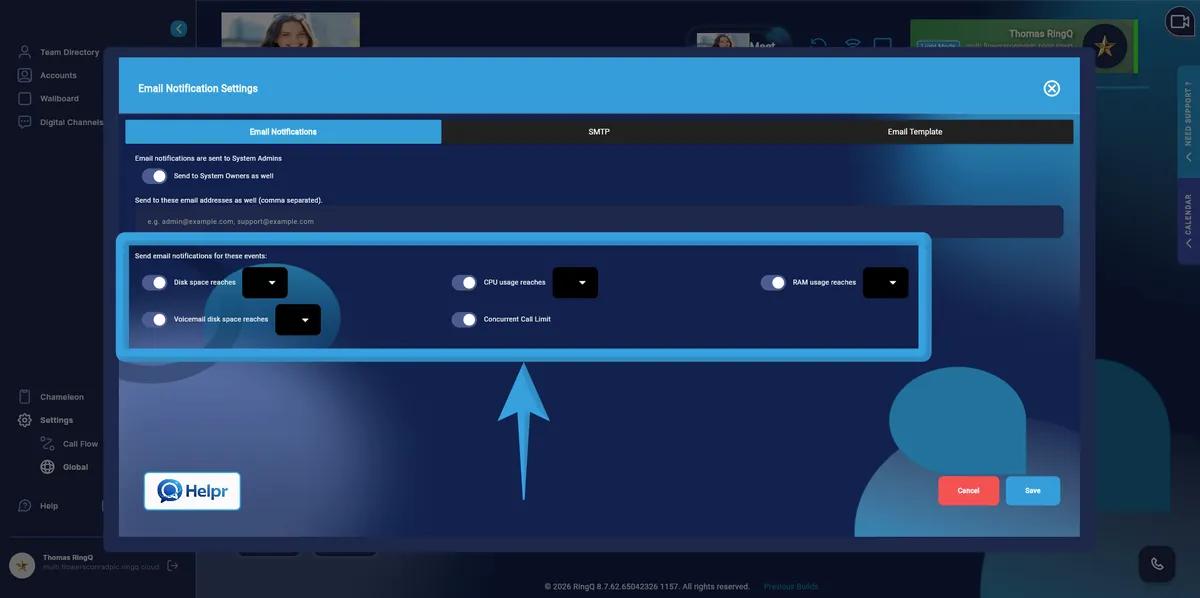
Disk Space Reaches
Voicemail Disk Space Reaches
CPU Usage Reaches
RAM Usage Reaches
Concurrent Call Limit
Each option includes a dropdown to define the trigger threshold (e.g., percentage or limit).
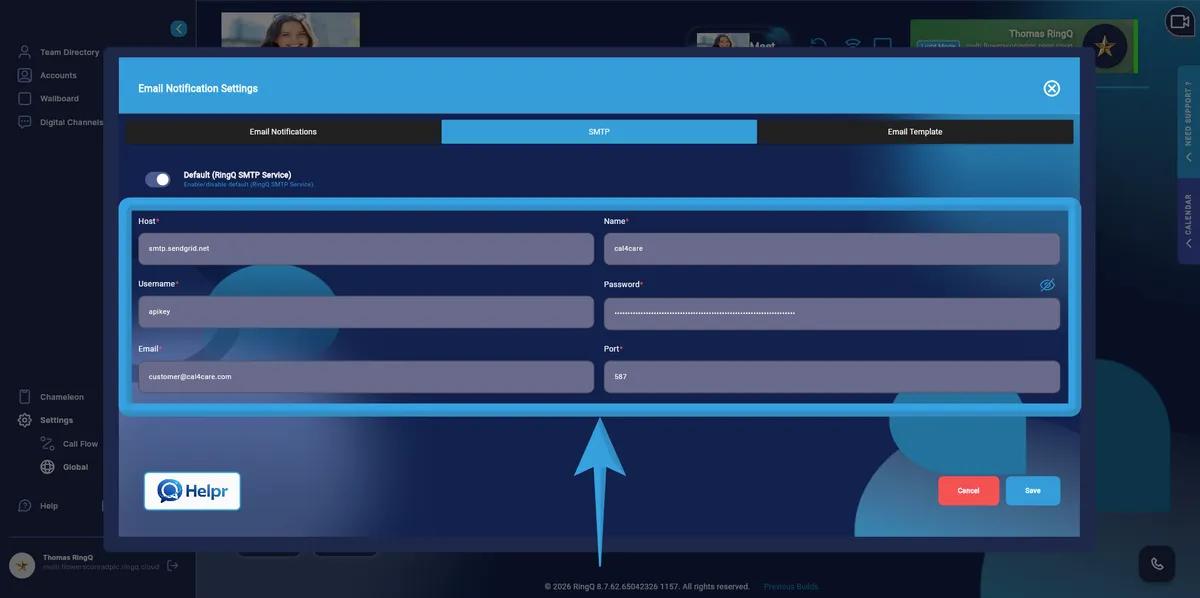
Steps to Configure SMTP
Go to the SMTP Tab - Navigate to Email Notification Settings → SMTP.
Enable or Disable Default SMTP Service
Enabled – Uses RingQ’s built-in email service (noreply sender).
Disabled – Allows you to configure your own SMTP provider.
Enter SMTP Details
Fill in the required fields:
Host - Enter your SMTP server address. Example: smtp.sendgrid.net
Name - Specify a sender name (this appears in outgoing emails). Example: cal4care
Username - Enter your SMTP username. Example: apikey (for SendGrid)
Password - Enter your SMTP password or API key (Hidden for security)
Email - Enter the sender email address. Example: customer@cal4care.com
Port - Enter the SMTP port number. Common values: 587 (TLS – recommended), 465 (SSL)
Accessing the Email Template Settings
Go to Email Notification Settings.
Select the Email Template tab (top right section).
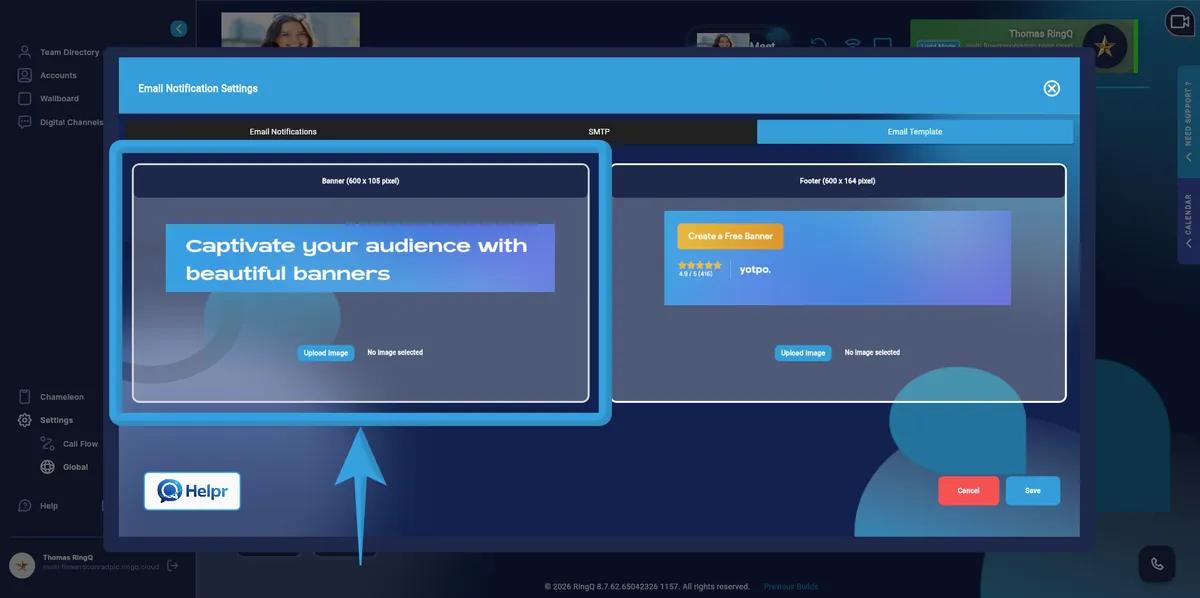
Banner Configuration (Top Section)
Locate the Banner (600 x 105 pixel) section.
Click Upload Image.
Select your banner image from your device.
Ensure the image matches the recommended size (600 x 105 px) and uses clear branding (logo, tagline, or campaign message)
Confirm the upload (image name will appear once selected).
Footer Configuration (Bottom Section)
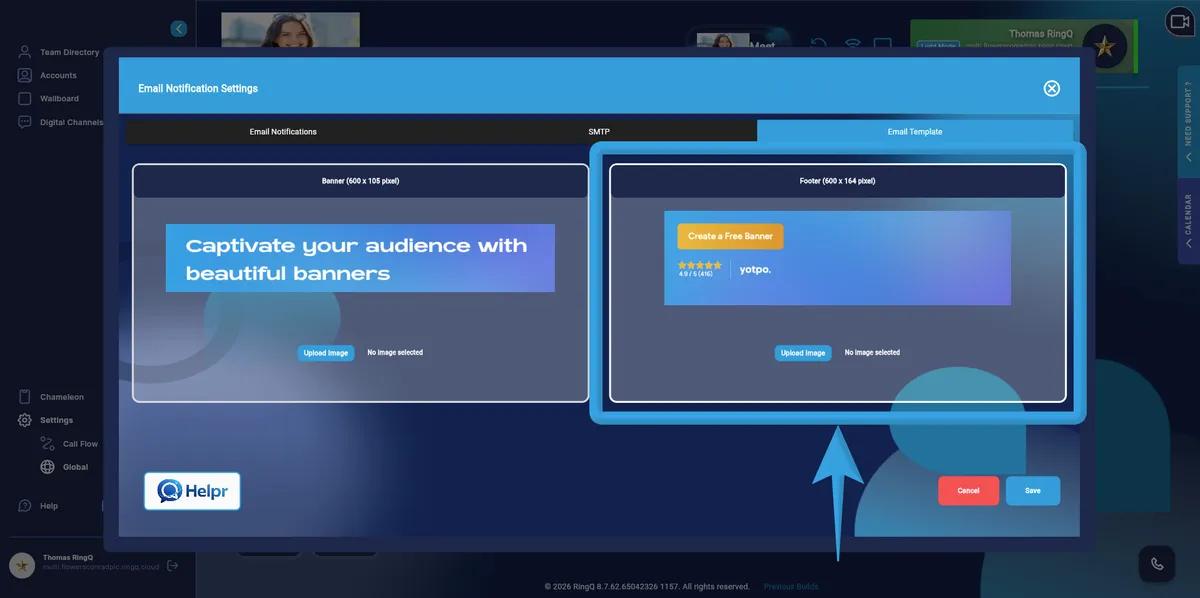
Locate the Footer (600 x 164 pixel) section.
Click Upload Image.
Select your footer image.
Recommended content: Call-to-action (CTA) or Ratings, links, or company info.
Ensure the image size is 600 x 164 px for proper display.
Click Save (bottom right).
A confirmation will apply your changes to outgoing emails.