This guide explains how to add a new tenant instance using the RingQ Customer Access Portal. Creating a tenant allows you to deploy a new RingQ environment under your multi-tenant license, providing a dedicated and isolated PBX instance for each customer. This ensures that users, configurations, and resources remain separate while being managed from a single platform.
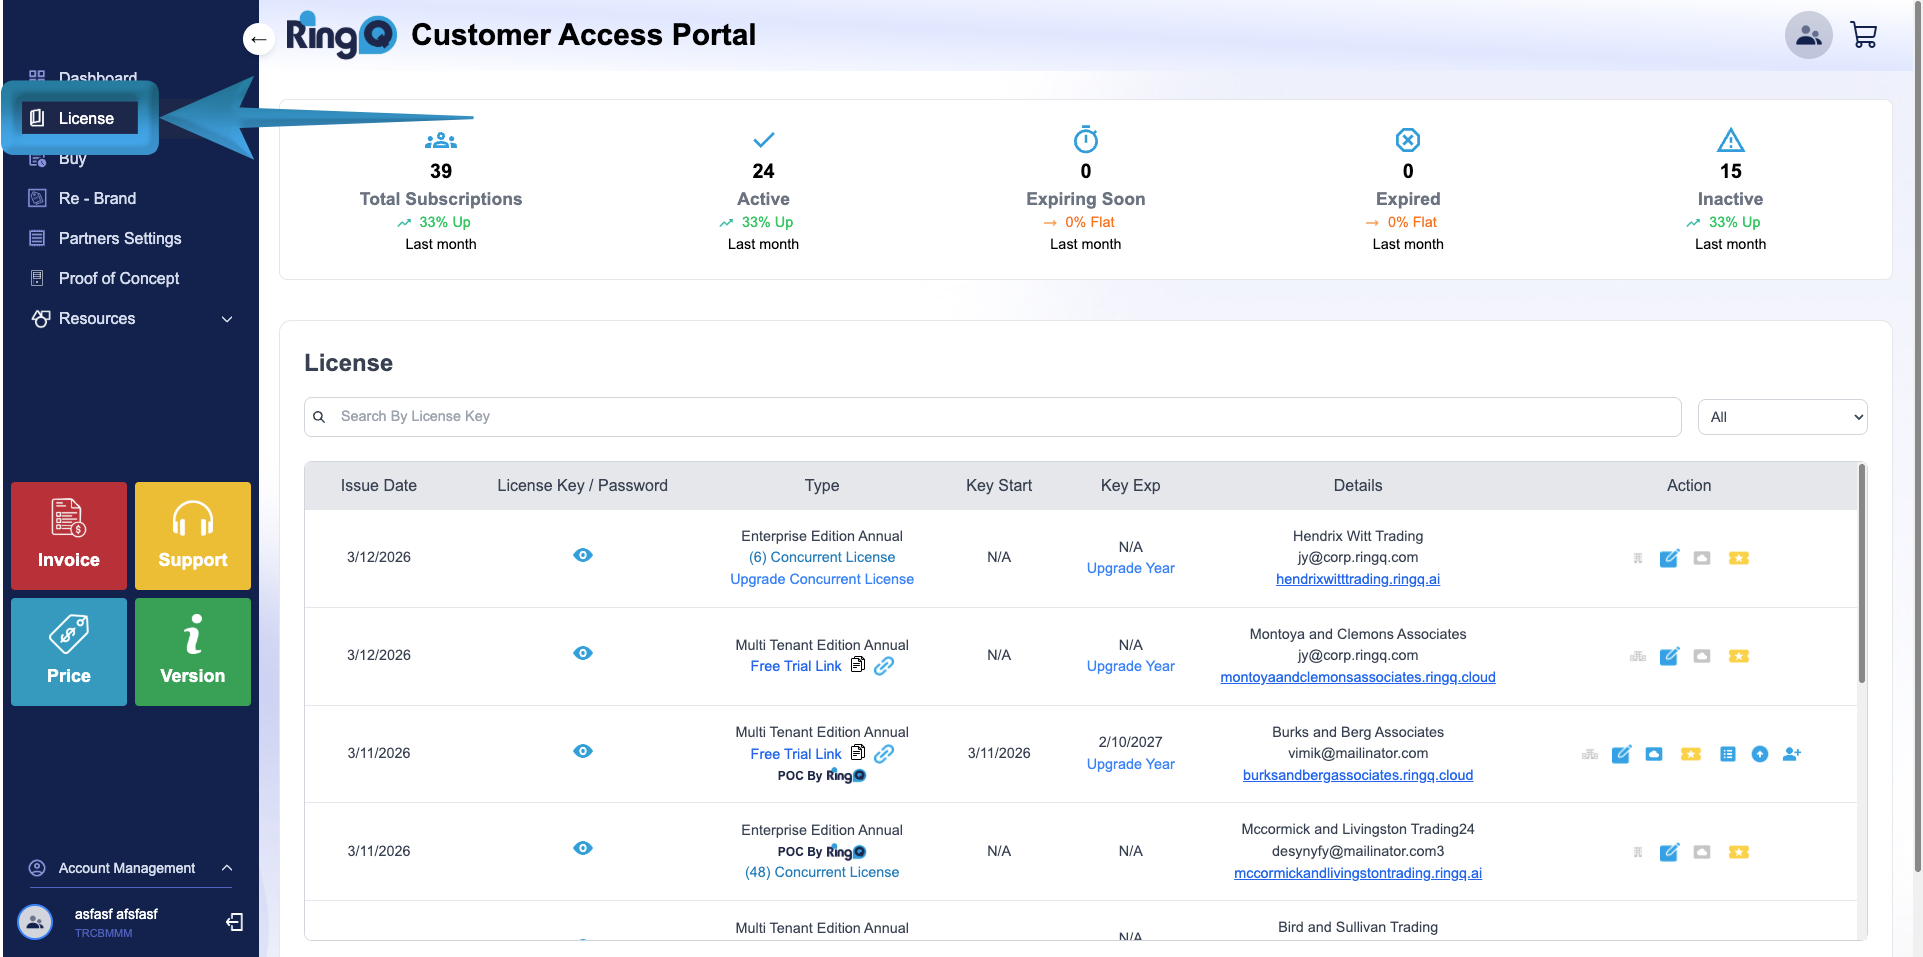
Log in to your RingQ Customer Access Portal dashboard.
From the side menu, click the arrow icon to expand the menu options. 3. Select License.
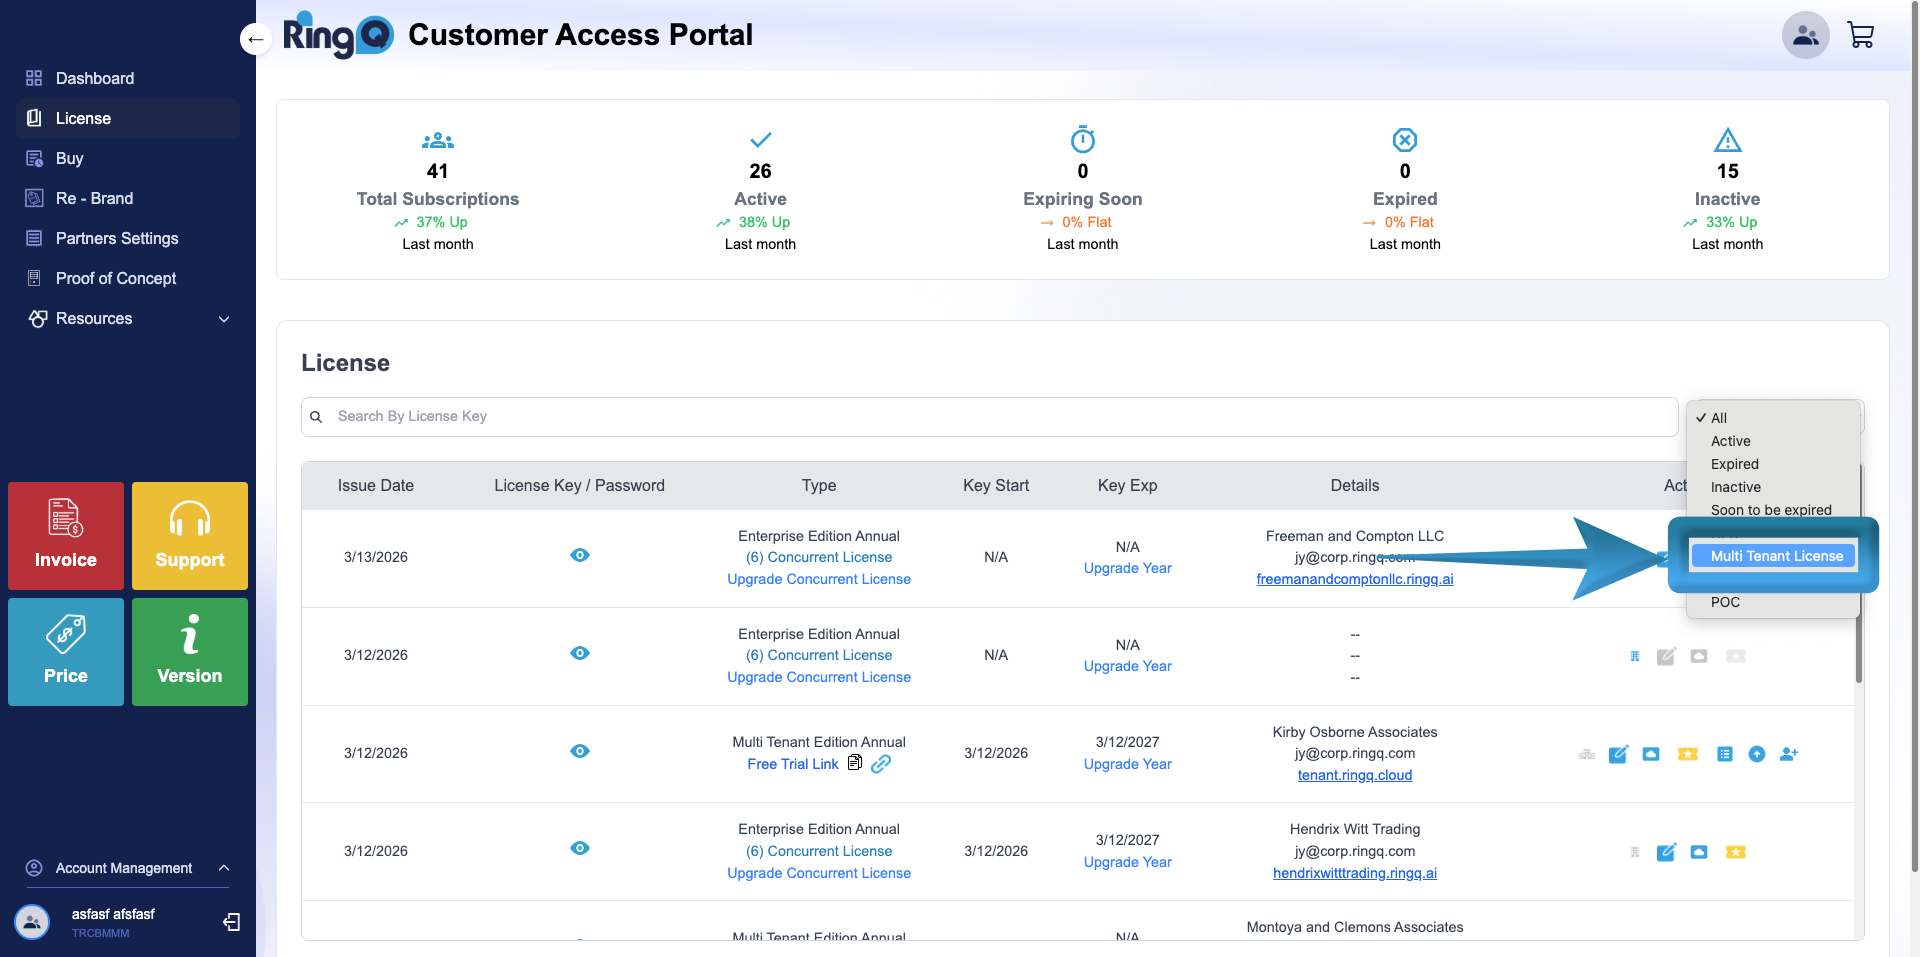
On the License page, locate the dropdown menu in the upper-right corner.
Select Multi-Tenant License from the dropdown list (shown above). The page will automatically filter and display only the available Multi-Tenant license accounts.
Click the multi-tenant account you want to add a tenant to.
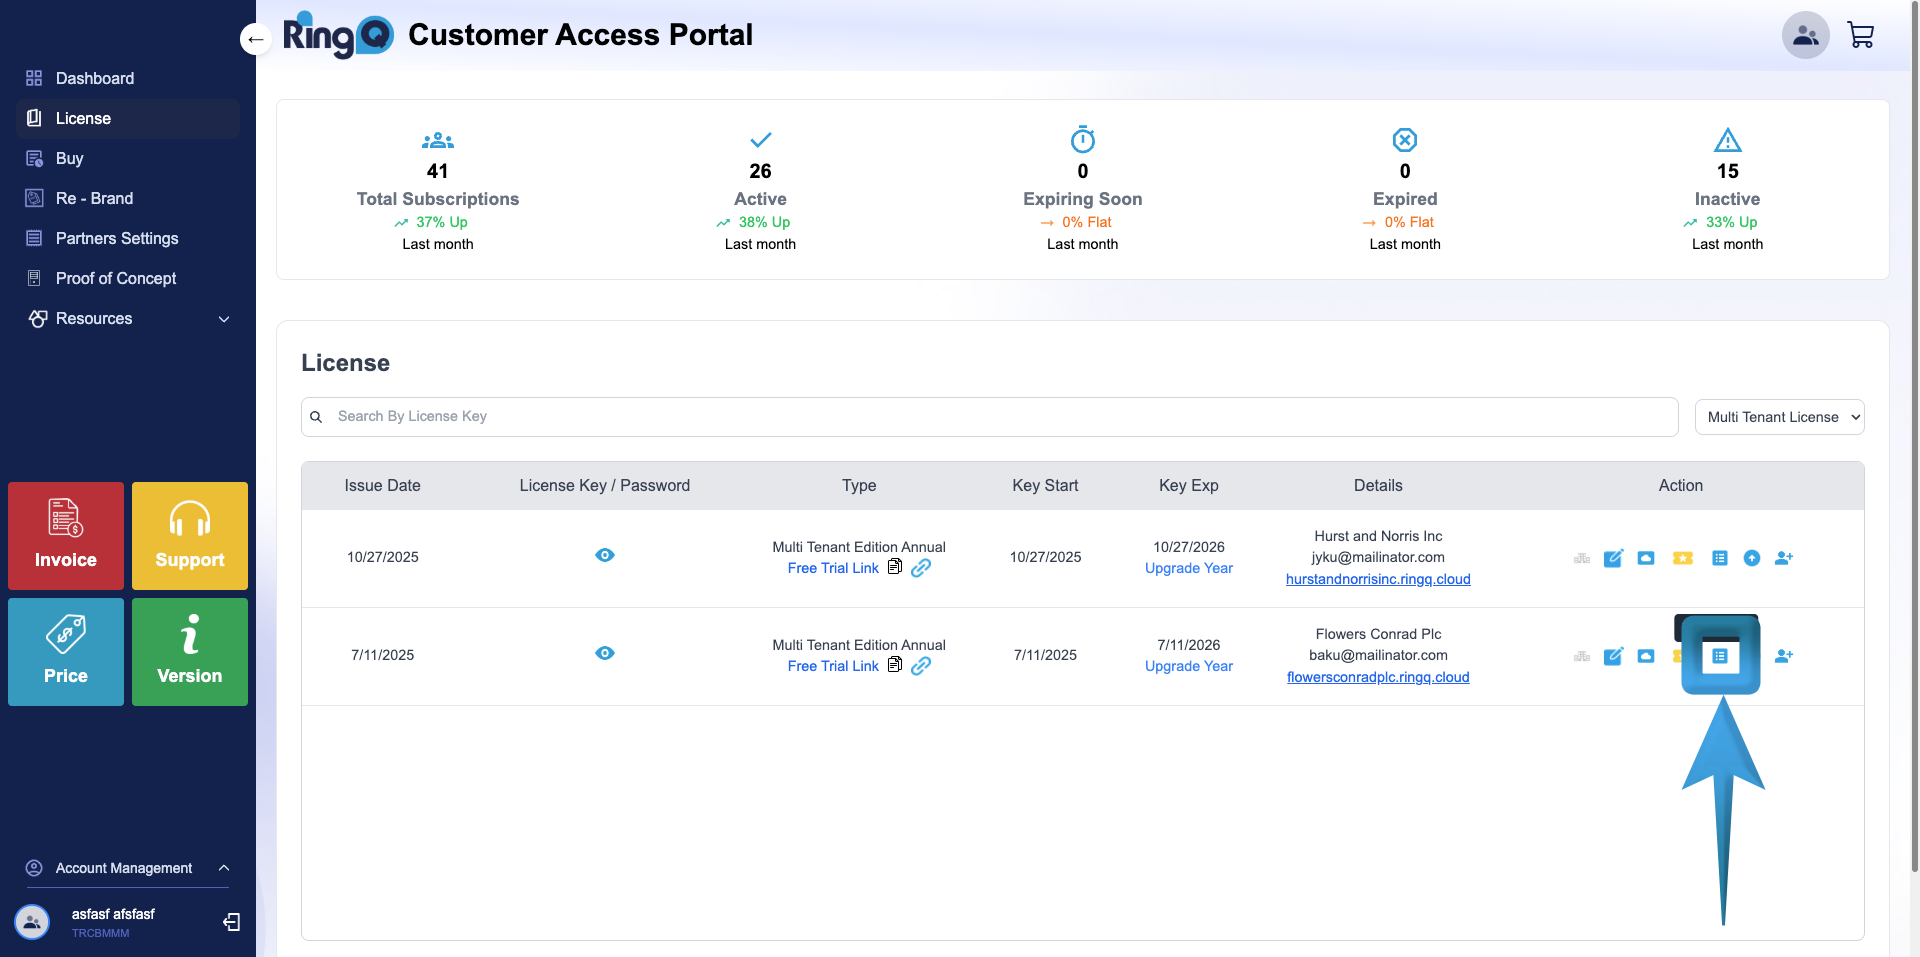
Go to the Actions column.
Click the Tenant List icon.
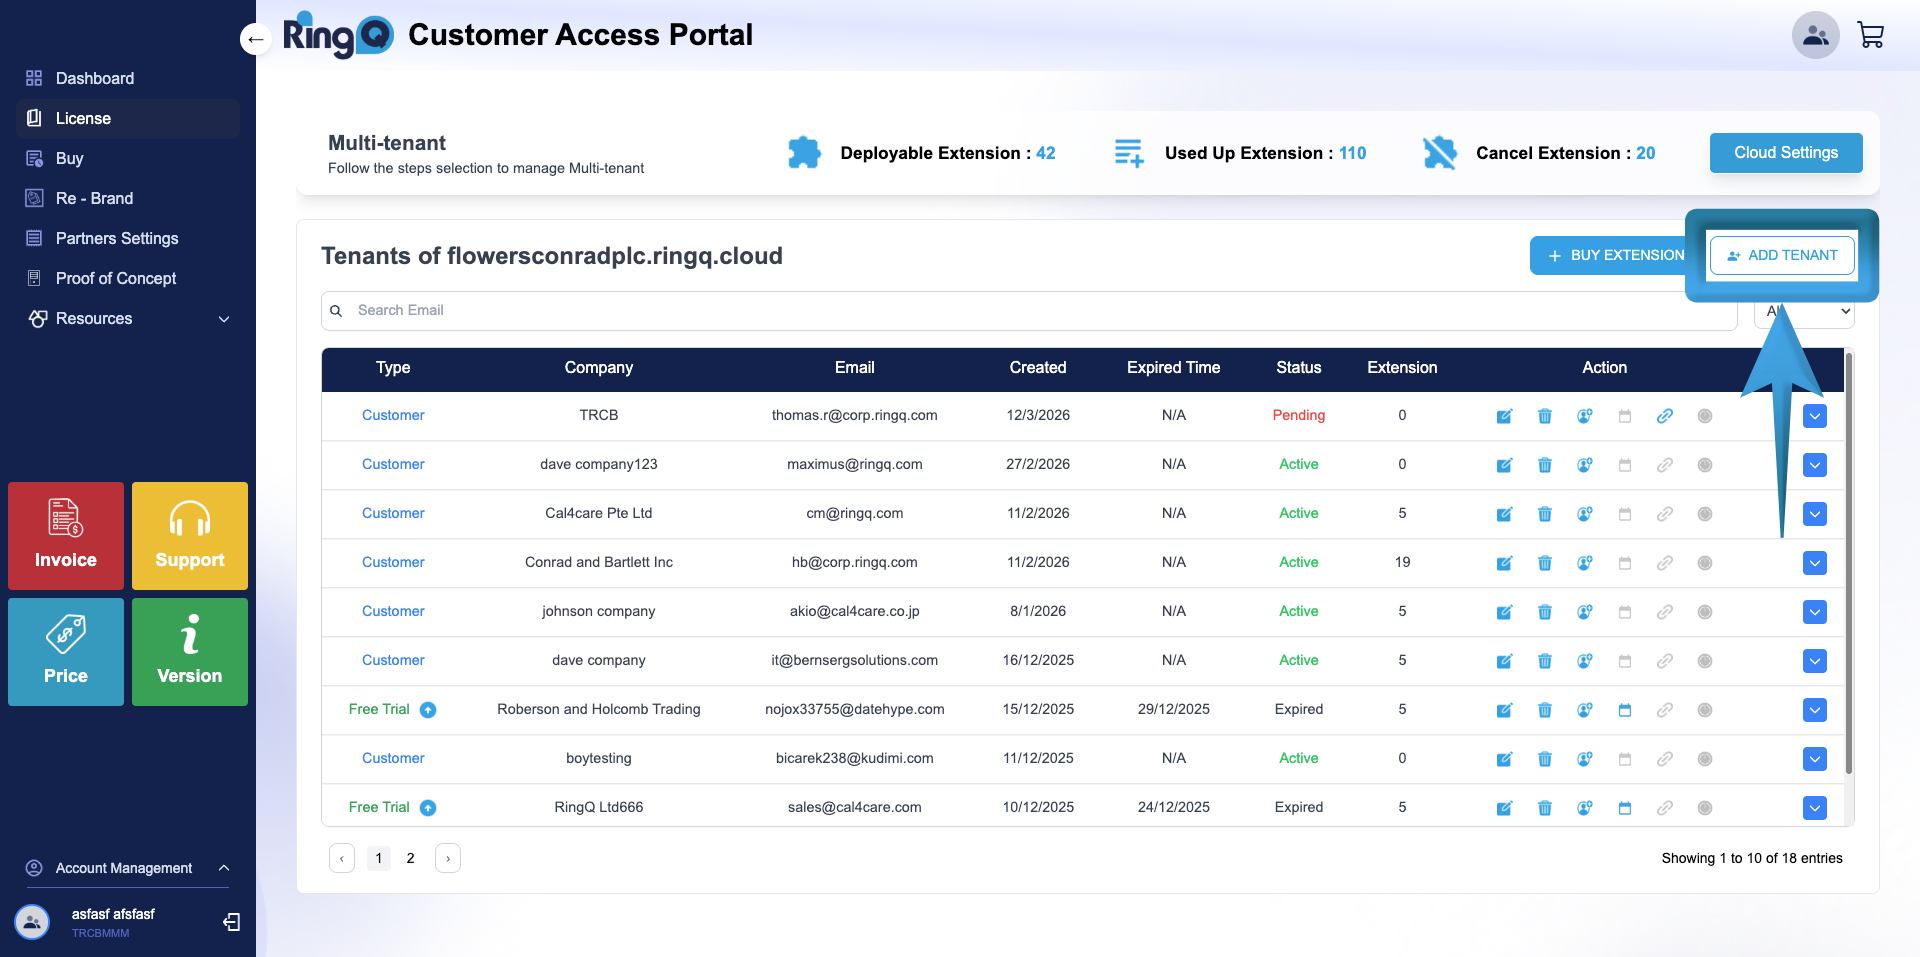
From the Tenant List page, locate the Add Tenant button in the upper-right corner.
Click Add Tenant.
You will be redirected to the Create Tenant page.
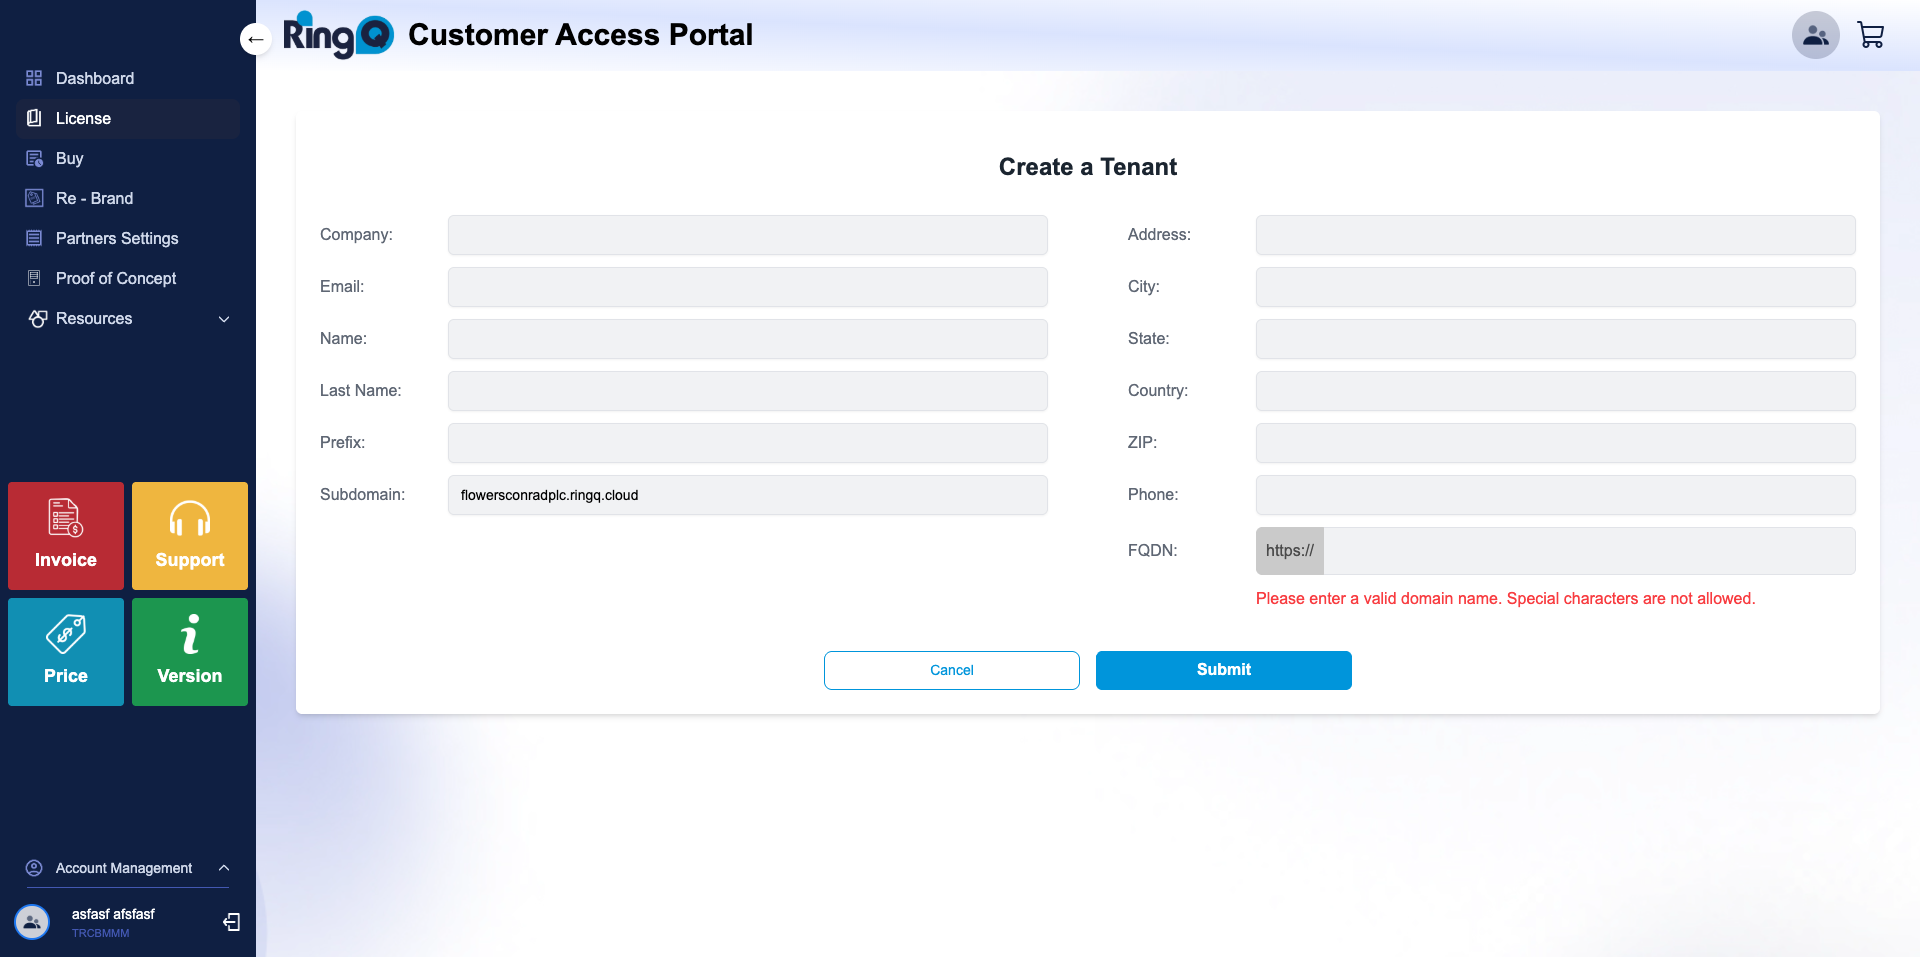
Fill out the form:
Ensure that all required fields are filled out correctly to avoid issues during tenant creation.
Click Submit.
A confirmation message will appear: “Processed! Successfully Created a Tenant.” Click OK.
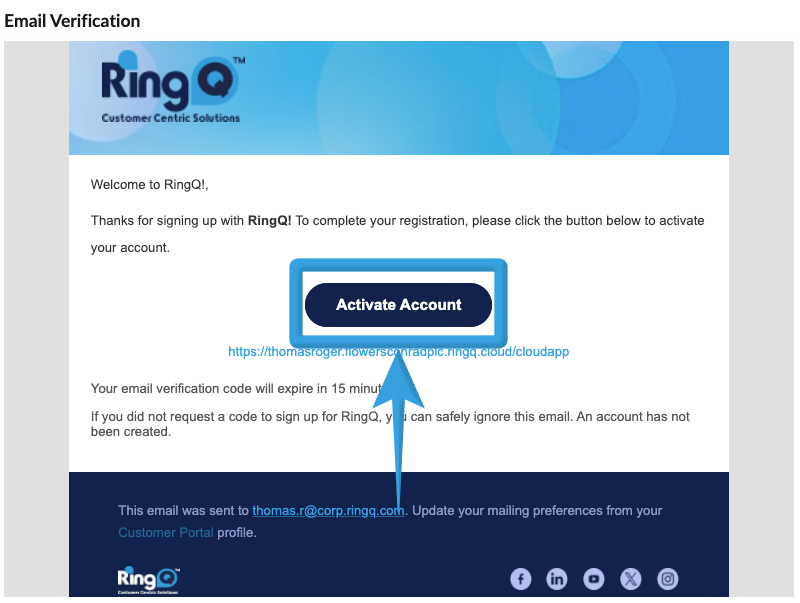
You will receive an email verification message to activate the tenant account.
Open the email and click the instance activation link.
Once activated, the new tenant instance will be ready for use, and you can begin configuring users, extensions, and system settings for the new environment.
