Integrating Zoho Desk with RingQ
Integrating Zoho Desk with RingQ helps businesses centralize customer communication and improve support efficiency. By connecting your help desk platform with your business phone system, support teams can manage calls more effectively, access customer information instantly, and deliver faster, more personalized assistance.
This guide will walk you through the process of integrating Zoho Desk with RingQ, including setup requirements, configuration steps, and the key features available after the integration is complete. From automatic ticket creation and click-to-call functionality to improved call tracking and customer interaction management, this integration enables your team to streamline workflows and enhance the overall customer support experience.
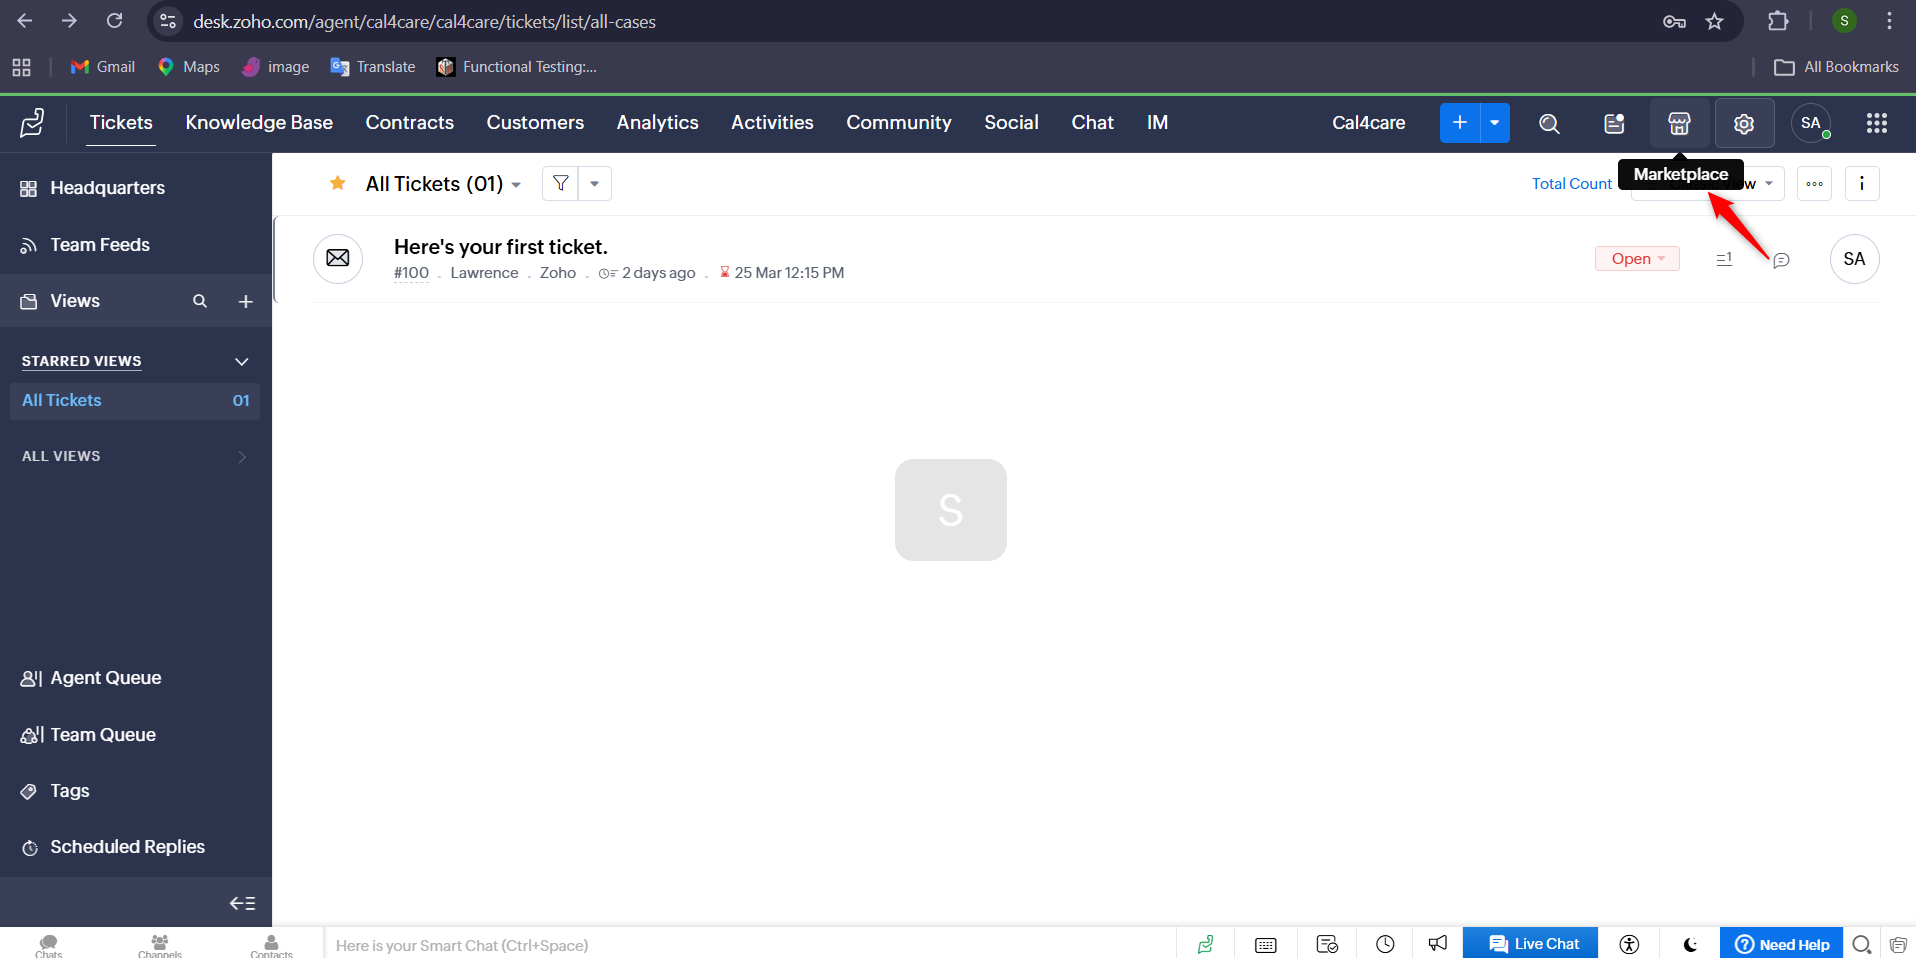
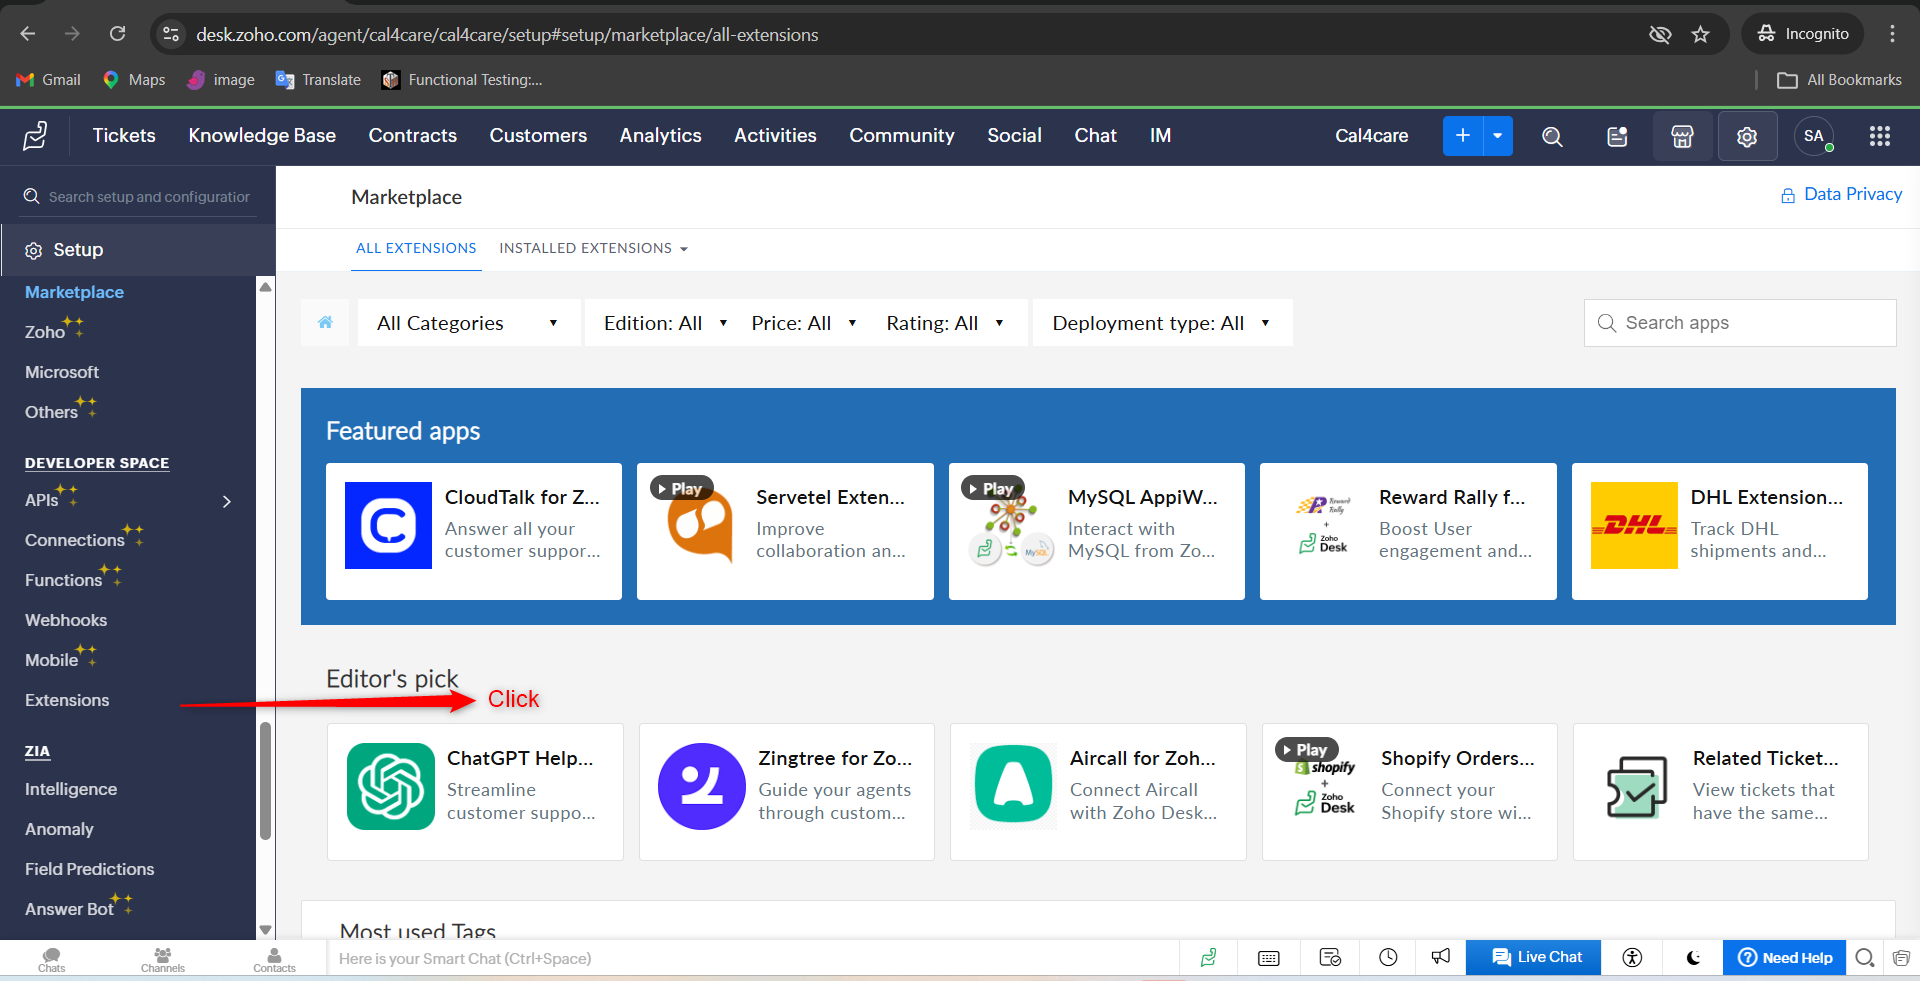
Navigate to Setup → Developer Space → Extensions.
Click Sigma.
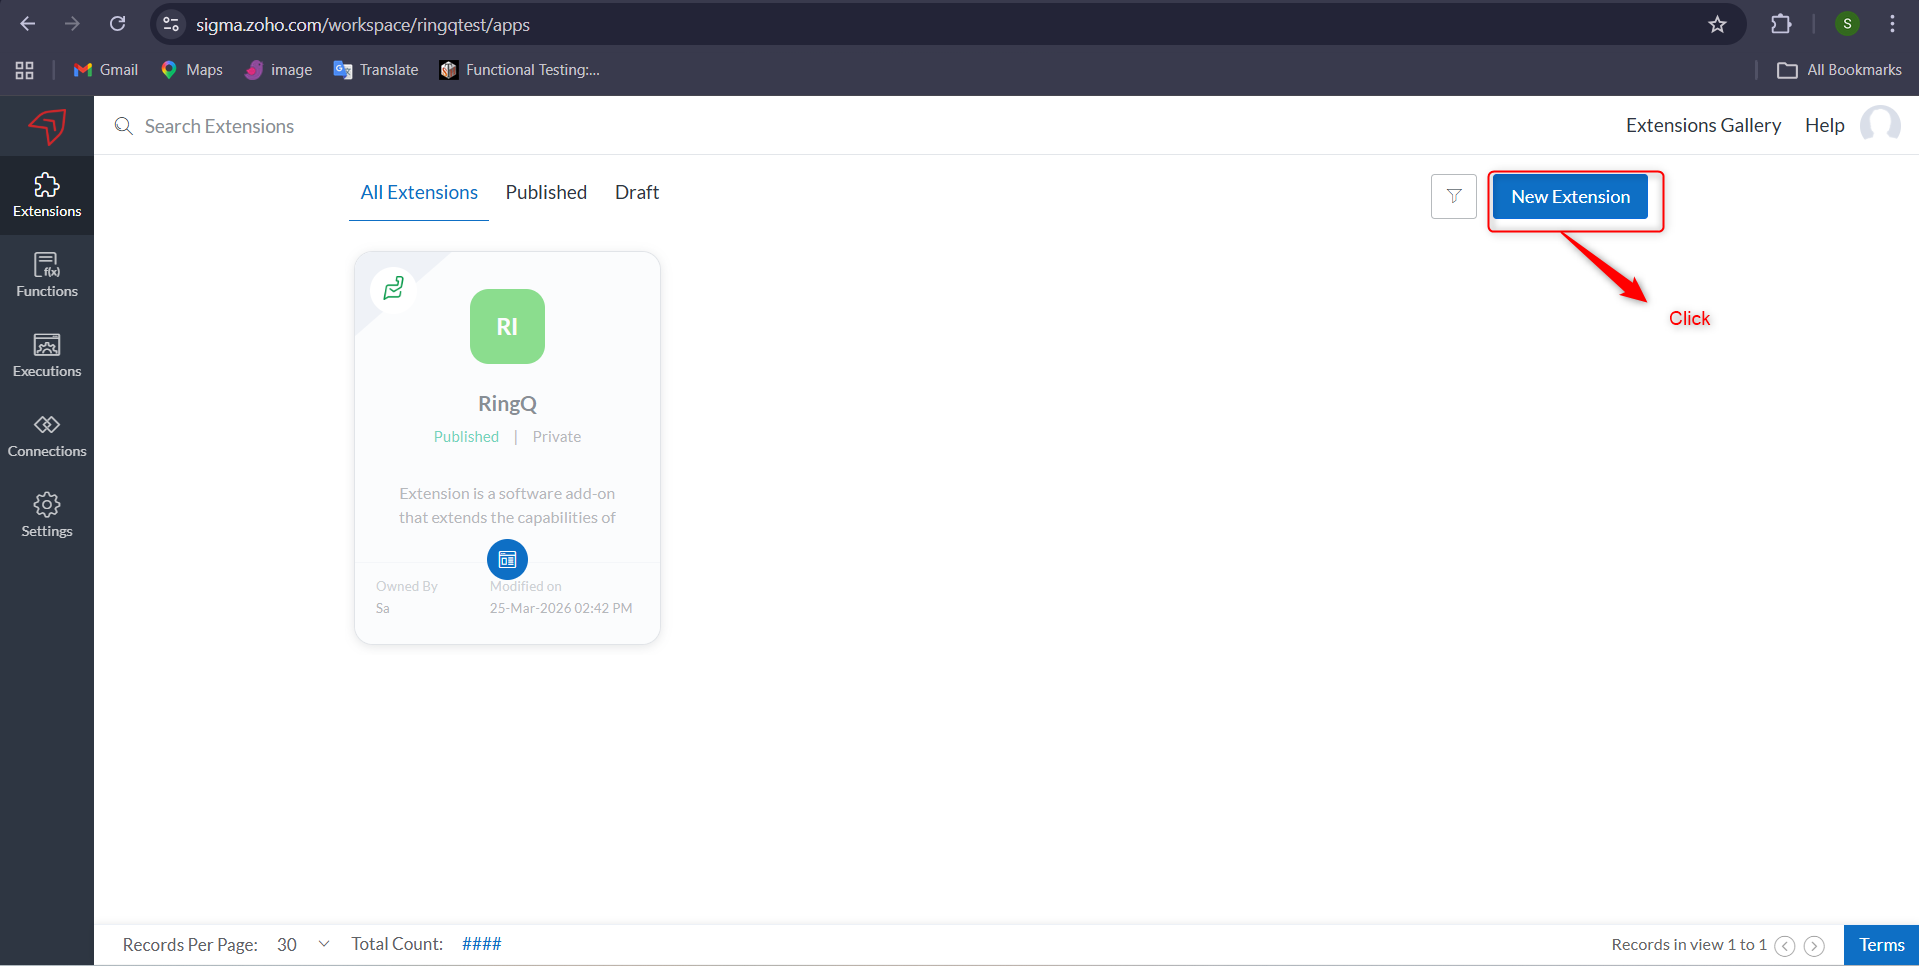
A new Sigma webpage will open. Click New Extension.
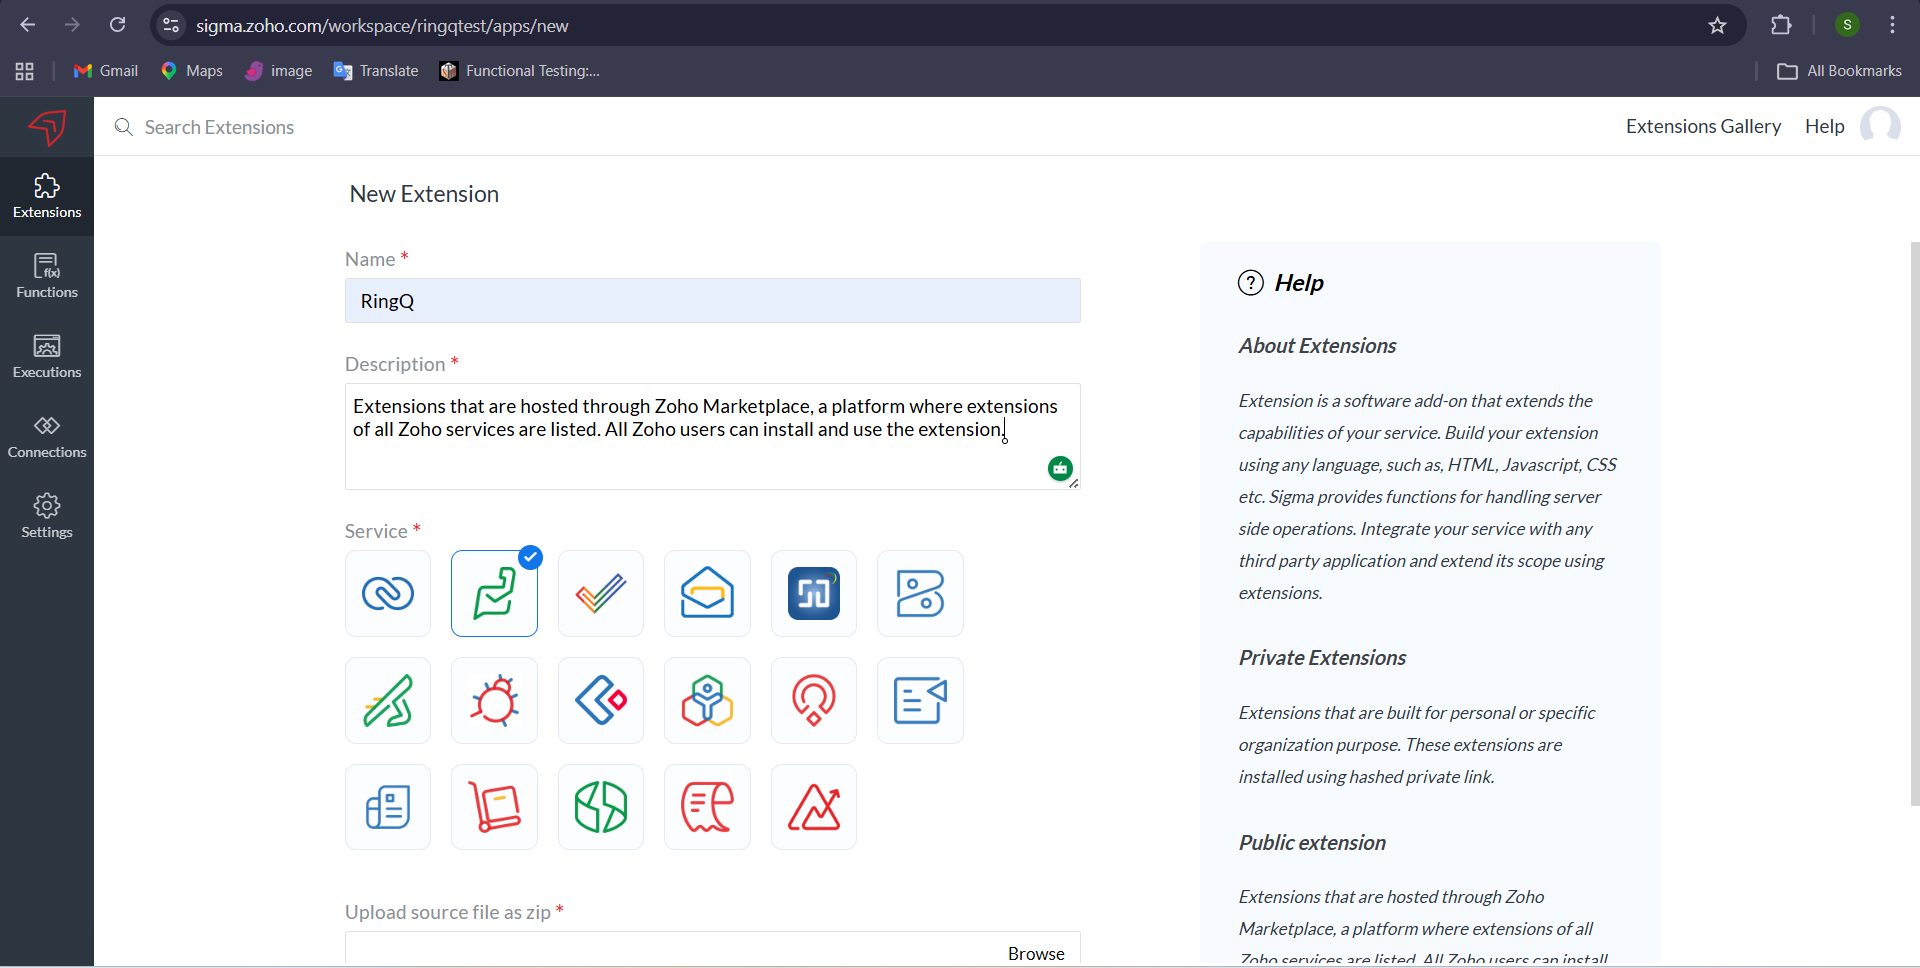
Enter the extension name, add a description, and select Service on Zoho Desk.
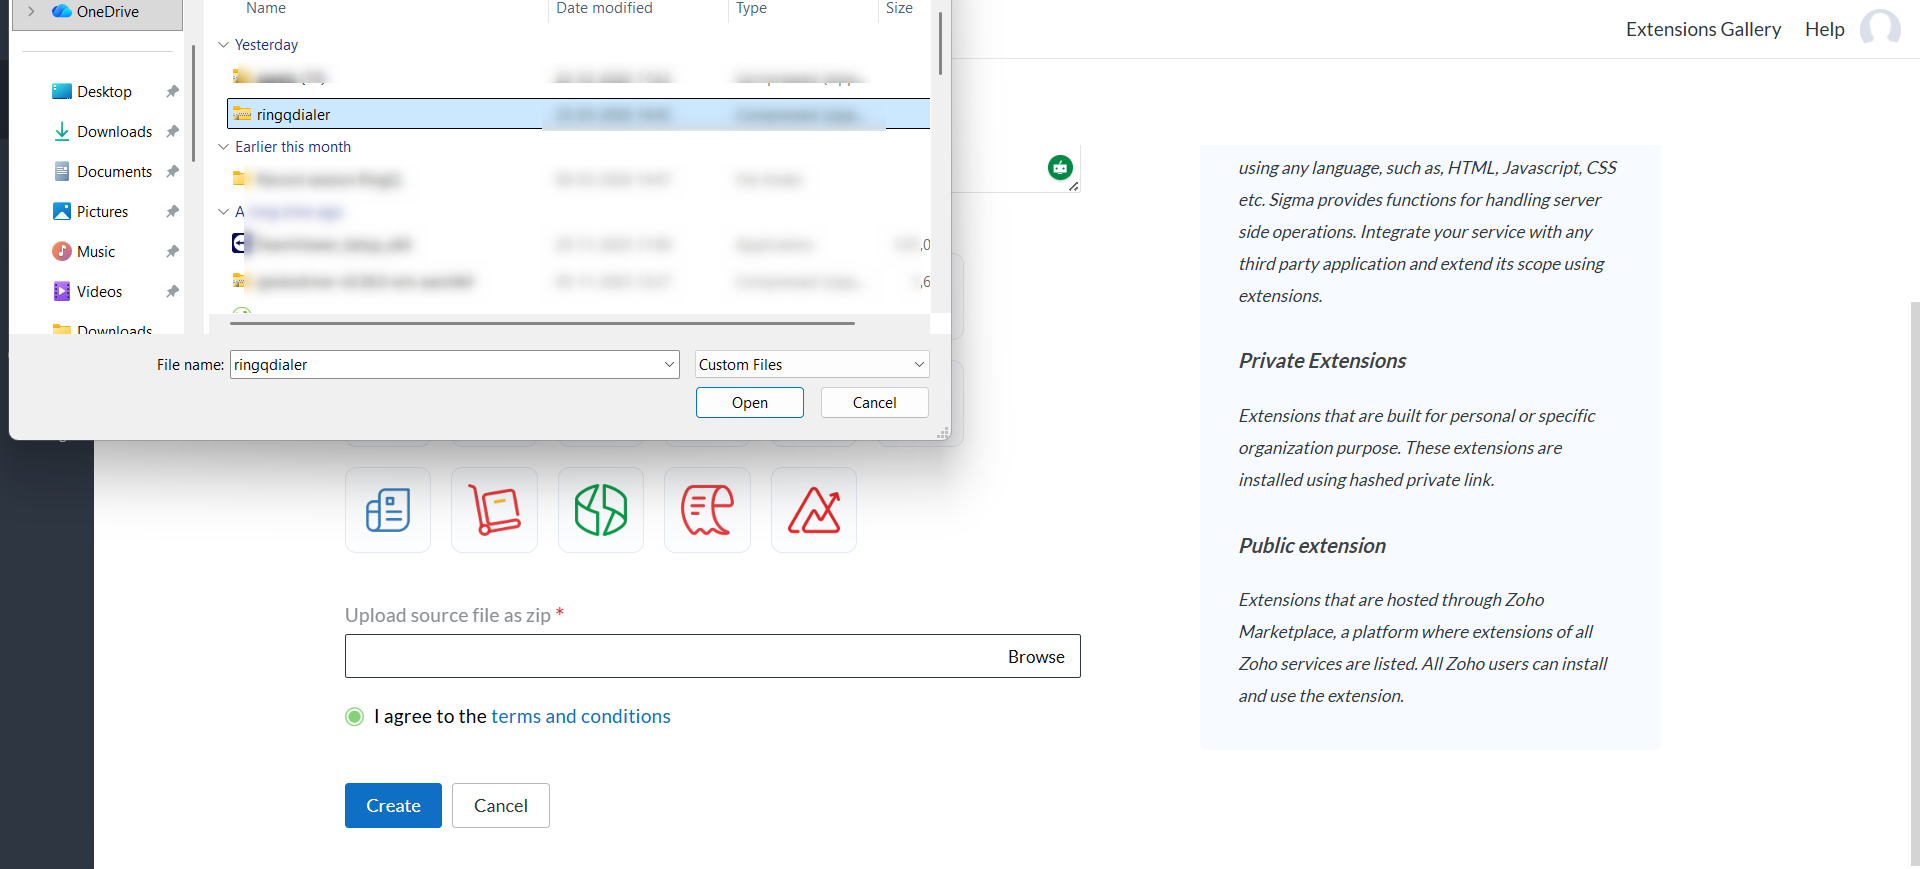
In the Upload Zip File section, upload the ZIP file provided by our team using the Browse button.
Click the Open button, select the checkbox to accept the terms and conditions, then click Create.
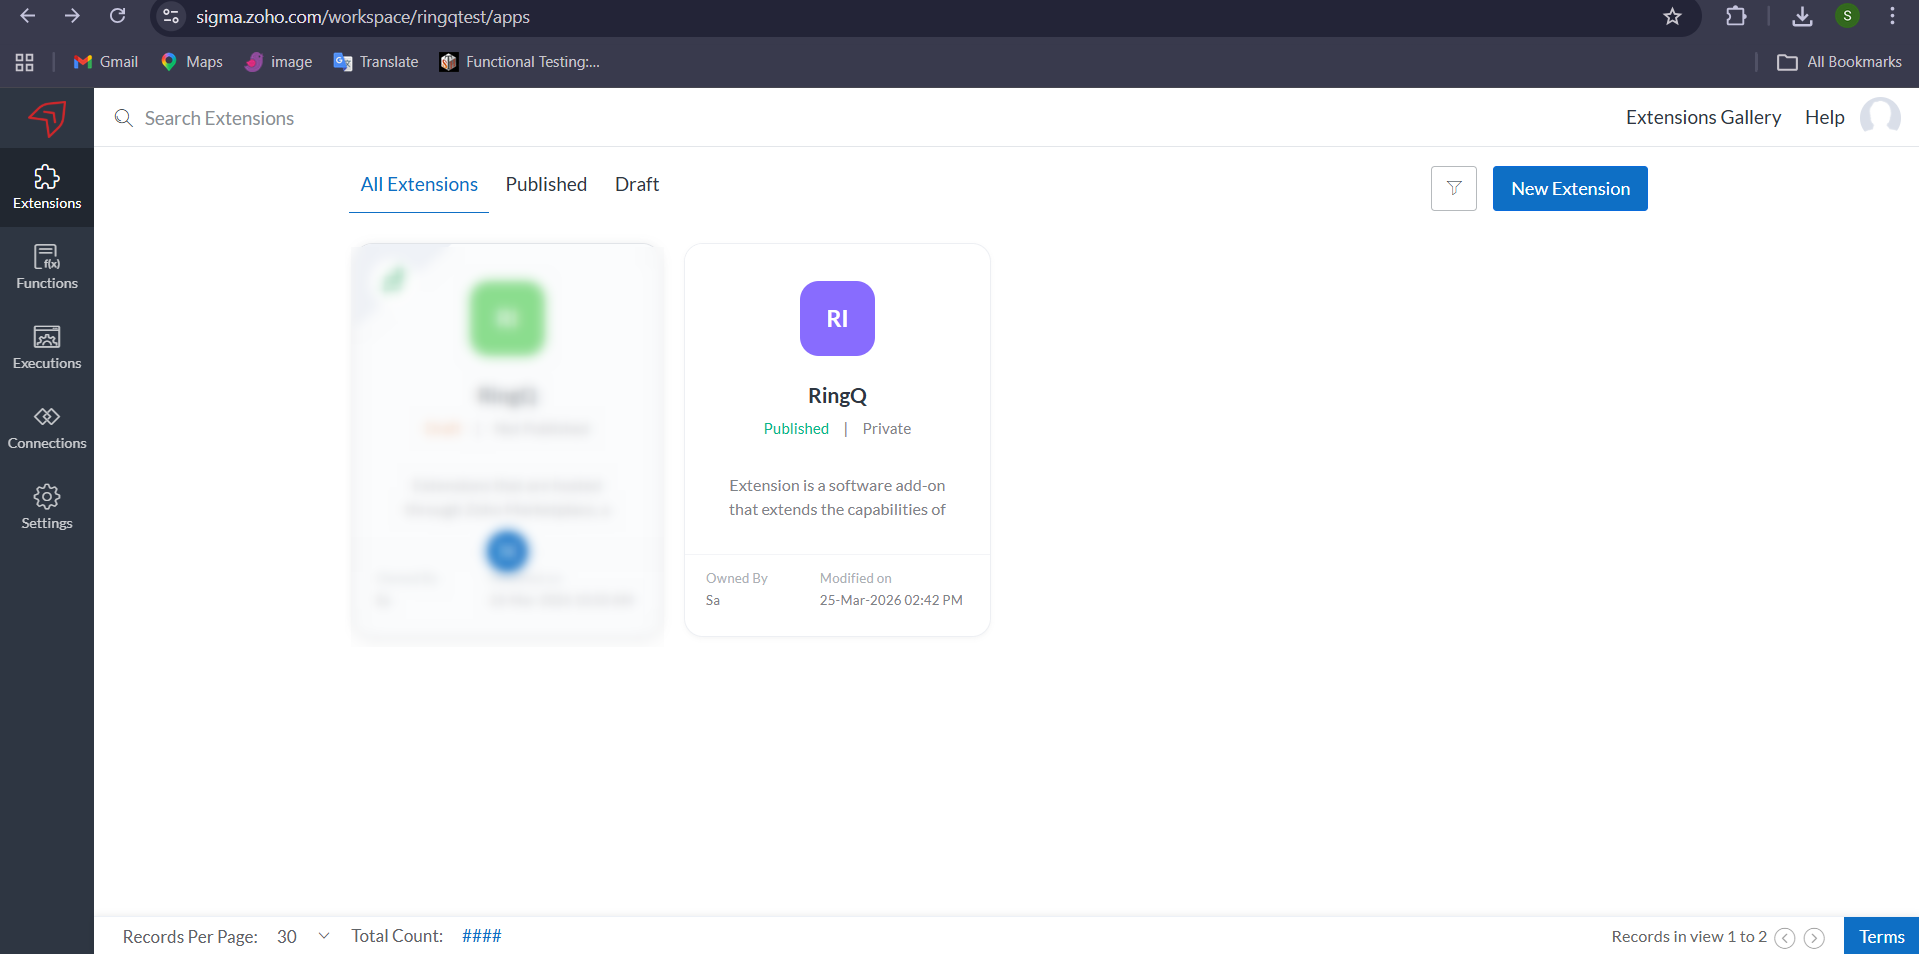
Click Extensions to view the created RingQ extensions.
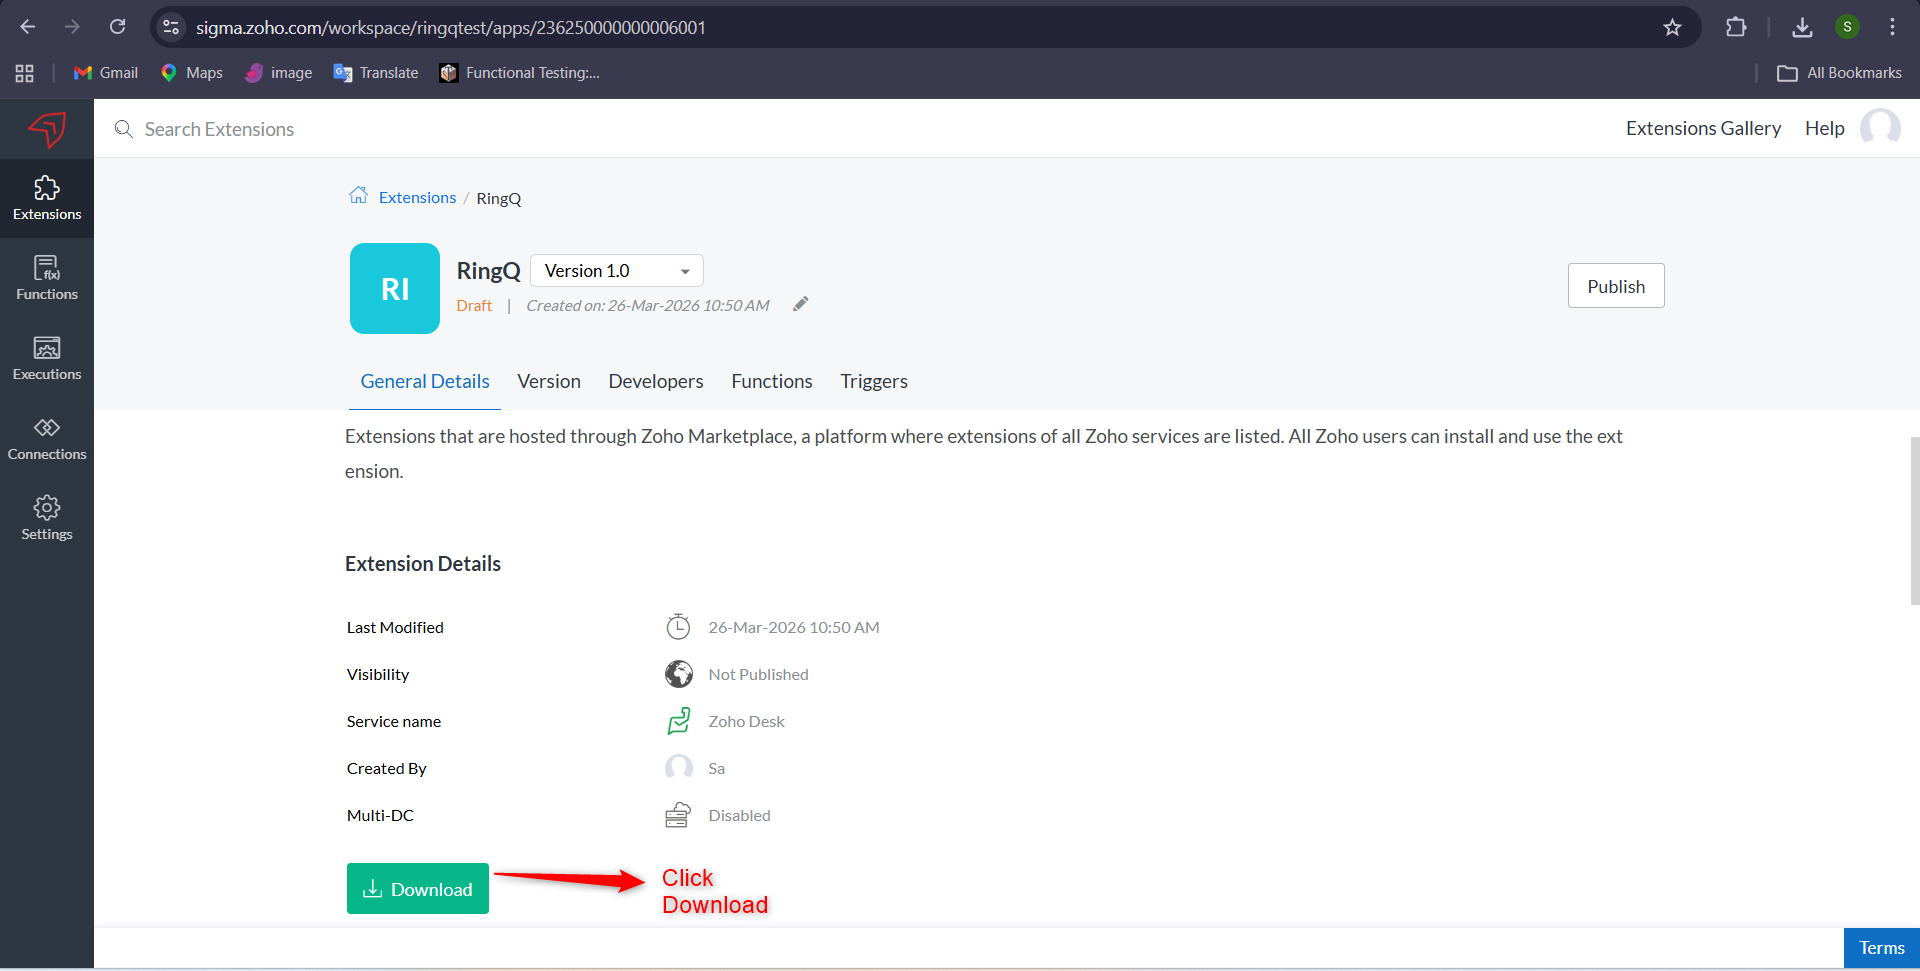
Open the RingQ extension to view the general details, then click Download.
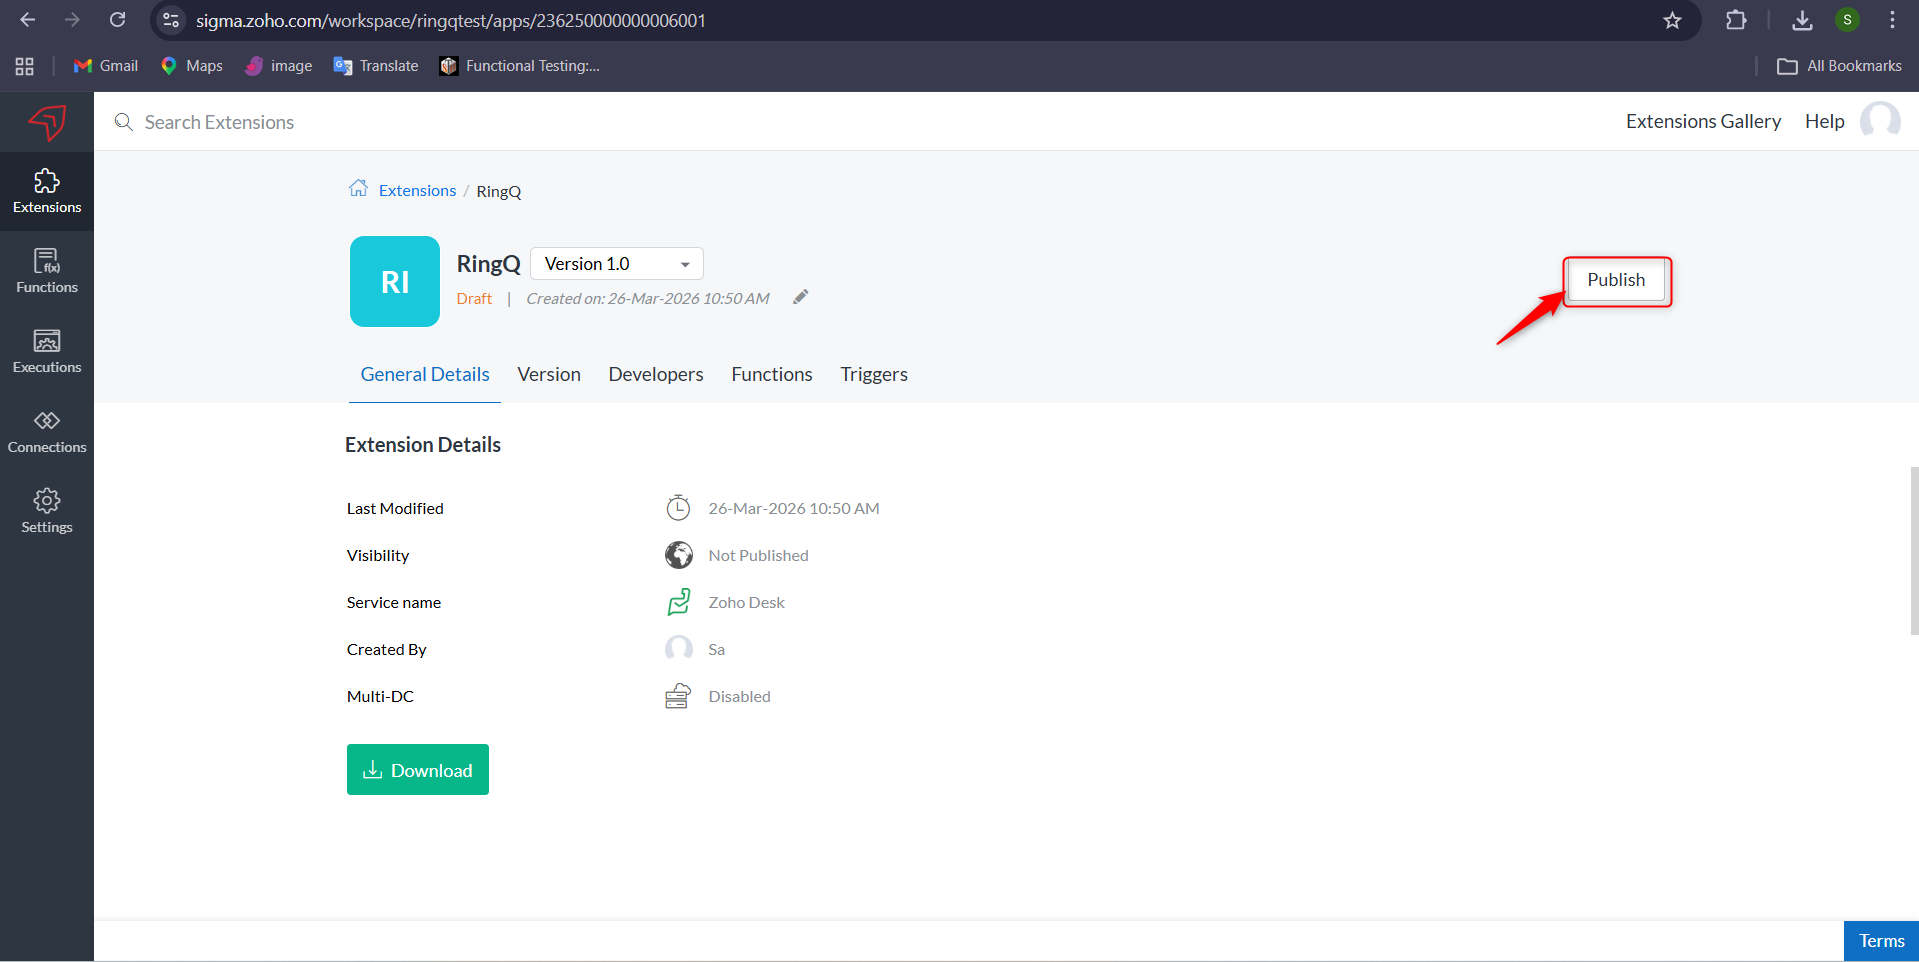
After downloading the ZIP file, click Publish.
Review the details in the popup window and click Publish.
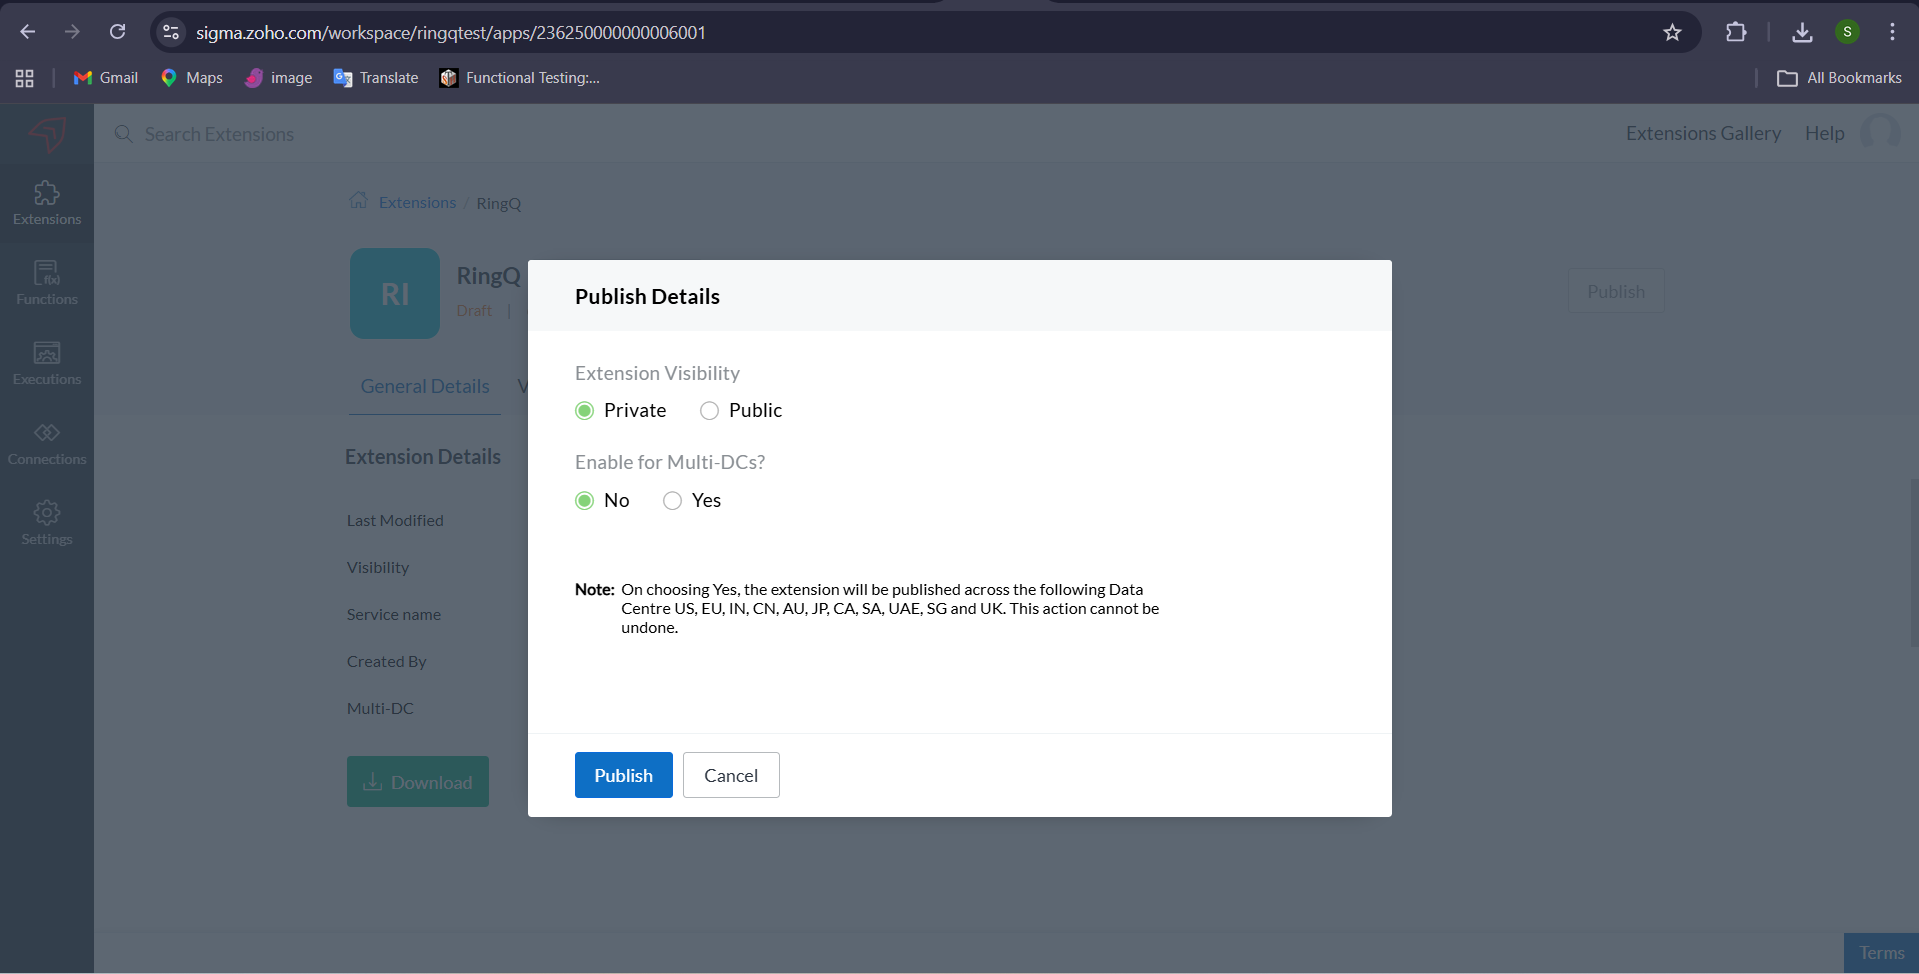
Create a new installation URL and copy the link.
Open a new browser tab and paste the copied link.
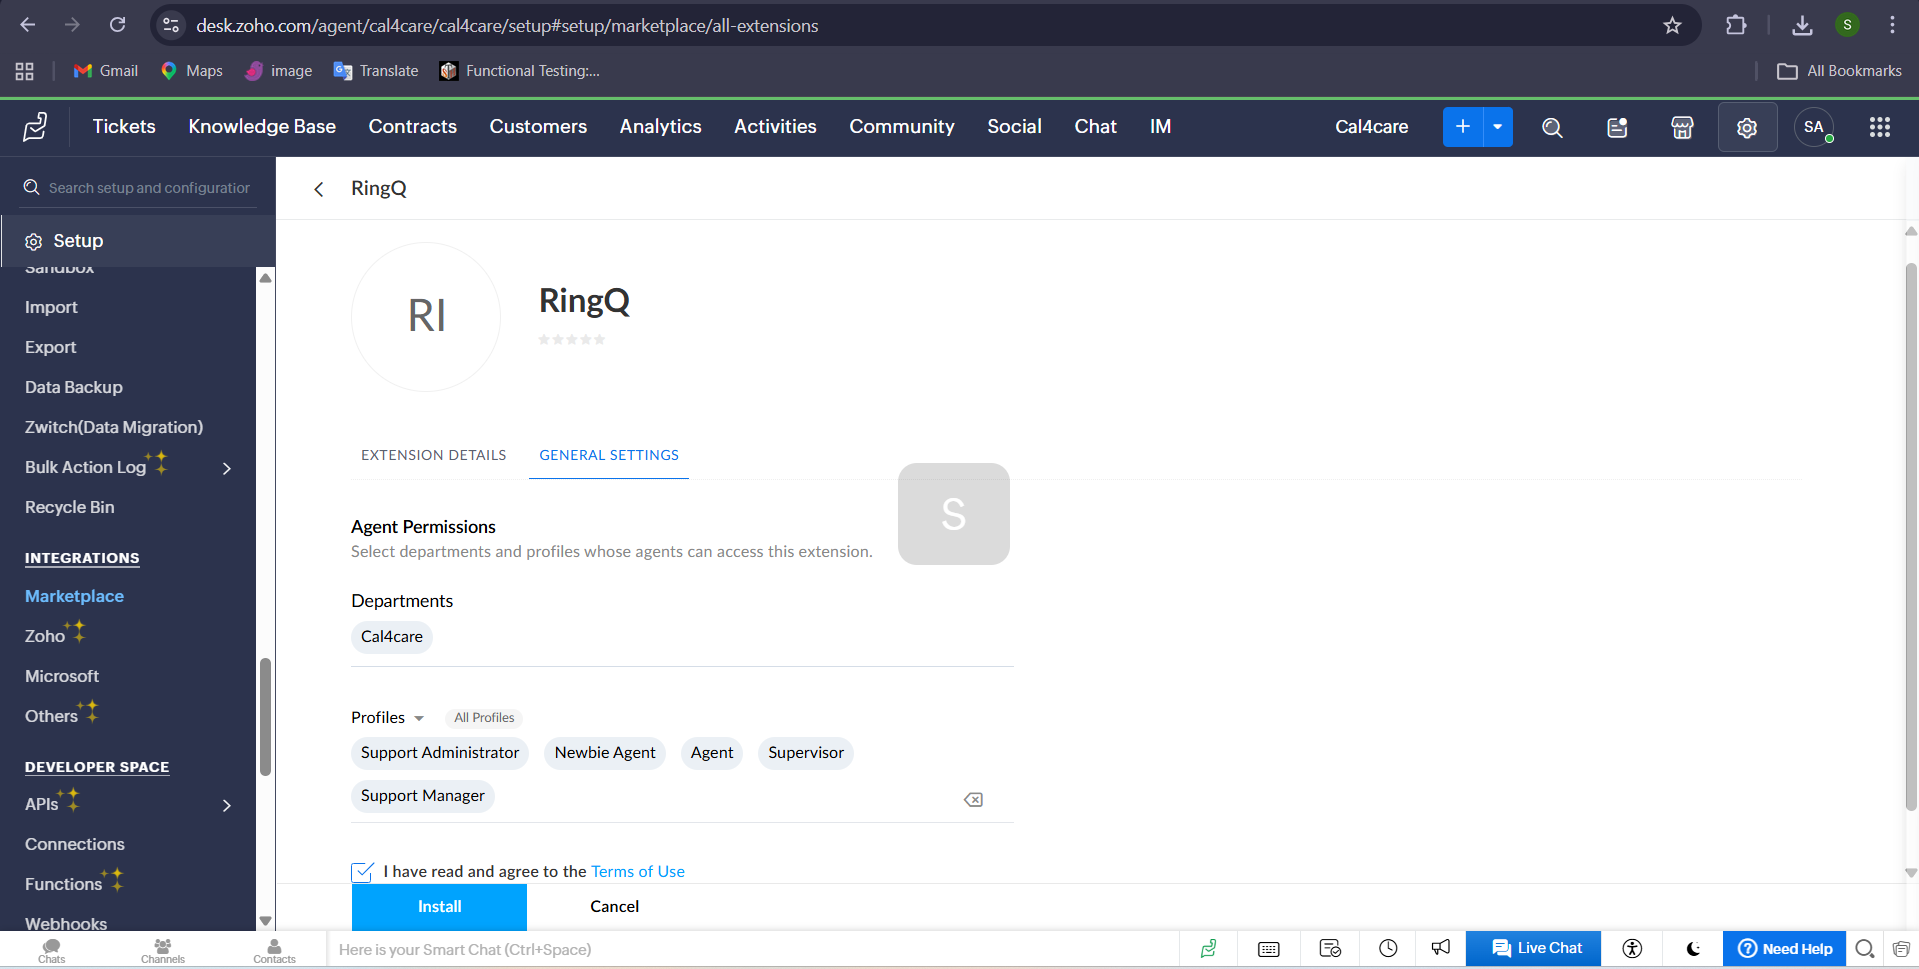
The RingQ extension installation page will appear. 16. Select the required departments and profiles, enable the necessary permissions, and click Install.
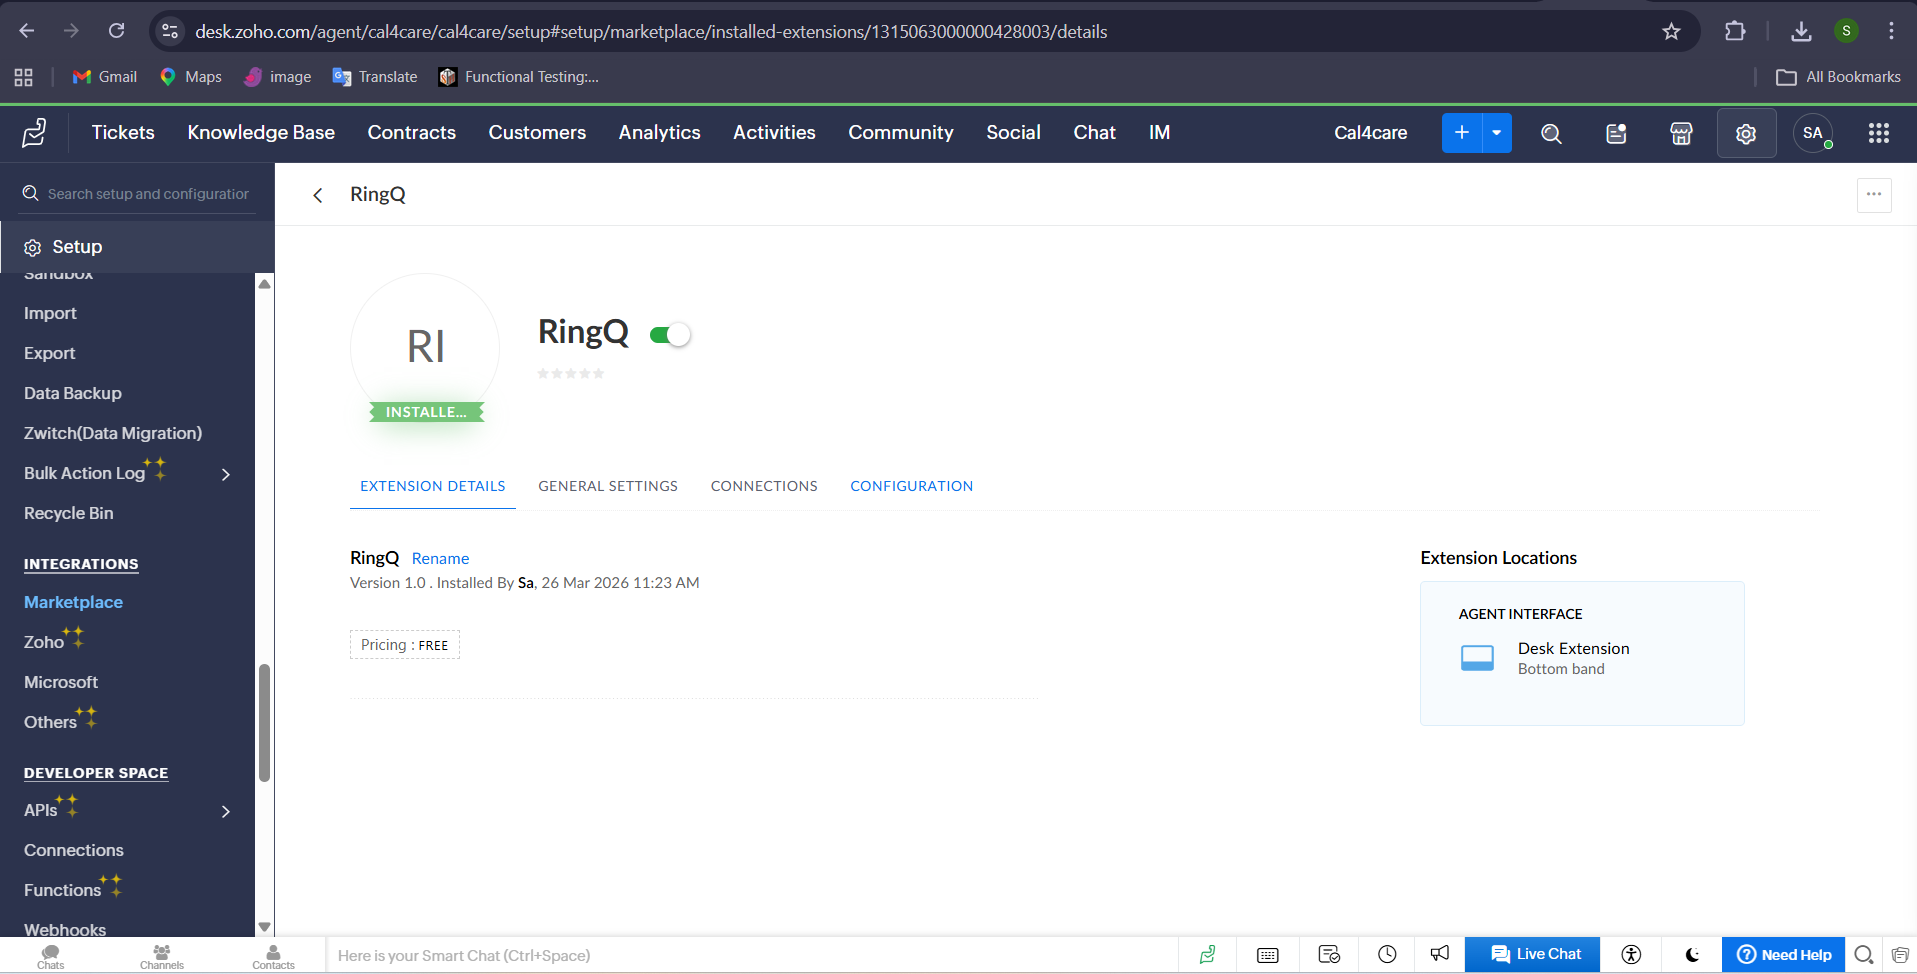
After installation, open the RingQ page and click Configuration.
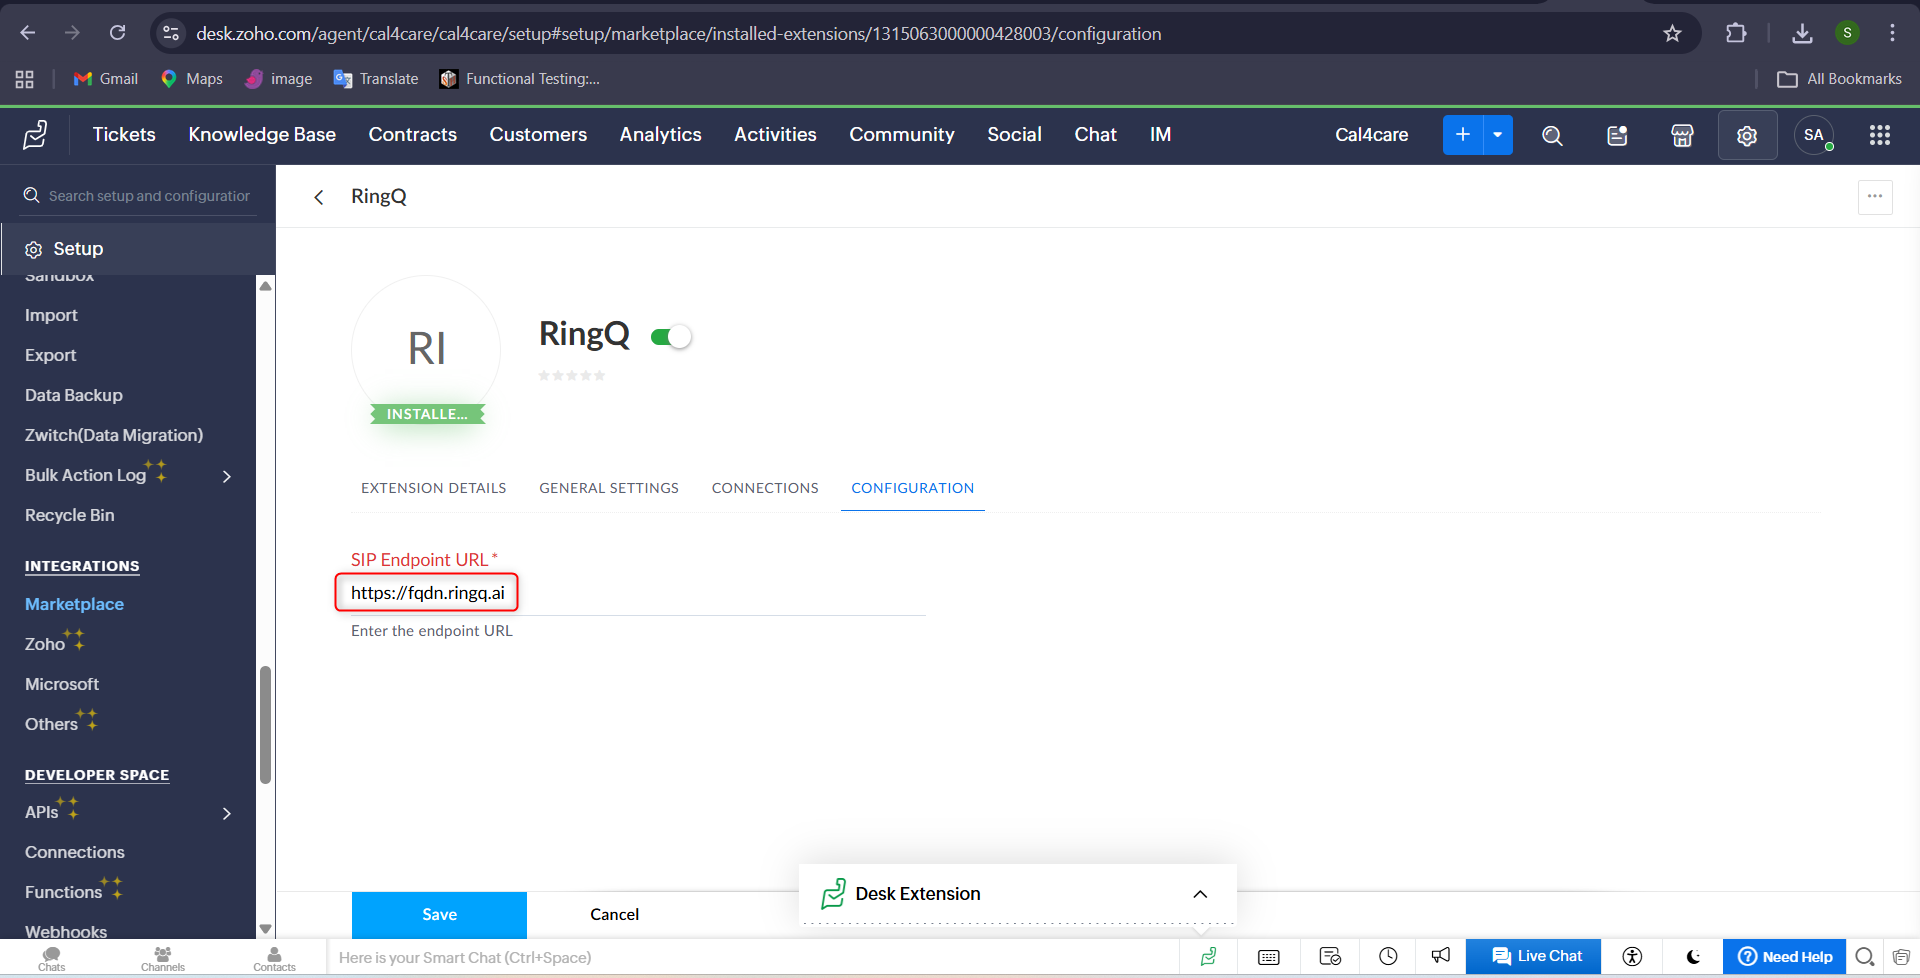
Enter your RingQ URL in the SIP Endpoint URL field.
Click Save.
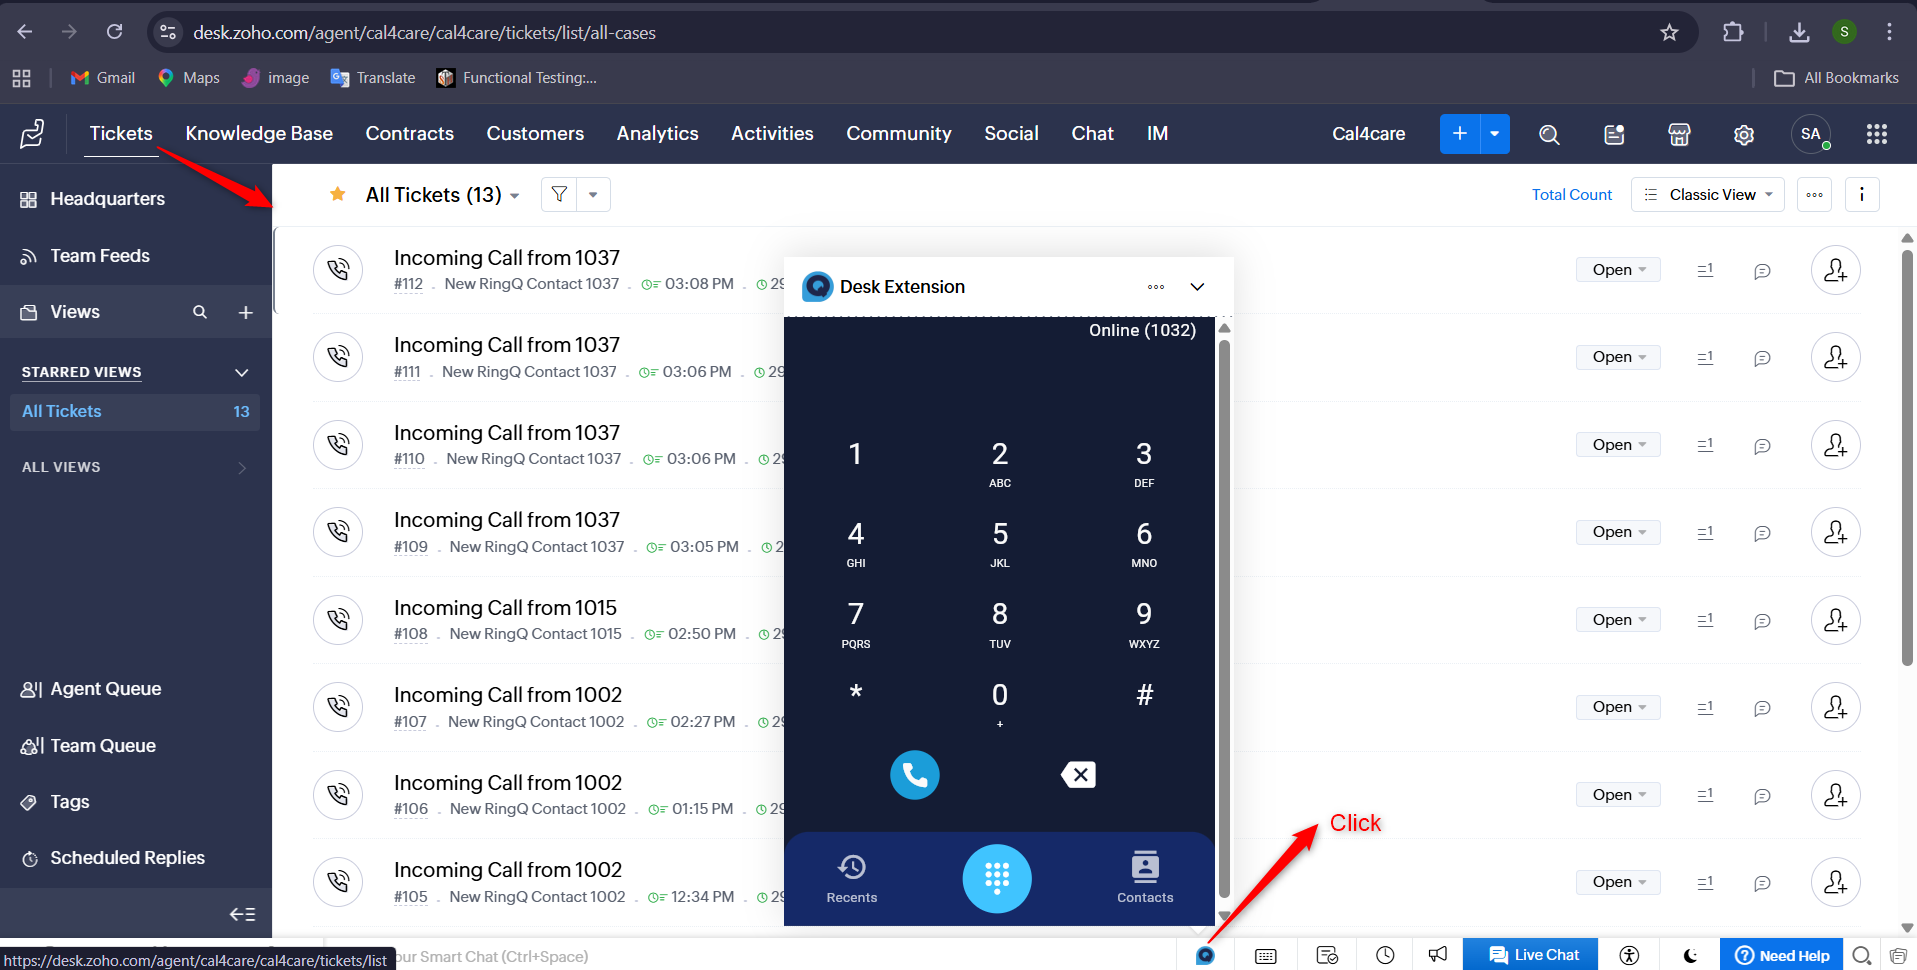
Go to Tickets > RingQ Extension.
Open a new browser tab and navigate to https://api-console.zoho.com/.
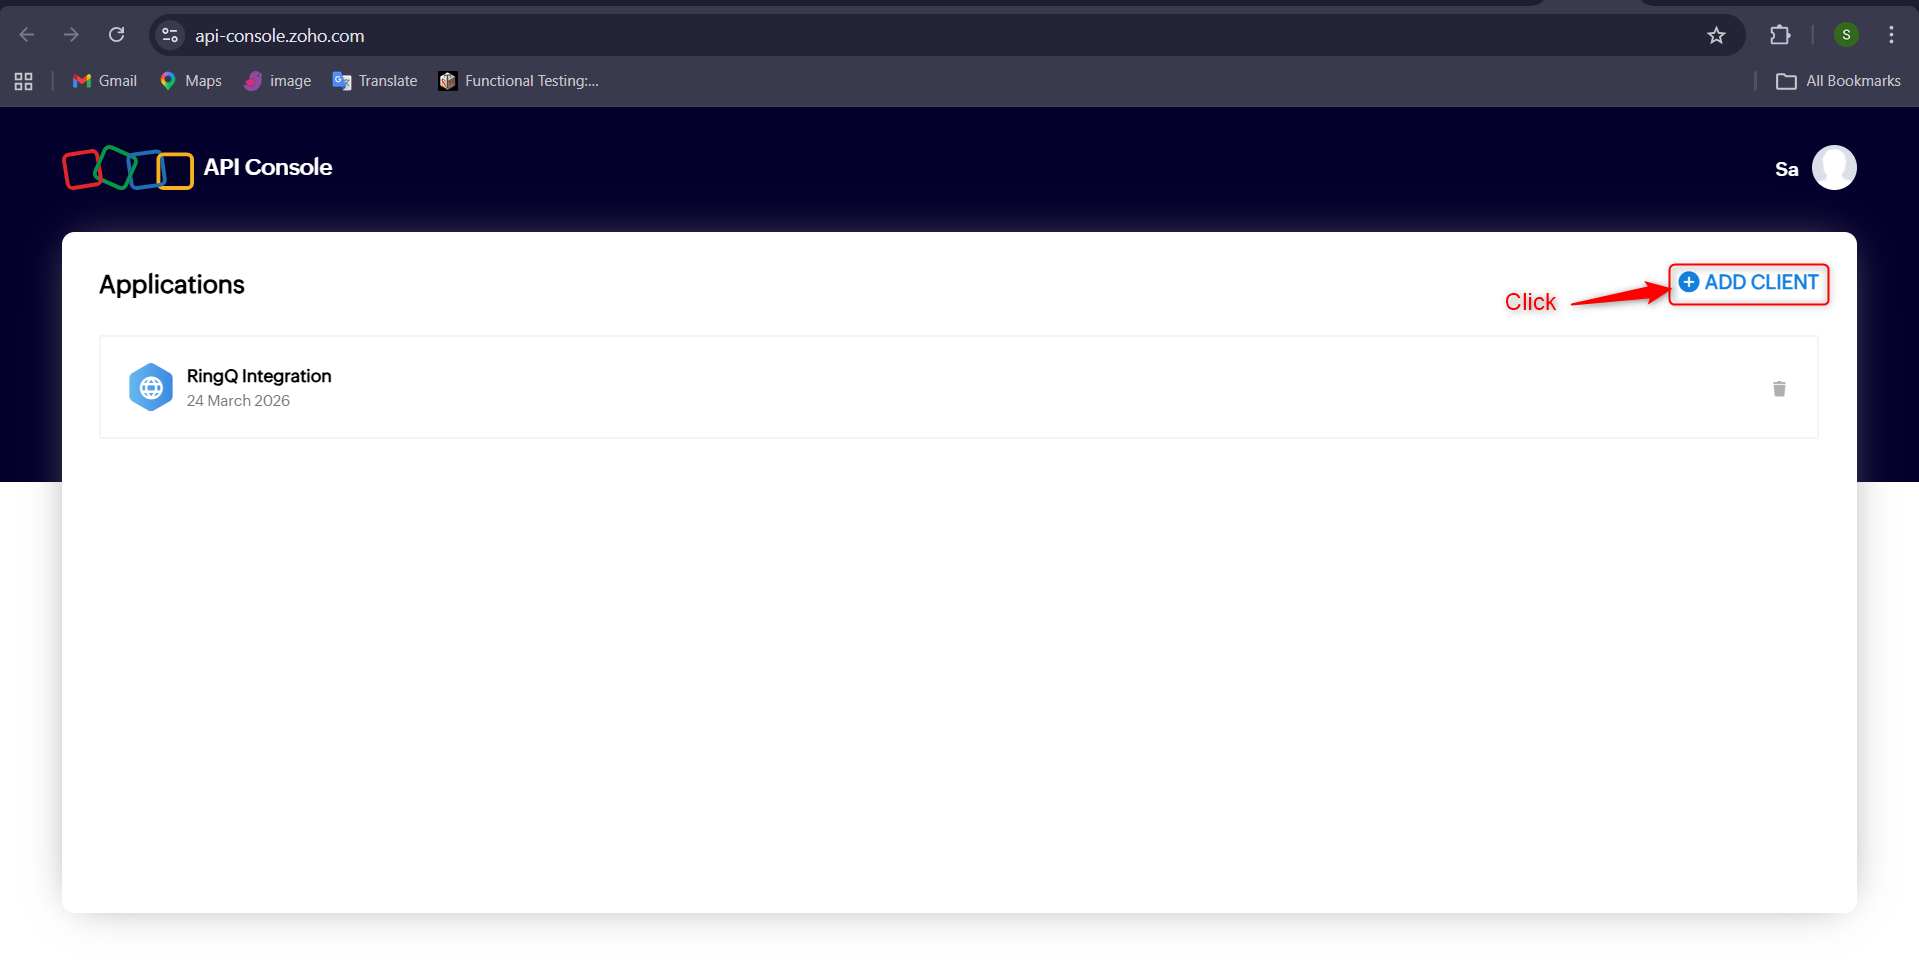
Open the Zoho API Console and click the Add Client button.
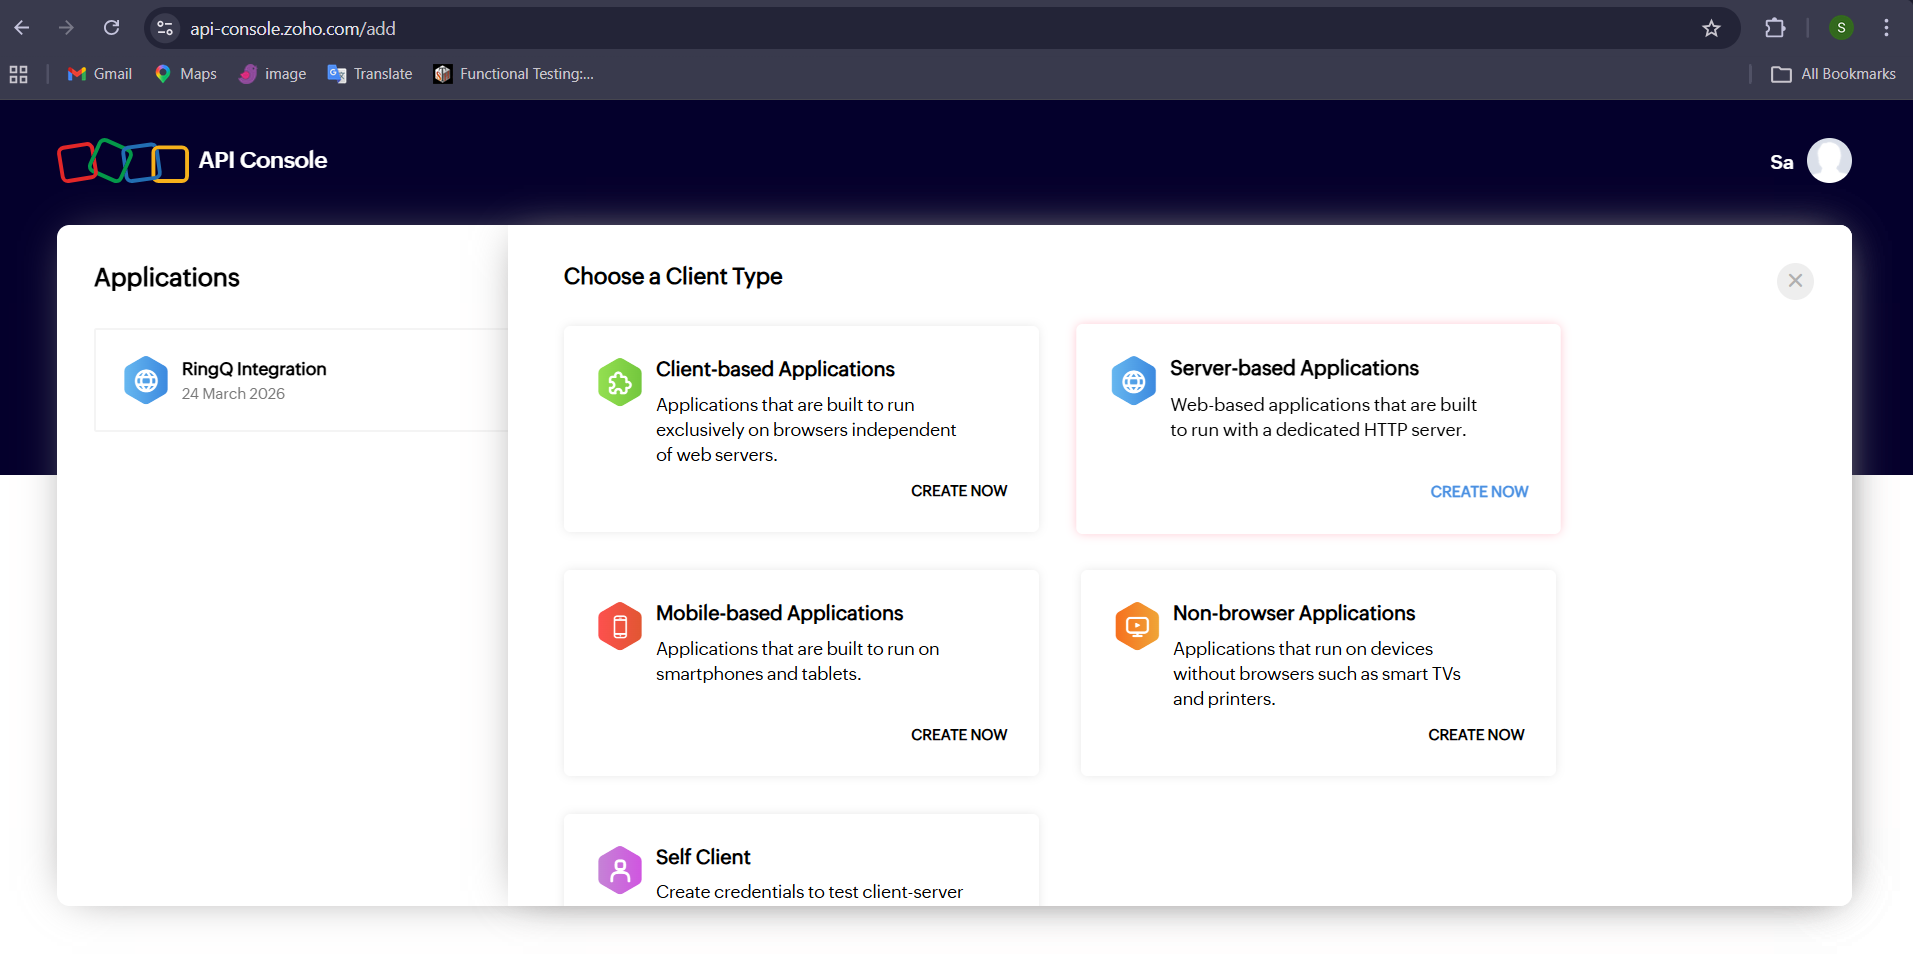
Click Create Now under Service-based Applications.
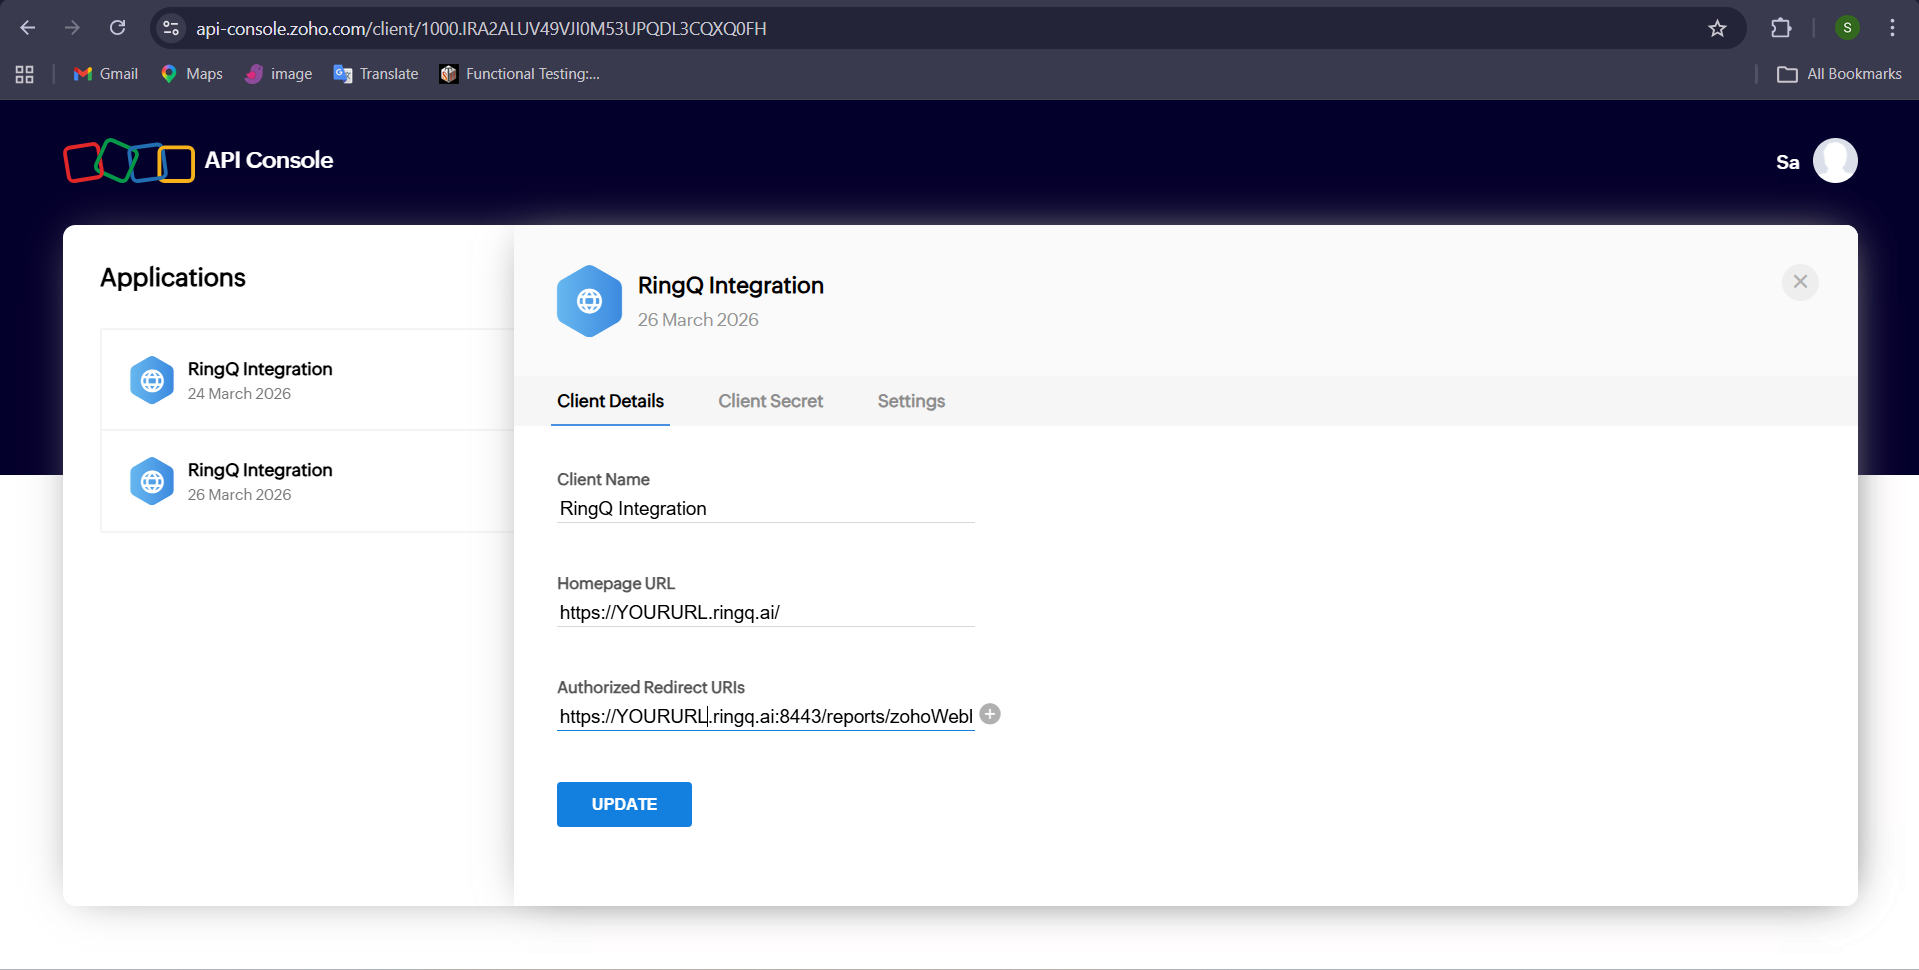
Enter the client name, homepage URL, and authorized redirect URLs.
https://<RINGQURL>.ringq.ai:8443/register/zohowebhookClick Update.
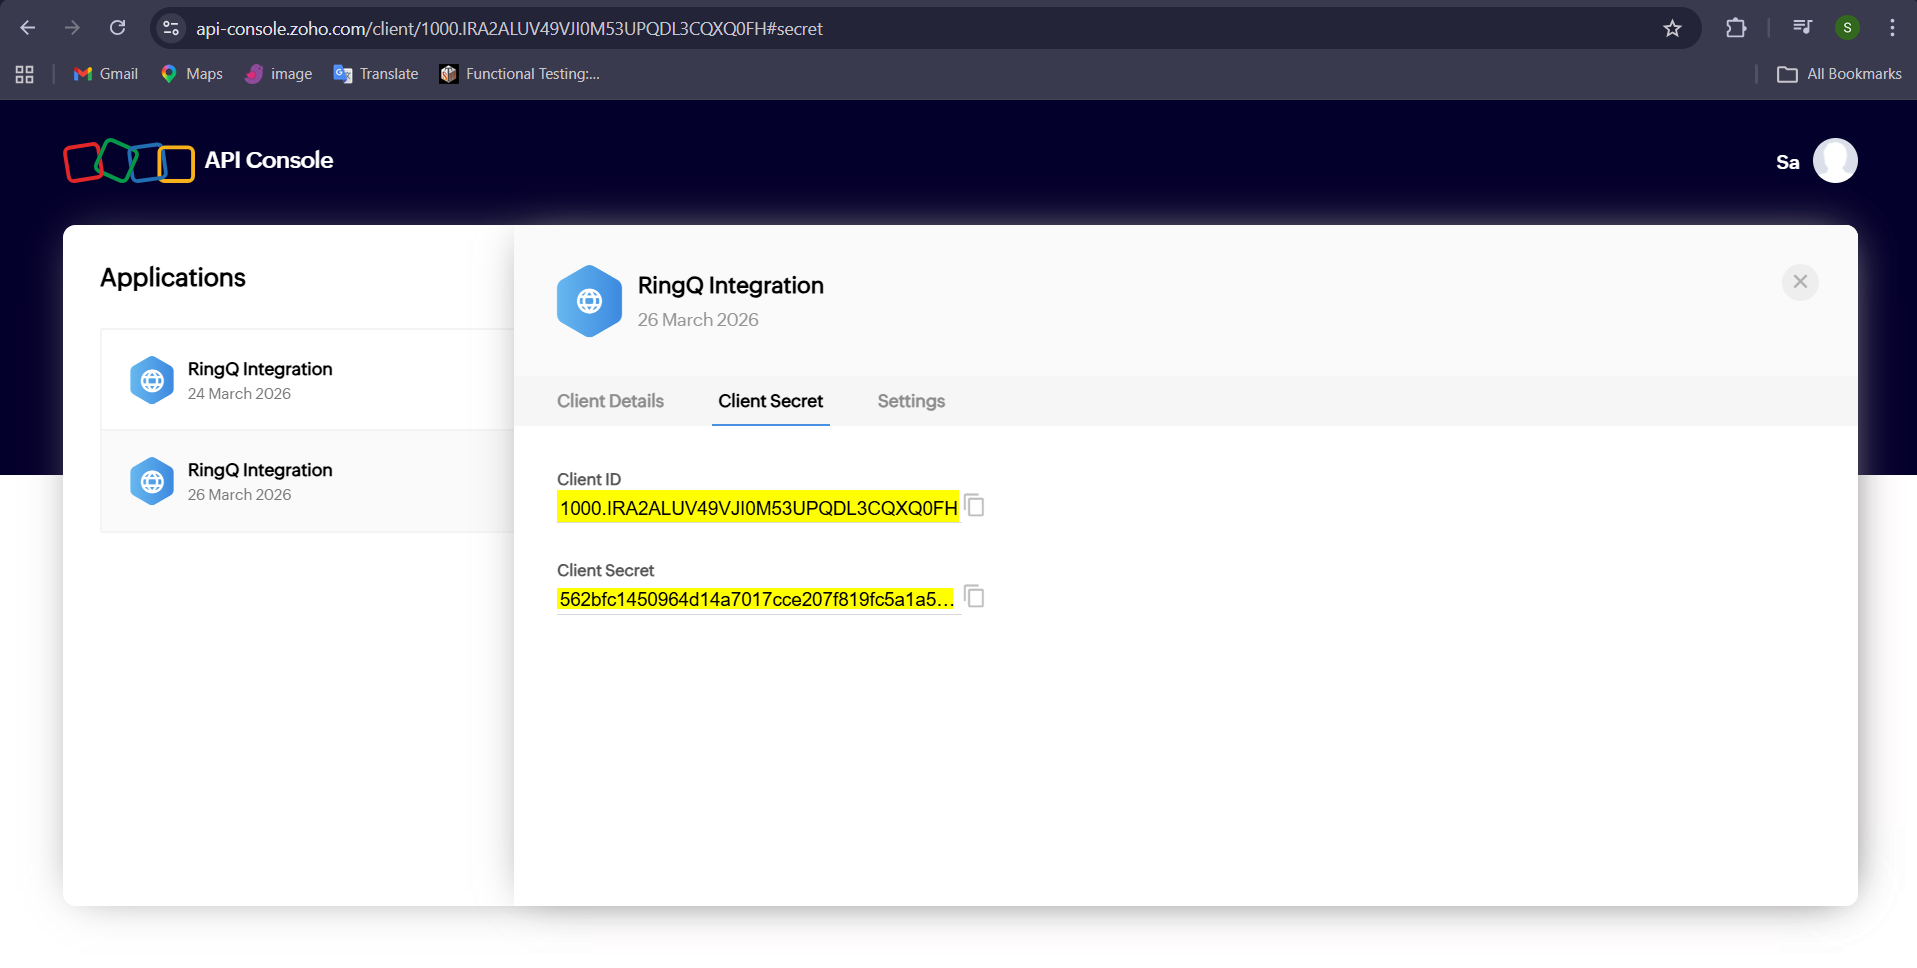
The Client ID and Client Secret are generated. Copy these.
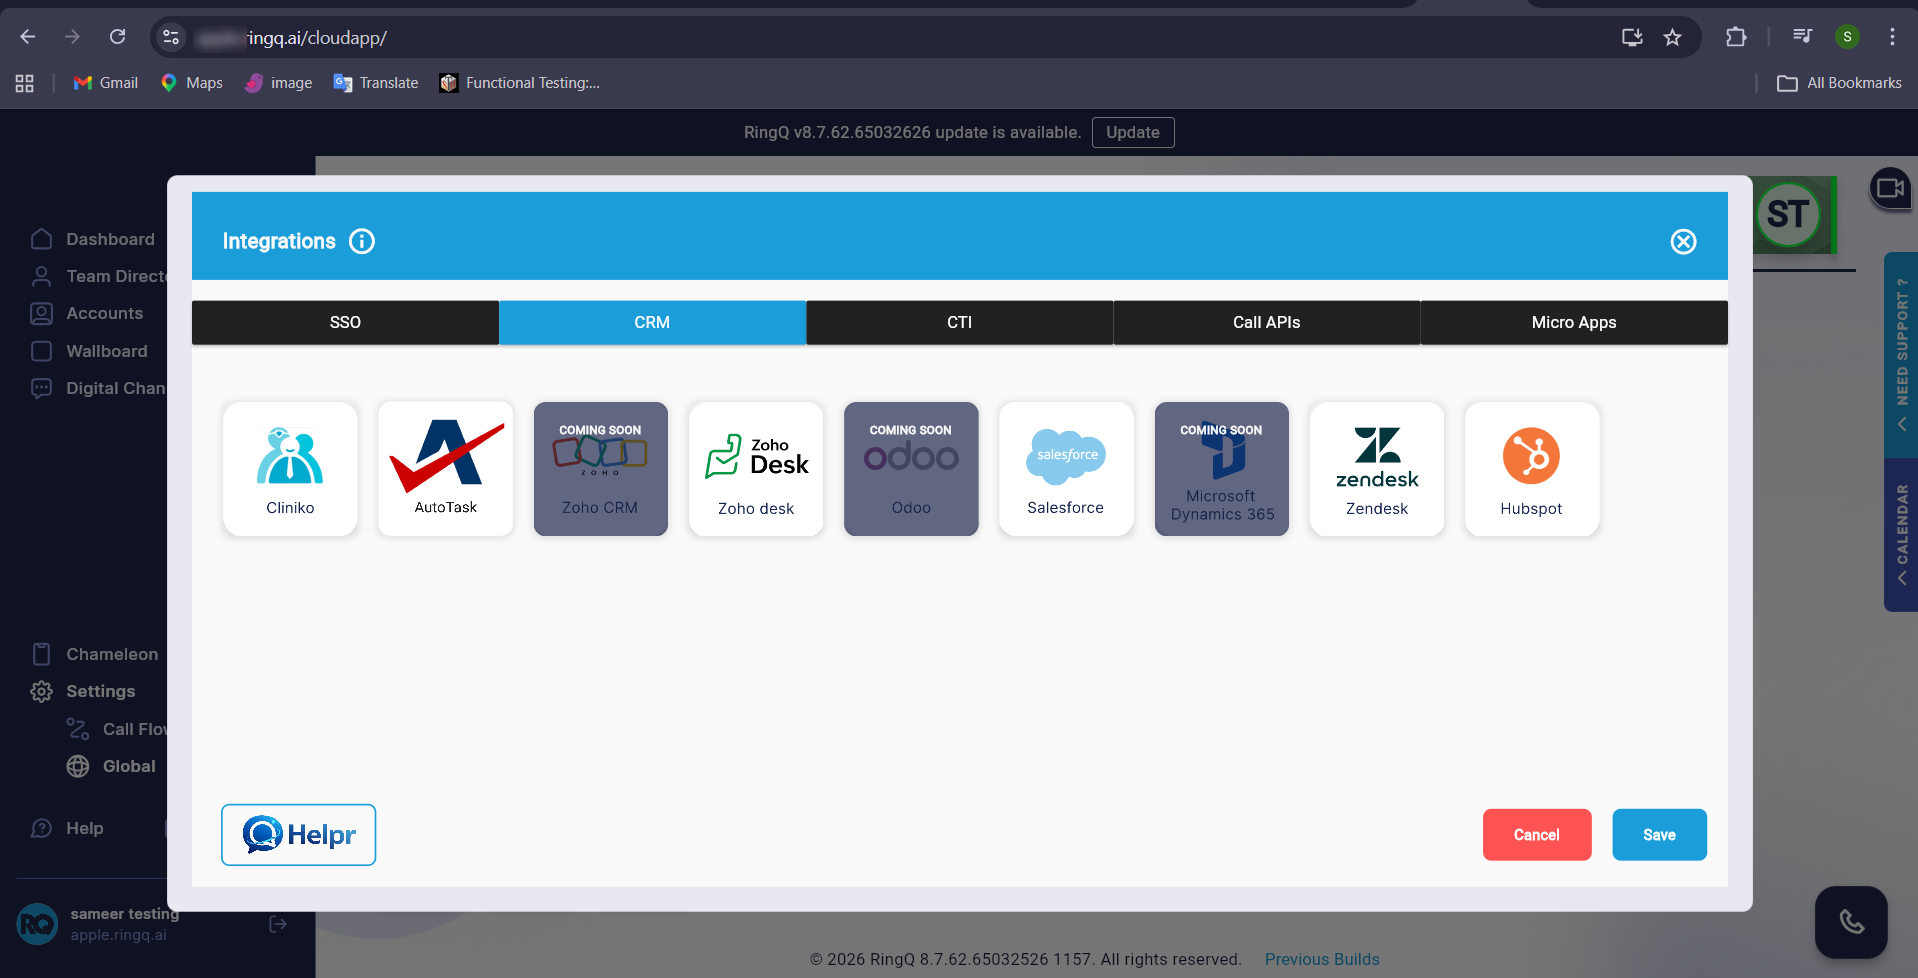
Log in to your RingQ Admin Dashboard and go to Settings → Global Integrations → CRM → Zoho Desk.
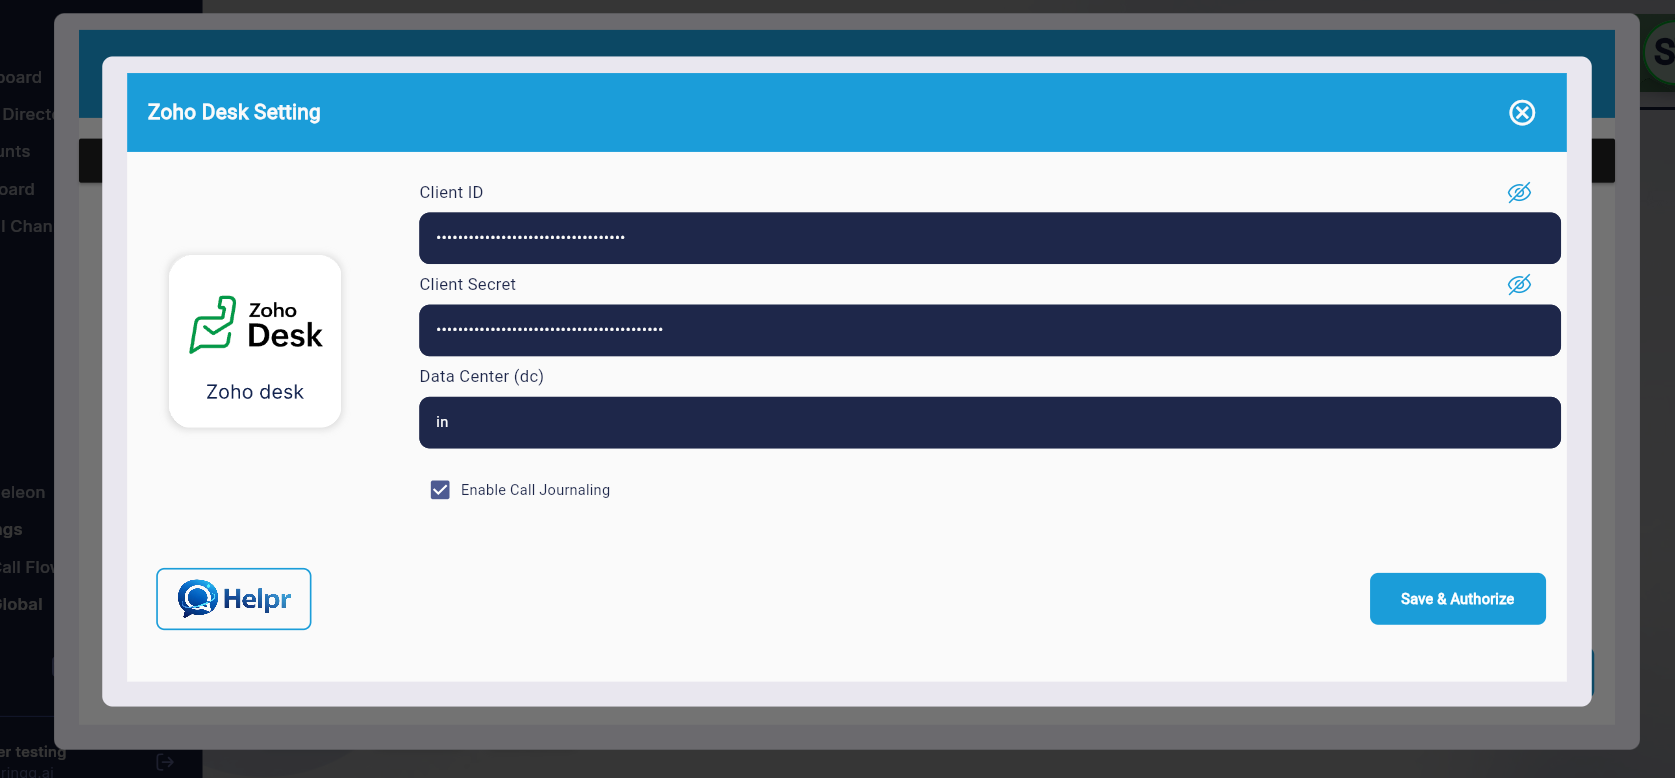
Paste the Client ID and Client Secret Key from the Zoho API Console.
Enter your data center value (for example: in, eu, com, or jp).
After filling in all details, click Save & Authorize.
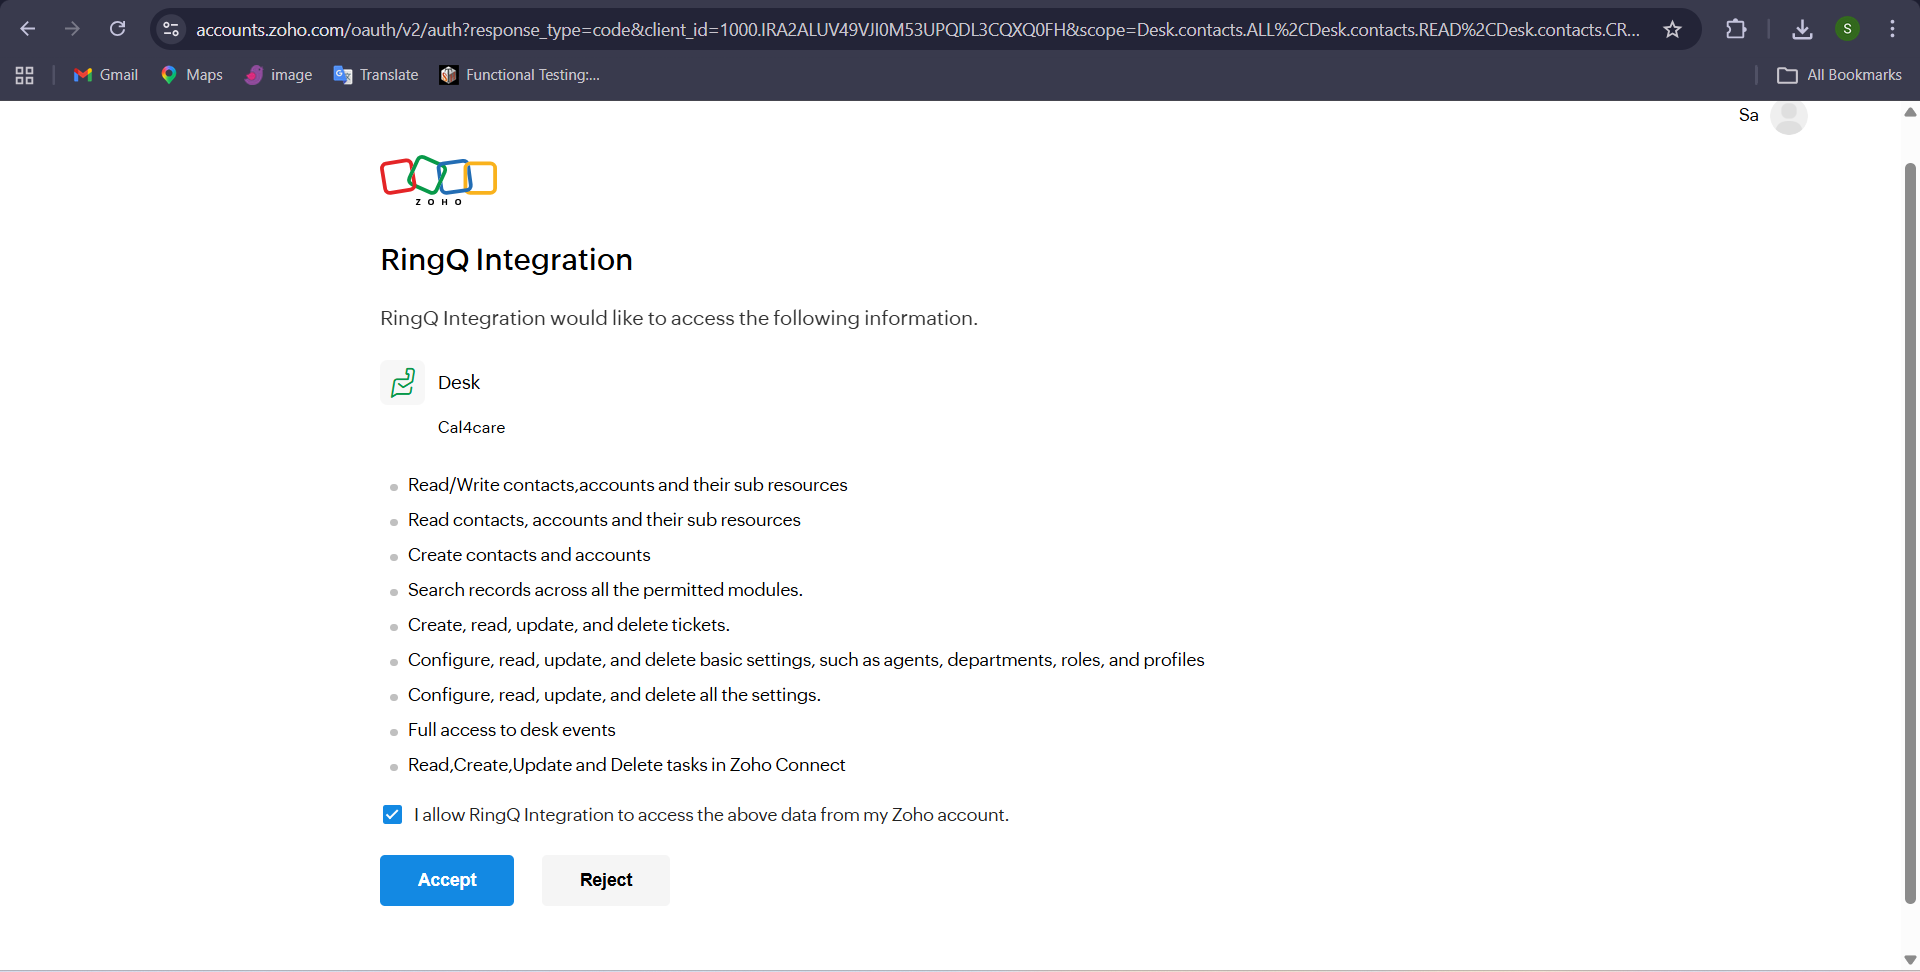
After authorization, the page will reload and display the integration details.
Review the access information, select the checkbox to allow RingQ integration with your Zoho account, and click the Accept button. A success message and a Webhook Received Successfully message will then be displayed.
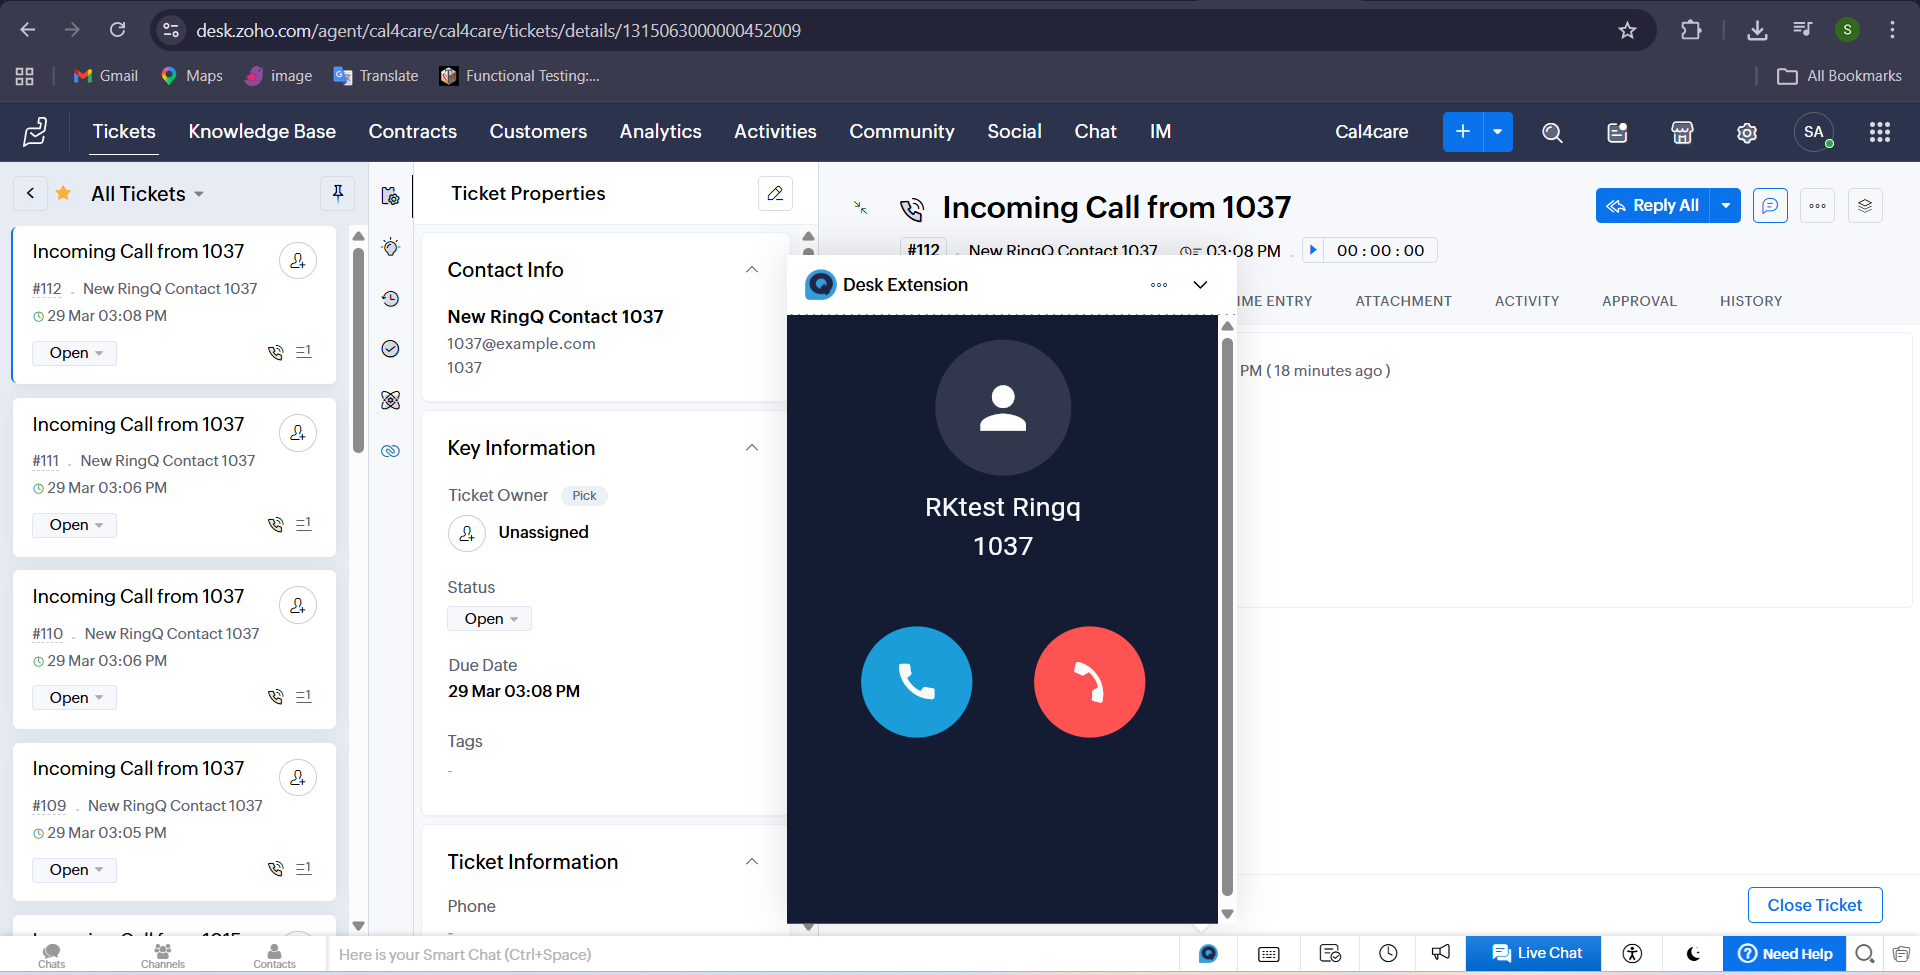
Refresh the Zoho Desk page and create a new call using the RingQ mobile app or web app.
The incoming call details will automatically appear in Zoho Desk.
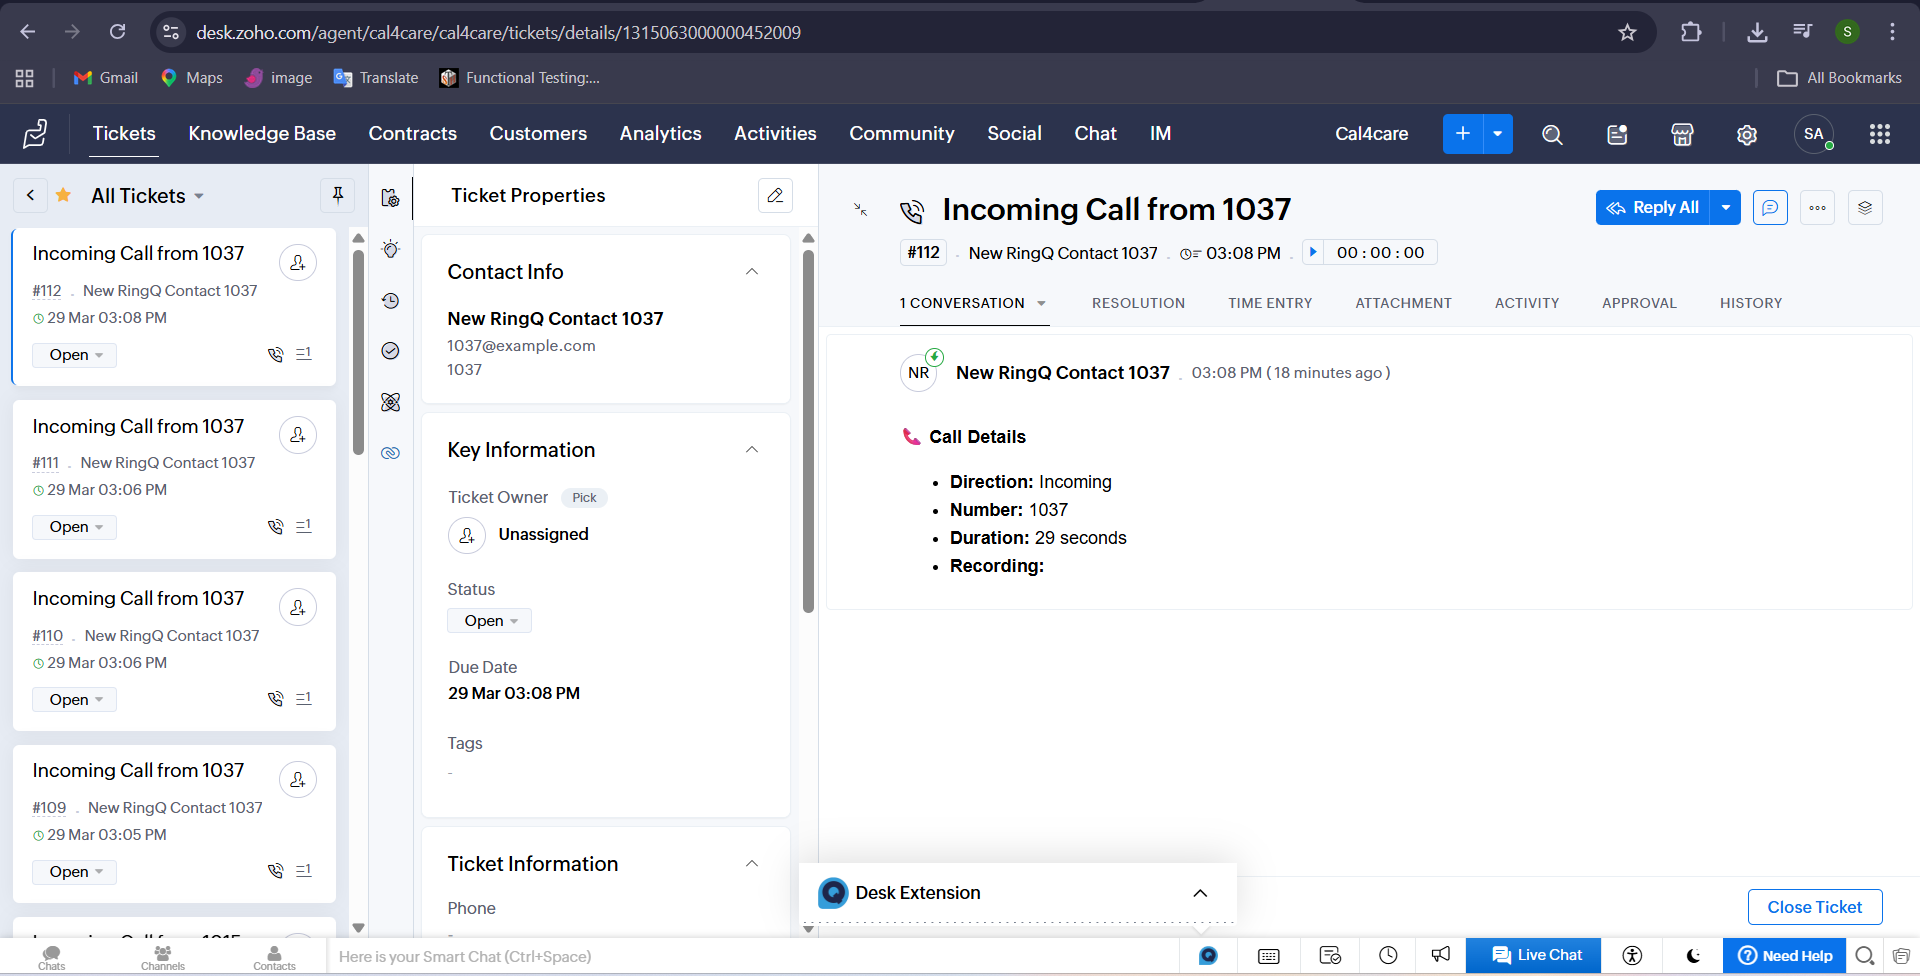
After the call ends, a ticket will be automatically created in Zoho Desk with the call status, timings, and duration.
