Integrating Salesforce with RingQ enables businesses to unify customer communication and sales operations within a single workflow. By connecting your CRM with your business phone system, teams can access customer data in real time, manage calls more efficiently, and improve engagement across sales and support interactions.
This guide will walk you through the process of integrating Salesforce with RingQ, covering the setup requirements, configuration steps, and the key features available after the integration is complete. Whether you want to enable click-to-call functionality, automate call logging, track customer interactions, or improve agent productivity, this integration helps streamline communication and create a more connected customer experience.
Salesforce Configuration
Login to your Salesforce Developer account. If you do not have an account you can create one here.
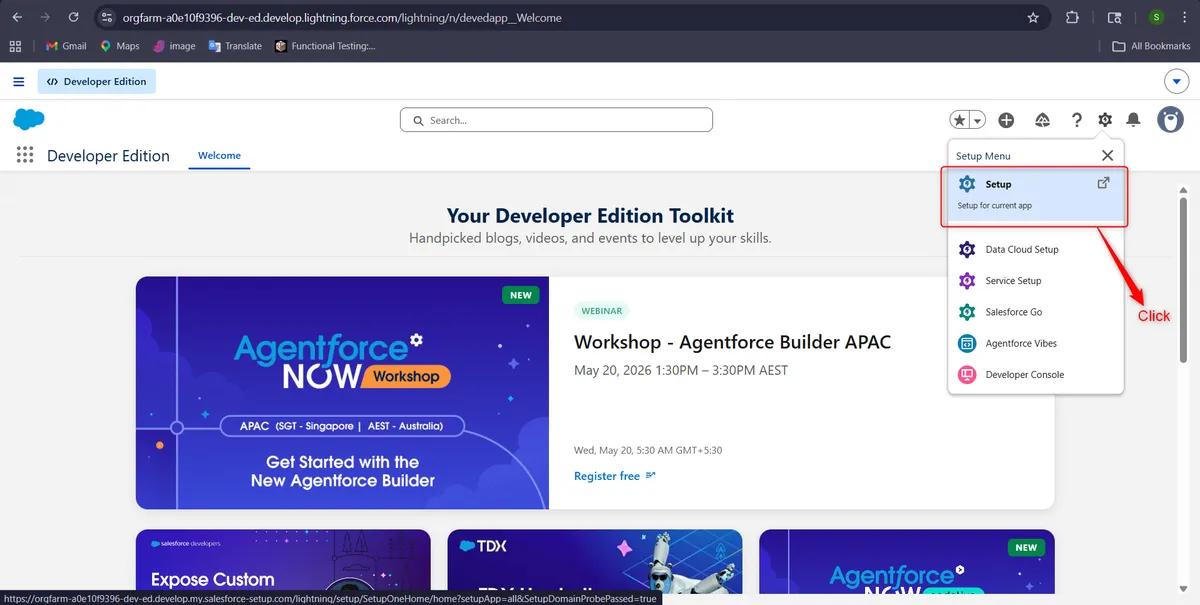
After logging in, navigate to the Home page and click the “Setup” option from the Setup menu.
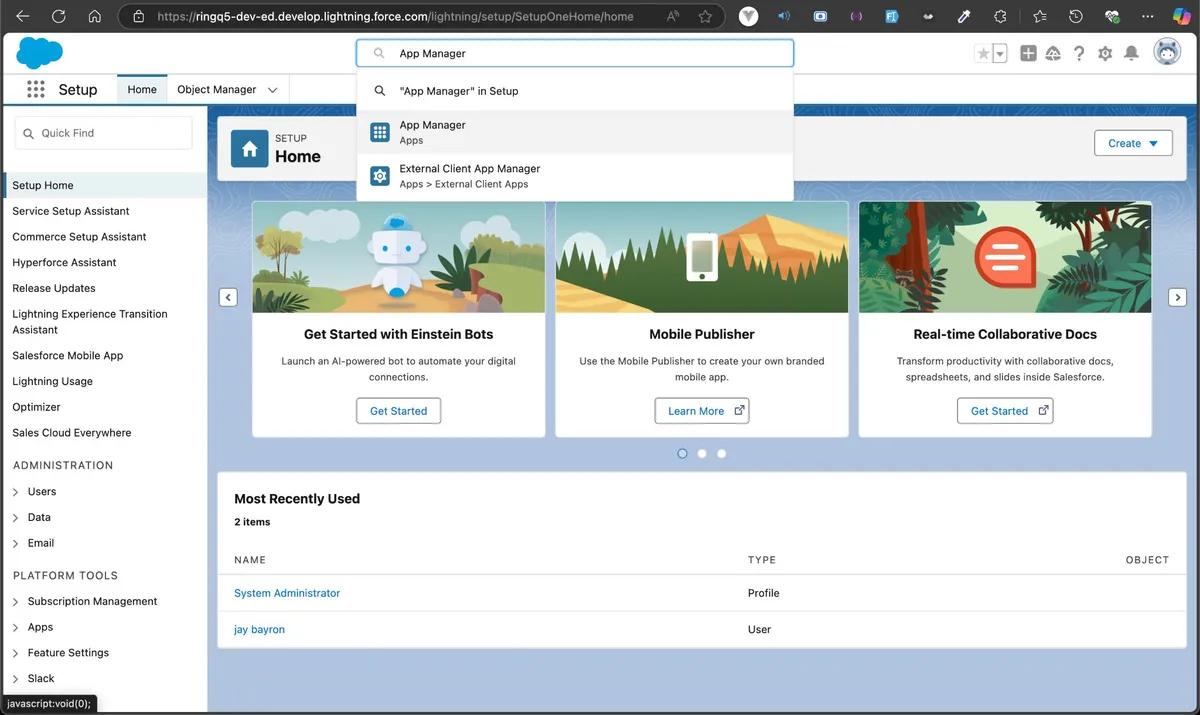
Type “AppManager” in the Search Setup bar.
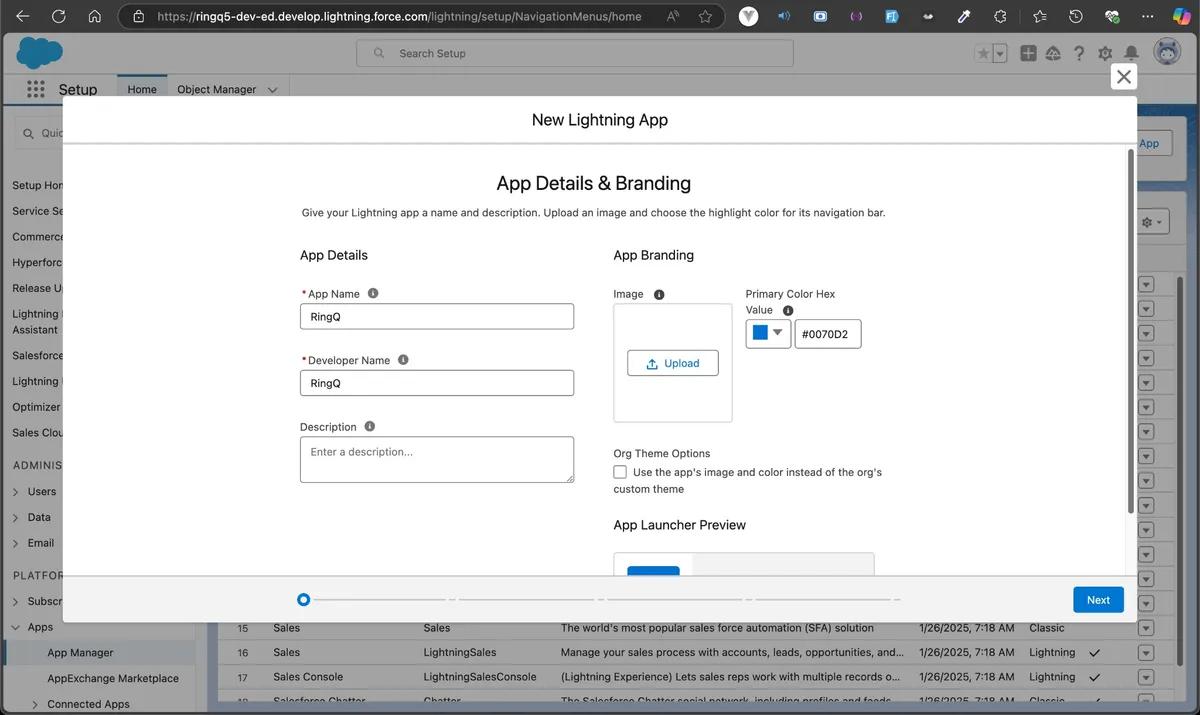
Click the 'New Lightning App' button to open a form. Fill out the required details and click the “Next” button.
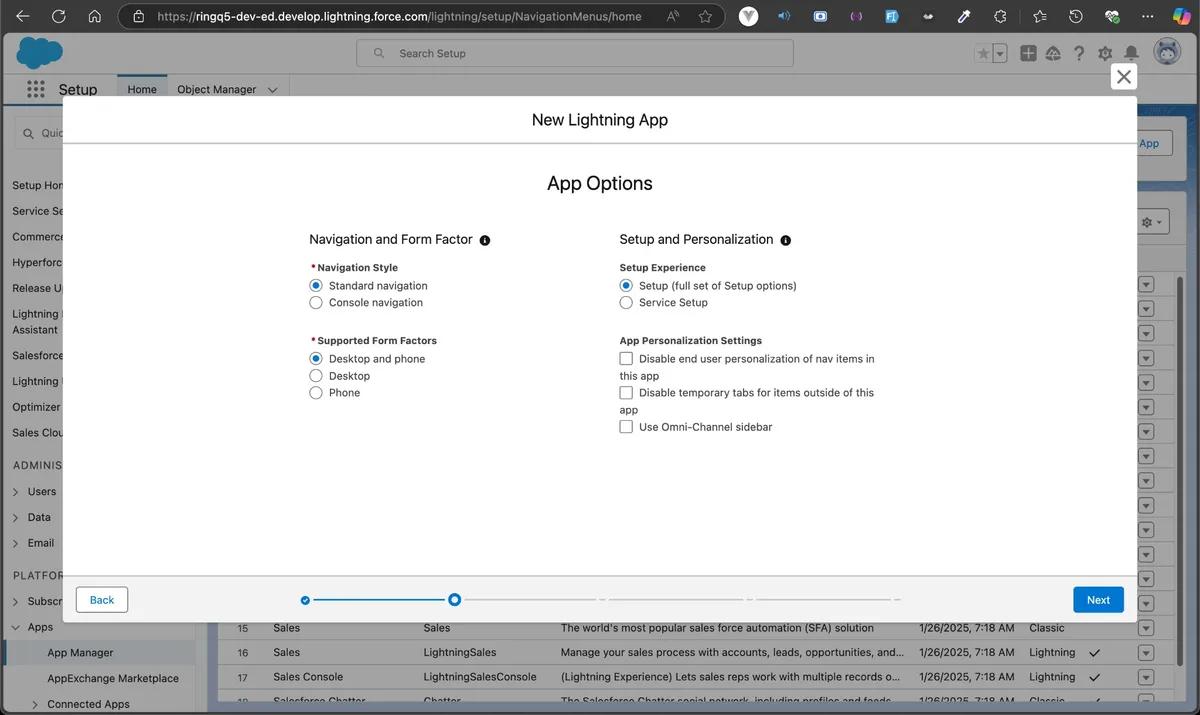
Keep the default selected options and continue by clicking the “Next” button.
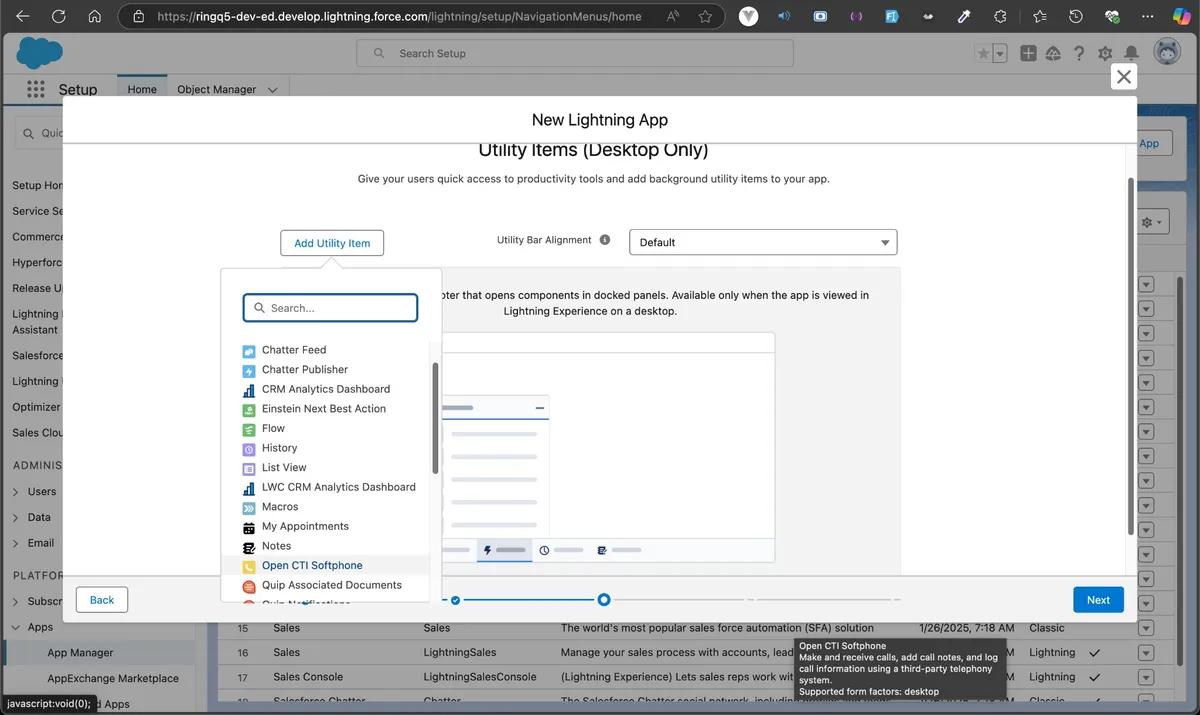
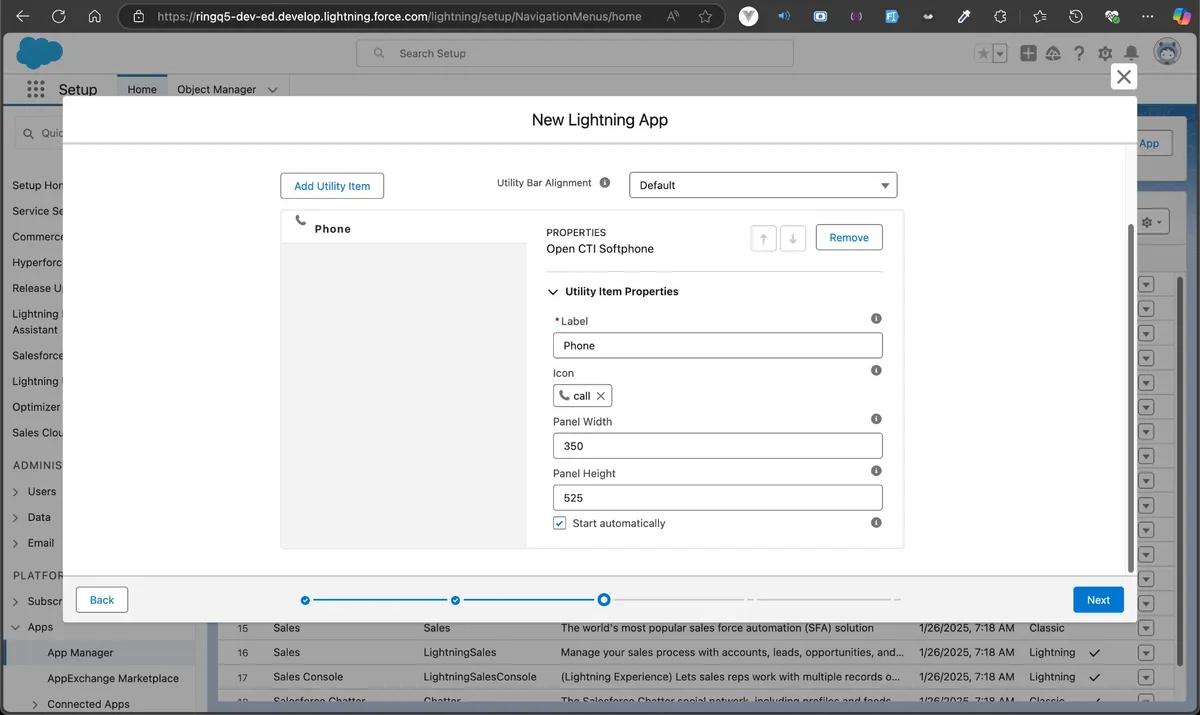
Click the “Add Utility Item” and look for “Open CTI Softphone”.
Set the width to “350” and the height to “525”, then continue by clicking the “Next” button.
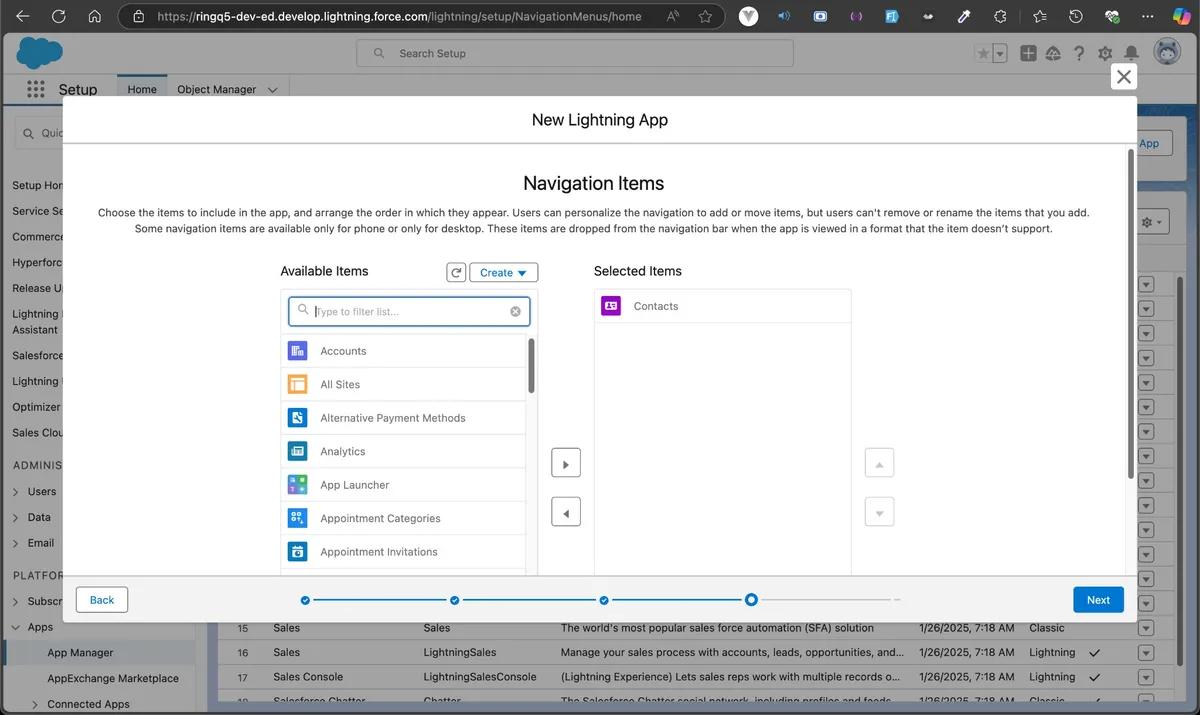
Select all the navigation items you want to display in your new Lightning App, then continue by clicking the “Next” button.
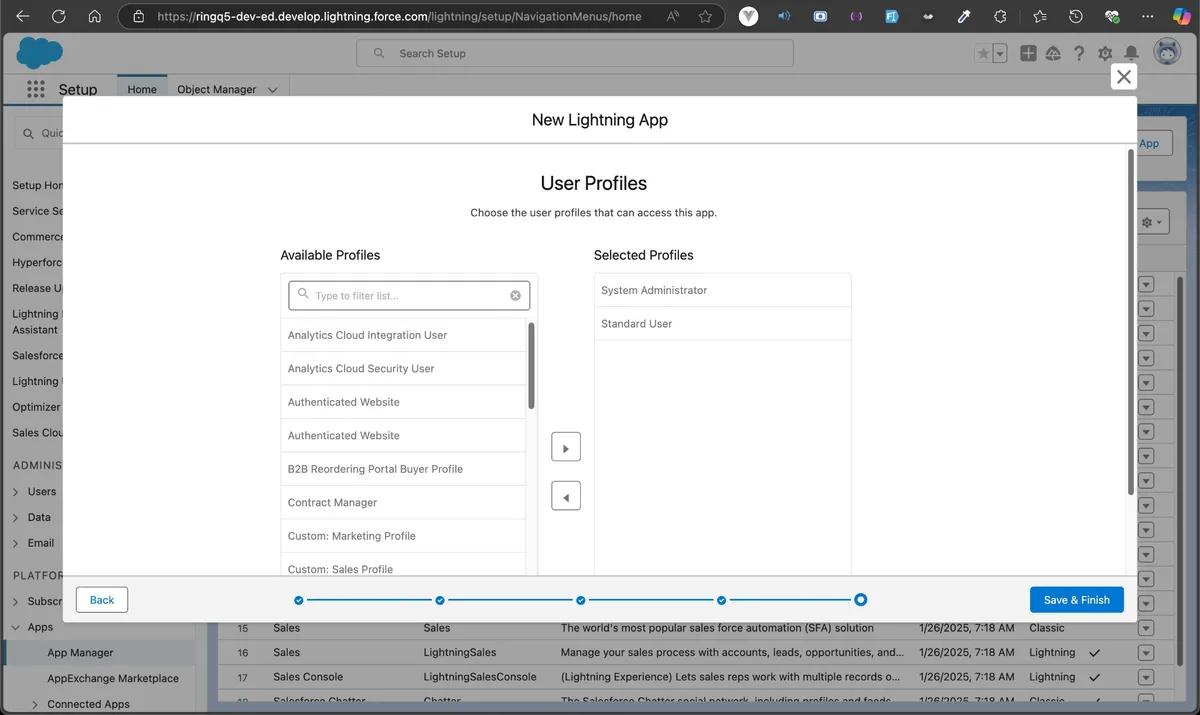
Select the profiles you want this Lightning App to be visible to. In this example, select “Standard User” and “System Administrator”, then click the “Save & Finish” button.
Note: If you encounter an error preventing you from creating the Lightning app, such as: 'An error occurred while trying to update the record. Please try again. Setup Entity ID is invalid: null’.
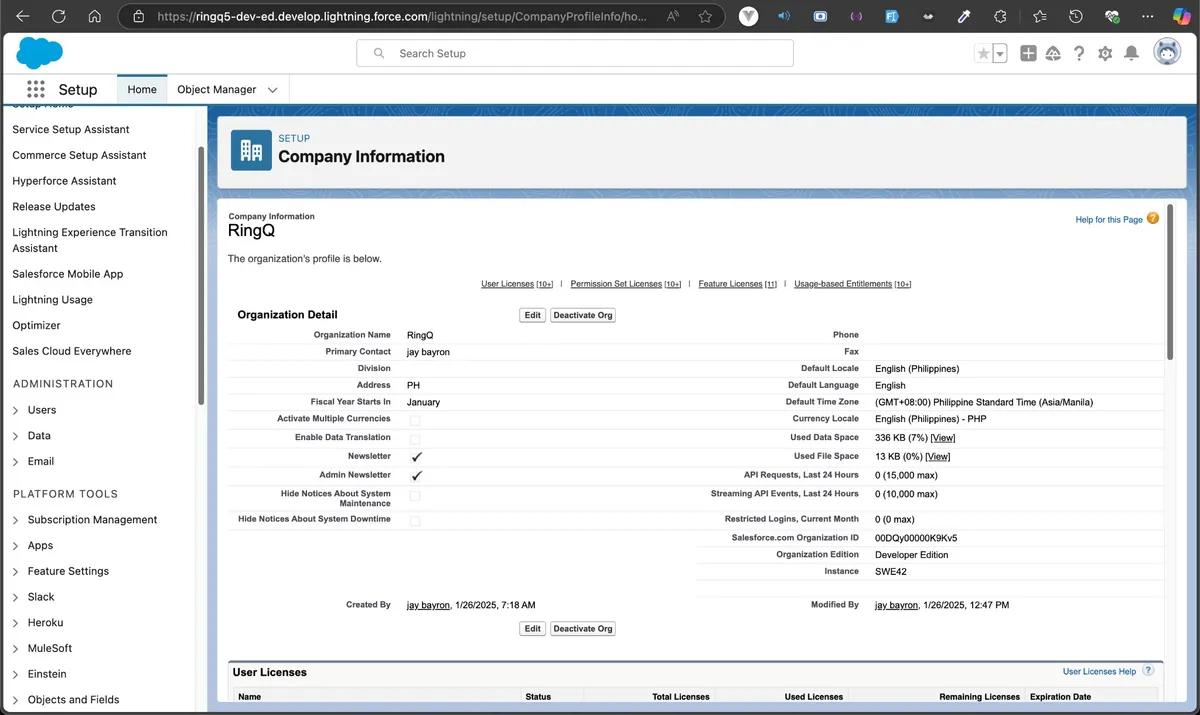
The possible cause is that your organization is using the 'Starter Edition.' To check your edition, go to Setup, search for 'Company Information,' and under 'Organization Details,' you will see your Organization Edition.
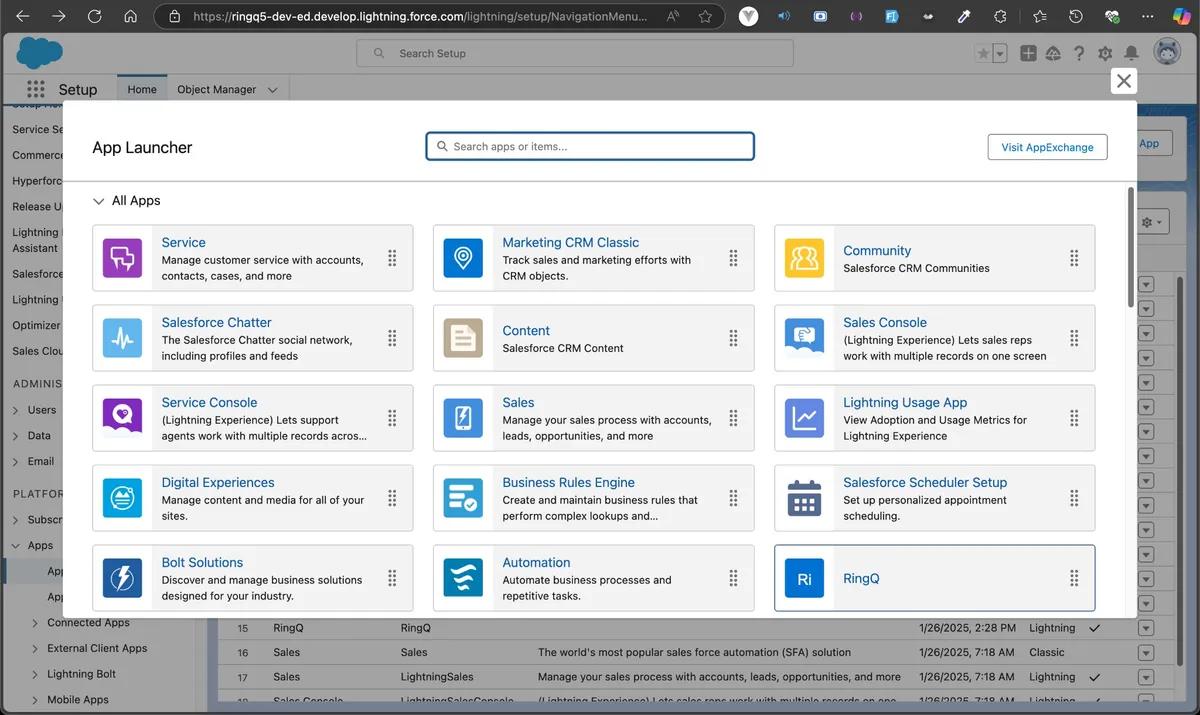
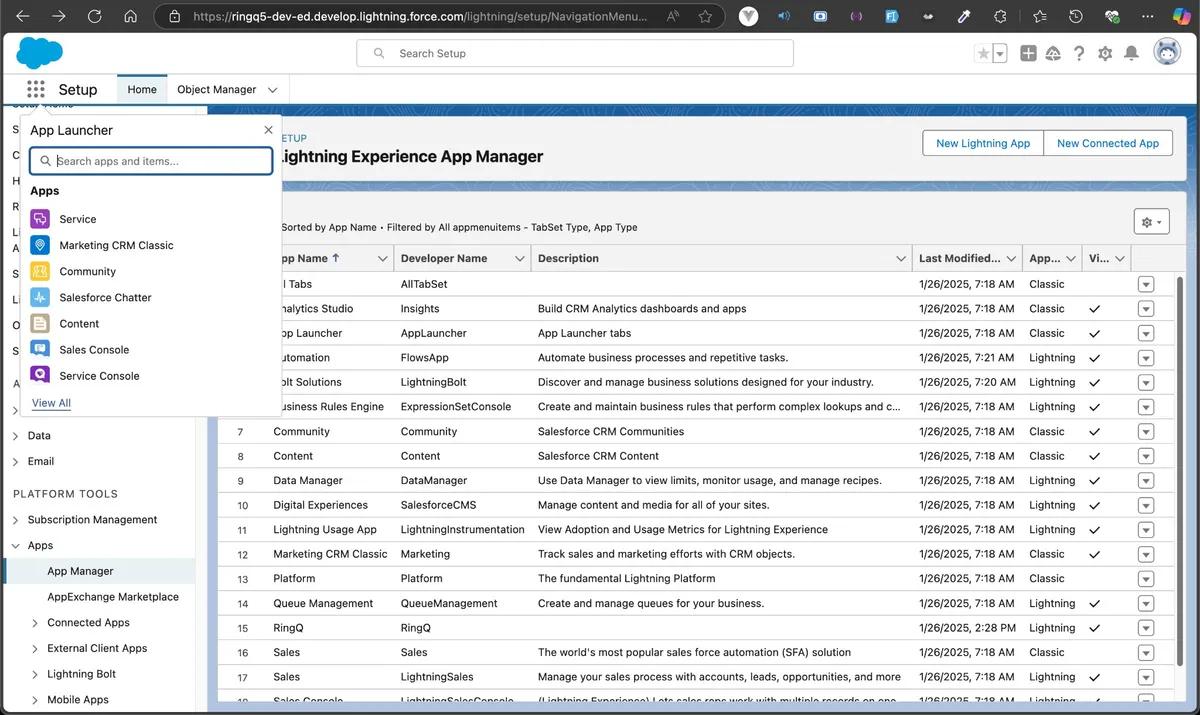
To verify whether the Lightning App is created successfully, click the App Launcher icon located at the top left corner of the page and select “View All”.
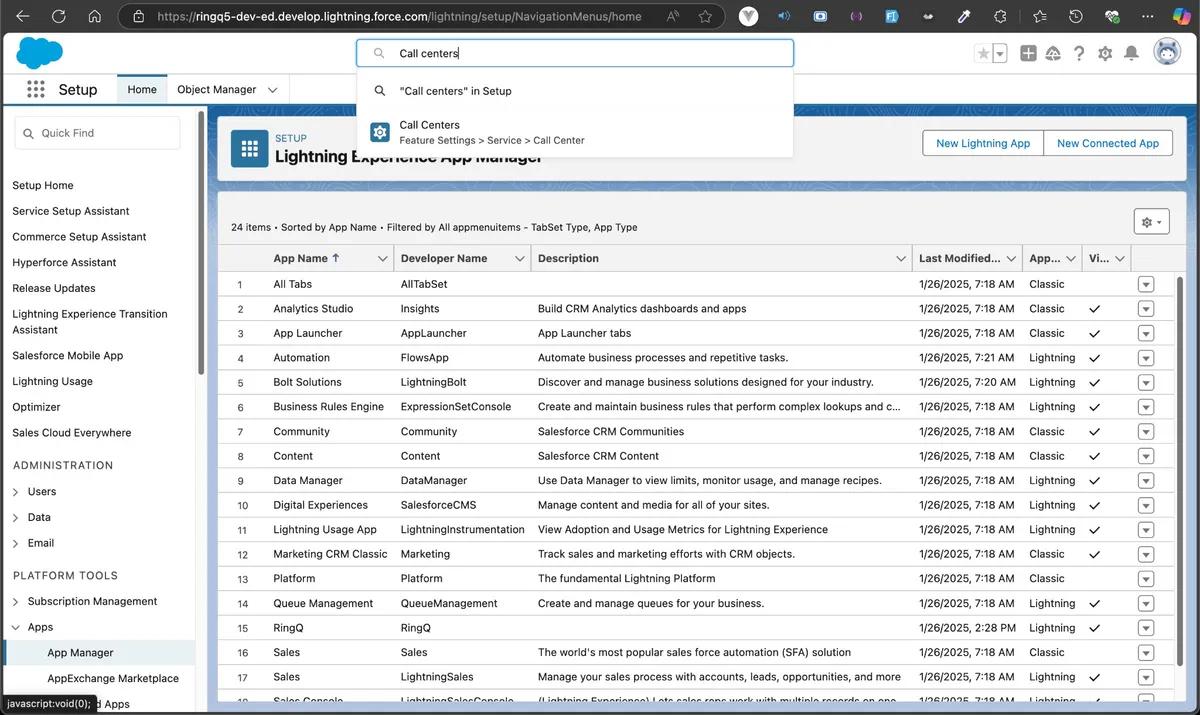
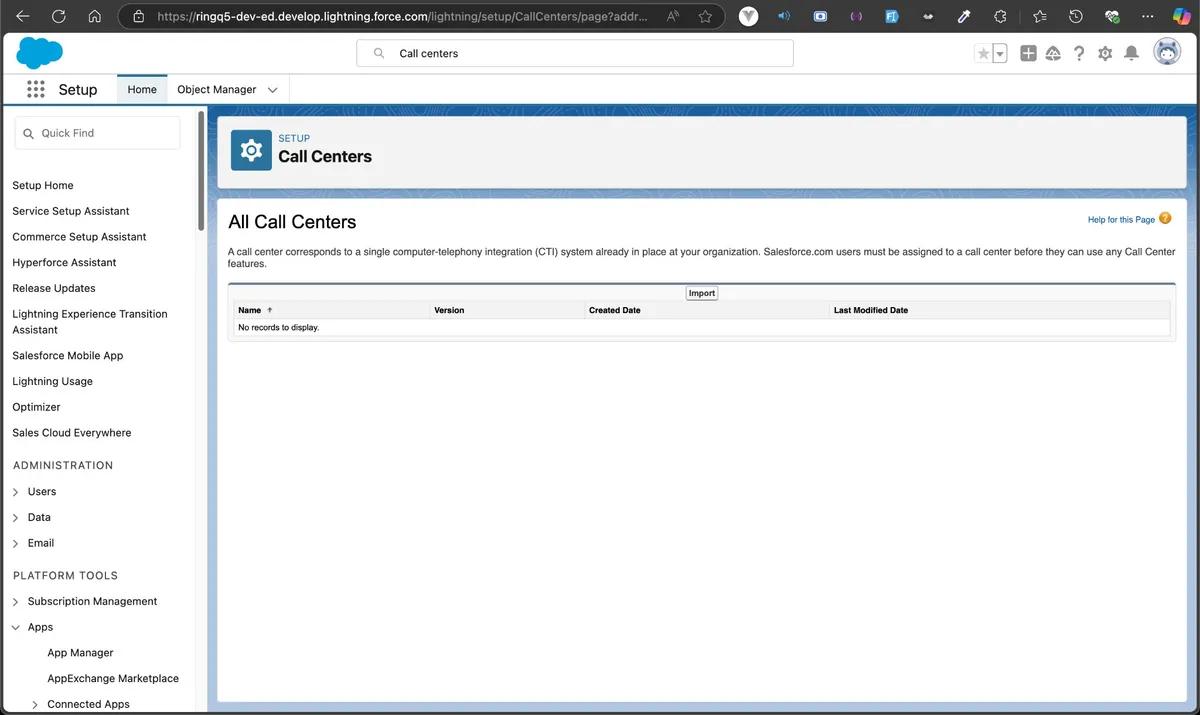
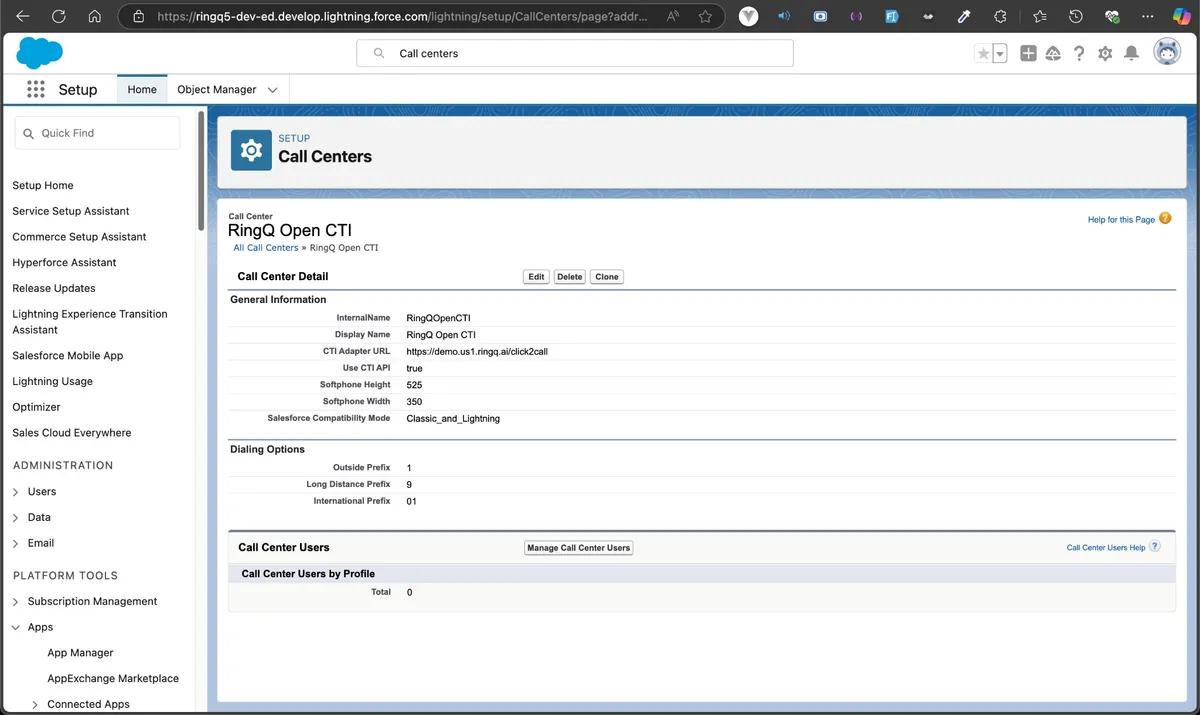
Close the 'App Launcher,' then go to the Search Setup and enter “Call Centers”.
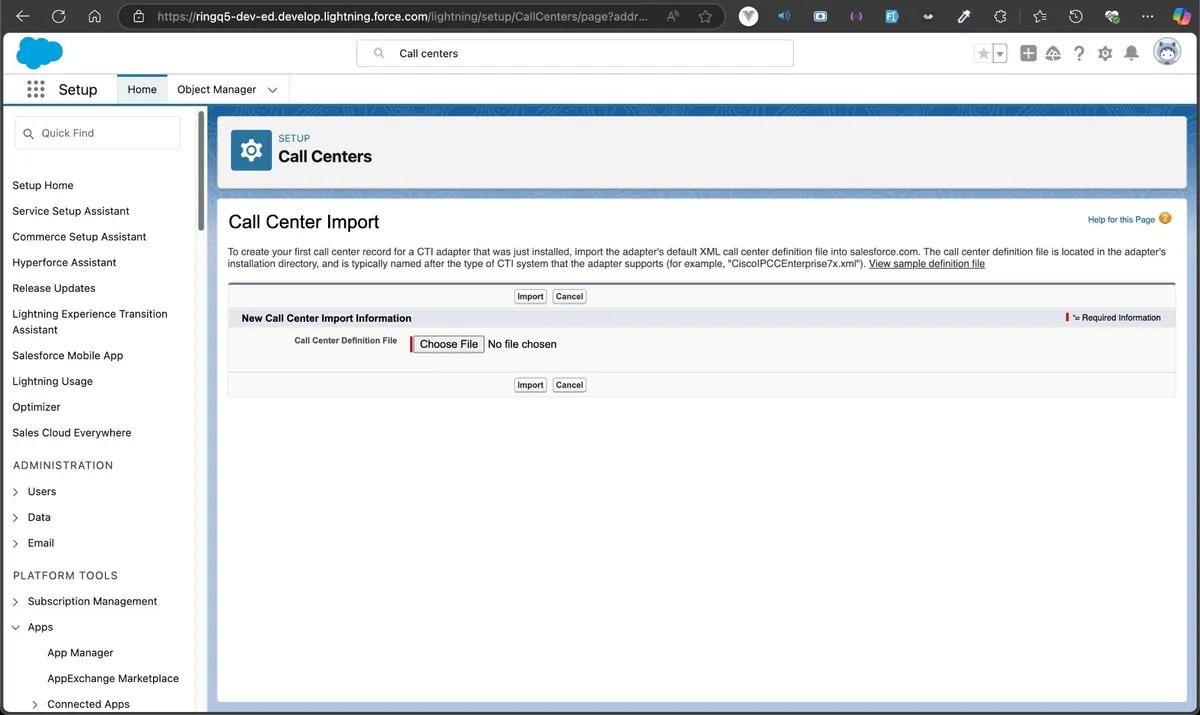
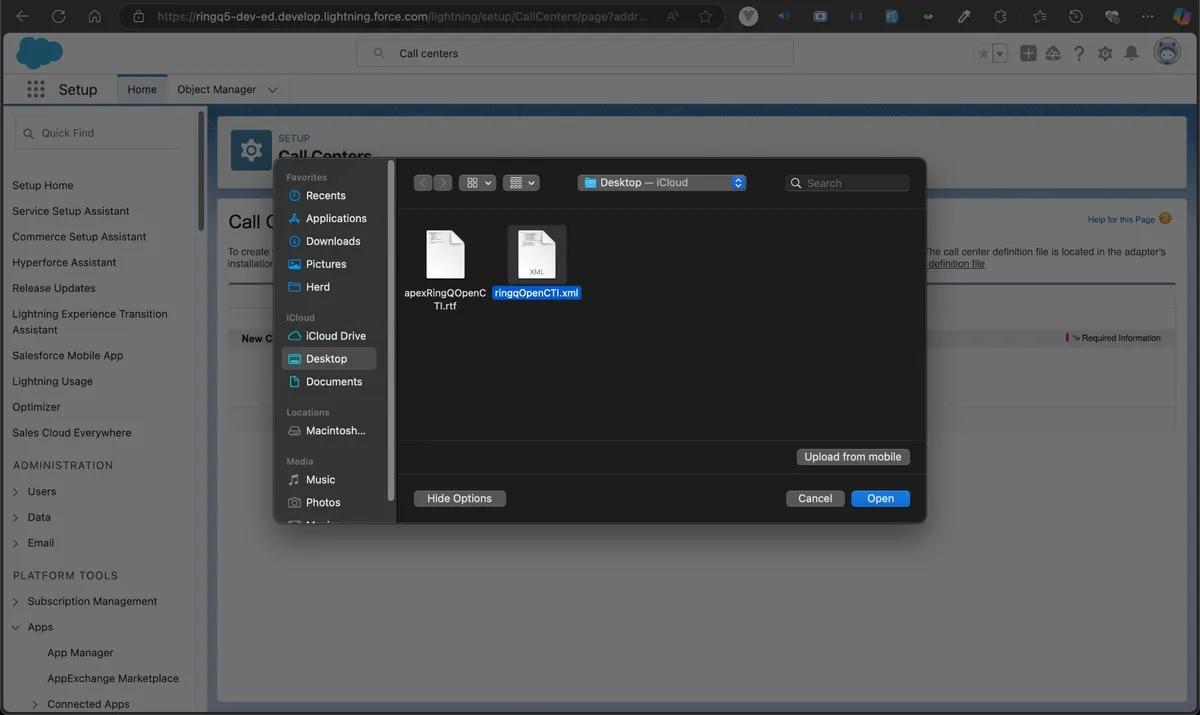
Click the “Import” button at the top of the table and select the XML file provided by RingQ. The team will provide the import file named “RingOpenCTI.xml”. Click “Open”, then click the “Import” button.
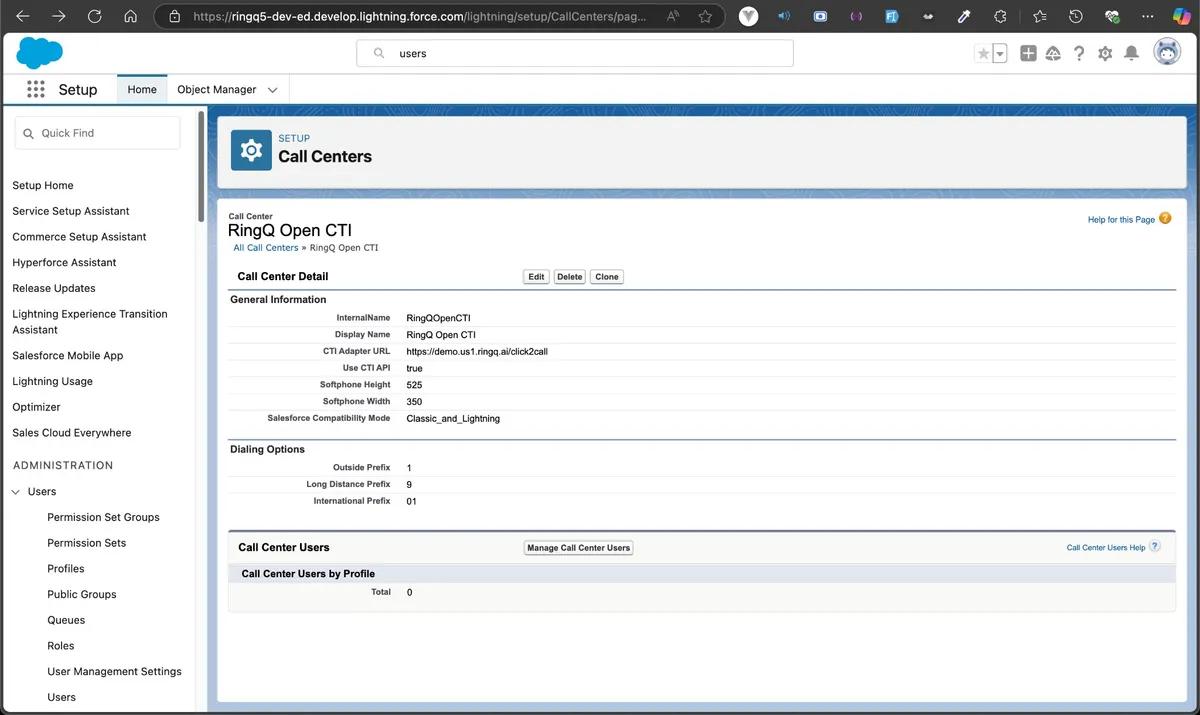
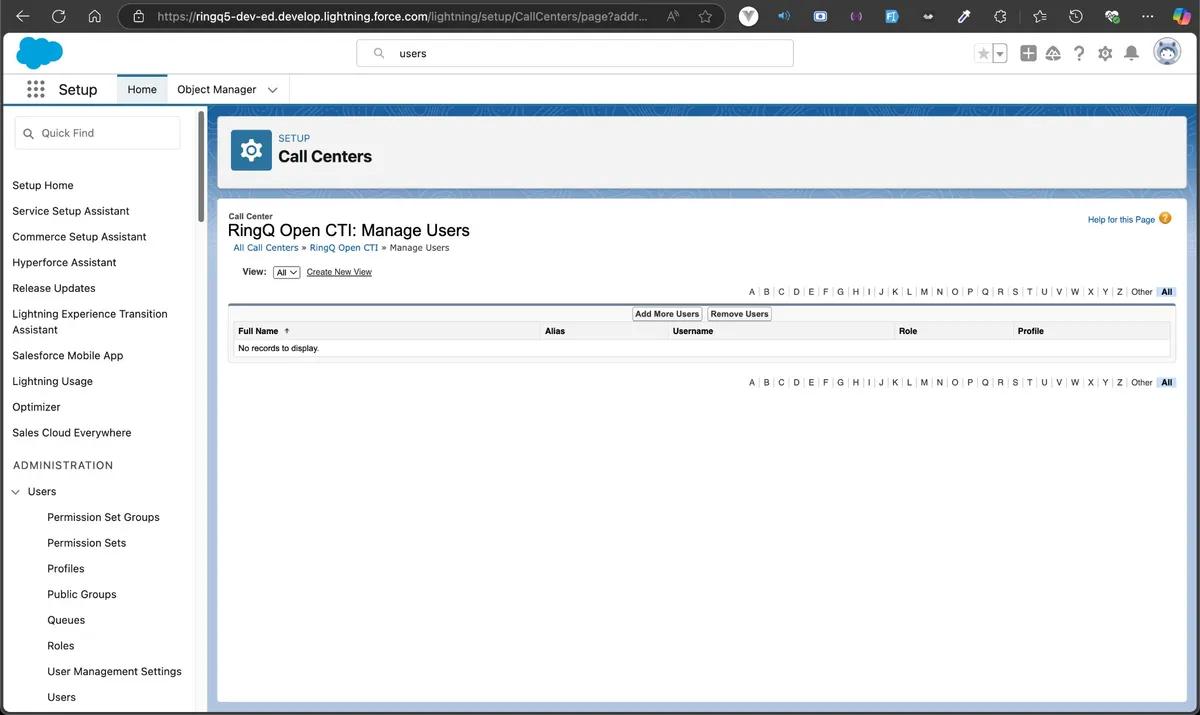
After configuring the “Call Center Details”, click the “Manage Call Center Users” button to add users to the created Call Center.
Click ‘Add More Users’.
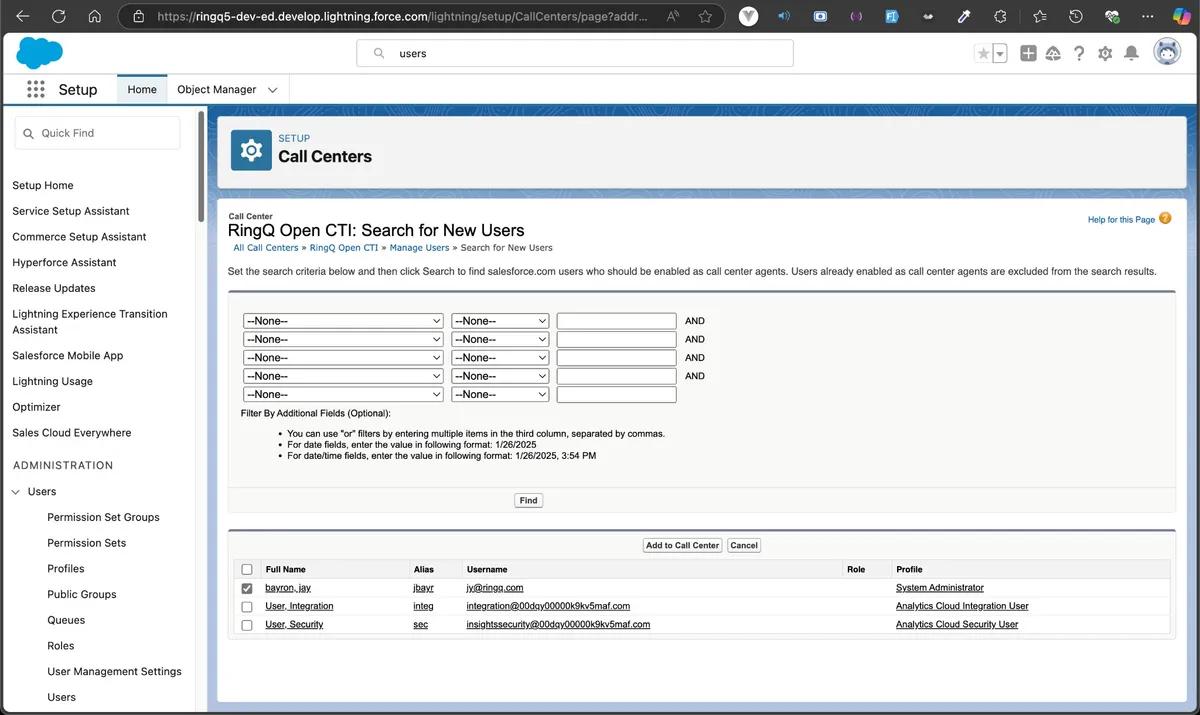
Click the Find button to display the list of users, select the required users, and click “Add to Call Center”.
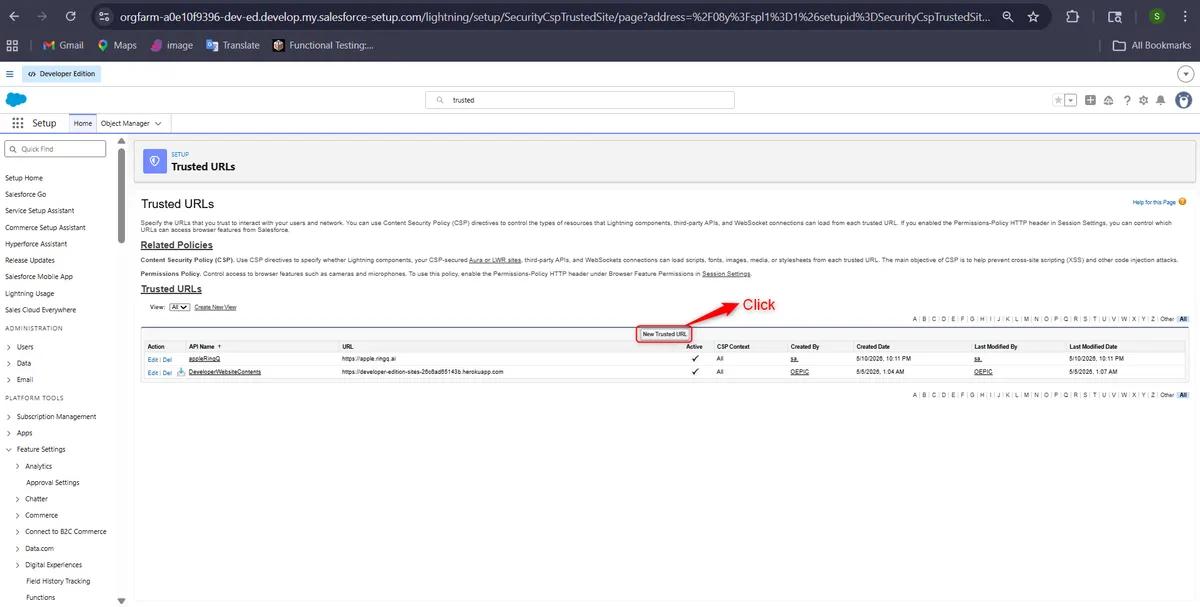
In the Search Setup, enter 'Trusted URLs.' and Click the “New Trusted URL” Button.
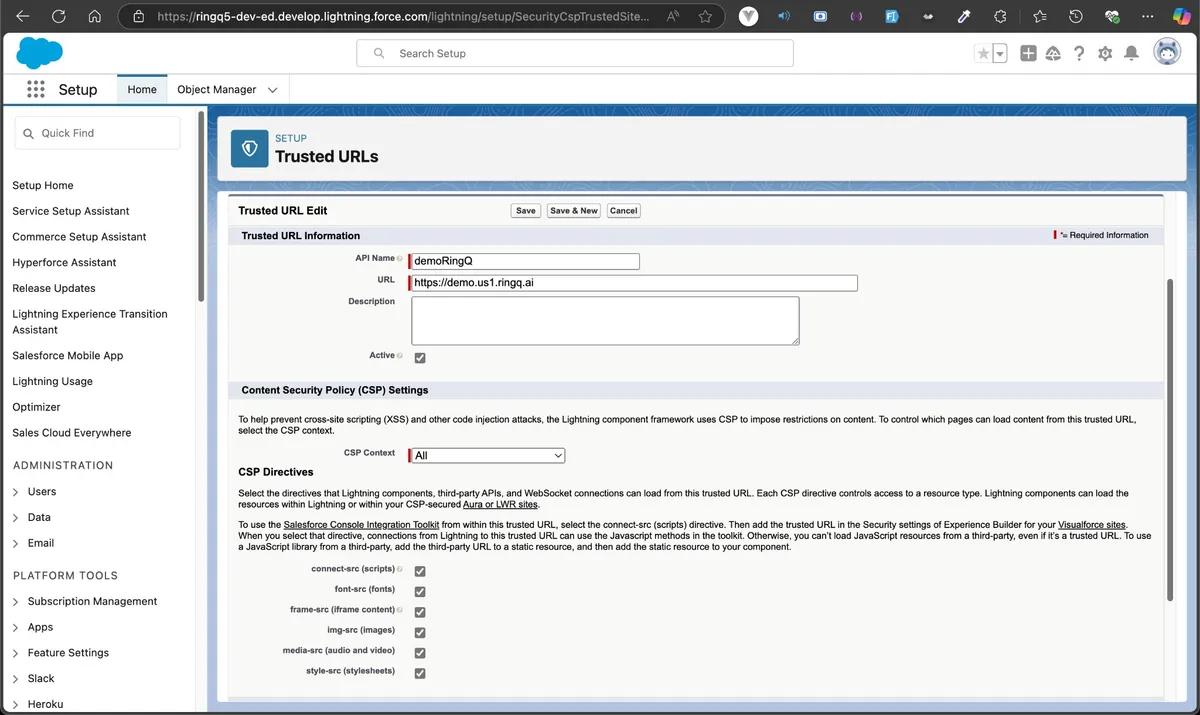
Enter the RingQ Server URL in the URL field to prevent blocking the external dialer (Example: https://.ringq.ai). Select all the checkboxes under “CSP Directives” and click the “Save” button.
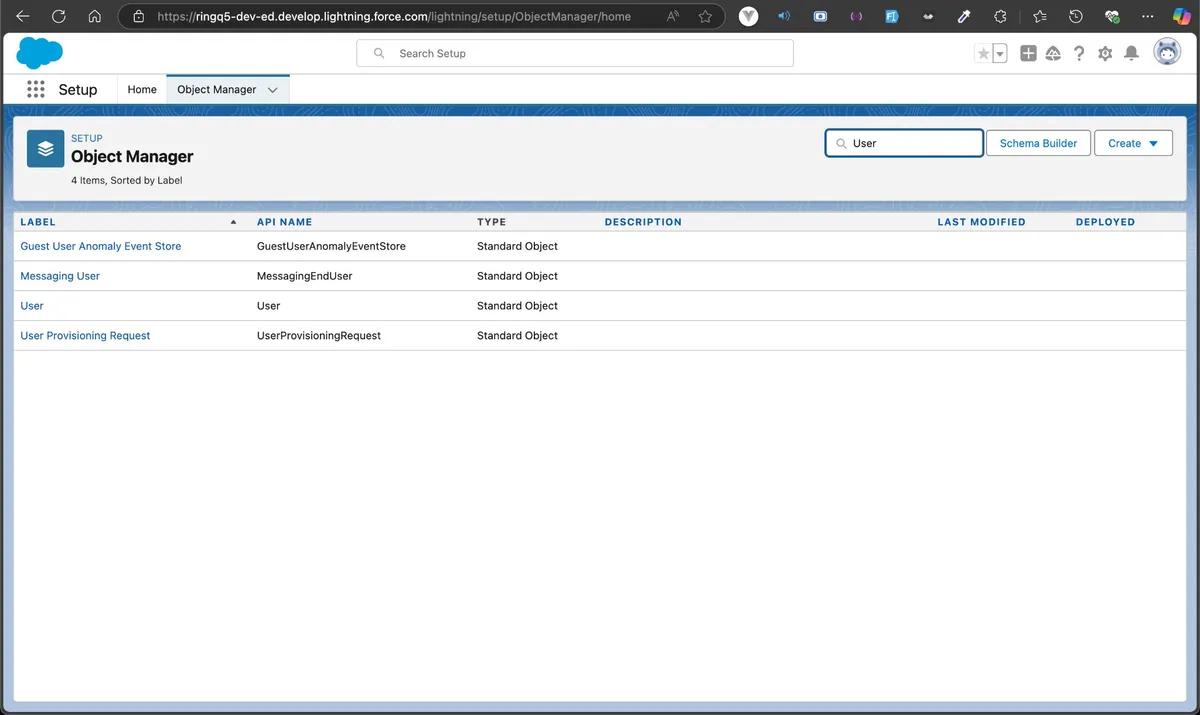
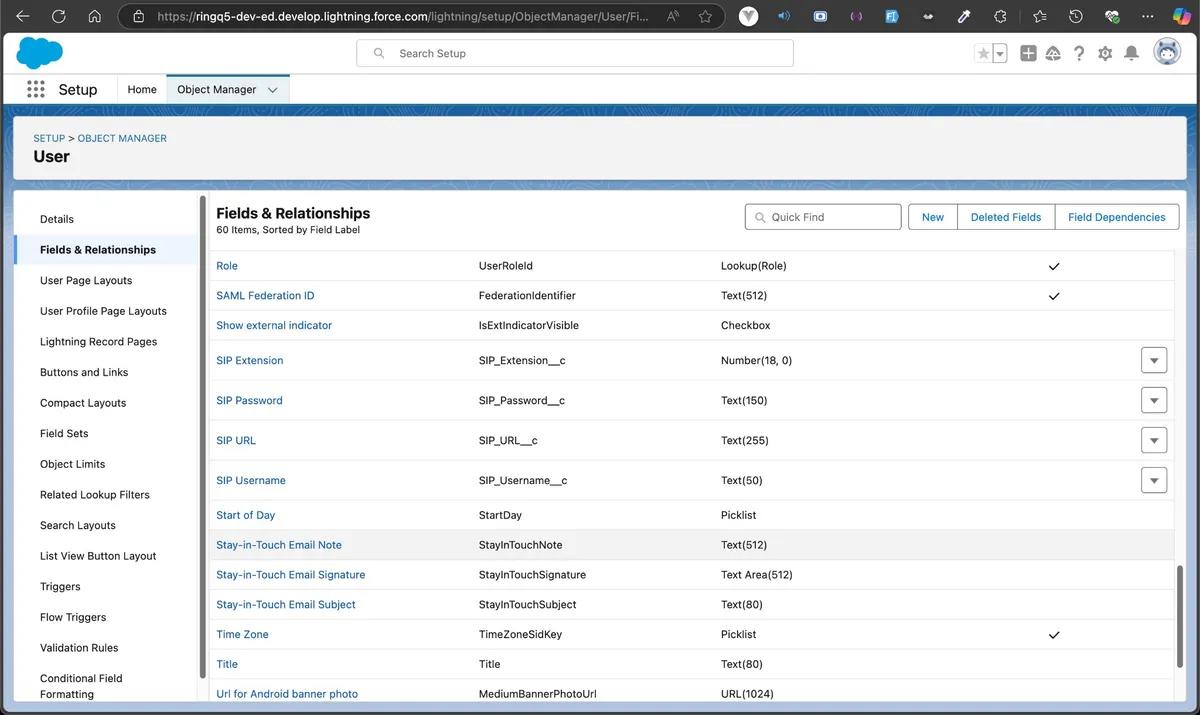
Go to “Object Manager” located at the top left corner of the navigation bar. In the Object Manager search bar, search for “User” and click it.
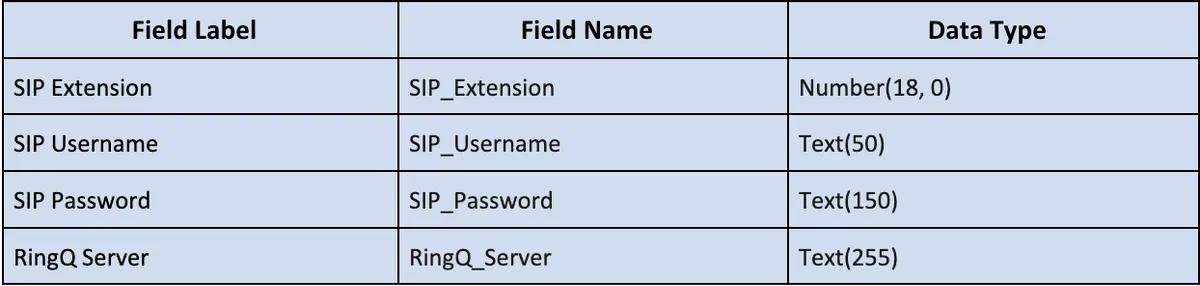
In the Side navigation bar of the 'User' object, navigate to “Fields and Relationships” and click the “New” button to add new fields to the User form.
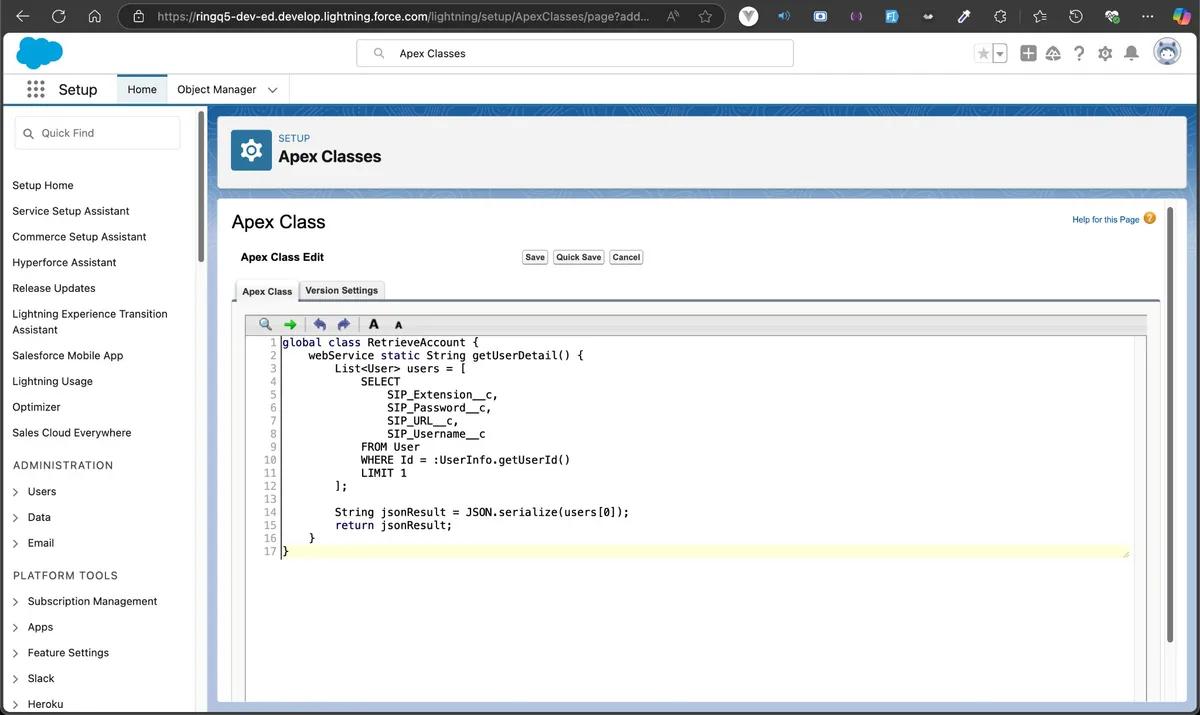
In the Setup Search bar, enter “Apex Classes” and click the “New” button to open the text editor.
The team will provide the file named “apexRingQOpenCTI.txt”. Save the file to your browser.
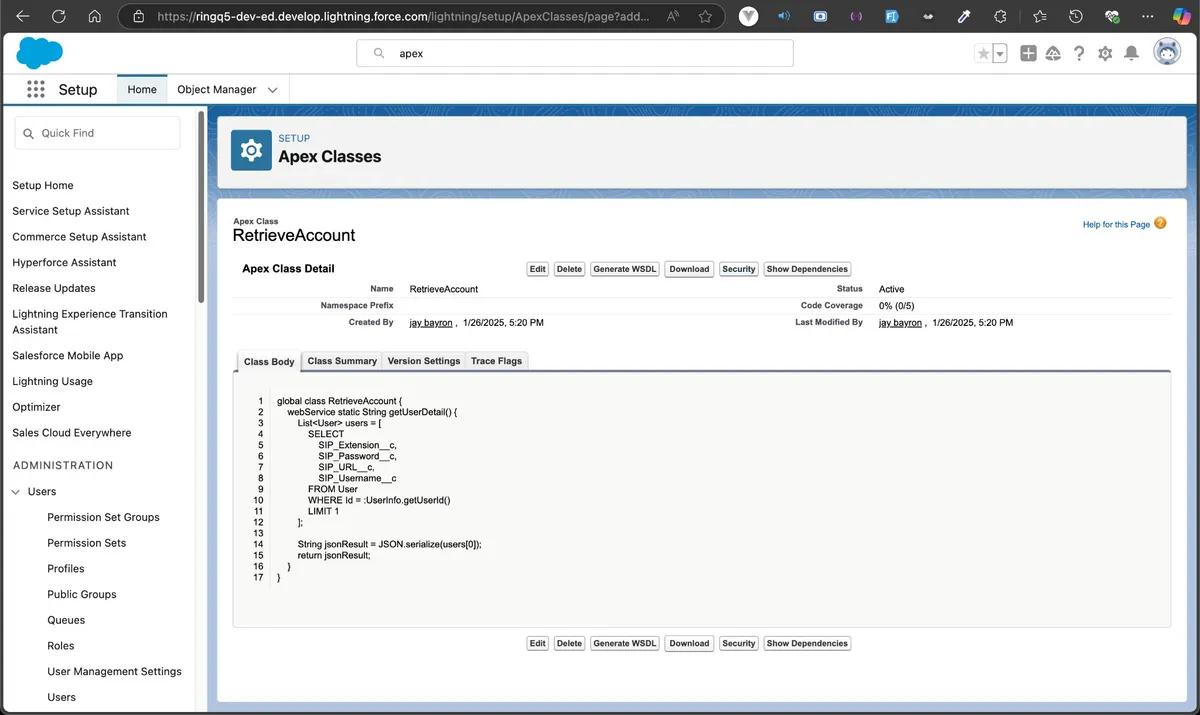
Copy and paste the Apex code into the editor, then click the “Save” button.
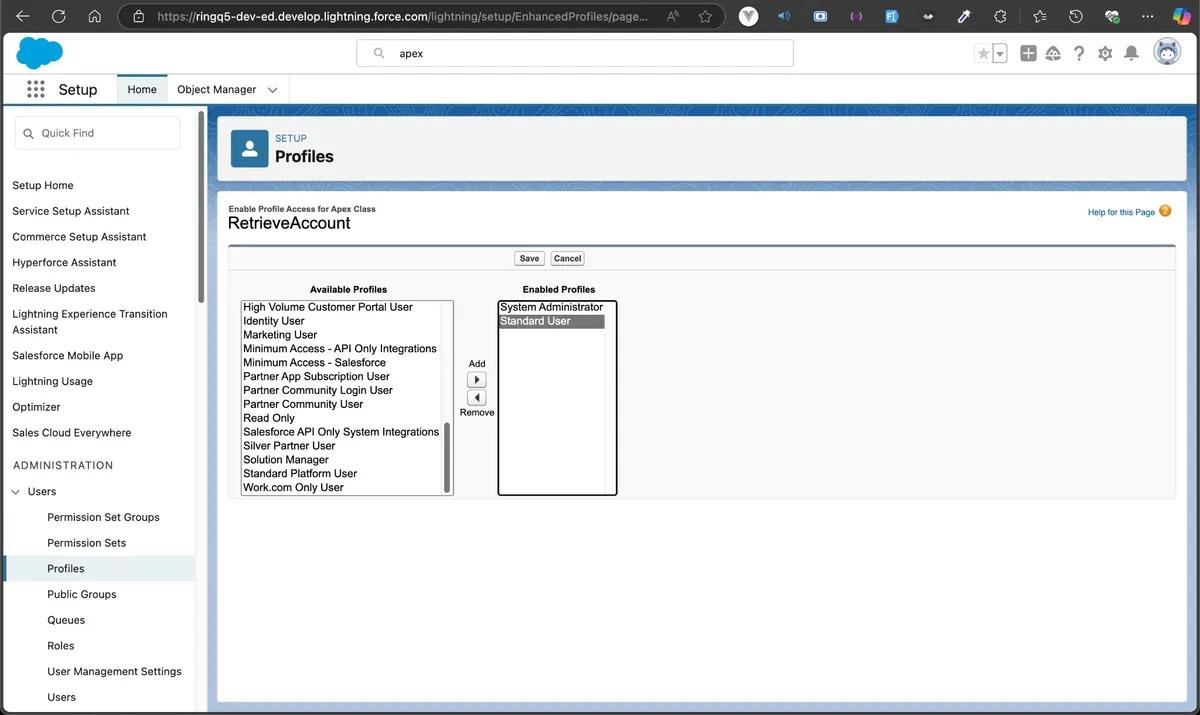
Click the ‘Security’ option.
Add the “Standard User” profile under “Enabled Profiles” and click the “Save” button.
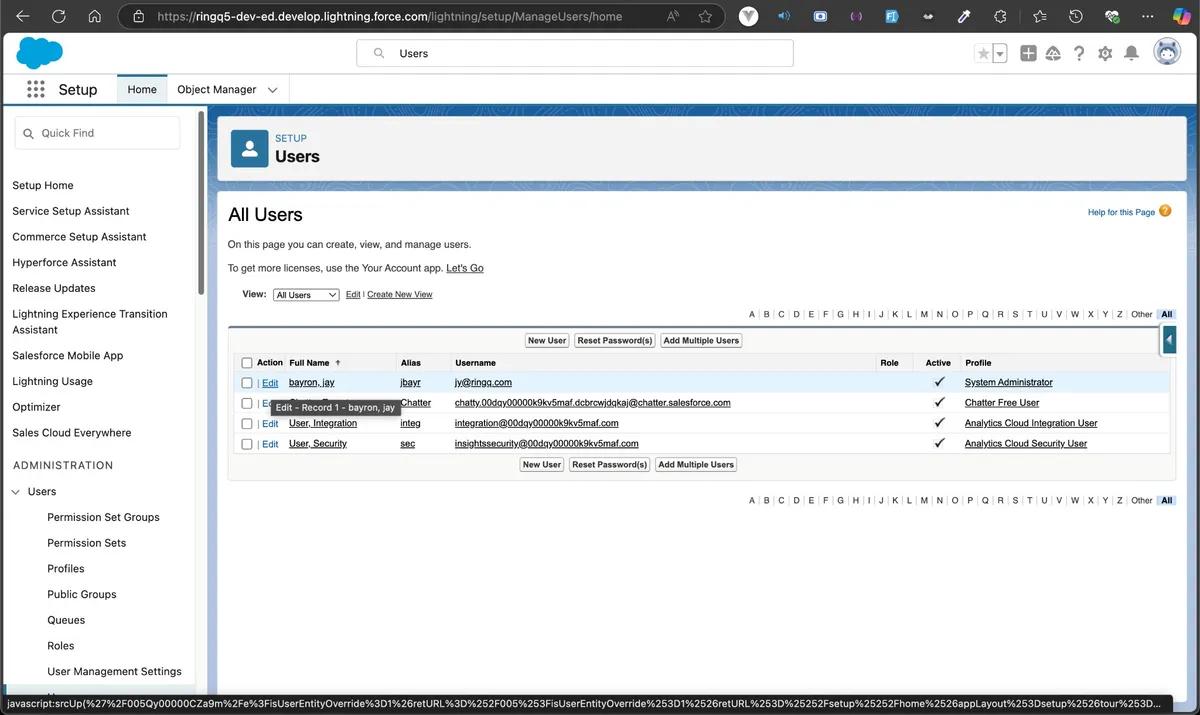
In the Setup Search, enter “Users” and click “Edit” for the required user account.
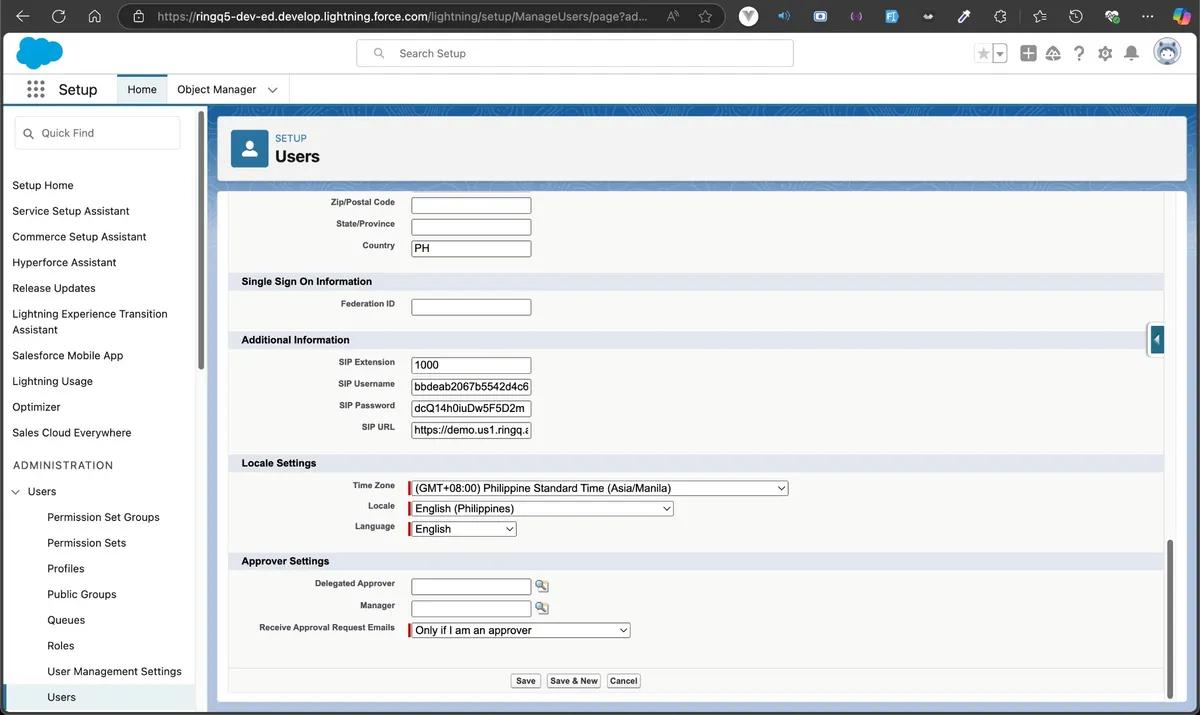
Navigate to “Additional Information” and fill out all the required fields including SIP Extension, SIP Username, SIP Password, and RingQ Server URL. The values can be obtained from the RingQ application. Then click the “Save” button.
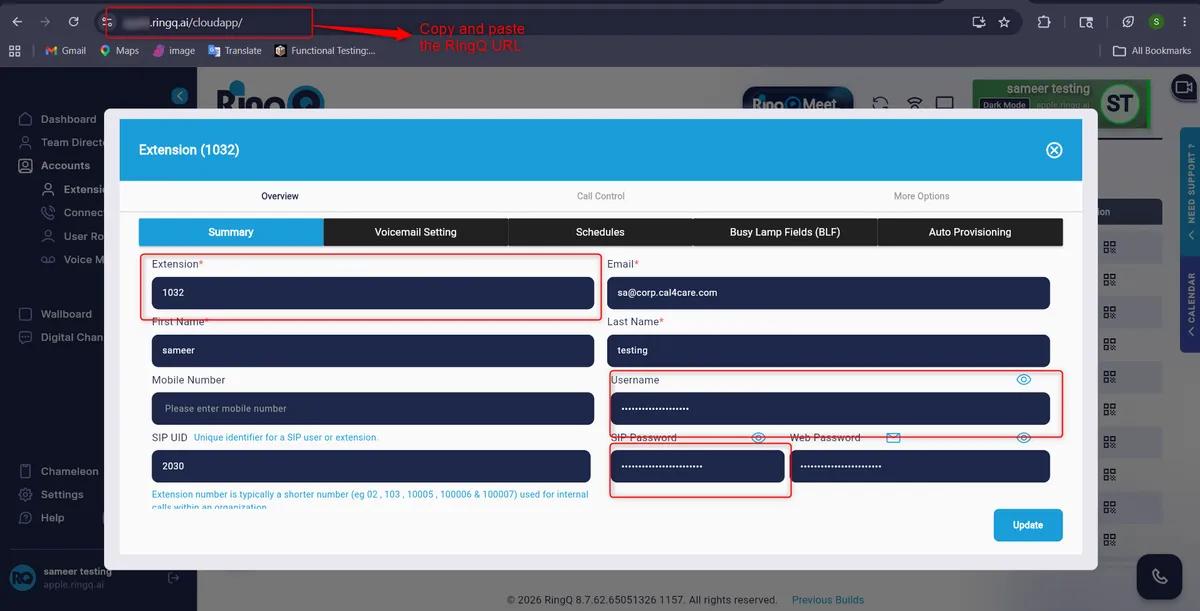
Open your RingQ URL, Navigate to Accounts >Extensions, search for the extension number and Click the extension number to view the SIP Extension, SIP Username, and SIP Password details. Copy and paste all the required details, then click the “Save” button.
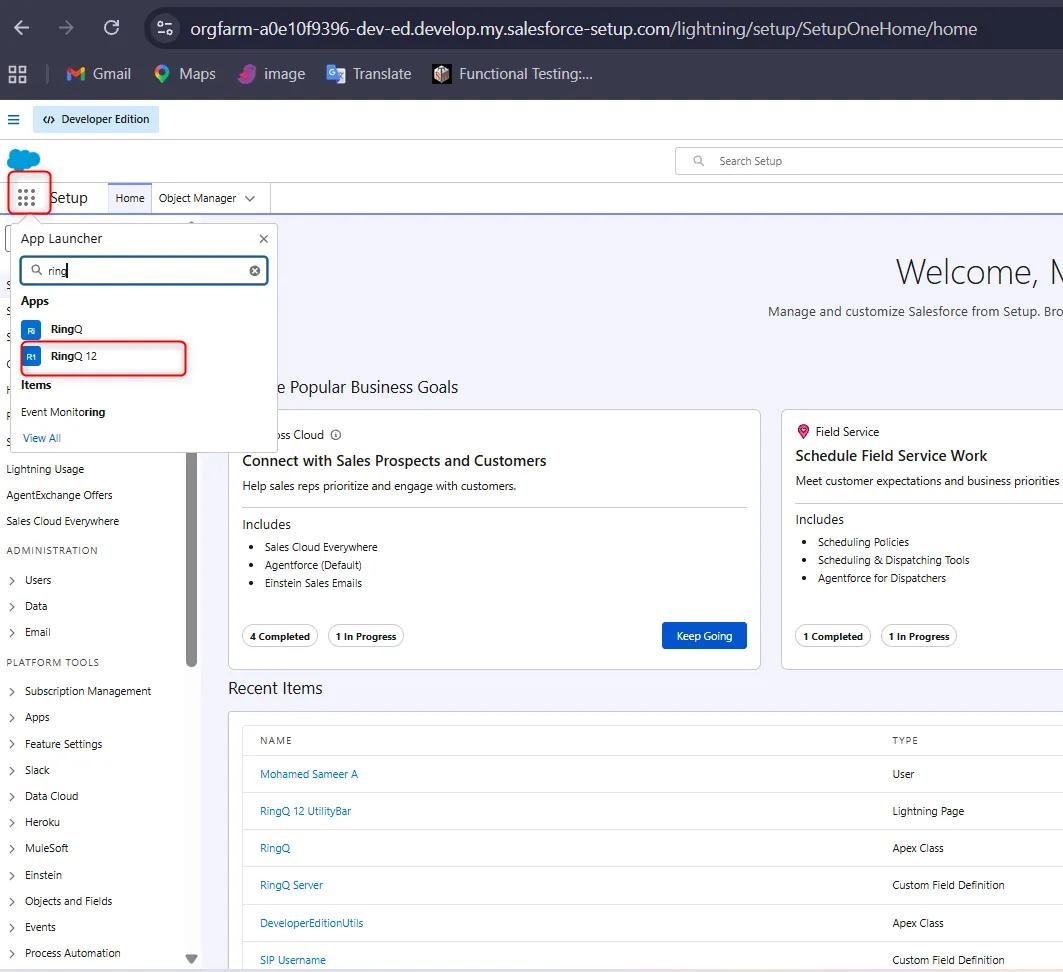
After saving the fields, click the Setup “9-dot” App Launcher option, search for your App name, and open the App.
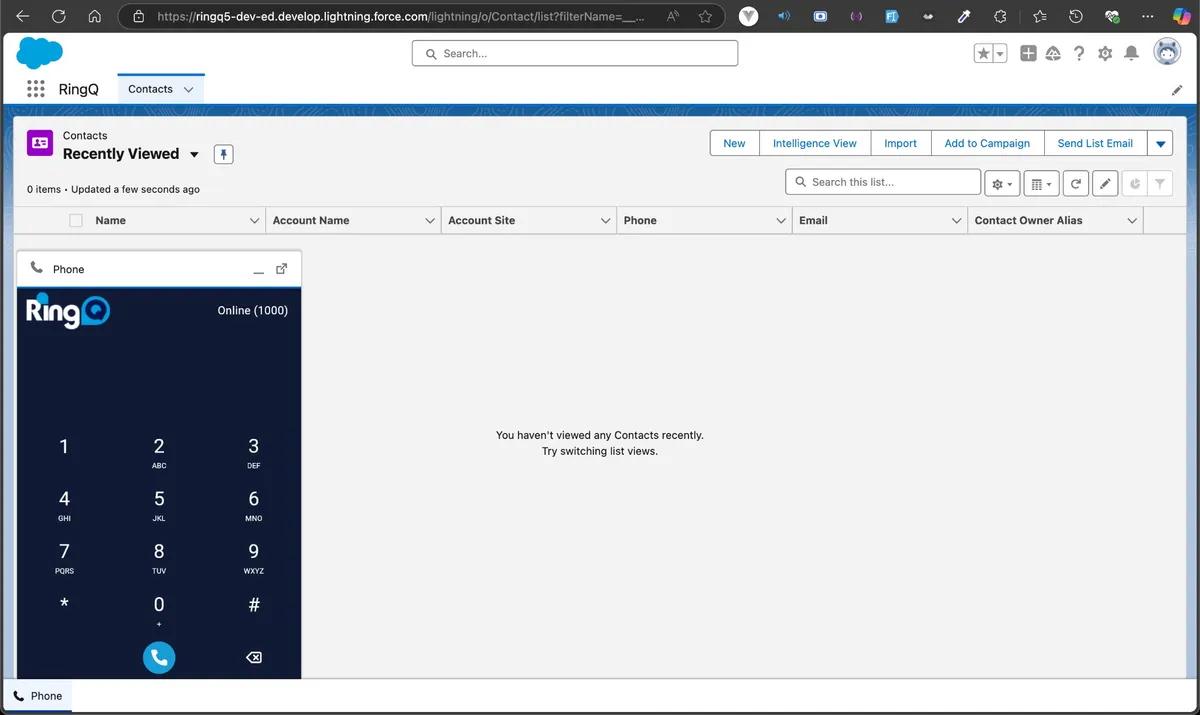
Open the newly created Lightning App (RingQ) and verify whether the RingQ Dialer is displayed and functioning properly.
Setting up a new Salesforce account under the System Administrator Profile
Go Setup > Search ‘User’ > New User
Fill up the fields in the ‘General Information’ and ‘Addition Information’
Fill in the fields:
Last Name
Alias
Email
Username
Nickname
Role - You can select ‘<Non Specified>’
User License -’ Select 'Salesforce.' (If you don’t see a 'Salesforce' option, it means all licenses have been used. To check, go to 'Company Information.')
Profile - You can select either ‘System Administrator’ or ‘Standard User’ base on your preference
Call Center - click the ‘Search logo’ button and select the ‘RingQ Open CTI’
SIP Extension - Go to RingQ App
SIP Username - Go to RingQ App
SIP Password - Go to RingQ App
RingQ Server - Go to RingQ App
Check the checkbox ‘Generate new password and notify user immediately’ and click ‘Save’ button.
To test if the new created user have a ‘RingQ Dialer’ you can enable ‘Administrators Can Log in as Any User’
In the Search Setup, type ‘Login Access Policies’ and enabled ‘Administrators Can Log in as Any User’
Go back to ‘User’ and you will see a ‘login’ beside ‘edit’ button