Introduction
This guide outlines a clear, step-by-step process for configuring Telegram Chat in the RingQ Web App. By following these instructions, you will integrate Telegram messaging with your RingQ platform, allowing it to reliably send and receive chat messages through Telegram.
Telegram Prerequisites
- Administrator access to the RingQ Web App
- Active Telegram account
- Access to Telegram
- You have created a Telegram Bot using BotFather Telegram bot
- You have generated a Bot Token from BotFather
- Your bot is active and properly set up
- You can complete any required verification or security checks
Access Chat Channel Settings
1. Sign in to your RingQ Admin dashboard.
2. From the main menu, go to Settings
3. Select Global Settings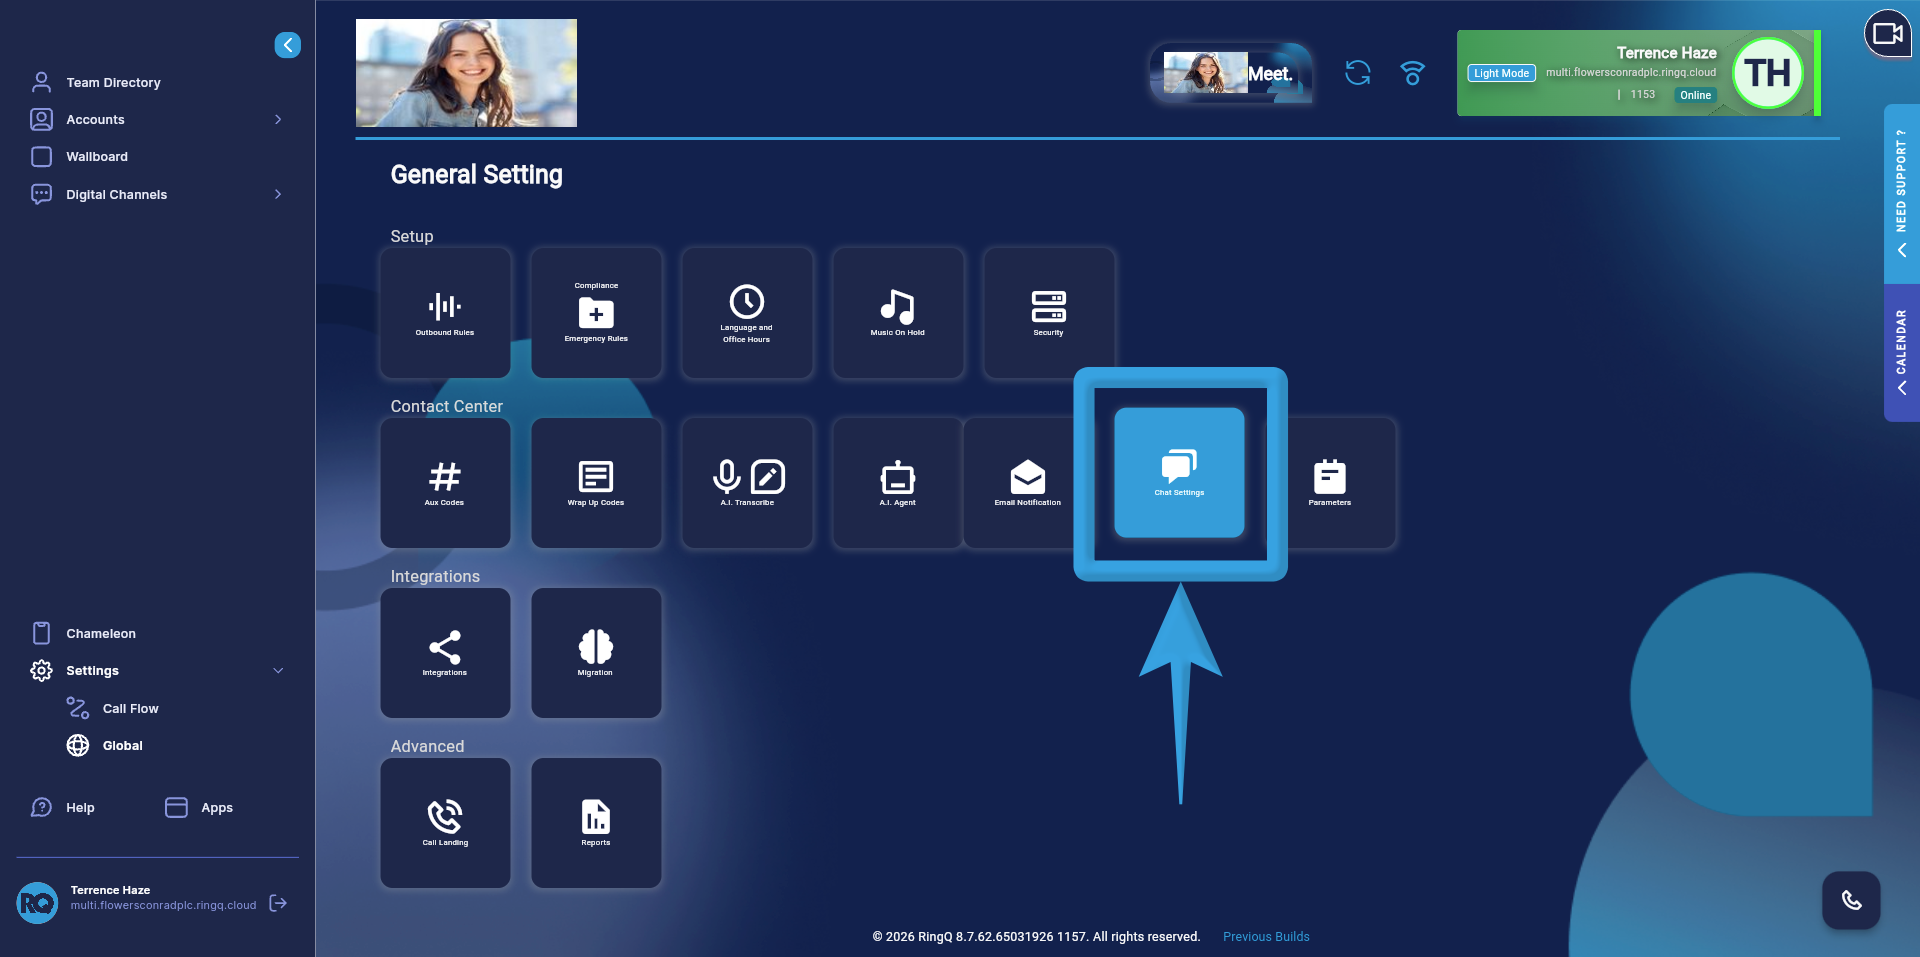
4. Click Chat Settings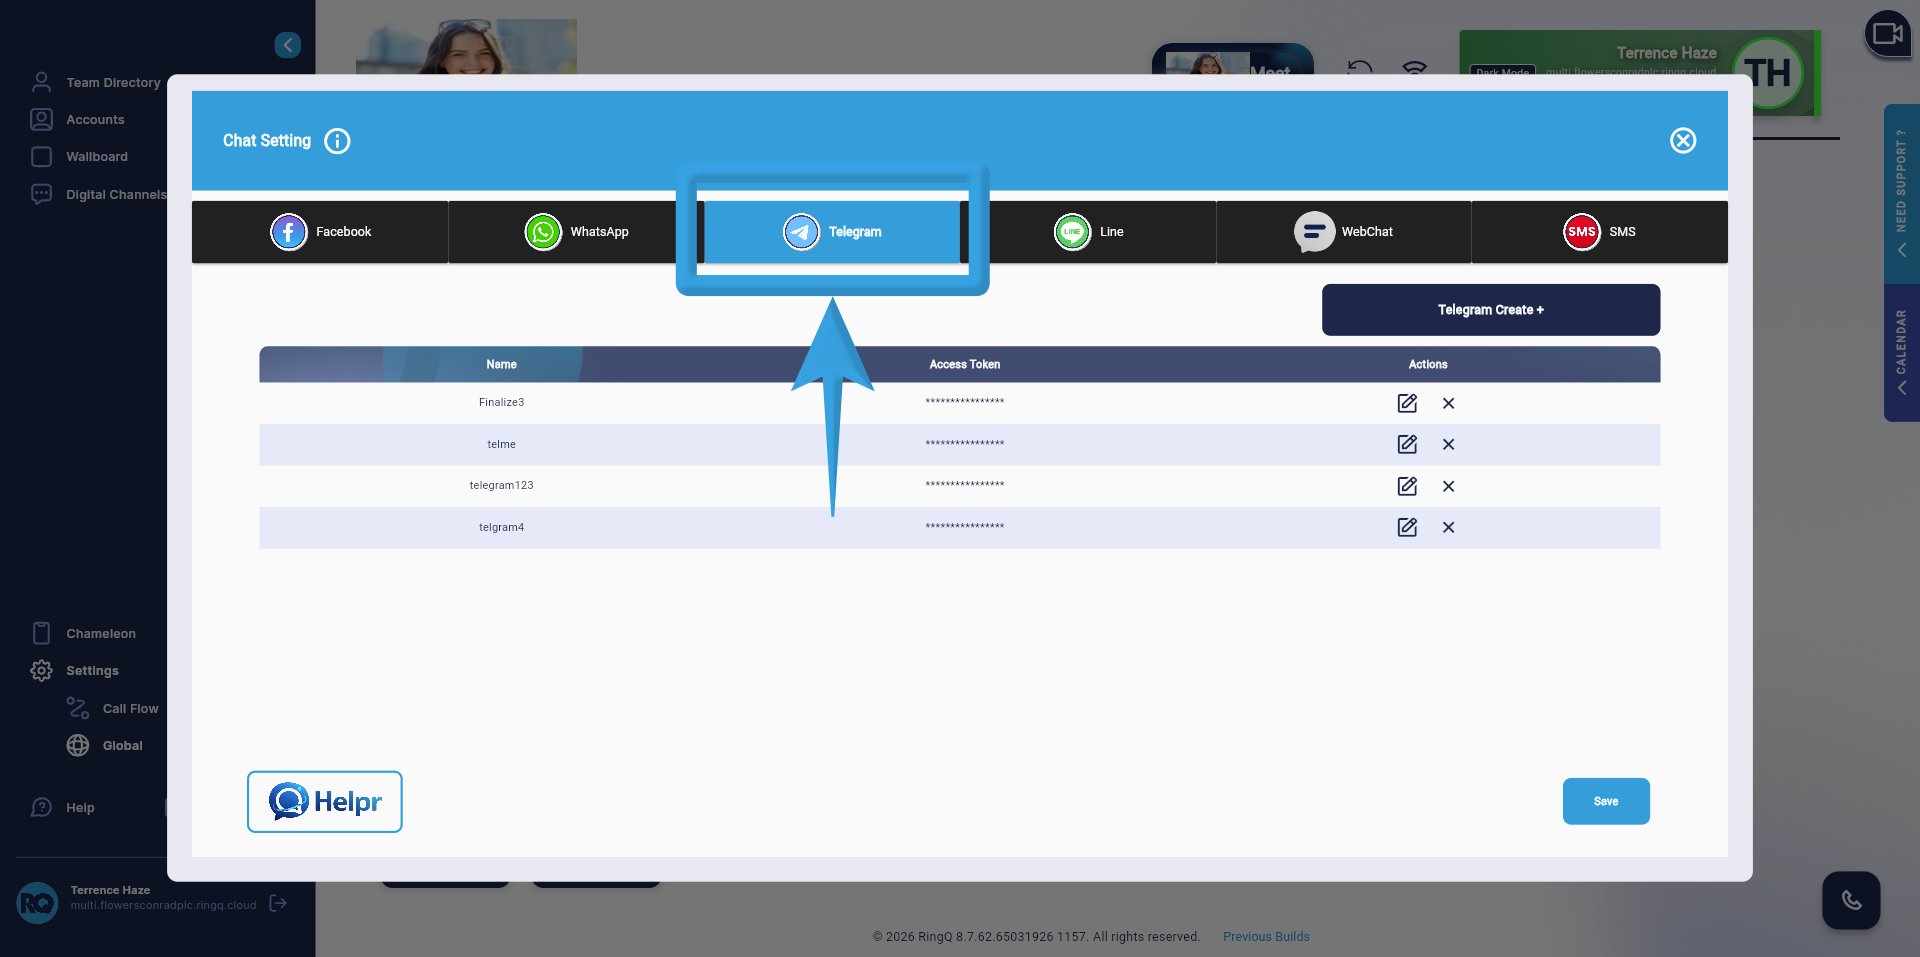
5. In the Chat Settings page, locate the list of available chat channels
Select Telegram to begin the configuration process.
At this point, RingQ is ready to accept Telegram-specific configuration details such as Bot Token and webhook settings.
Configure Telegram
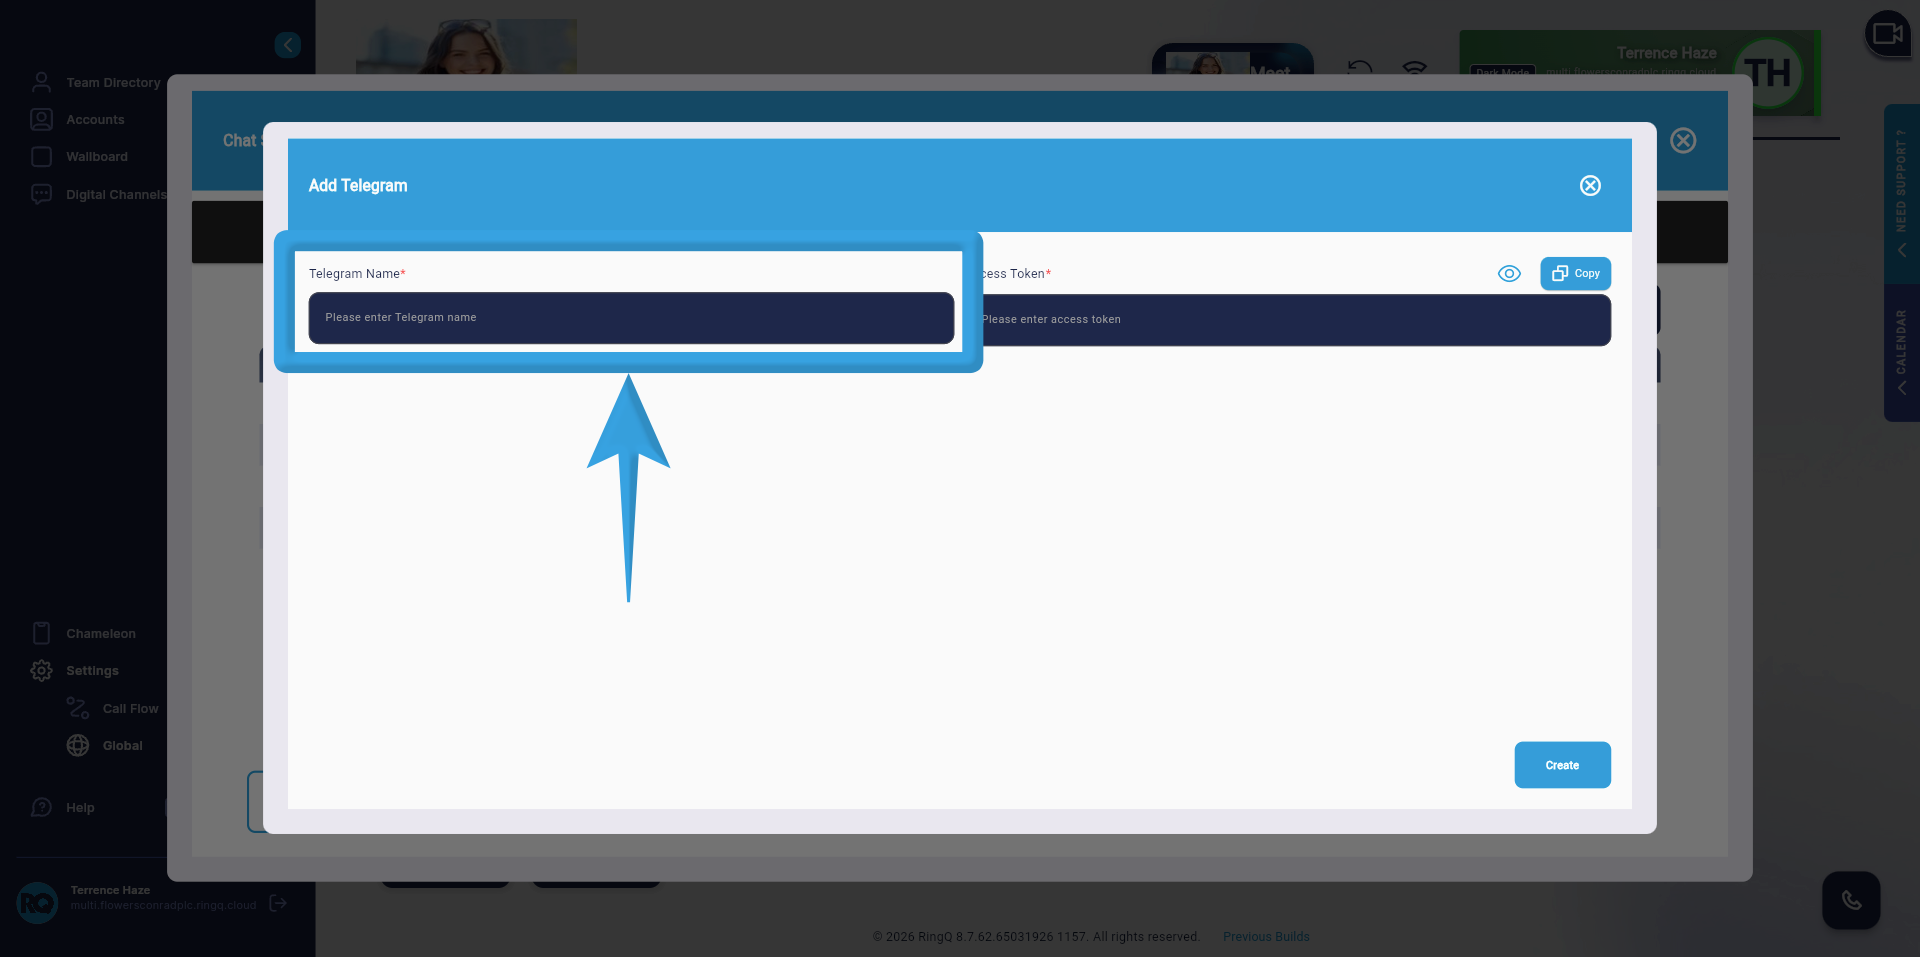
1. Enter a descriptive name for the integration. This will serve as the display label in RingQ.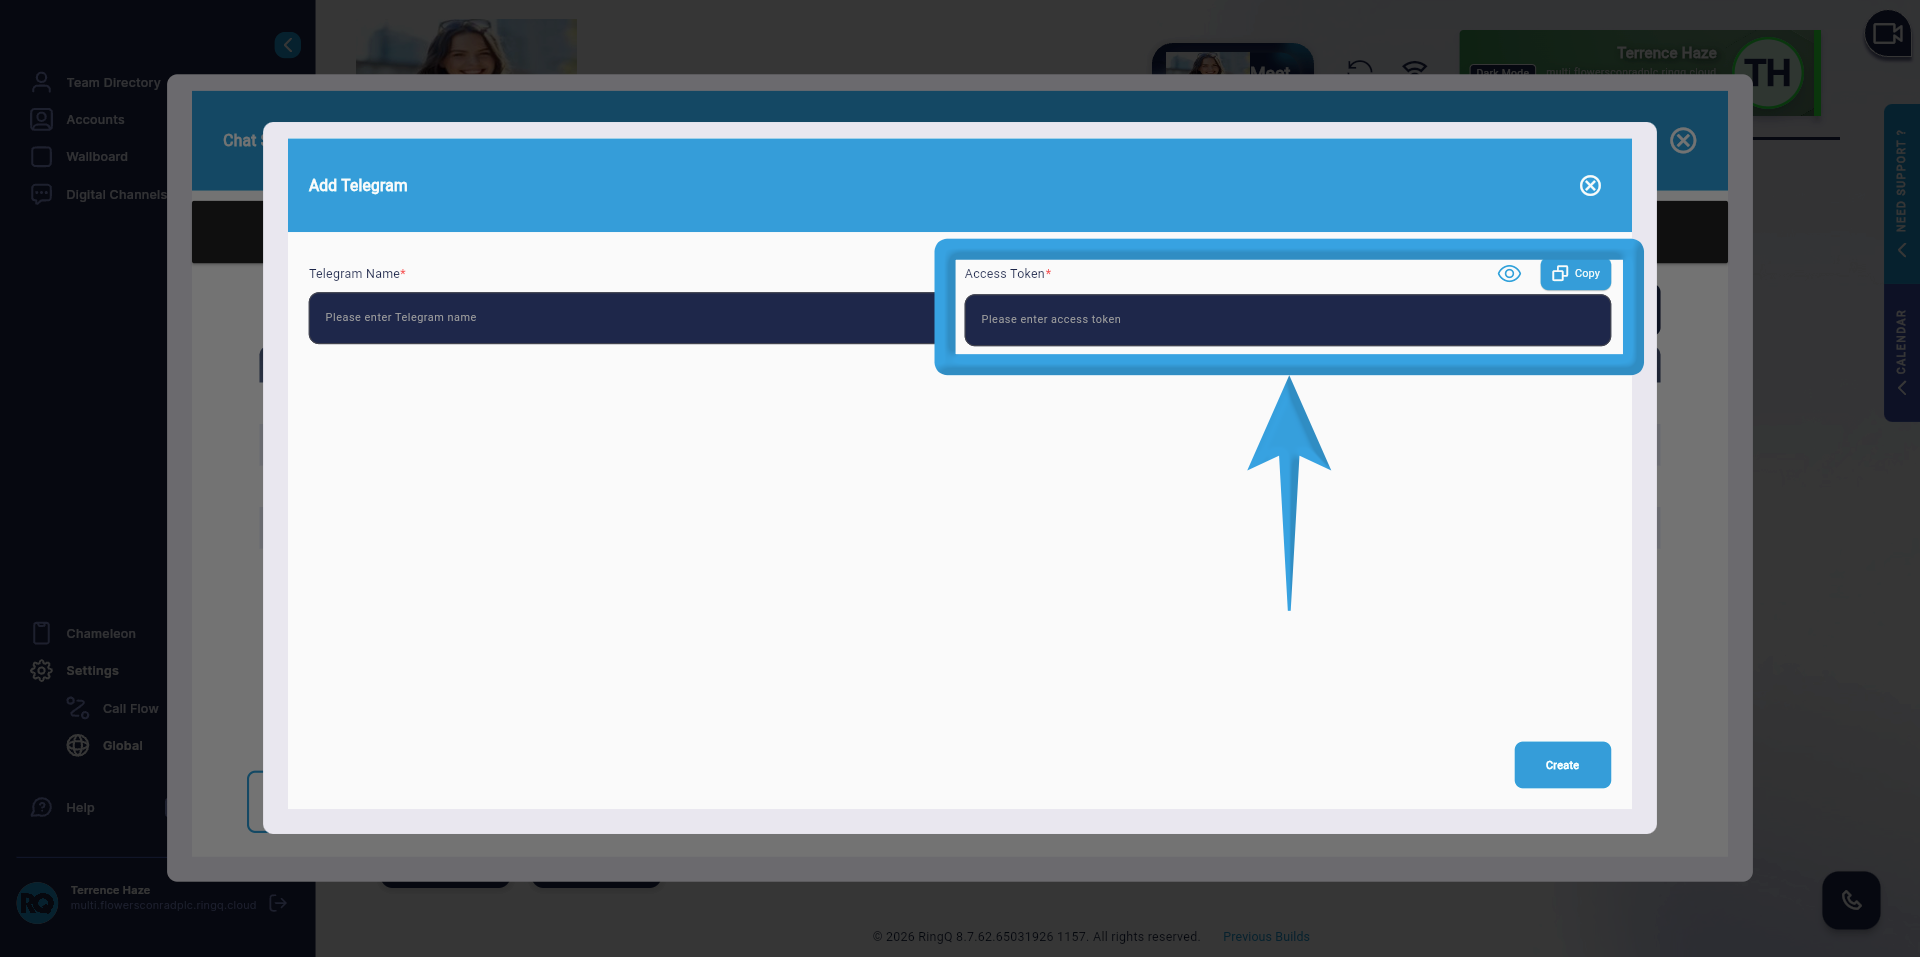
2. Copy the Bot Token from BotFather and paste it into the Bot Token field in RingQ. The Bot Token is used to authenticate and securely connect RingQ to your Telegram bot, enabling message sending and receiving.
3. Click ‘Create’.
Important Notes
- Ensure all values are copied correctly from Telegram.
- Do not interchange fields (e.g., Bot Token should only be placed in the Bot Token field).
- Make sure the Bot Token is valid and active.
- Copy and paste each value into its corresponding field.
- Ensure accuracy and correct field mapping.
- Configure one field at a time to avoid errors.
- Double-check all entries before saving.
