Introduction
Note that the first tenant of a mulrti-tenant license is unusable and use your own company name or any other name related to your company for the FQDN.
The first instance is mainly used for management for the server.
The second instance onward, you should be able to add your own customers.
Please also follow the FQDN and procedure as below for multi tenancy.
(Image)
Also, please note that all the main settings like buy extension (link) and cancel extensions (link) are done using CAP portal.
Reboot / update / service restart are now available in CAP portal and first instance.
Step-by-Step Guide
Step 1: Understand the first tenant - note that the first tenant is unusable.
Step 2: Use proper FQDN naming. Use your own company name or another relevant name to your company for the FQDN.
Step 3: Use the first instance for management – the first instance is mainly used for server management.
Step 4: Add customers from the second instance onward.
Step 5: Follow the FQDN and multi tenancy process.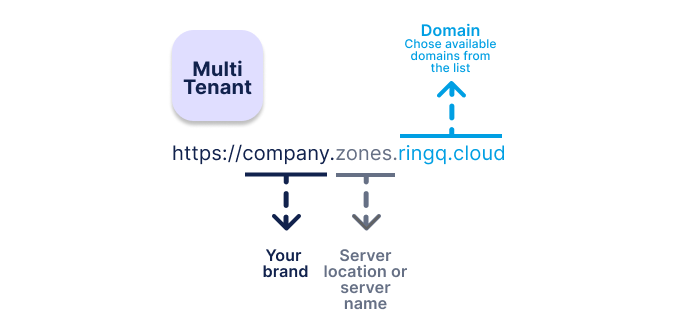
Step 6: Manage main settings from the Customer Access. All the main settings like buying an extension and cancelling extensions are done via the portal.
Step 7: Reboot and maintenance controls Reboot / update / service restart are accessible from the portal and first instance.
Summary
| Component | Purpose |
|---|---|
| First Tenant / Instance 1 | Reserved for management (not usable) |
| Instance 2 onward | Customer tenants |
| FQDN | Use company or relevant customer name |
| CAP Portal | Buy / Cancel extensions |
| System Controls | Reboot / Update / Service restart (CAP portal & first instance) |