Introduction
This guide will walk you through the steps to release or cancel an extension in the RingQ Multi-Tenant platform. By following these instructions, you can quickly remove unused extensions and keep your tenant configuration accurate and up to date.
Filter the Multi-Tenant License
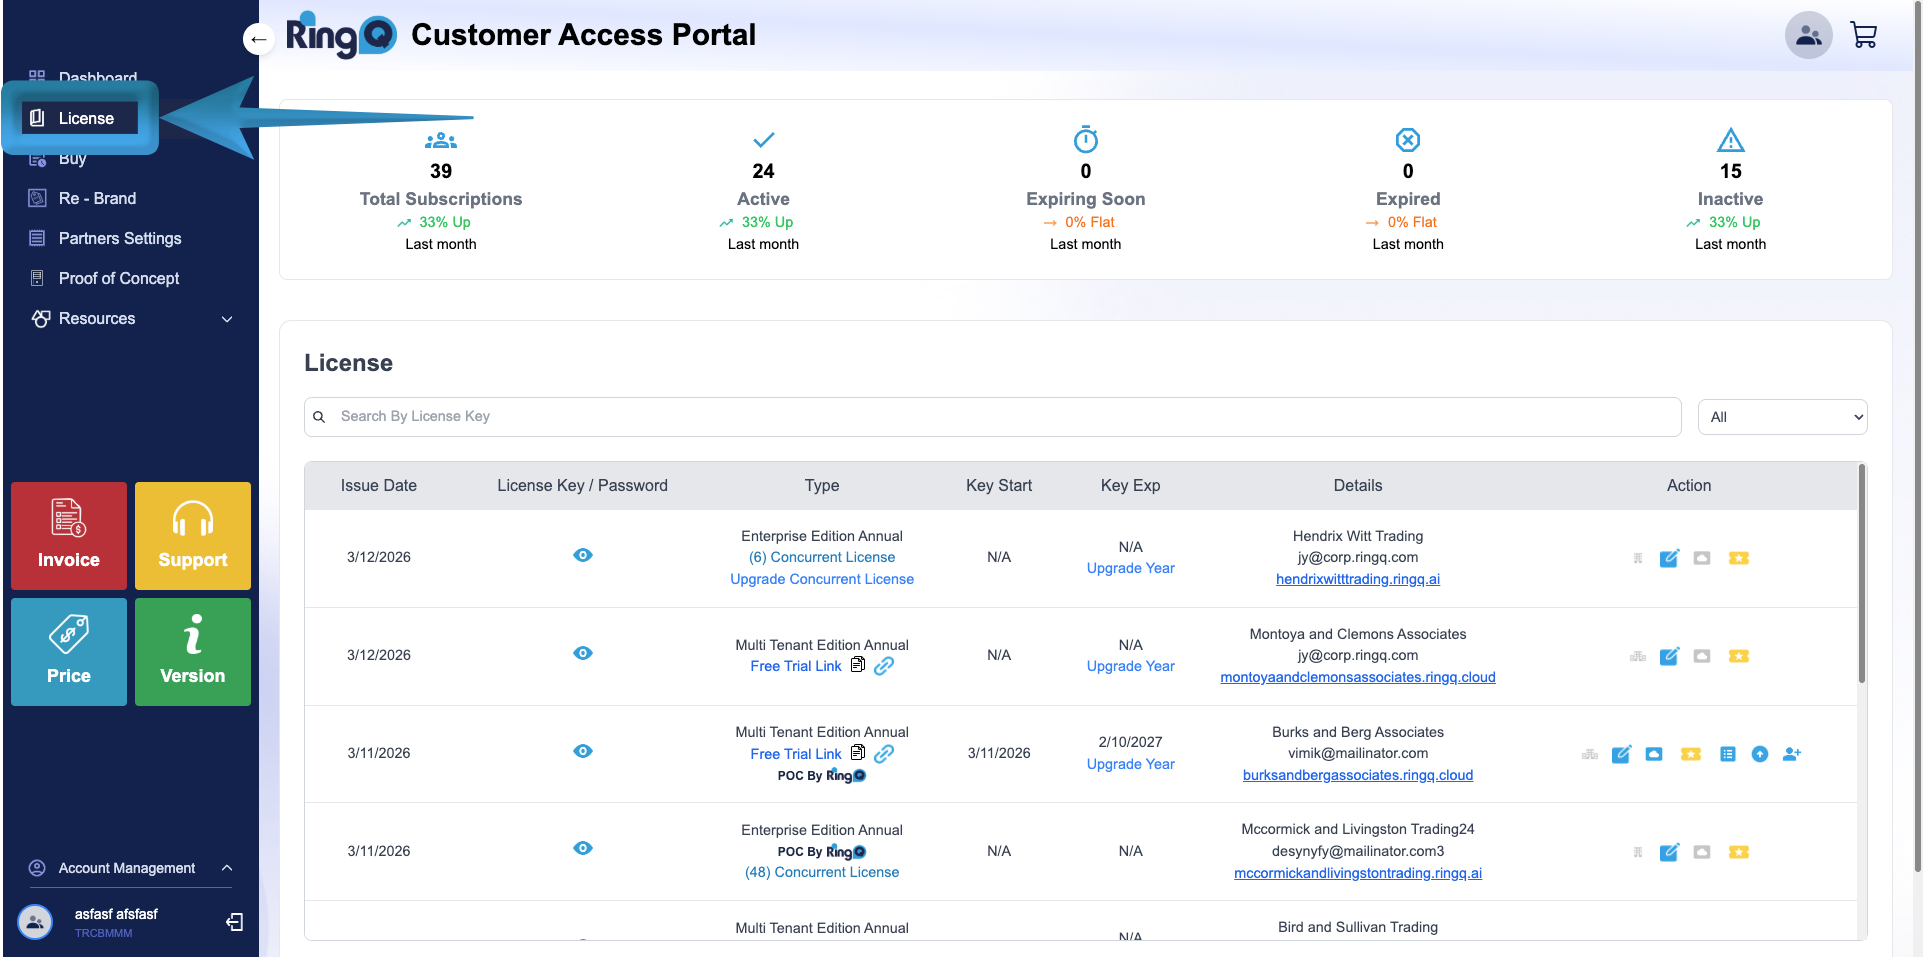
1. Log in to the RingQ Customer Access Portal Dashboard.
2. From the side menu, click the arrow icon to expand the menu options.
3. Select License.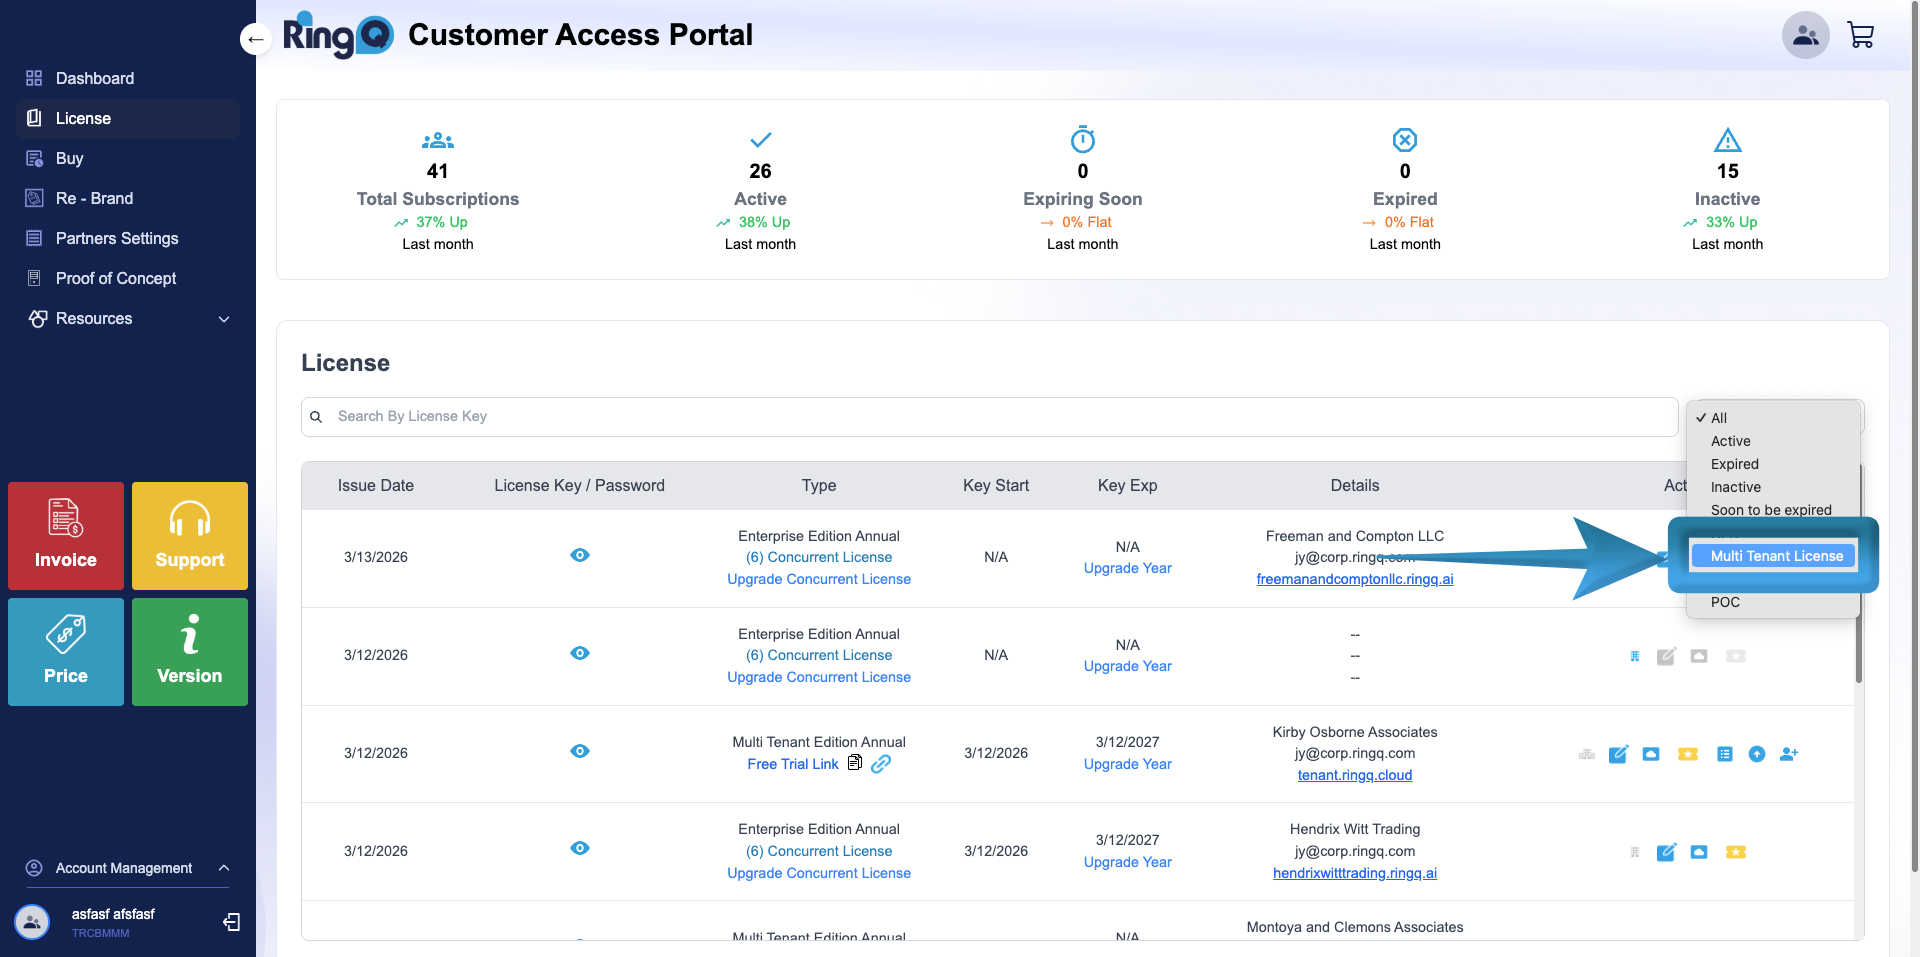
4. Locate the dropdown menu on the upper-right corner and select Multi-Tenant License from the dropdown list.
5. The page will automatically filter and display only the available Multi-Tenant license accounts.
6. Locate the Multi-Tenant license account you want to manage.![]()
7. Go to the Actions column and click the Tenant List icon.
Extension Cancellation or Release
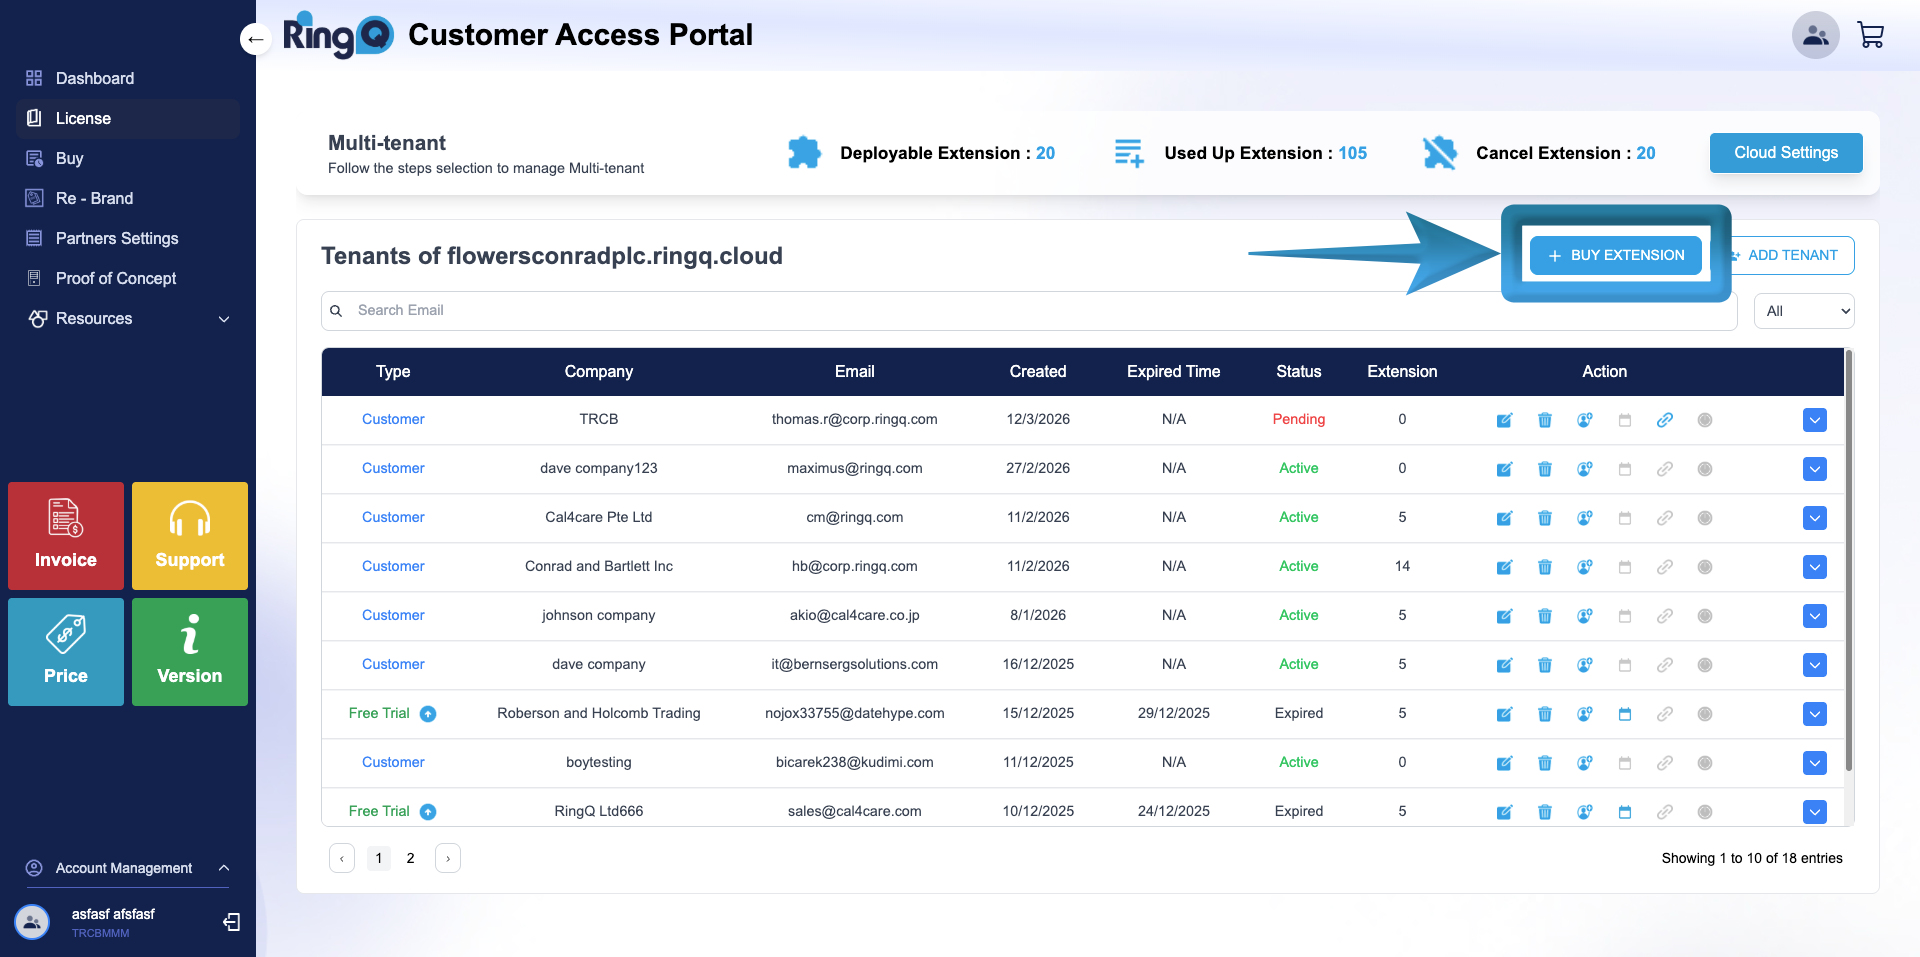
1. Click the Buy Extension button.
2. Click the Cancel Extension button.
3. On the Extension Options page, review the license details displayed:
- Multi License FQDN: flowersconradplc.ringq.cloud
- Balance to be Paid: 308
- Current User License Recurring Start: 15/03/2026
- Current User License Recurring End: 15/04/2026
- Available Extensions: 1346 / 1500
- Deployable Extensions Across All Instances: 39
- Used by Extensions: 110
- Partner Extension Price: 2 per extension
- Cancel Extension Count: 23
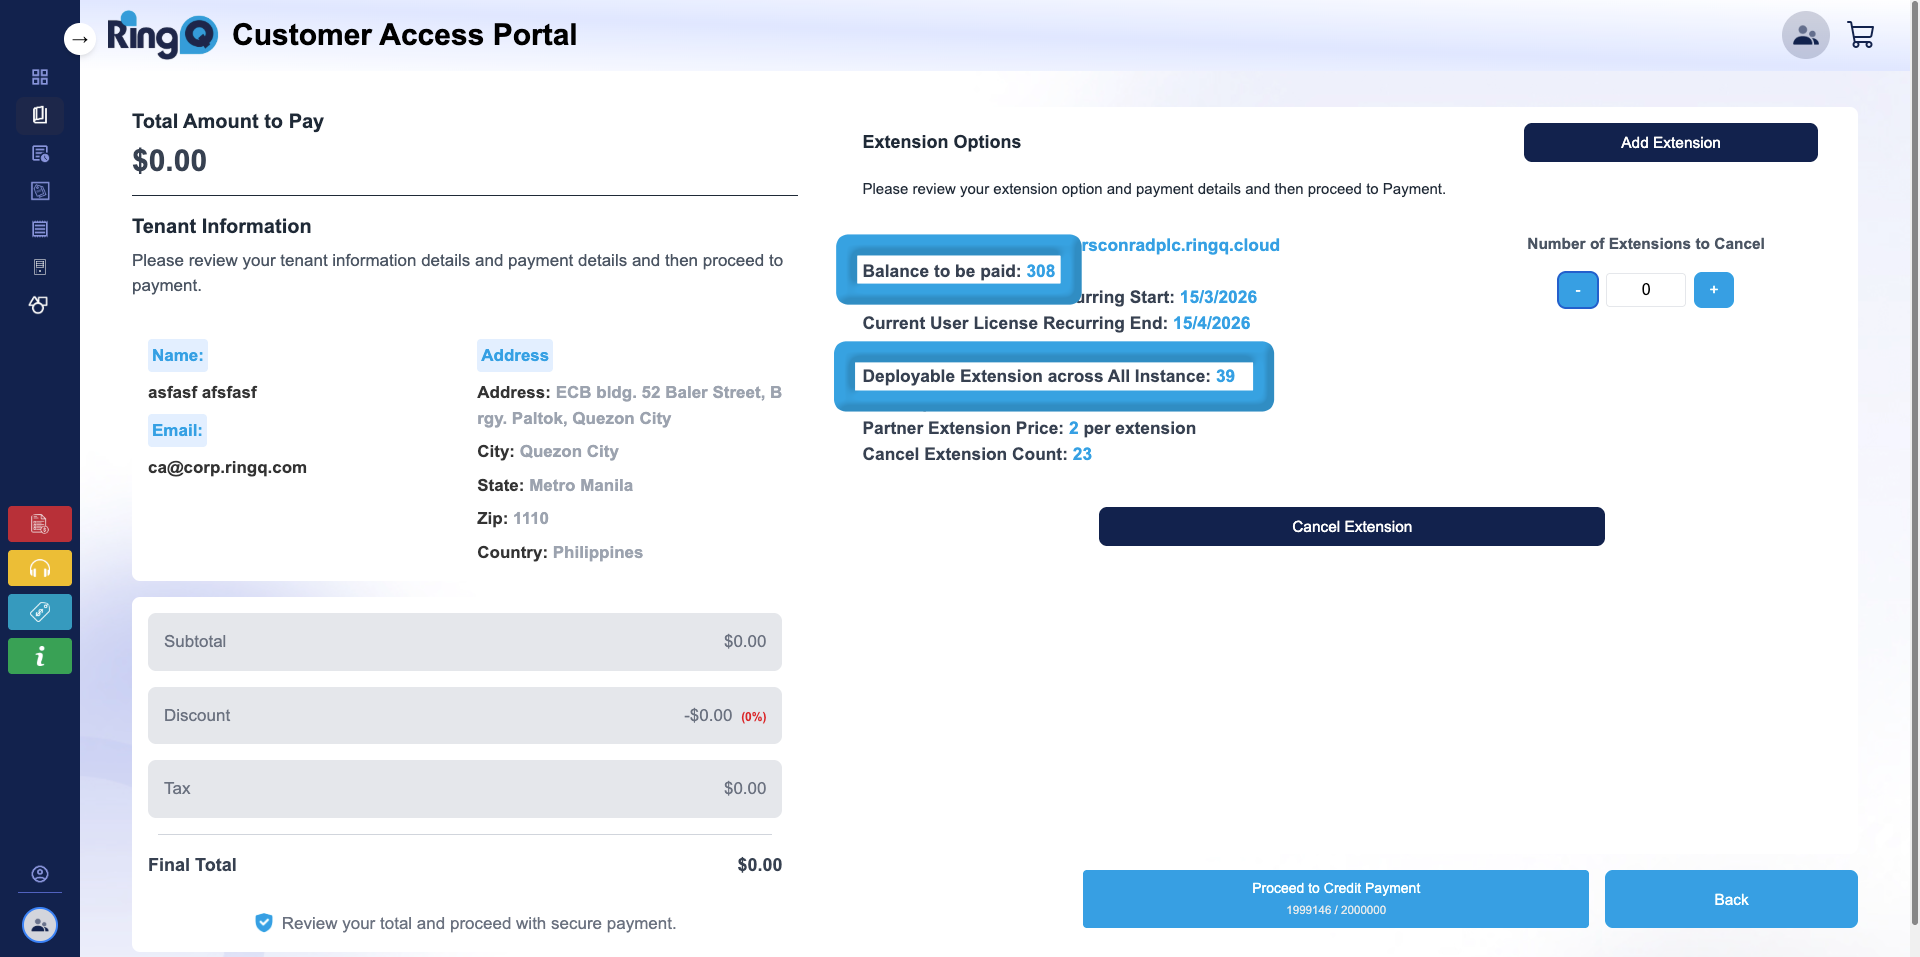
4. Before cancelling extensions, review the following important values:
- Balance to be Paid
- Deployable Extensions Across All Instances
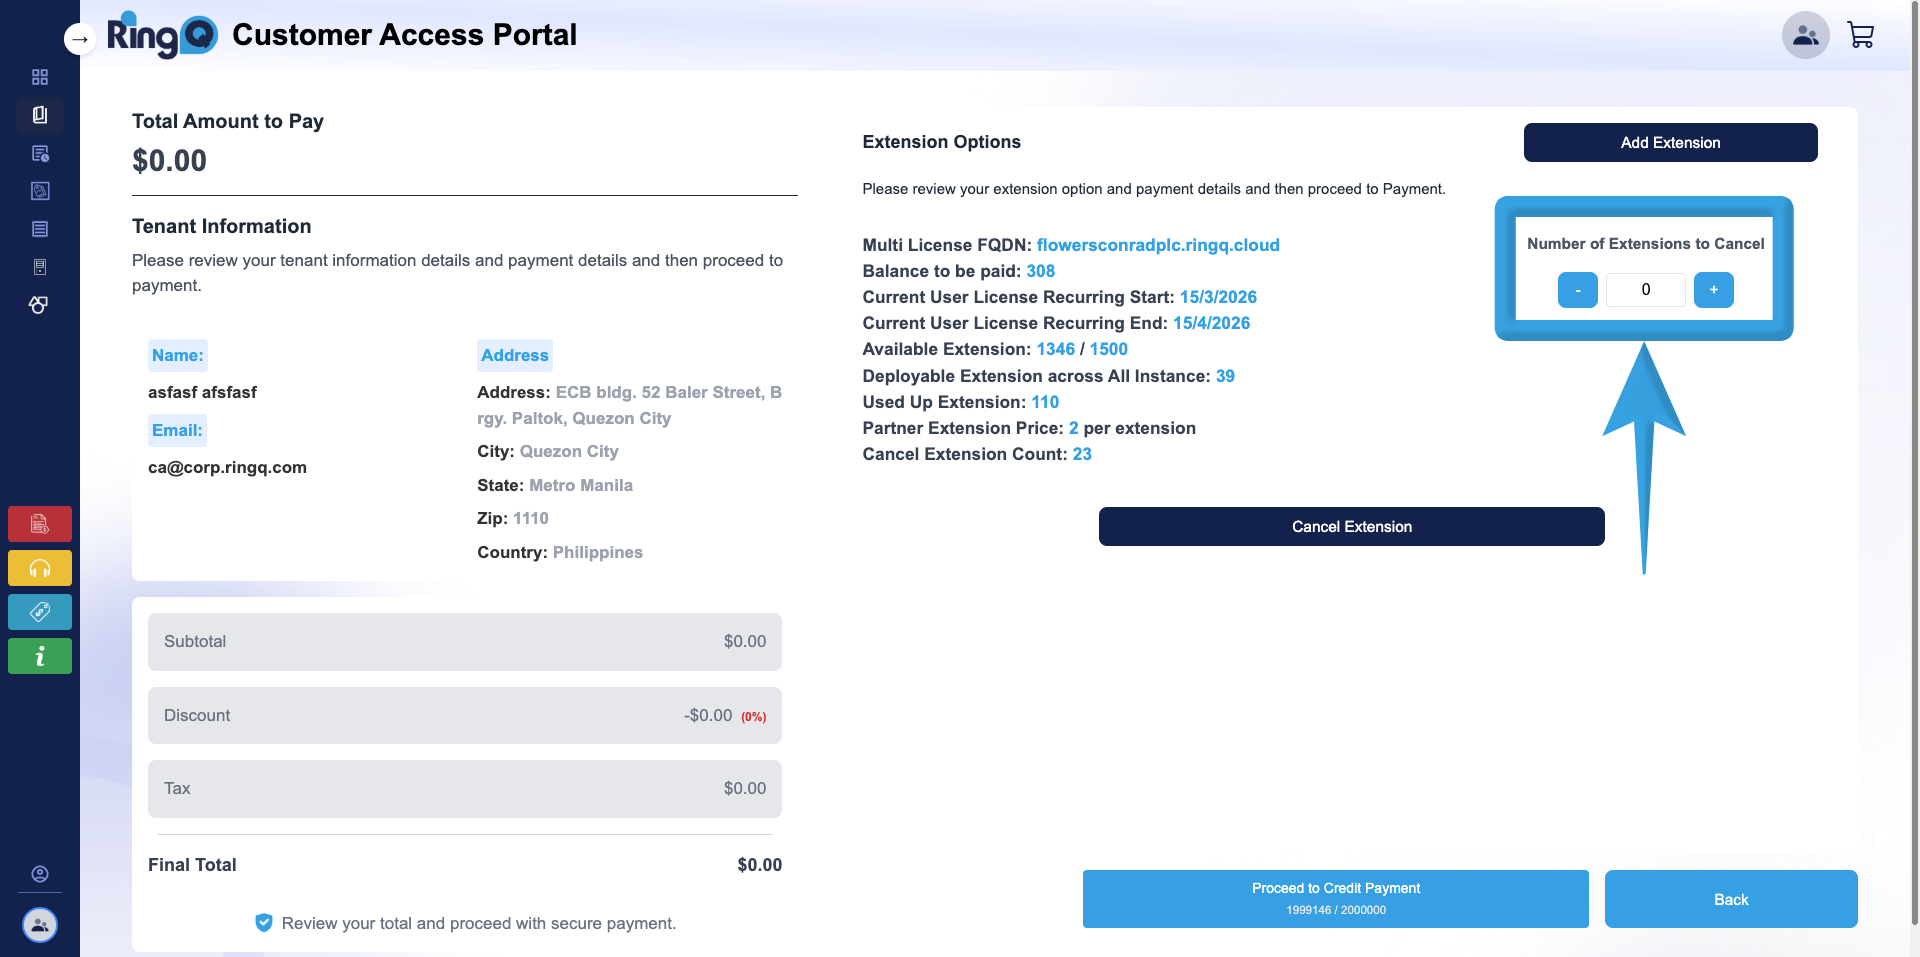
5. Locate the Number of Extensions to Cancel section and click the Add “+” button to specify the number of extensions you want to cancel or release.
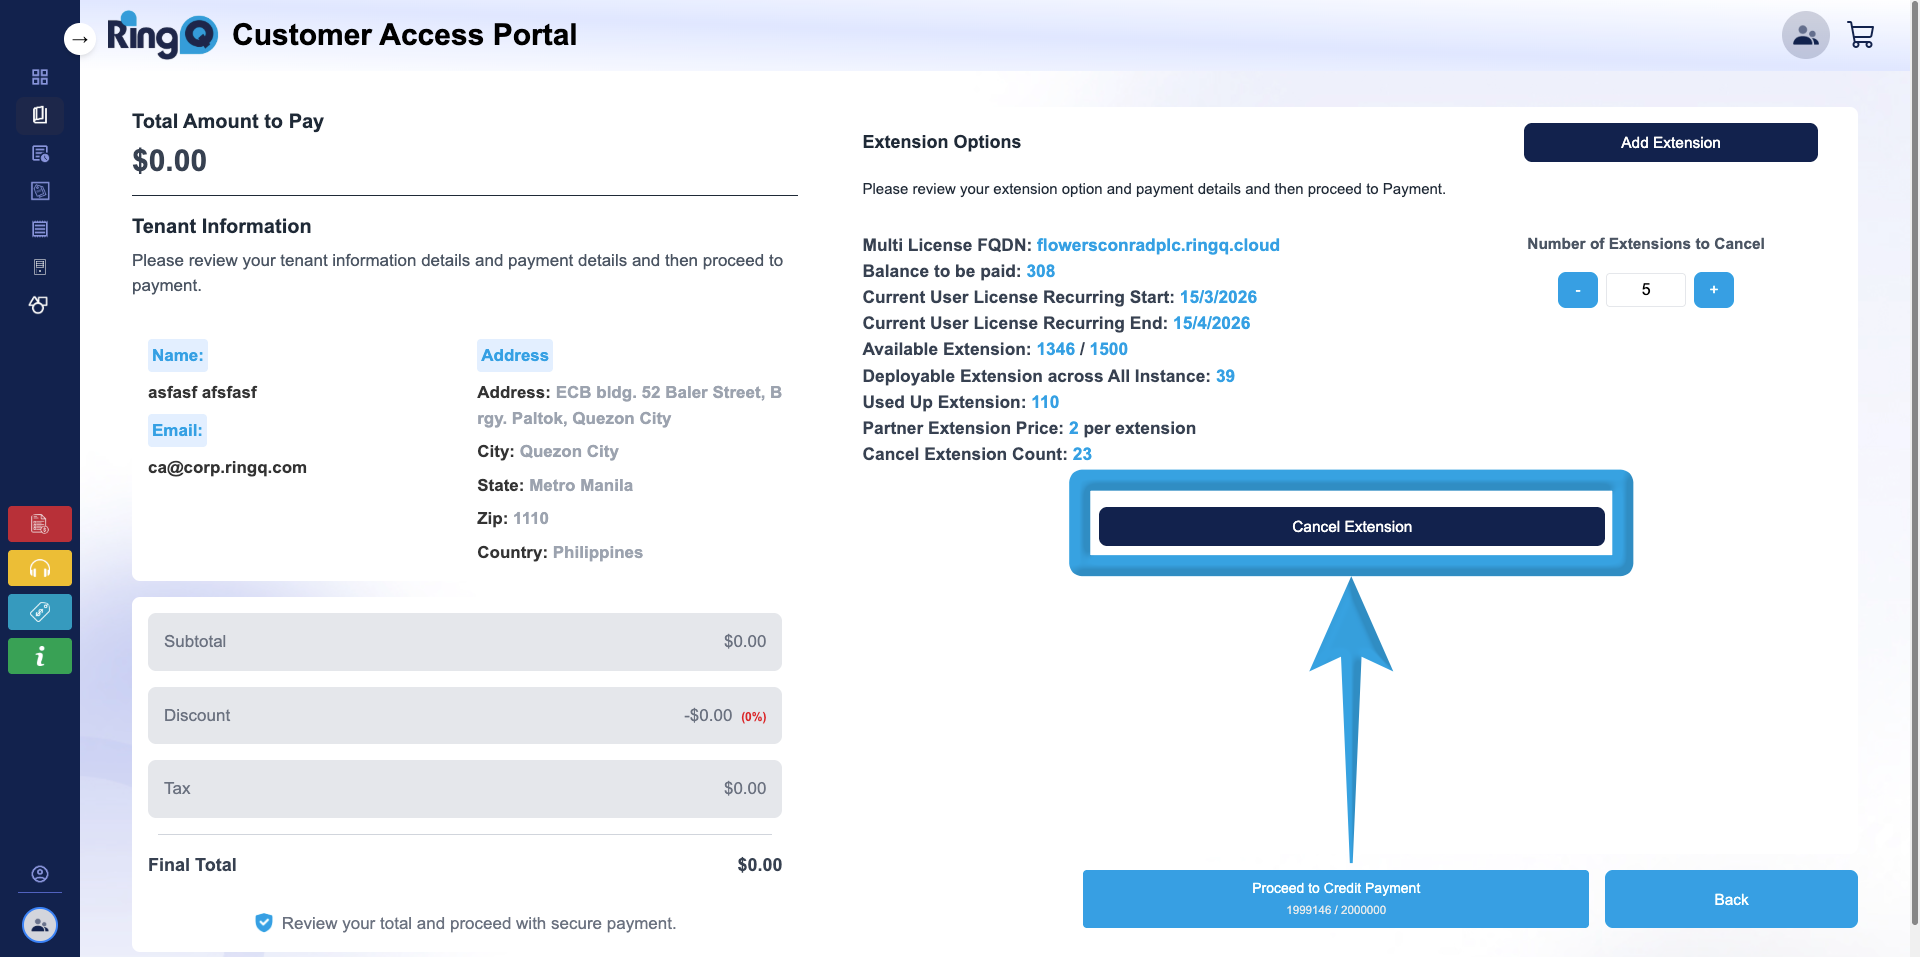
6. Click the Cancel Extension button.
7. A confirmation pop-up will appear. Click Yes to confirm and proceed.
To verify the updated values:
- Click the Buy Extension button again.
- The page will display the latest Balance to be Paid and Deployable Extensions Across All Instances after the cancellation has been processed.