Introduction
RingQ is a cloud-based communications platform that helps contact centers manage calls efficiently and track performance. Wrap-up codes in RingQ let agents quickly record the outcome of each call, making it easier to analyze trends and improve service. This guide explains how to use wrap-up codes effectively so your team can work smarter and provide a better customer experience.
Why use Wrap-Up Codes?

- Categorize call outcomes — e.g., Sale Completed, Follow-up Needed, No Answer.
- Enable reporting — managers can see call patterns, conversion rates, and issue trends.
- Assist in follow-ups — ensures the right team member can take the next step without listening to the entire call.
- Improve training — by analyzing successful vs. unsuccessful call results.
How Wrap-Up Codes Work in RingQ
 1. Call Ends → The system switches the agent into Wrap-Up Mode (a short timeframe before they are available for the next call).
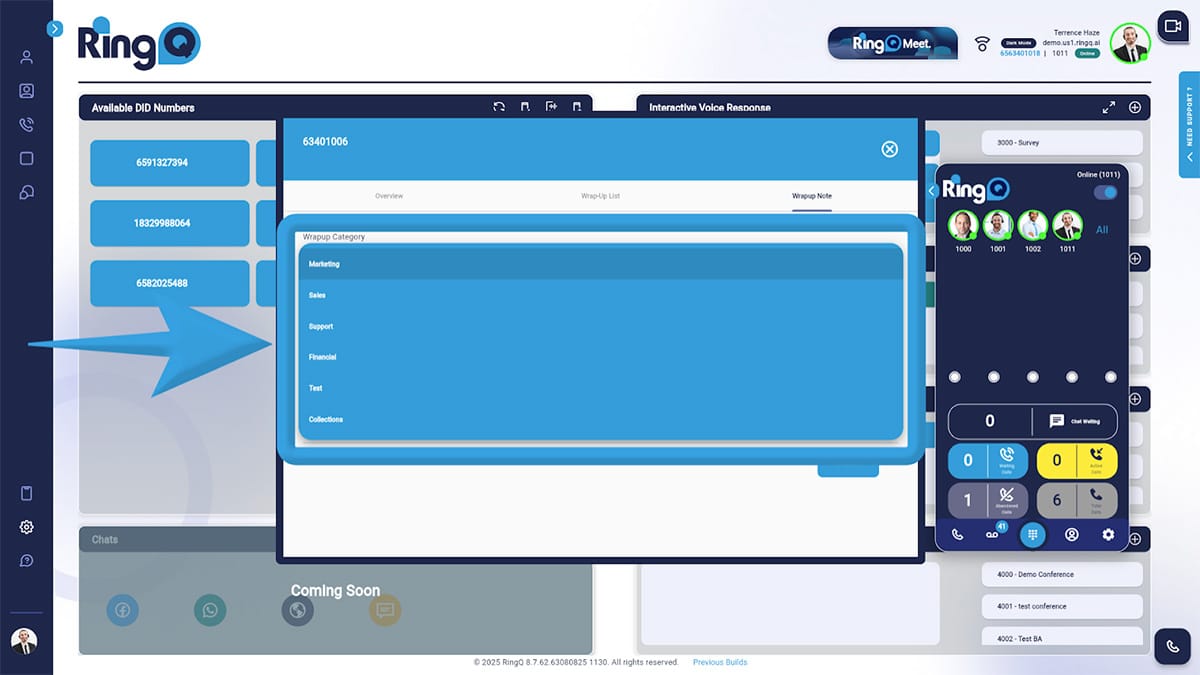 2. Agent Selects a Code → From a dropdown list in the RingQ Dialer or CRM screen.
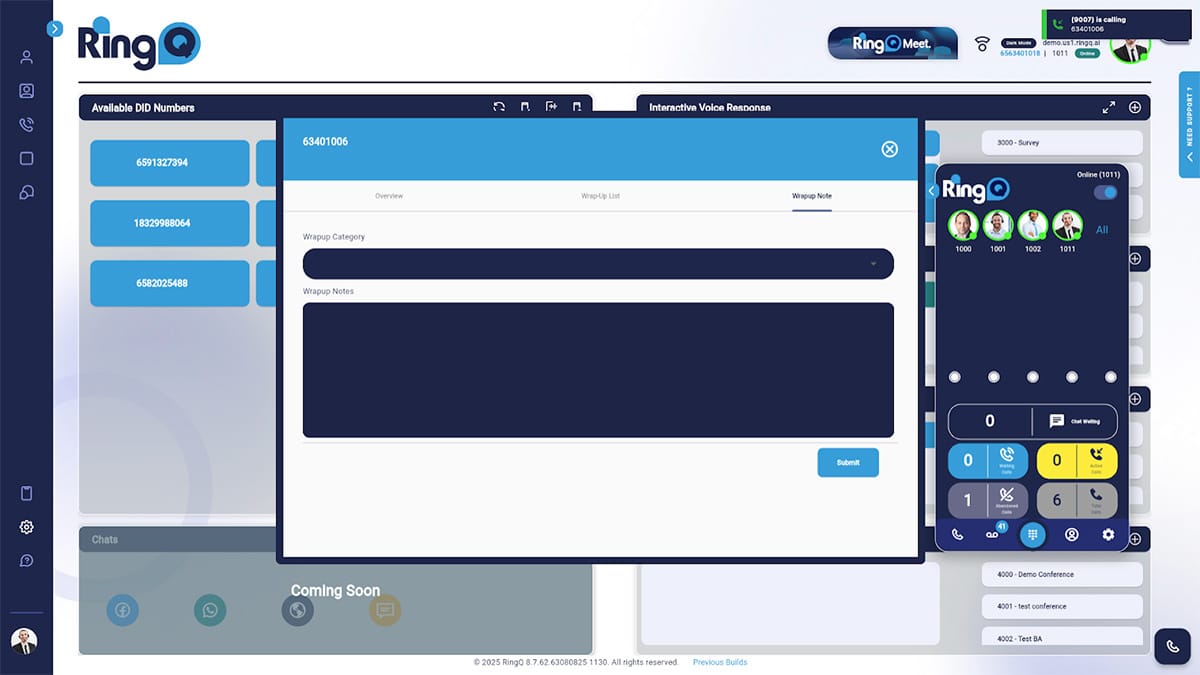 3. Optional Notes → Agents can add details alongside the wrap-up code for clarity.
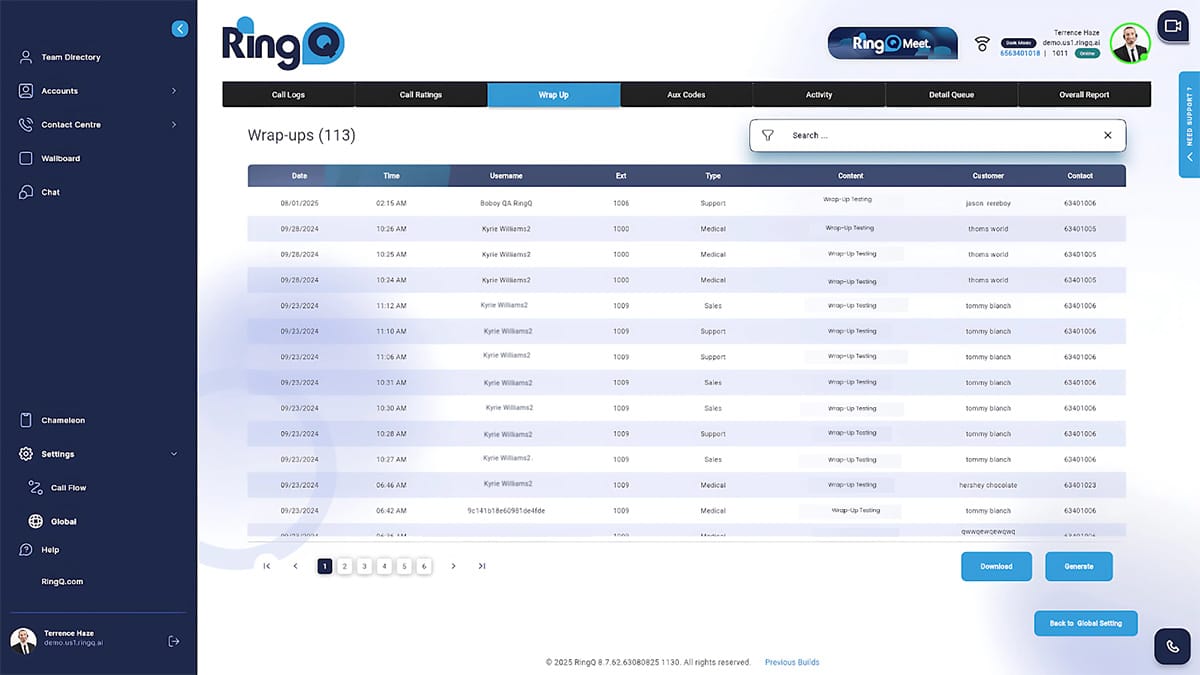 4. Data Saved to Reports → Both the code and notes are stored with the call record.
Example Wrap-Up Code Categories
| Wrap-Up Code | Meaning |
|---|---|
| Sale Closed | Customer purchased |
| Callback Scheduled | Follow-up booked |
| Not Interested | Customer declined |
| No Answer | No one picked up |
| Wrong Number | Contact info incorrect |
| Support Resolved | Issue fixed during the call |
Setting Up Wrap-Up Codes in RingQ
1. Login to you RingQ Admin Dashboard → Call Center Settings → Wrap-Up Codes
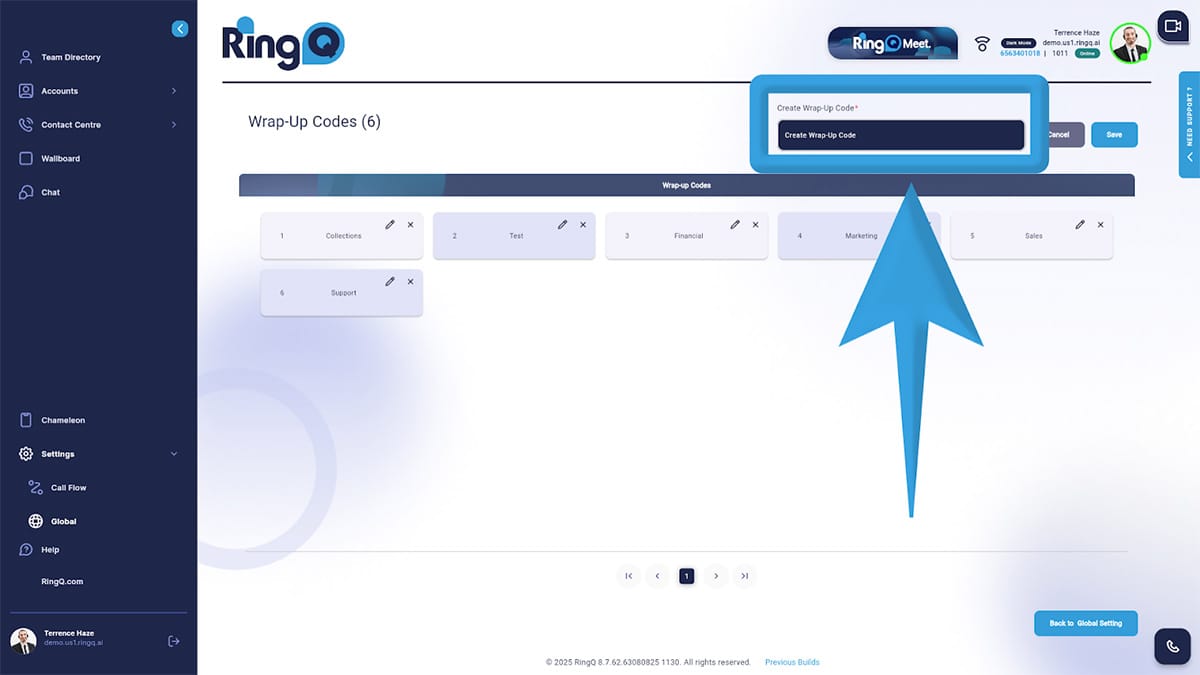 2. Click Add New Code.
3. Give it a clear name (short but descriptive).
4. Add an optional description for agents.
5. Save and assign to the relevant queues or campaigns.
2. Click Add New Code.
3. Give it a clear name (short but descriptive).
4. Add an optional description for agents.
5. Save and assign to the relevant queues or campaigns.
Best Practices
- Keep the list short & relevant (8–12 codes max).
- Make sure every code is mutually exclusive (no overlap in meaning).
- Train agents to always select a code before finishing ACW.
- Review wrap-up code reports weekly to identify trends and improve scripts.