Introduction
An extension is a unique internal number assigned to a user within your RingQ system, allowing quick and direct communication between team members without dialing full phone numbers. Setting up extensions is a fundamental step in configuring your system, ensuring each user can make and receive calls, transfer calls internally, and be part of ring groups or teams. This section covers how to create and assign extensions to users in RingQ.
- Accounts: The Accounts menu allows you to manage user extension numbers and voicemail messages.
- Extensions Management: The Extensions page lists all extension numbers associated with users or agents. Users can add, update, and remove extension numbers as needed.
Adding an Extension
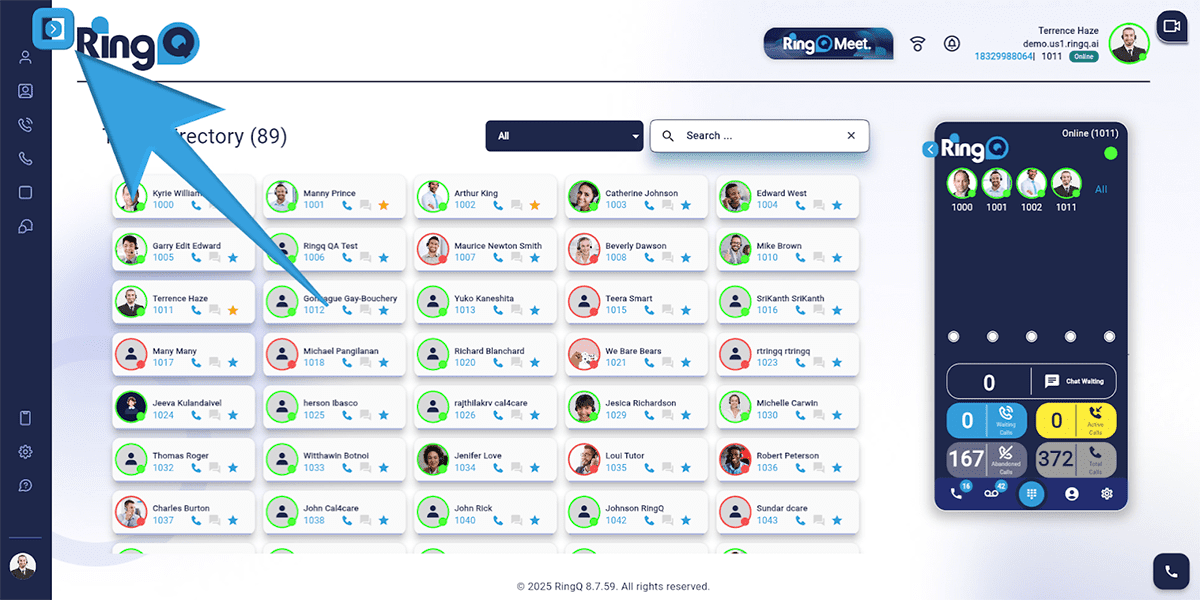
1. Click the Show Side Menu button (shown above) to reveal the menu.
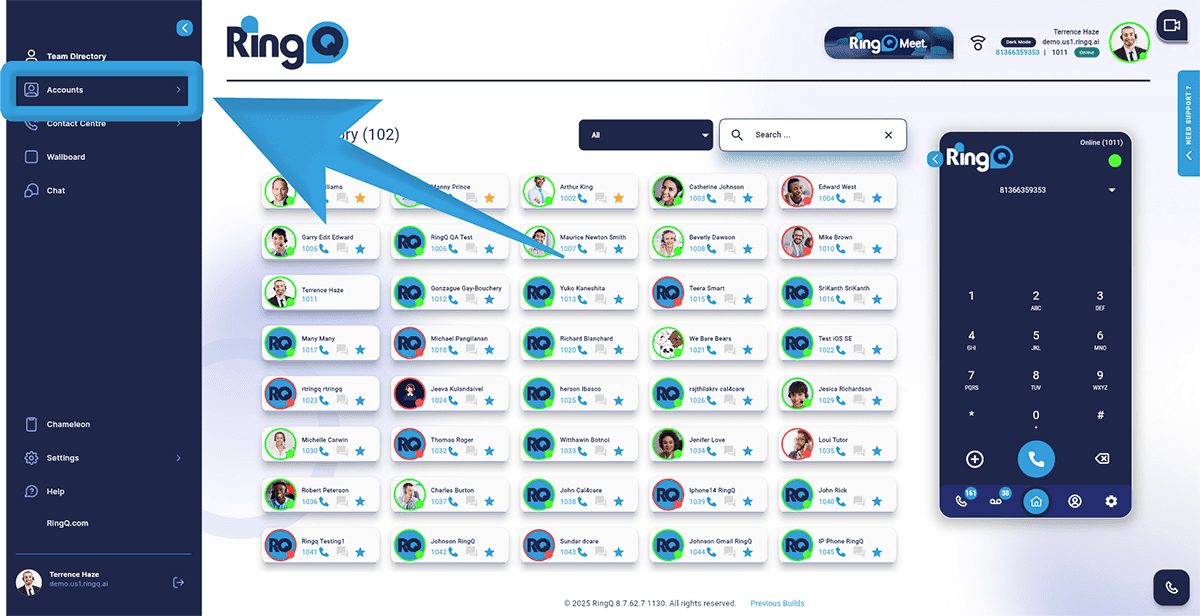
2. Navigate to the Accounts menu and click the Dropdown button to reveal Accounts options.
3. Select Extensions.
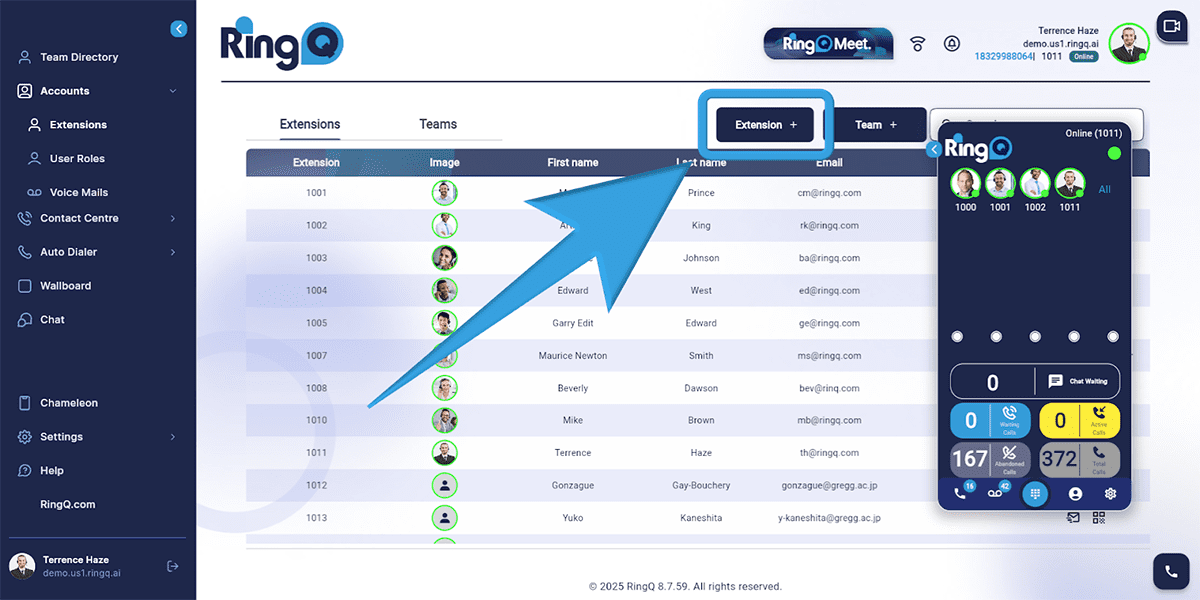
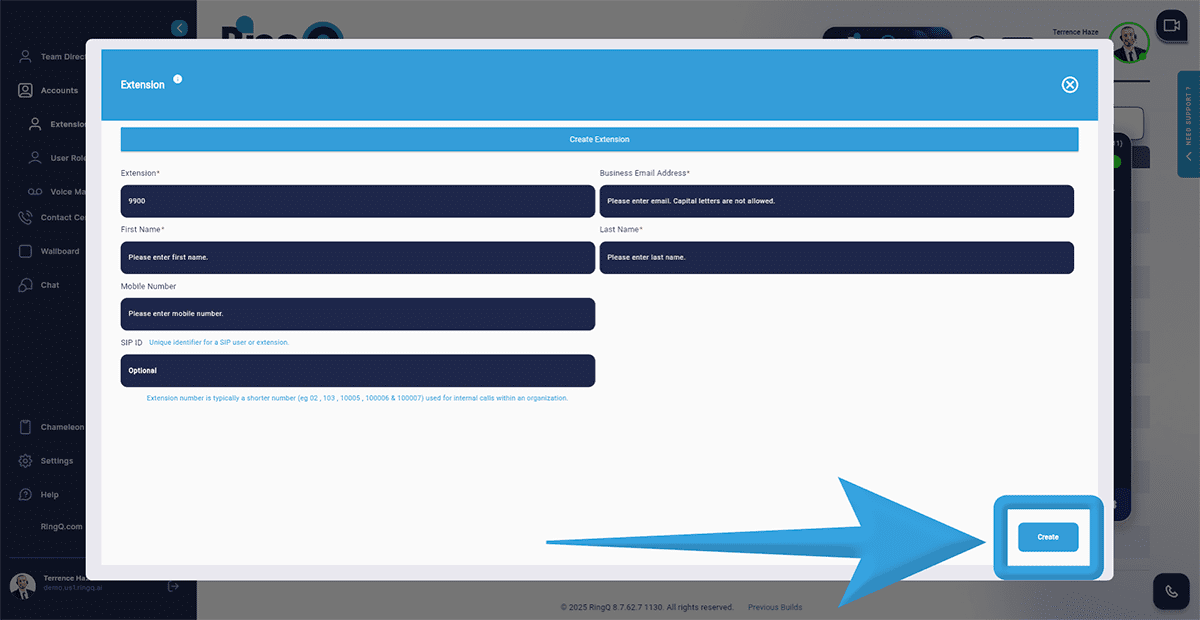
4. Click the “Extension +” button and fill out the required fields:
- Extension: Automatically generated and displayed.
- Business Email: Email address associated with the user.
- First Name: User’s first name.
- Last Name: User’s last name.
- Mobile Number: User’s mobile contact number.
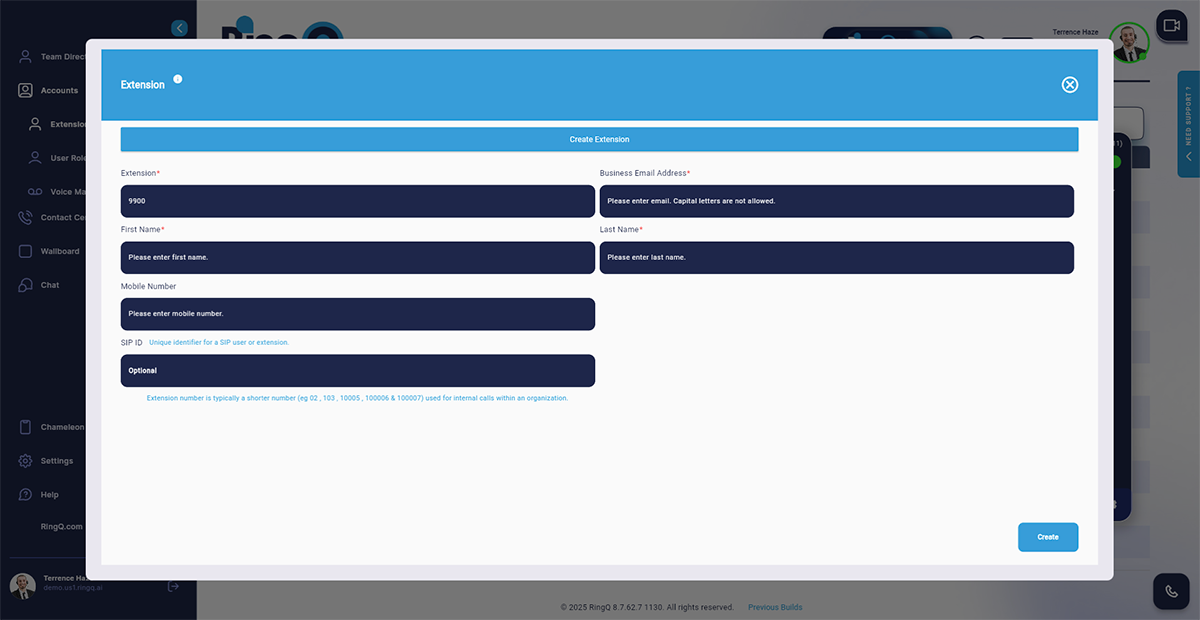
5. Click the Create button to save the new extension.