Introduction
RingQ lets you create multiple WebChats for different websites, pages, brands, or departments. Each WebChat has its own configuration, access token, and embed script.
Creating a WebChat
1. Log in to the RingQ Admin Dashboard using your administrator credentials. 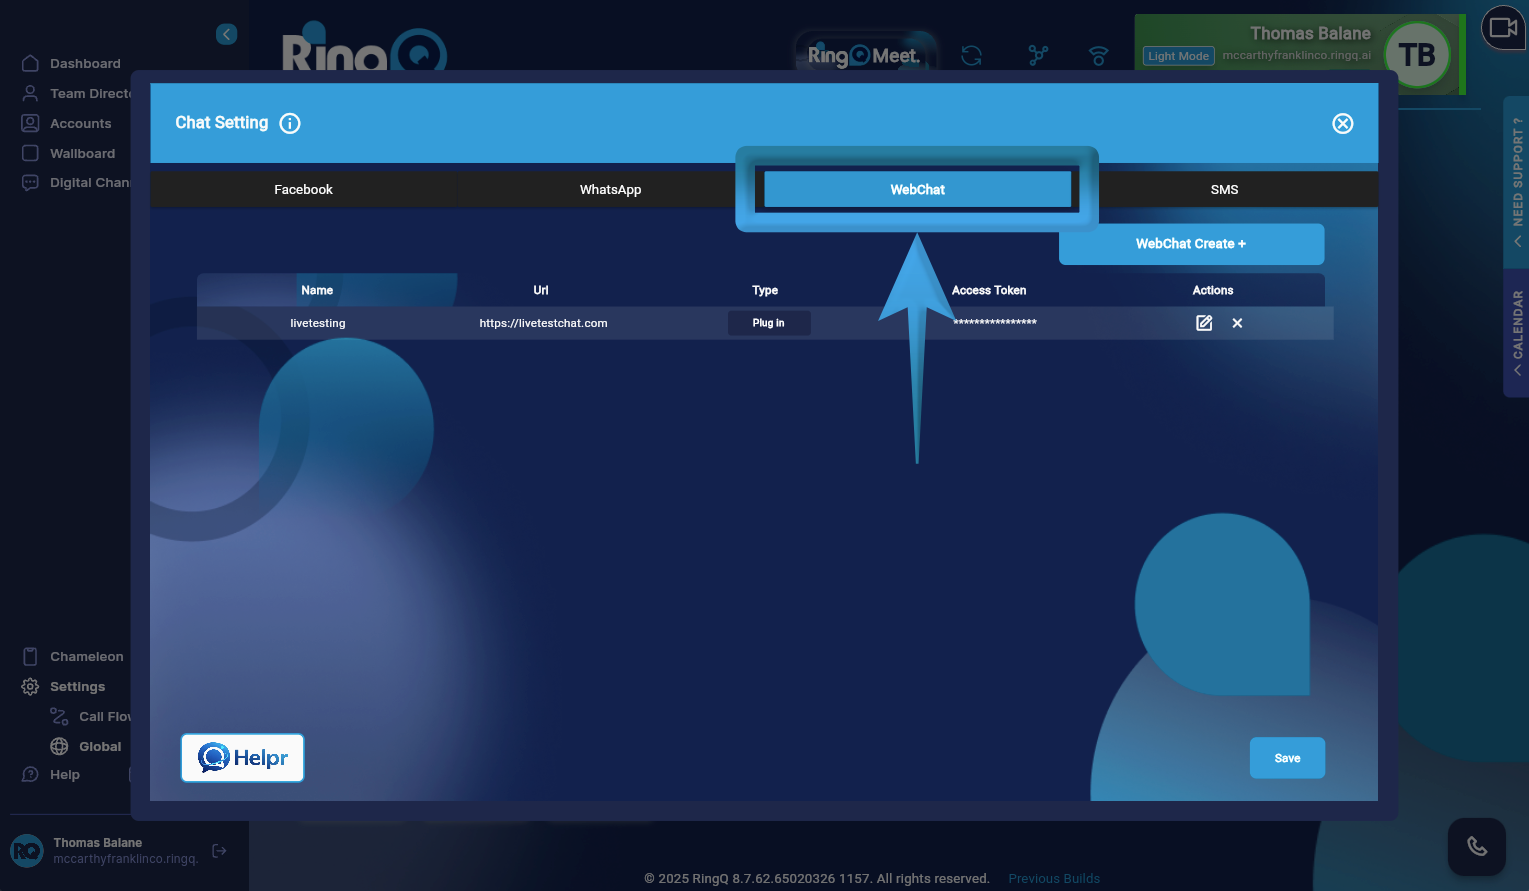
2. Go to: Settings → Global → Chat Settings → WebChat
3. From the WebChat configuration page, click the “WebChat Create +” button.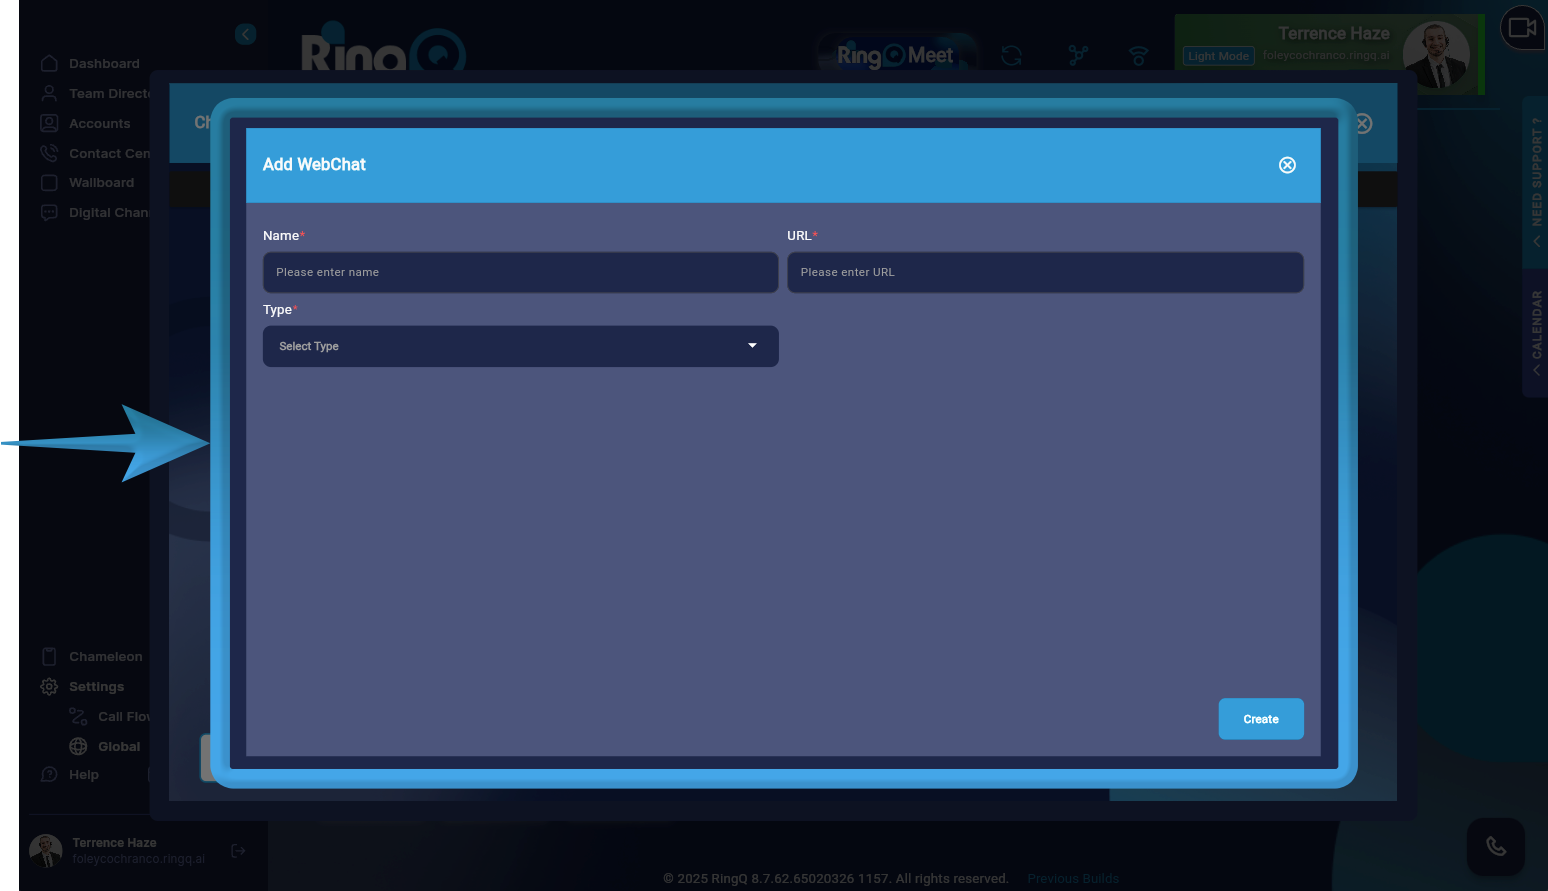
3. The Add WebChat window will open, where you can define the settings for your new WebChat.
4. Fill in all mandatory fields to ensure the WebChat is created successfully.
- In the Name field, provide a descriptive name for the WebChat.
- In the URL field, input the website domain where the chat widget will be embedded.
- Under Type, choose from the available options:
- Widget – for embedding the chat directly into a website
- Plugin – for CMS or platform-based integration.
5. Click the Create button.
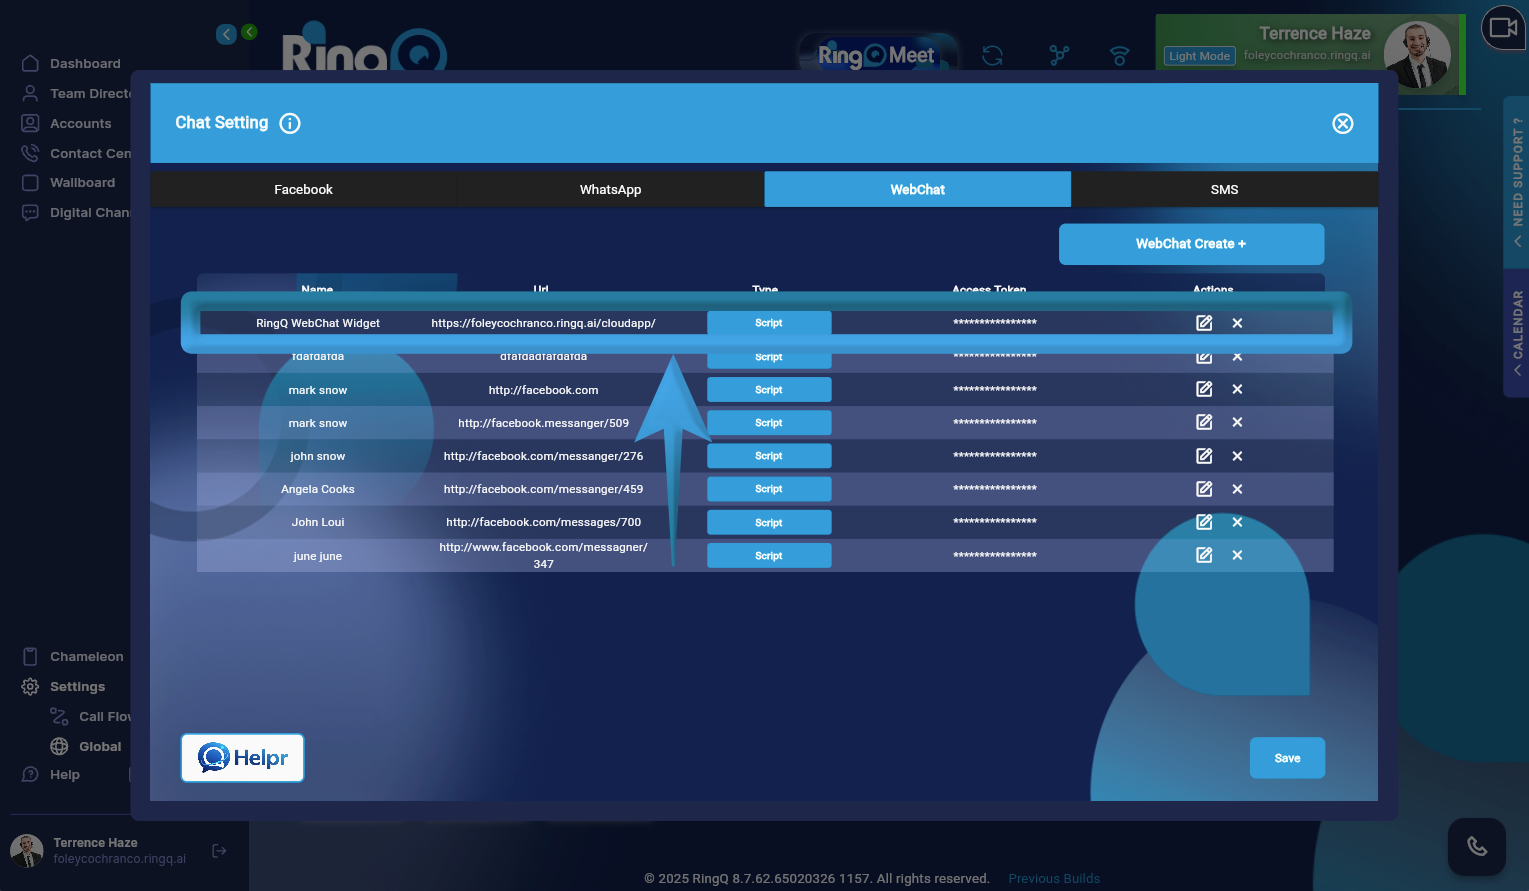
6. Once created, the WebChat widget will appear in the WebChat list, where you can proceed to retrieve the widget script, customize its appearance, or make further updates.
Adding Additional WebChats
To add more WebChats, simply repeat the same process for each new website or use case.
There is no limit to the number of WebChats you can create, allowing you to assign separate chats per domain, campaign, or department.
Managing WebChats
All WebChats are displayed in the WebChat List.
From the Actions column, click the Edit button to manage a specific WebChat. You can perform the following actions:
- Update the WebChat name
- Regenerate the access token, if a new token is required
- Change the WebChat type (Widget or Plug-in)
Best Practices
- Use unique and descriptive names for each WebChat to avoid confusion.
- Assign one WebChat per website or purpose for better tracking and management.
- Keep WebChats organized to simplify maintenance and reporting.
This setup ensures scalable, organized, and professional WebChat management across all your digital touchpoints in RingQ.