Introduction
Direct Inward Dialing (DID) numbers allow callers to reach specific extensions or departments without going through a main menu. Gateways connect your RingQ system to external phone networks, enabling inbound and outbound calls. In this guide, we’ll show you how to create and assign DIDs to users or call flows, and how to add a gateway to get your system ready for live traffic.
Creating & Assigning DID
1. Login to your RingQ web app and click on “Settings” in the left-hand menu. 2. Click on “Call Flow”
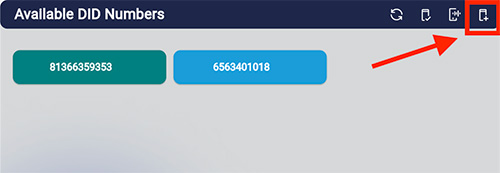 3. From this screen you will see the available DID numbers in your system. Click the “Add DID” button.
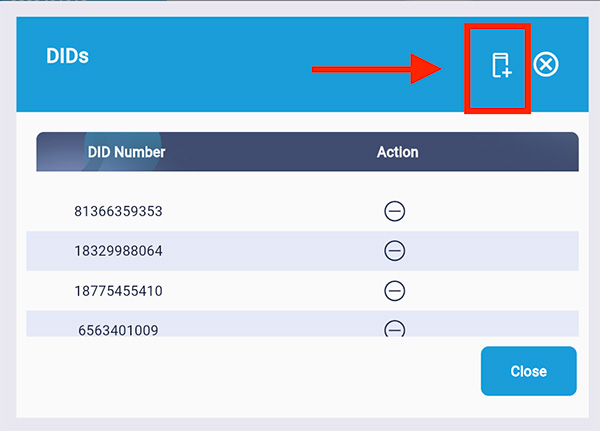 4. Click the “Add DID” button again as shown above.
5. Enter the preferred DID number.
6. Click “Create”.
4. Click the “Add DID” button again as shown above.
5. Enter the preferred DID number.
6. Click “Create”.
Setting a DID as the Primary Outgoing ID
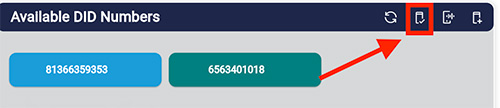
 1. Select a DID.
2. Click and hold.
3. A pop-up notification will appear to confirm that DID has been set as the primary outgoing ID.
4. Click the “Approve” button.
1. Select a DID.
2. Click and hold.
3. A pop-up notification will appear to confirm that DID has been set as the primary outgoing ID.
4. Click the “Approve” button.
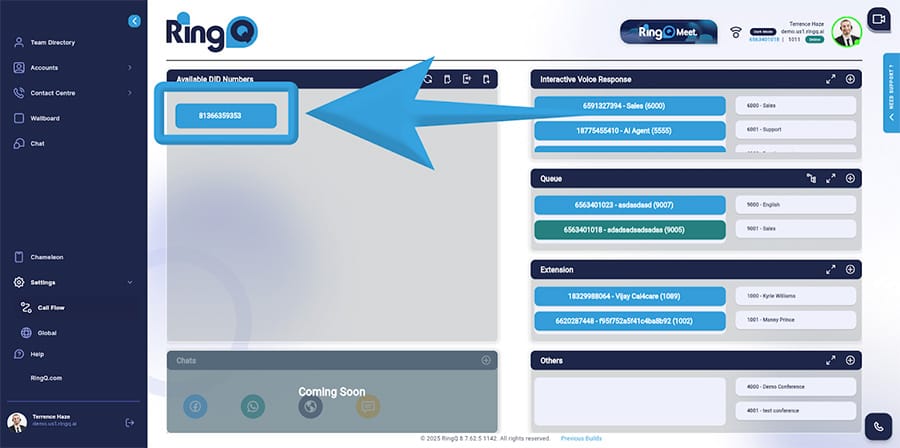
Assigning a DID Number to Conference, Extension, Queue, and IVR
From the Available DIDs screen drag and drop the DID you want to assign into any of the IVR, Extenion, Queue or Other (Conference) containers.Clear Cache
You can also clear the cache if you need to from here. Clear Cache is the process of deleting temporary files stored in the system.Adding a Gateway
 1. Click the “Gateway” button.
 2. Click on the “Create Gateway” button.
3. Fill in the required fields.
4. Click “Create”.
2. Click on the “Create Gateway” button.
3. Fill in the required fields.
4. Click “Create”.