Introduction
Hosting seamless, high-quality conference calls is essential for effective team collaboration and communication. With Ringq, setting up a conference is simple, fast, and flexible—whether you’re connecting colleagues, clients, or partners. This guide walks you through the steps to create a conference using Ringq, so you can bring everyone together—anytime, anywhere.
Creating a Conference
1. Login to your RingQ web app. From the left hand menu go to “Settings”>”CallFlow”.
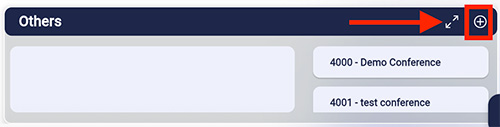
2. Click the “+” button to create a new conference.
3. Fill in the required information in the form. Make sure to enter the Moderator and Participant PIN to share.
4. Click “Create”.
Editing a Conference
1. Click on the selected conference extension.
2. The Conference Extension Number is automatically assigned by series of 4000, with each creation increased by one.
3. From here you can edit the conference name, moderator’s PIN and participant’s PIN.