Admin
Users & Call Controls
- Creating Extensions for Users
- Editing and Managing Extensions
- Creating Teams & Assigning Extensions
- Configuring Agent Status & BLF
- Managing Extension Schedules
- Managing User Roles
- Managing Call Controls
- Setting up Shared Parking
- Voicemails
- The BLF Function
- Configuring the Speed Dial
- Configuring the Busy Lamp Field (BLF)
Deployment Methods & System Requirements
Installation Guides
Deploying RingQ in Amazon Lightsail
Introduction
This guide walks you through deploying RingQ on Amazon Lightsail, a simple and cost-effective way to get your communications platform running in your cloud account. Lightsail is recommended for lightweight virtual server setups, making it ideal for hosting RingQ without the overhead of complex infrastructure management. By the end of this guide, you’ll have a fully functional RingQ instance deployed and ready to use.
Prerequisites
- Have an Amazon Lightsail account.
- Obtain a license key, and activate it in the RingQ Customer Portal
Purchase and Activate a License Key
Follow this guide to purchase and activate a license key.
Creating a Lightsail Instance
1. Navigate to https://lightsail.aws.amazon.com and log in.
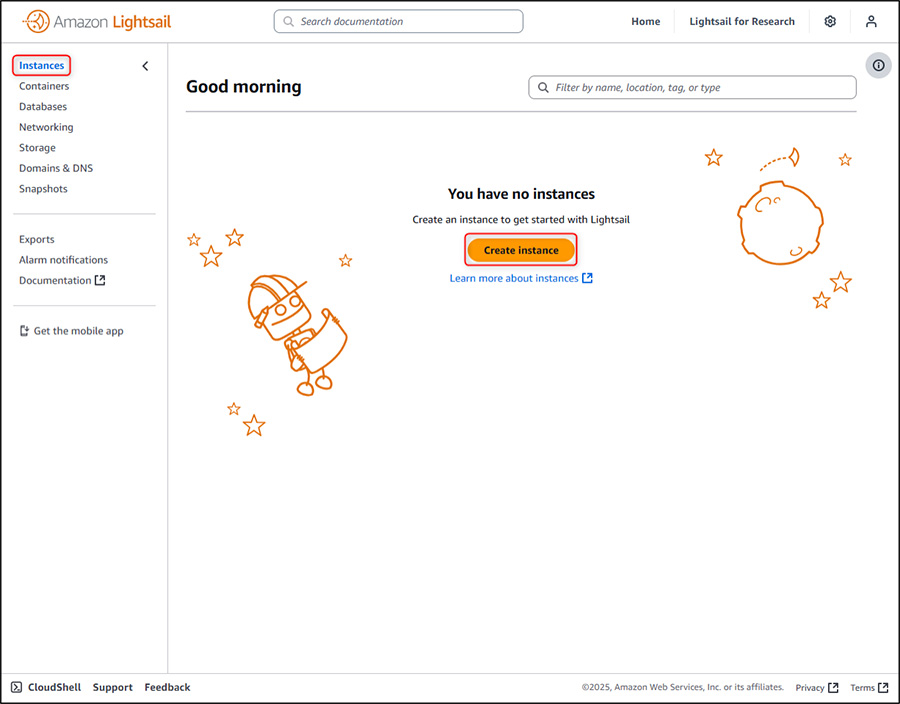
2. Go to Instances and click on Create instance.
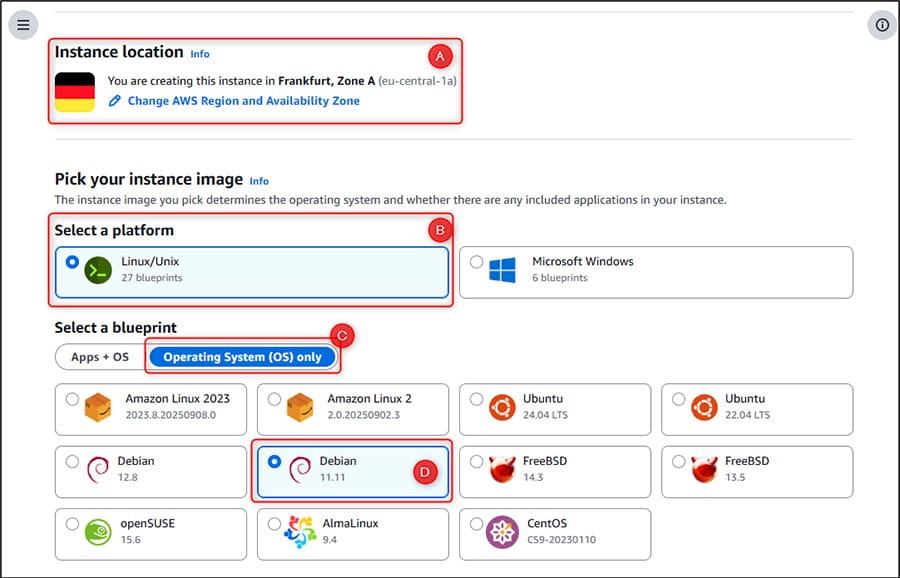
3. In the Instance creation form:
- Select the region to create your RingQ installation. Select the region closest to where you want the system deployed.
- Select Linux/Unix platform and under Operating System (OS) [C], select Debian 11 [D].

- Select a SSH Key. If you don’t have one, create one by clicking Create custom key.

- The region will be verified, and a key will be created for this region. Click Create.
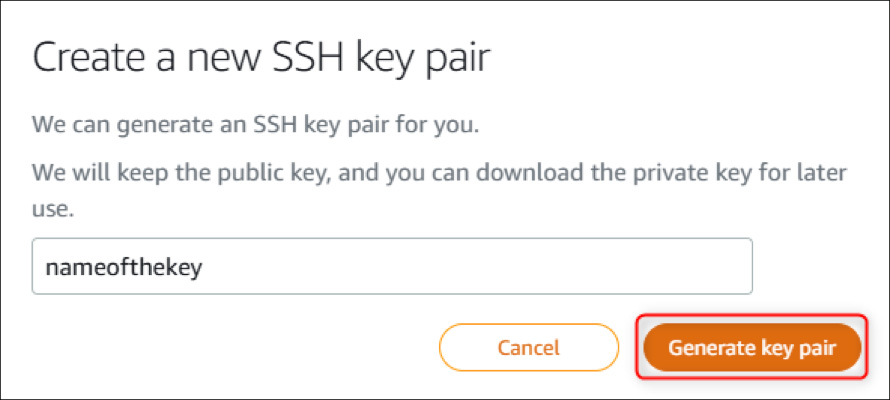
- Name the key and click Generate key pair.

- Important! Download and save your Private Key, otherwise you will not be able to connect to your instance.
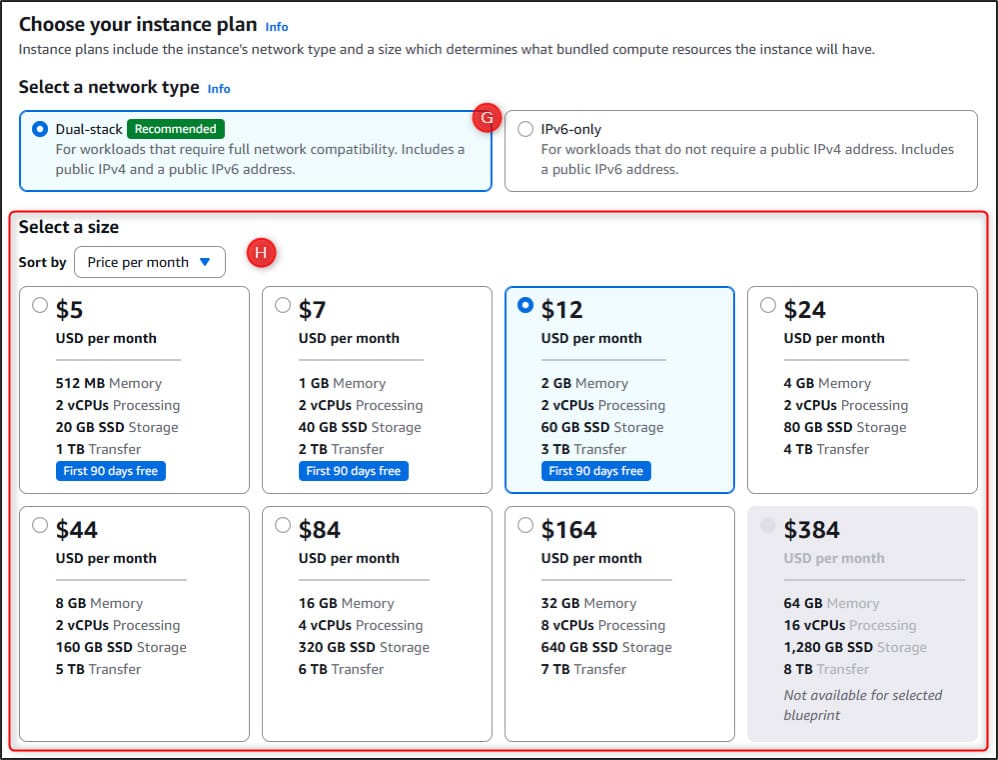
- Select Dual-stack as the network type. This will enable IPv4 and IPv6 networking.
- For the instance size, for most installations 2 vCPUs / 2 GB RAM should suffice, but for larger installations choose either 2 vCPUs / 4 GB RAM or 4 vCPUs / 16GB RAM.

- Set a name for your RingQ instance. This must be unique for the region of Lightsail being used.
- Click Create Instance.
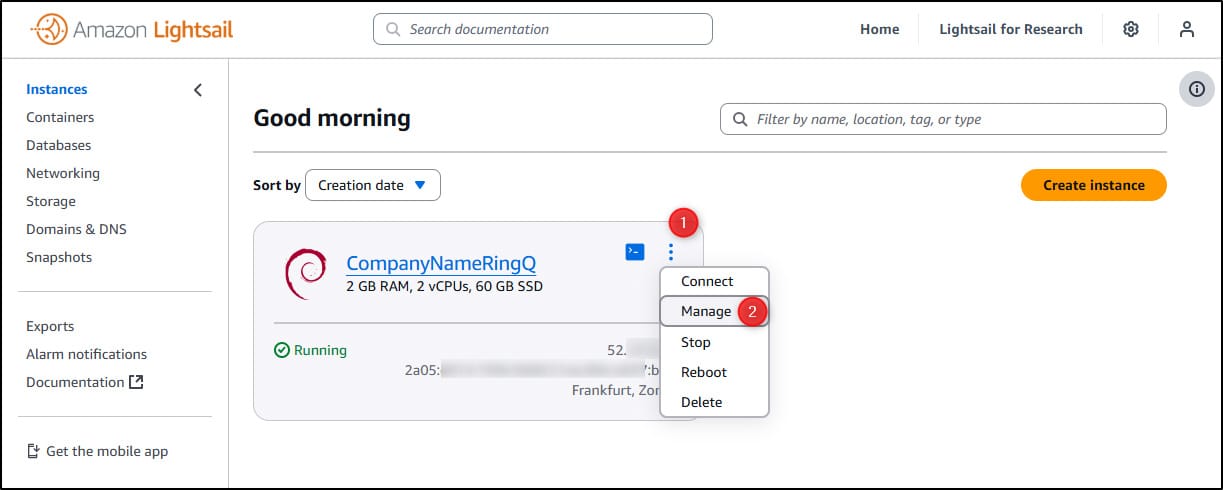
4. Go back to the Instances menu and wait until your instance is Running, then click on your instance’s menu [1] and select Manage [2].
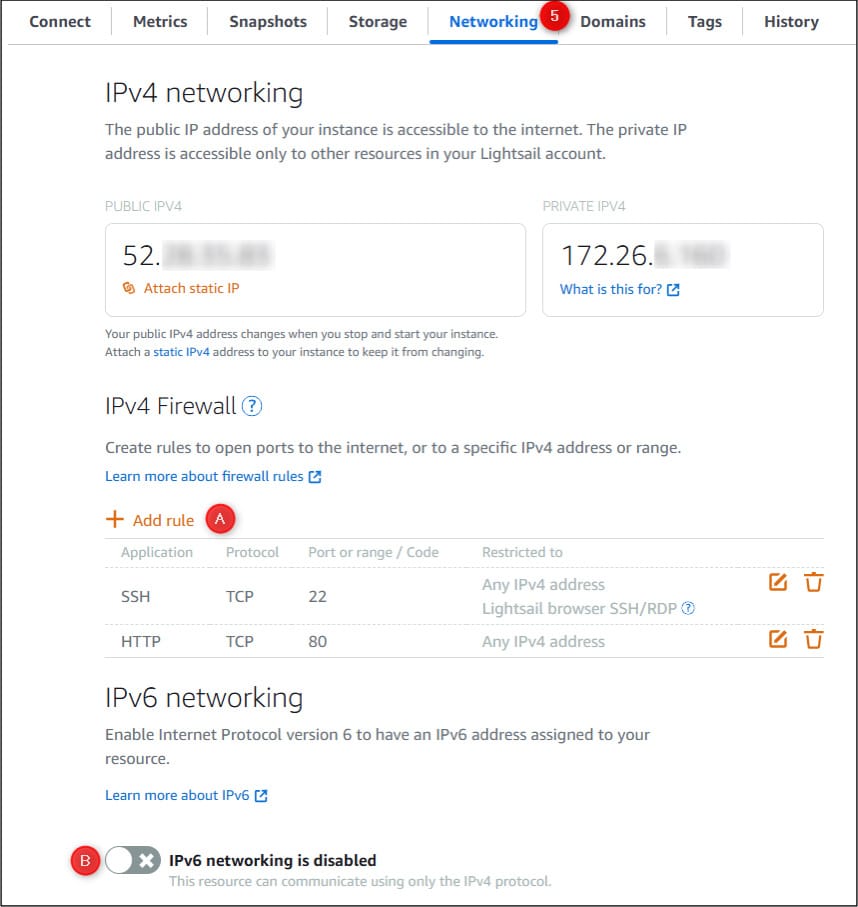
5. Next go to the Networking tab and create 2 new Firewall Rules
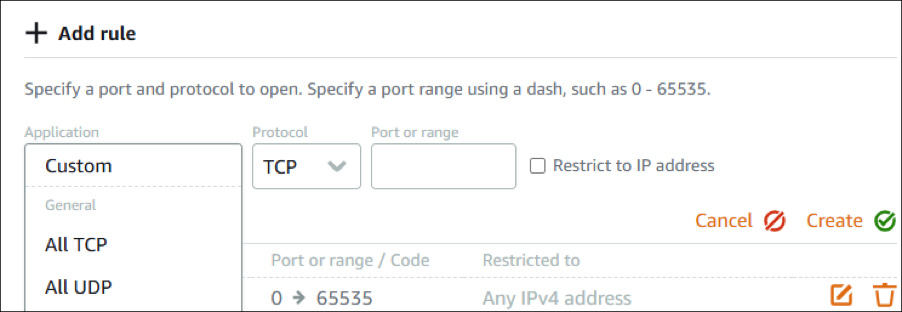
- Create 2 Firewall Rules:
– All TCP
– All UDP - Disable IPv6.
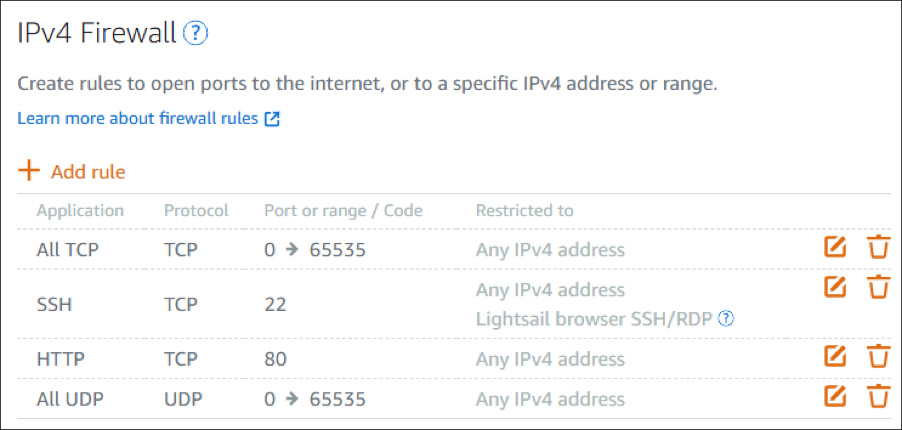
- The rules should now show in the console.
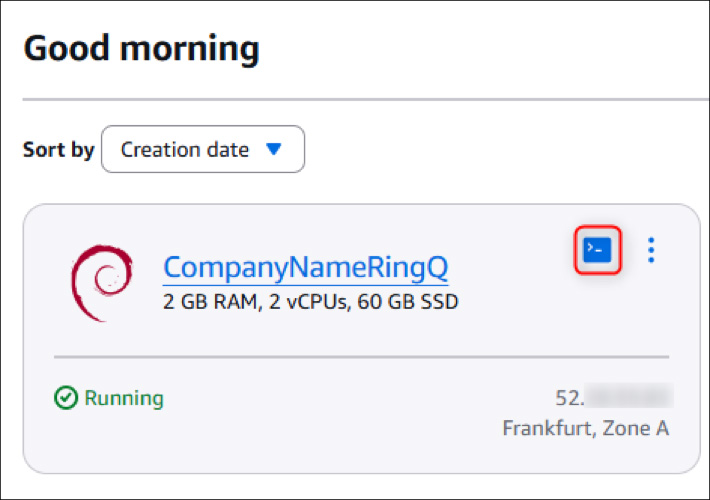
6. Go back to the Instances menu again and press the console button to open the terminal.
7. In the Console window that has opened, type the following commands:
a. sudo su
b. wget -O /usr/local/bin/ringq_installer.sh https://download-global.ringq.ai/ringq_installer.sh
c. chmod 777 /usr/local/bin/ringq_installer.sh
d. /usr/local/bin/ringq_installer.sh
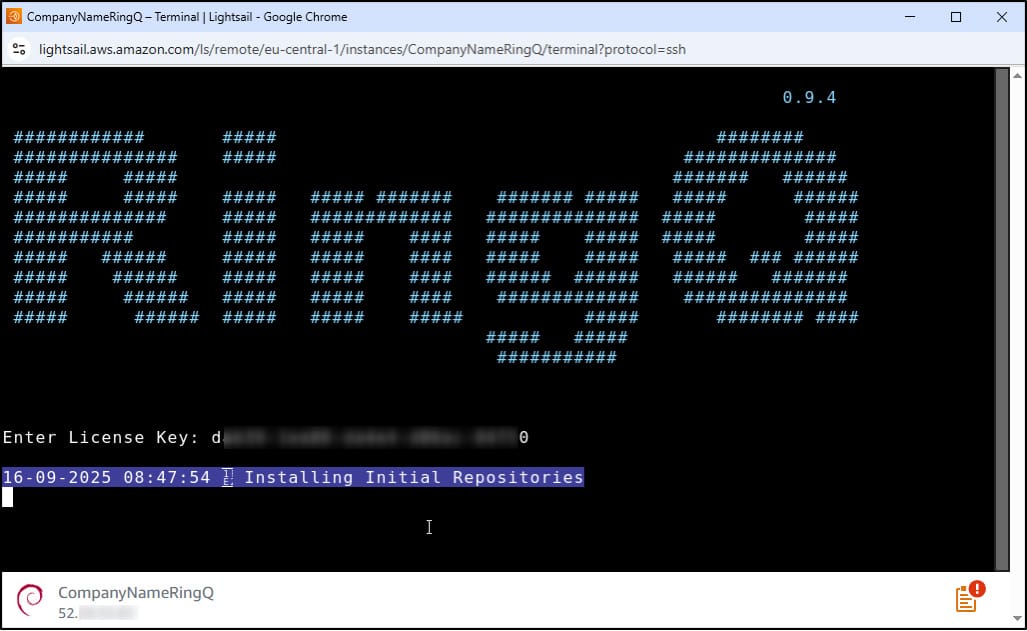
8. In the prompt that appears, type in your RingQ License Key and press Enter.
9. Wait until the installation is finished and don’t close the window. The installation process can take up to 40 minutes.
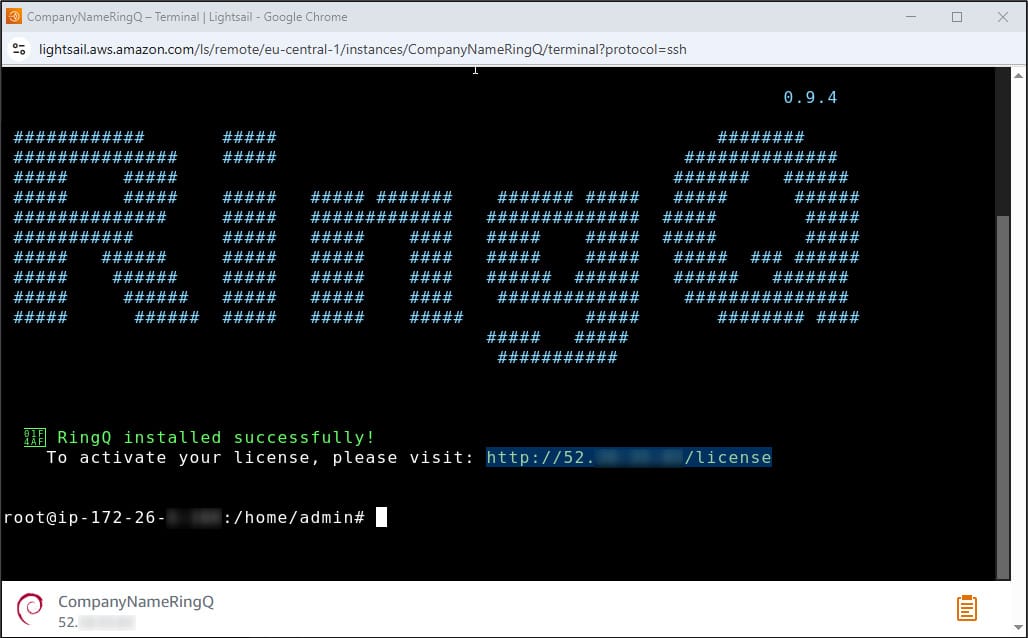
10. Once the installation finishes, open your browser and navigate to the address shown. If your browser shows you a warning, select the proceed option so that it takes you to the website.
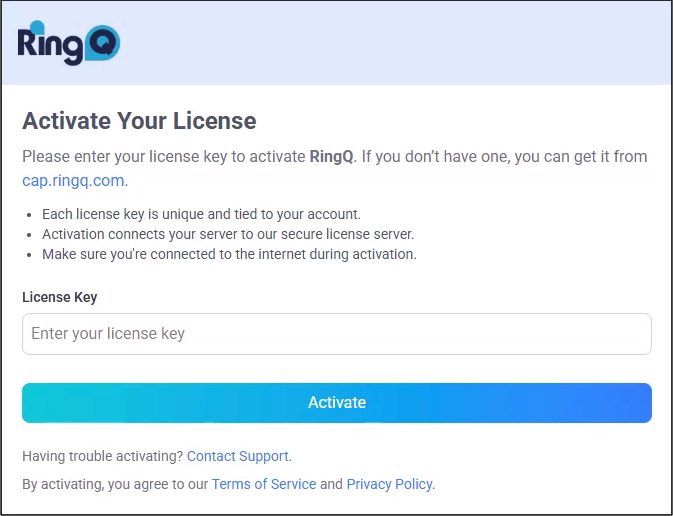
11. Enter your RingQ License Key and press Activate.
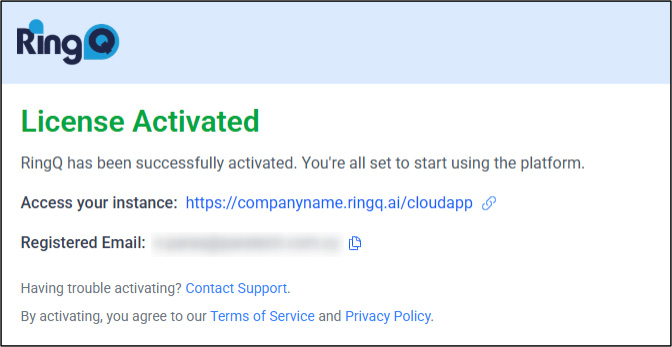
12. Once the License Activation finishes, your RingQ installation is complete, and you can access your instance!
